...
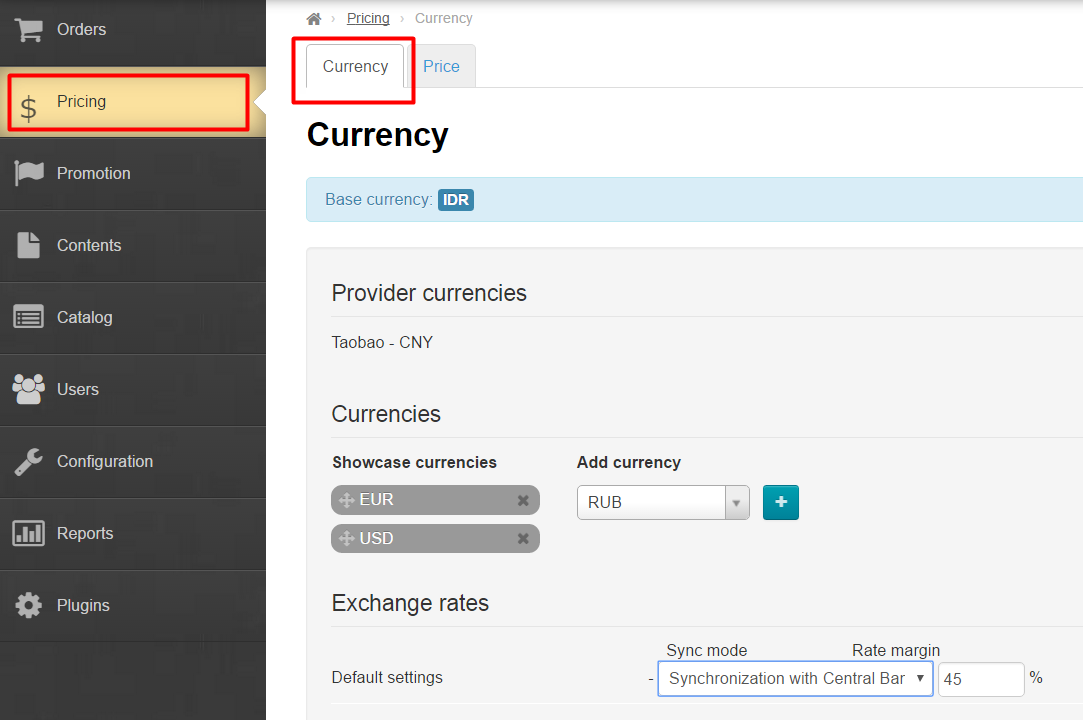
Go to “Pricing” section in your website admin area and open “Currency” tab.
How to add currency for storefront
...
“Currency” section is what you need if you need to alter currency.

Follow below steps to specify currencies to be displayed and the order they will appear:
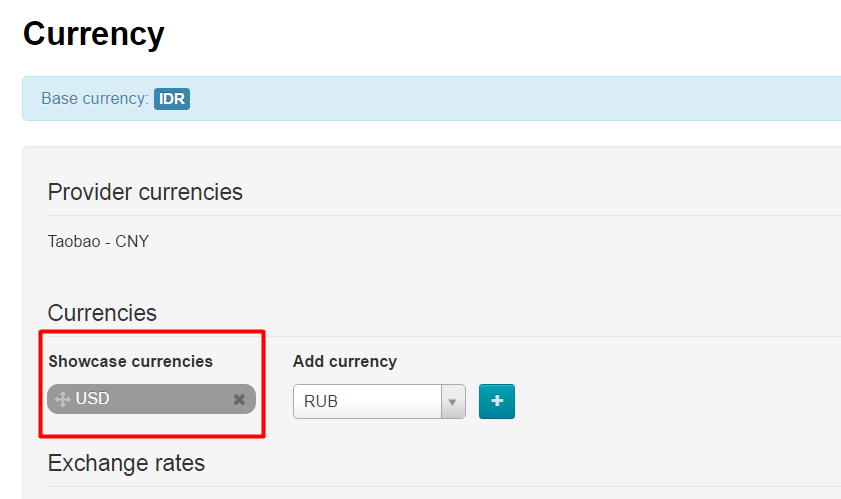
- Take a look at all available storefront currencies.
- Add currency you need.
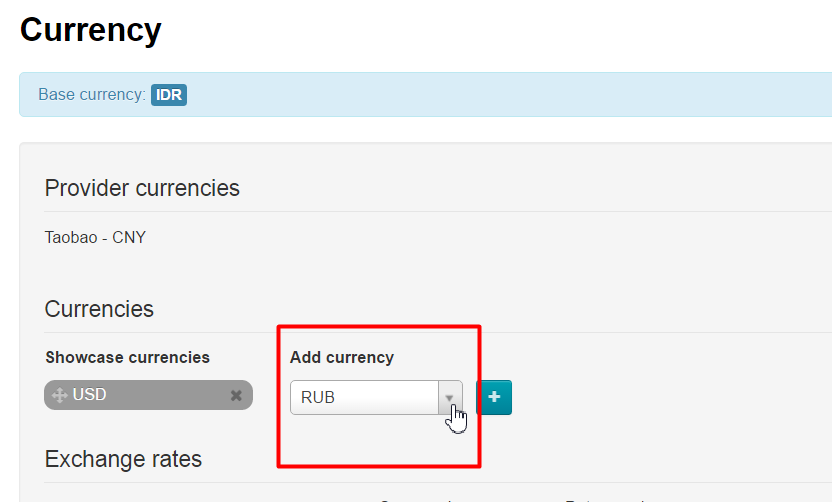
How to add new currency
Click dropdown list arrow in the right-hand menu “Add currency”.
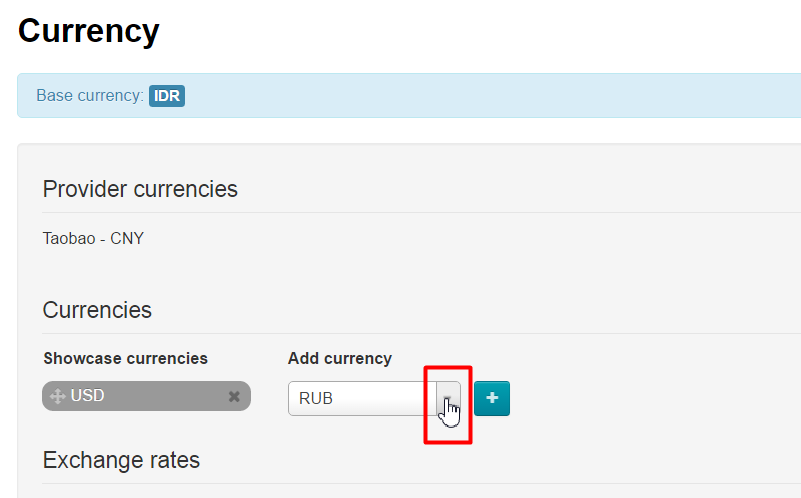
Find necessary currency in the list:
- Type first two or three letters of currency name in Roman letters.
- Scroll through the list by dragging scroll box to the right of the list.
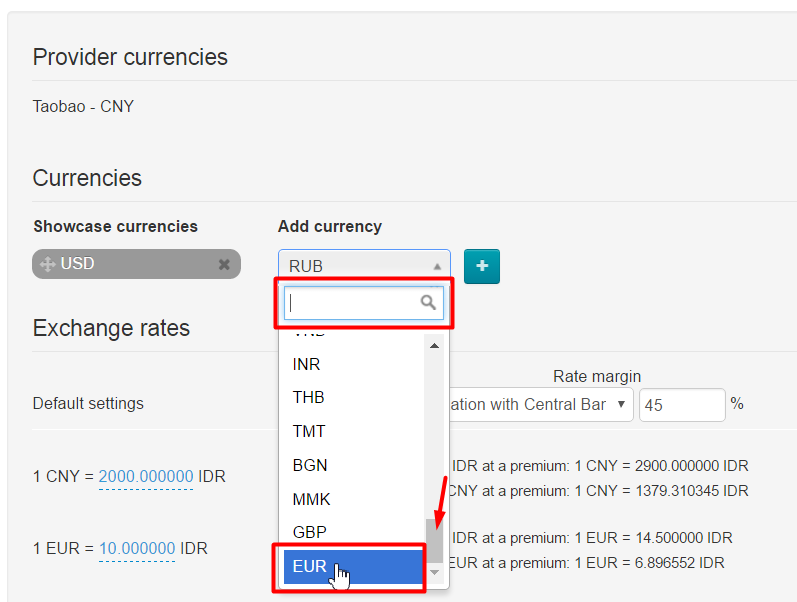
- Click currency when you find it. The option you selected will appear in selection window.
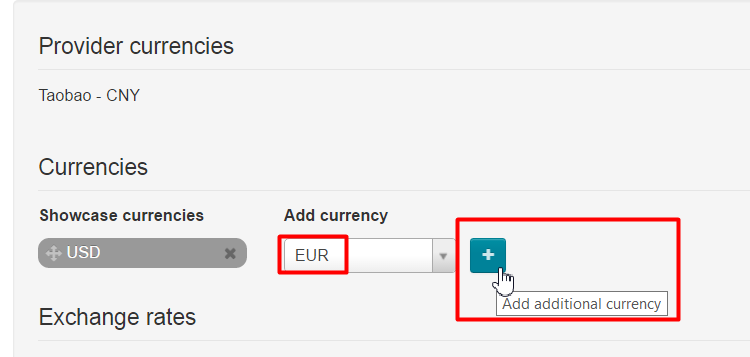
- Click plus button in order to add currency to the list on the left-hand side (the new currency will be highlighted in green).
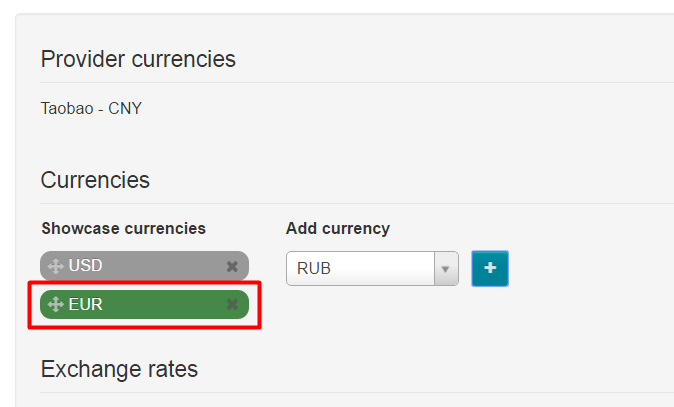
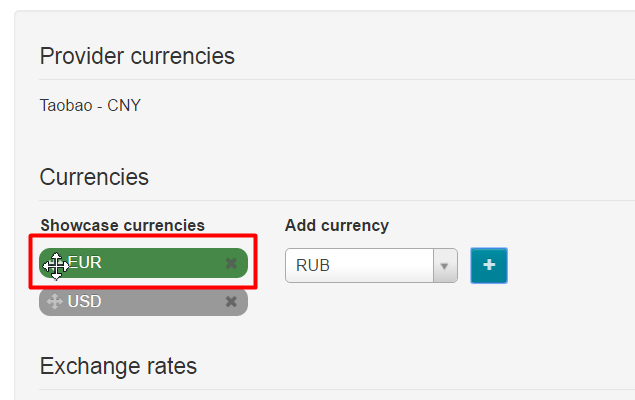
- Rearrange currencies to your liking if necessary:
- Hover cursor over Move icon (four-headed arrow) to the left of currency name.
- Click and hold the left mouse button when cursor changes to the four-headed arrow
.
- Drag currency up or down and place it as you need without releasing mouse button.
- All currencies will be rearranged:
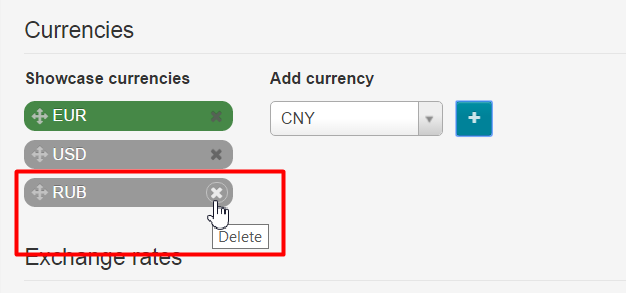
- Click Delete icon (x) to the right of currency name if it should be deleted.
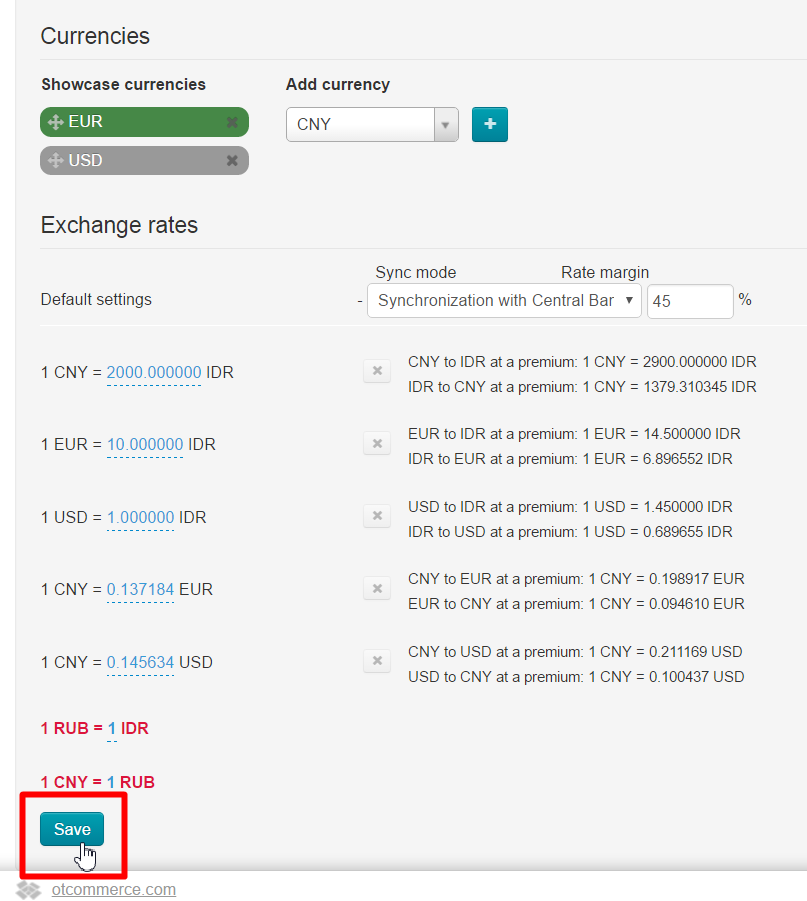
- Click “Save” button at the bottom of page when you’re done.
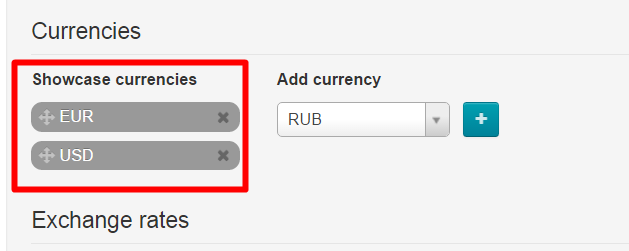
- Added currencies will be shown grey once you’ve saved modifications.
Once being saved, currencies can be added, deleted or rearranged. Be sure to click Savebutton to save your changes.
...
In some cases, it is a good practice to work with your own currency rate rather than synchronize it with the Central Bank of Russian Federation.
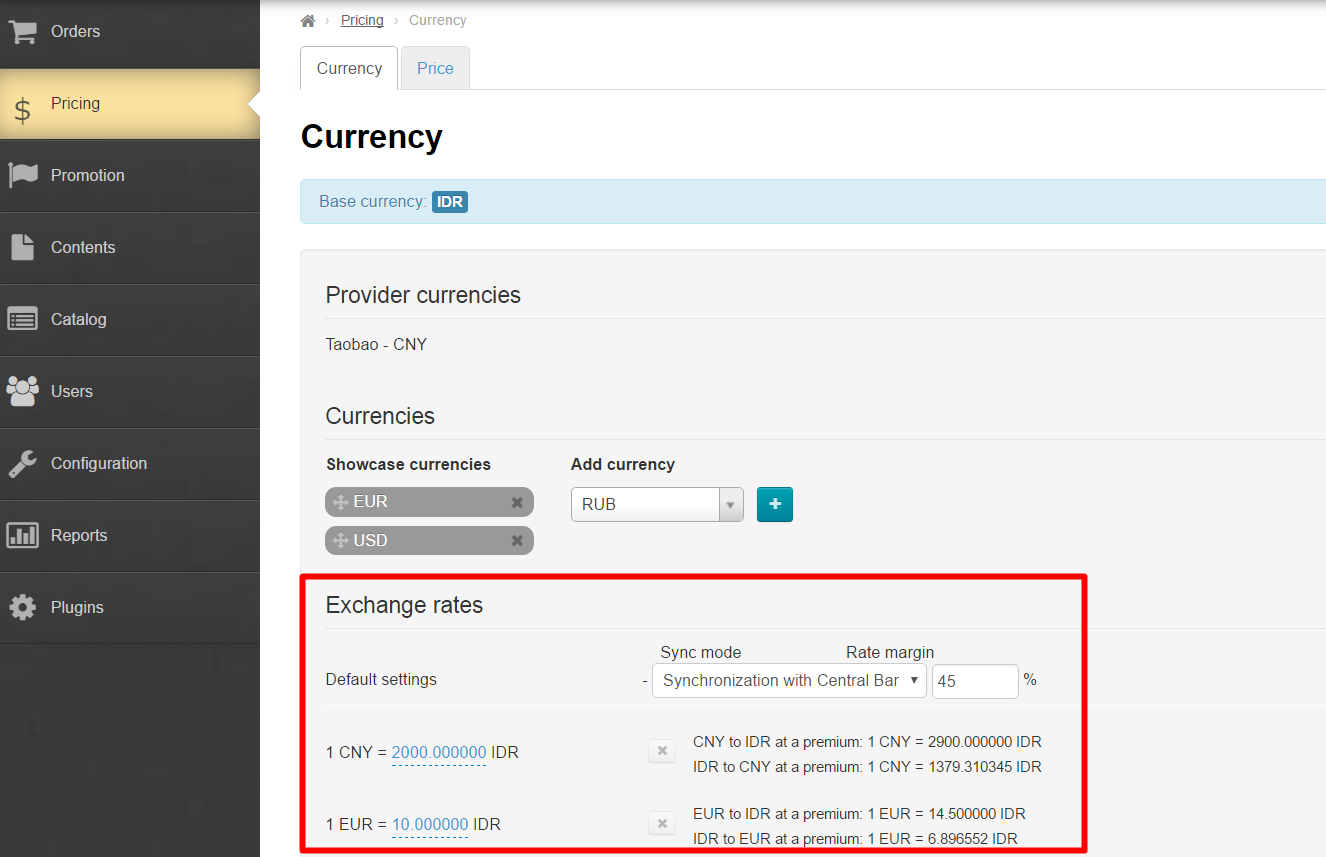
We recommend you select Synchronization with Central Bank of Russian Federation” option when you add new currencies. You will know approximate cost of each currency and it will make your work easier.
...
First, you should disable synchronization by selecting “Without synchronization” option from dropdown list.
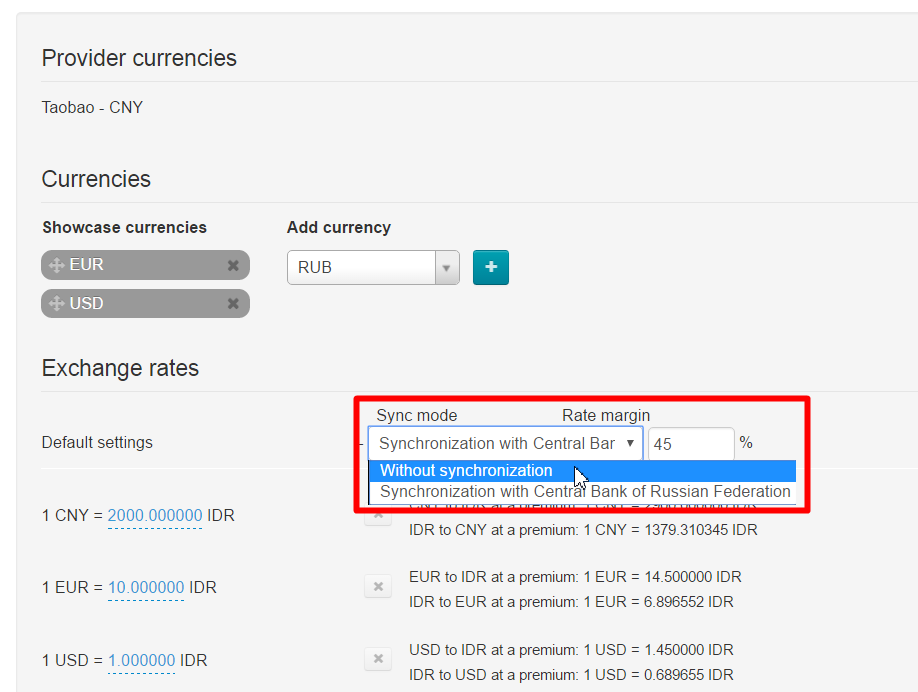
Next, look at available currency rates:
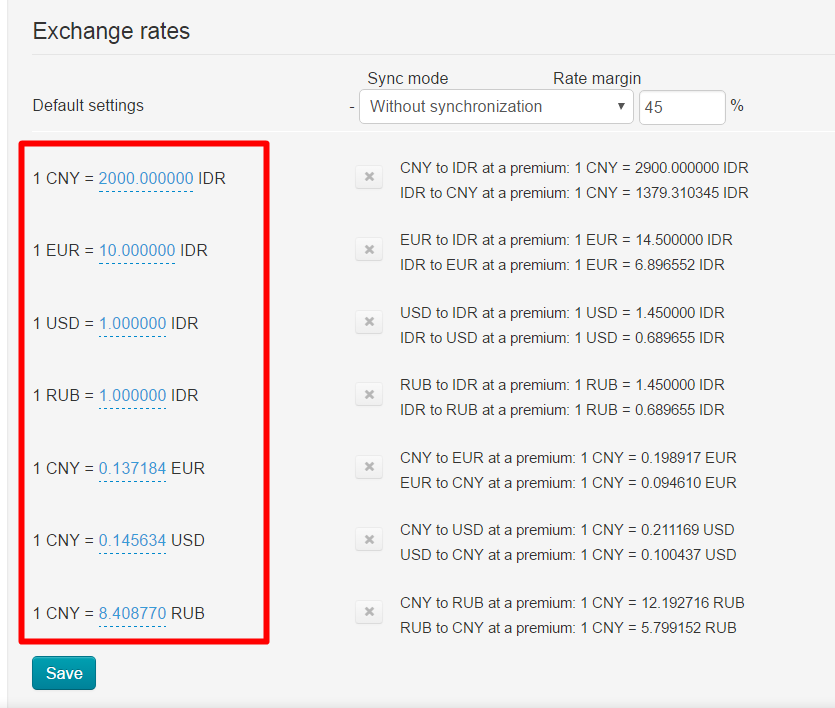
Click blue dashed underlined text and change cost for the one you need to alter rate.
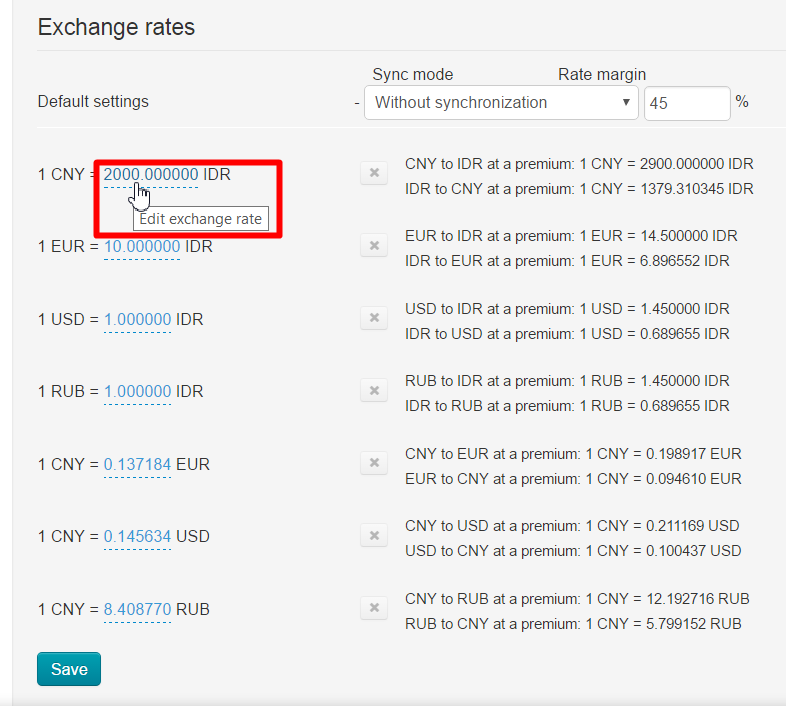
Be sure to click check mark button to save your changes after rate was corrected.

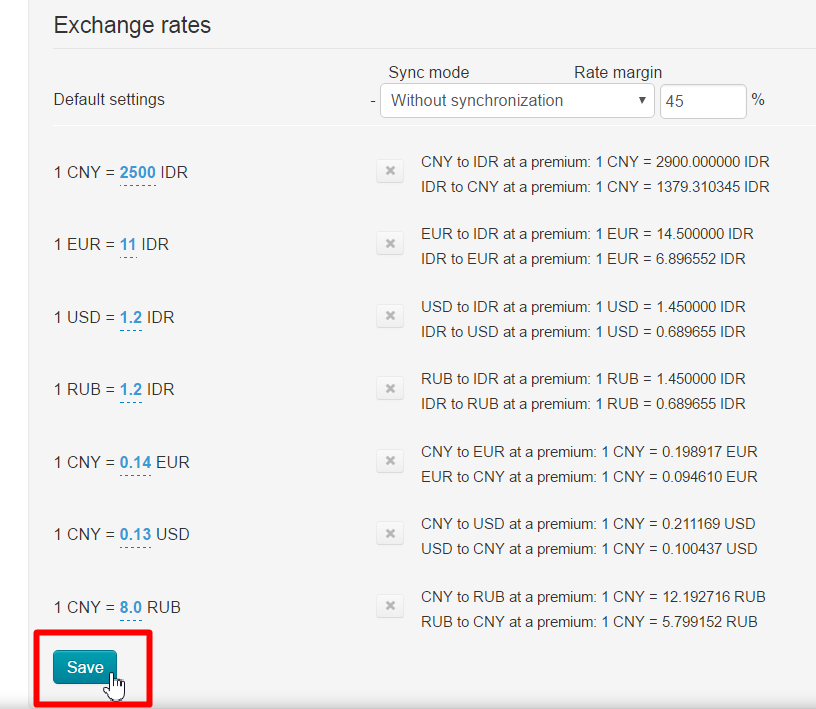
Correct all rates you need in a similar way and click “Save” button at the bottom of page.
Enable it once again if synchronization is required.
Sophisticated product price settings
Open “Price” tab.
Price rounding
This is where you can specify number of decimal places (digits after decimal point) when rounding off product price.
...
You need to click blue link in order to specify number of decimal places when rounding off item price.
Next, you should enter value-indicating number of decimal places when rounding item price in the edit form.
Save modifications by clicking checkmark button.
Click “Delete” button (x) in edit field if you want to delete value.
Click “Delete” (x) button if you need to quit edit menu without saving modifications.
Margin percentage
...
Click blue link to set margin percentage.
Enter value indicating margin percentage on product price in edit field.
Save modifications by clicking checkmark button.
Click “Delete” button (x) in edit field if you want to delete value.
Click “Delete” (x) button if you need to quit edit menu without saving modifications.
Minimum margin
...
Click blue link to specify minimum margin.
Enter value in the edit field that indicates minimum margin in CNY and is added to product price.
Click checkmark button after modifications were made.
Click “Delete” button (x) in edit field if you want to delete value.
Click “Delete” (x) button if you need to quit edit menu without saving modifications.
Seller’s discount
You can allow or deny display of seller’s discounts.
Click blue link.
Select “Allow” or “Prohibit” from dropdown menu.
Save modifications by clicking checkmark button.
How it is displayed on website
| Discounts are allowed | Discounts are prohibitedforbided |
|---|---|---|
StorefrontShowcase | | |
Item Product page |
...
Clear cache to make changes on Homepage.
...
Seller’s VIP discounts
Sellers may offer VIP discounts. VIP discounts are set in a similar way to those described in “Seller discounts” section.
...