
| Оглавление |
|---|
Описание
Помогает в использовании Сервисов, что может включать в себя возможность получать платежи за товары и услуги, а также получать благотворительные пожертвования или пожертвования в рамках кампании.
...
Description
It assists in using the Services, which may include the ability to receive payments for goods and services and charitable or campaign donations.
Website
...
Pricing
Правовая форма
Юридические лица, Индивидуальные предприниматели, Физические лица
Территория обслуживания
Весь Мир
Главный офис находится в США
Регистрации аккаунта для России нет
Подключение
Регистрация в ПС
Legal form
Legal Entity, Self-employed, Private Person from new startups to public companies.
Service Area
The whole world
The main office is located in the USA
There is no account registration for Russia
Connection
Registration in payment system
Got to website Заходим на сайт https://dashboard.stripe.com/register и заполняем форму регистрации and fill out registration form.
Активация и настройка аккаунта
После регистрации необходимо активировать аккаунт. На указанный e-mail придет письмо для активации.
После активации e-mail адреса, активируем сам аккаунт. Кликаем по надписи «Activate your account».
И проходим по очереди все пункты настройки аккаунта.
Заполняем предложенные формы и нажимаем «Next →»
Когда все формы успешно заполнены, на последнем шаге появится резюме по всей предоставленной информации и возможность передать на рассмотрение.
Нажимаем кнопку «Submit» и ждем активацию аккаунта.
После полной активации настраиваем аккаунт для взаимодействия с Коробкой ОТ.
На главной странице аккаунта нажимаем на надпись «Get your API keys»
Выбираем вкладку «Live API Keys»
Здесь указаны 2 ключа: публичный и секретный.
Секретный ключ, если вы его ранее не получали, скрыт кнопкой «Reveal live key»
Нажимаем кнопку, чтобы получить секретный ключ тоже.
Теперь у вас есть 2 ключа: Один с приставкой sk_live (секретный) и один pk_live (публичный).
Копируем себе в отдельное место оба ключа. Позже, в тикете на подключение ПС необходимо будет указать оба ключа.
Activation and account settings
It's necessary to activate account after registration. Activation information will be sent to specified e-mail.
Activate account after email activation. Click "Activate your account".
And go through all the account settings.
Fll in the proposed forms and click "Next →"
When all the forms have been successfully completed, the last step will give a summary of all provided information and opportunity to submit for consideration.
Click "Submit" button and wait for account activation.
Set up an account to interact with OT Box after full activation.
Click "Get your API keys" on the main page of your account.
Select "Live API Keys" tab
You will see 2 keys here: publishable and secret.
Secret key, if you have not received it before, is hidden by "Reveal live key" button
Click the button to get a secret key.
You have 2 keys now: one with prefix sk_live (secret) and one pk_live (publishable).
Copy both keys to a separate place. Later you will need to specify both keys in the ticket for connecting PS.
Next, go to Далее переходим по адресу https://dashboard.stripe.com/webhooks (вкладка слева Developers → Webhooks tab on the left)
Нажимаем на кнопку «Click "+ Add endpoint»endpoint" button
Здесь необходимо ввести адресEnter address here:
https://paygate.otapi.net/stripe.callback?internal=[адрес вашего сайта без http и без www]. — Скопируйте ссылку которую вы использовали для создания тикета подключения ПС к Коробке ОТ.
Например, если наш сайт https://top-test.otcommerce.com/ ссылка будет выглядеть так:
your website address without http and www]. — Copy the link that you used to create a ticket for connecting PS to OT Box.
For example, a link will be https://https://paygate.otapi.net/stripe.callback?internal=top-test.otcommerce.com if our website URL is https://top-test.otcommerce.com/.
Далее настраиваем «Events to send». В выпадающем списке выбираем Set "Events to send" further. Select invoice.payment_failed (можно скопировать эту фразу и вставить для поиска по спискуfailed in drop-own menu (you can copy this phrase and paste to search the list)
Затем в этом же списке выбираем Then select invoice.payment_succeeded (можно точно также скопировать значение и вставить в строку поискаsucceeded in the same list (you can also copy the value and paste it into the search bar)
В
итоге будет 2 надписи в списке. Нажимаем кнопку «Add endpoint»As a result, there will be 2 options in the list. Click "Add endpoint" button.
Создание тикета для подключения
Авторизуйтесь в службе технической поддержки OT Commerce, перейдите на страницу подачи заявки.
Create ticket for connection
Log into OpenTrade Commerce support system and go to the page to create ticket for service.
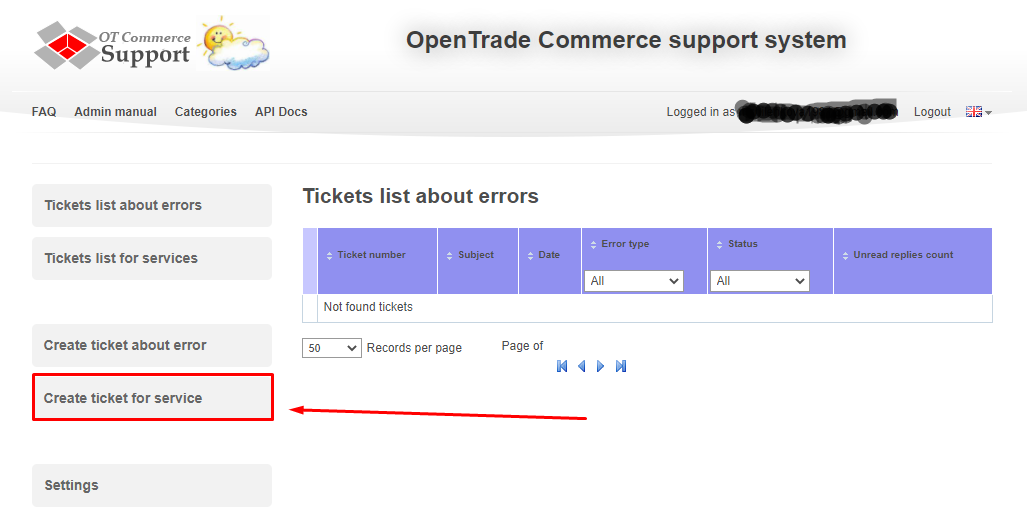
Select "Connection of the payment system"
Выберите «Подключение платёжной системы».
...