| Оглавление |
|---|
...
Description
"Export to external resources" module Module allows to export products from your online store to external resources.
...
Information about traffic, target audience and other data is freely available on the Internet. Therefore, we recommend you study information and develop your strategy for successful sale of goods or your store promotion.
Create
...
categories in Selector module
Read detailed instruction how to set and work with "Selector" in "Selector module" instruction.
...
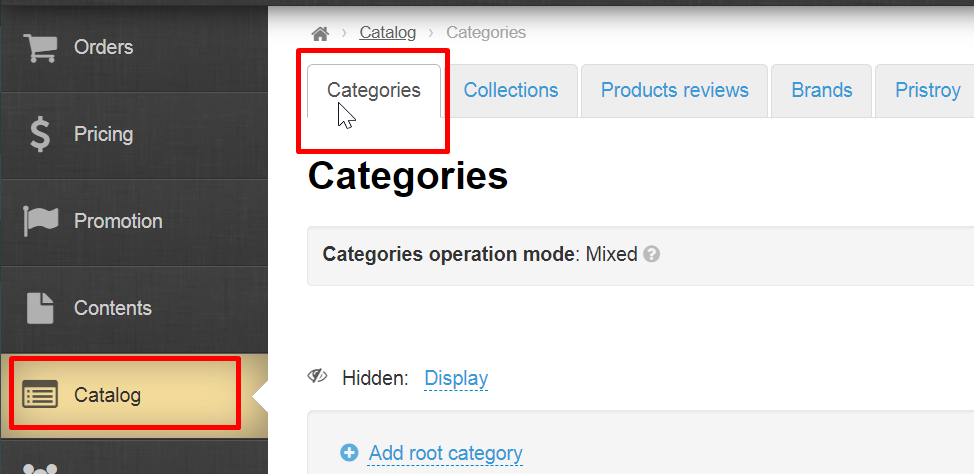
Open "Catalog" section and "Categories" tab.
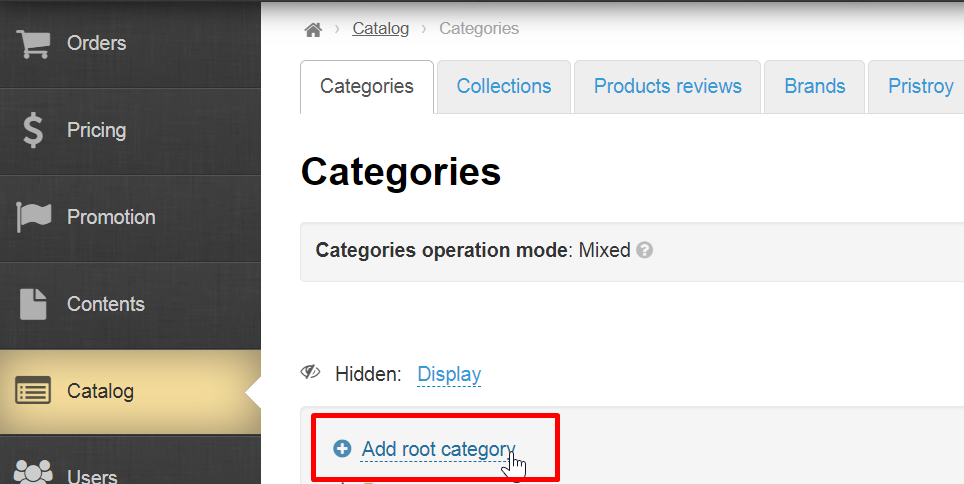
Click "Add root category".
Enter name of this category in catalog and select virtual type of binding:
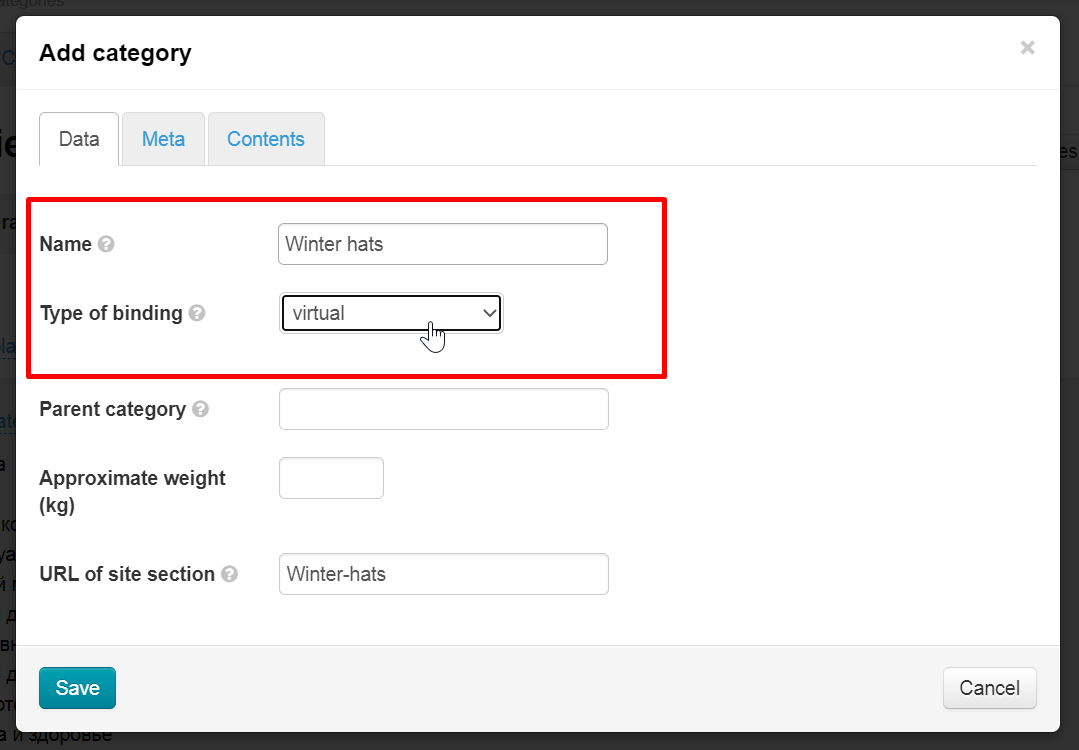
Other parameters are optional (check "Catalog: Add root category" section)
Click "Save" button:

Page will refresh and category will appear in the catalog.
...
Hover over a category. Click "Set Products in Selector" icon.
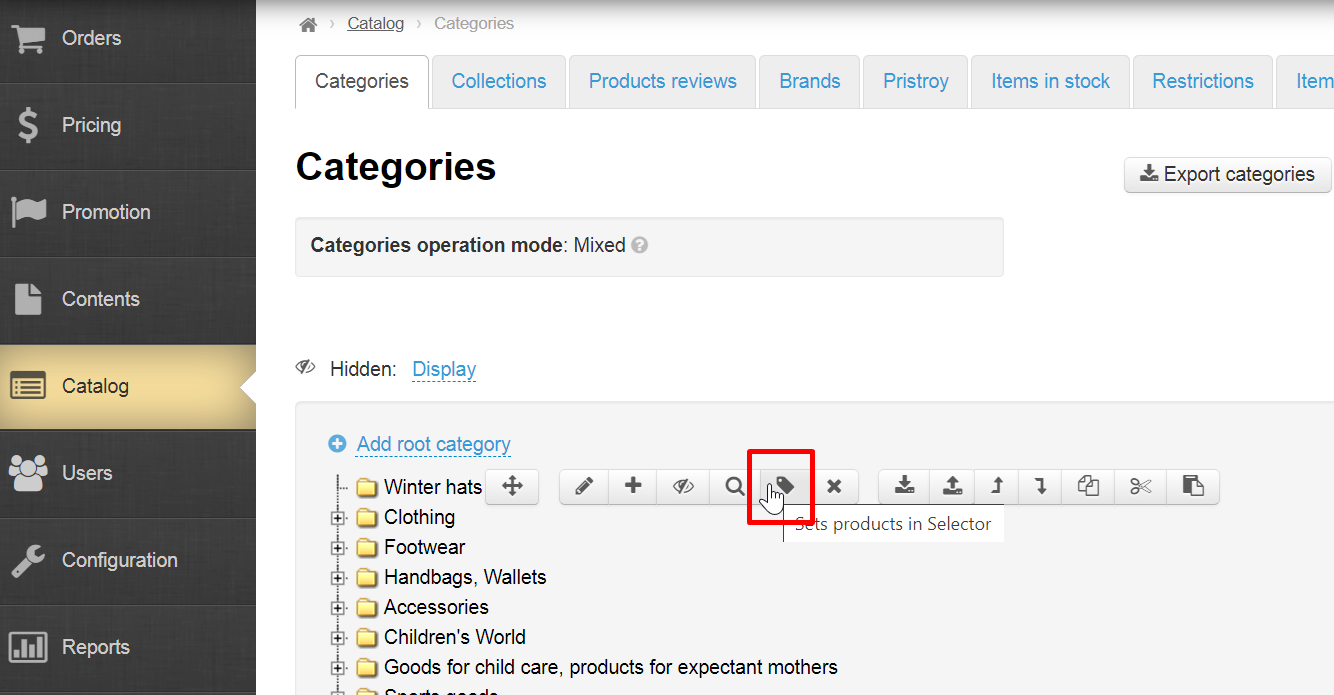
You will be redirected to "Collections" section (this will open a new tab in the browser).
...

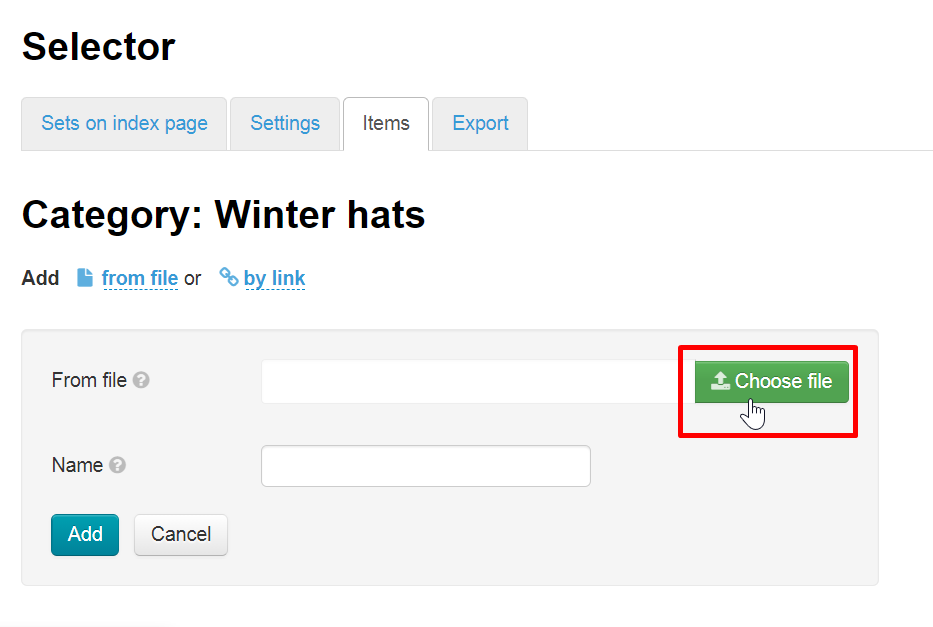
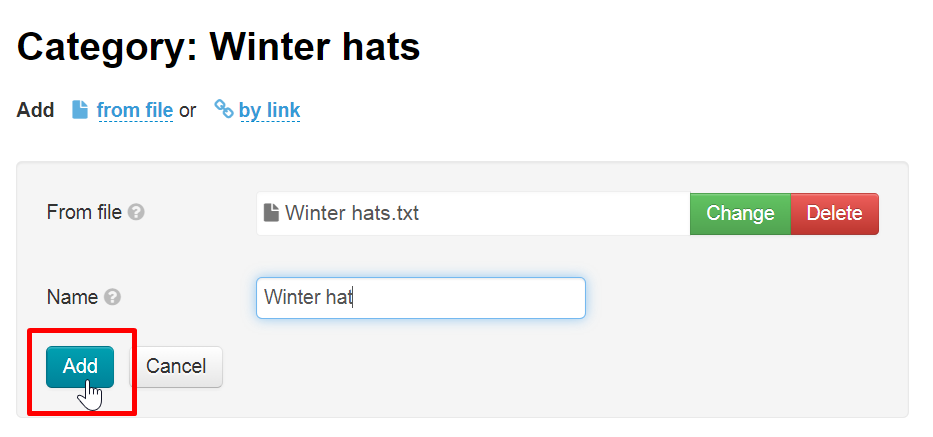
Click "from file":
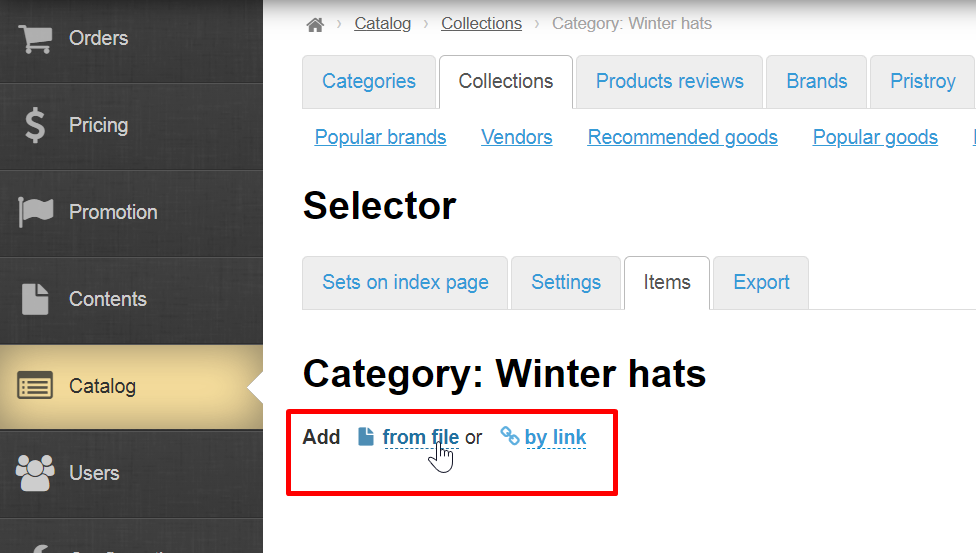
Select file created on the step above:
In addition, you can specify a common name for all products, for example "Teddy BearsWinter hat":
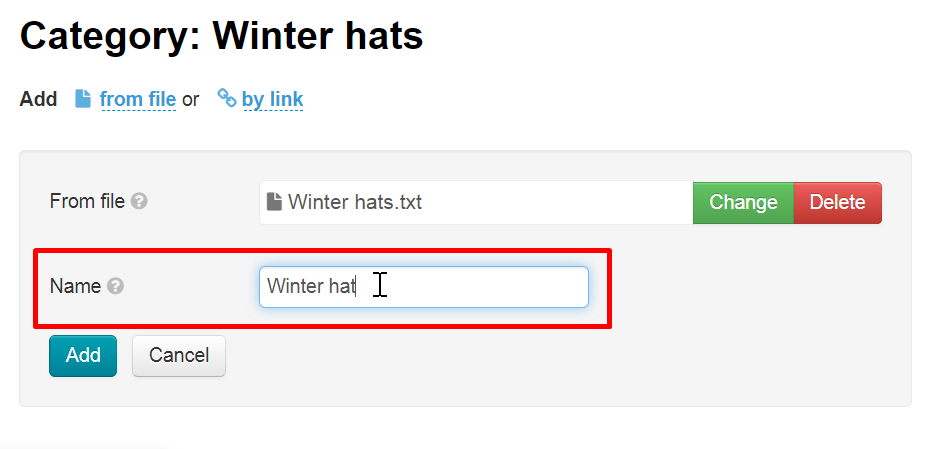
Click "Add":
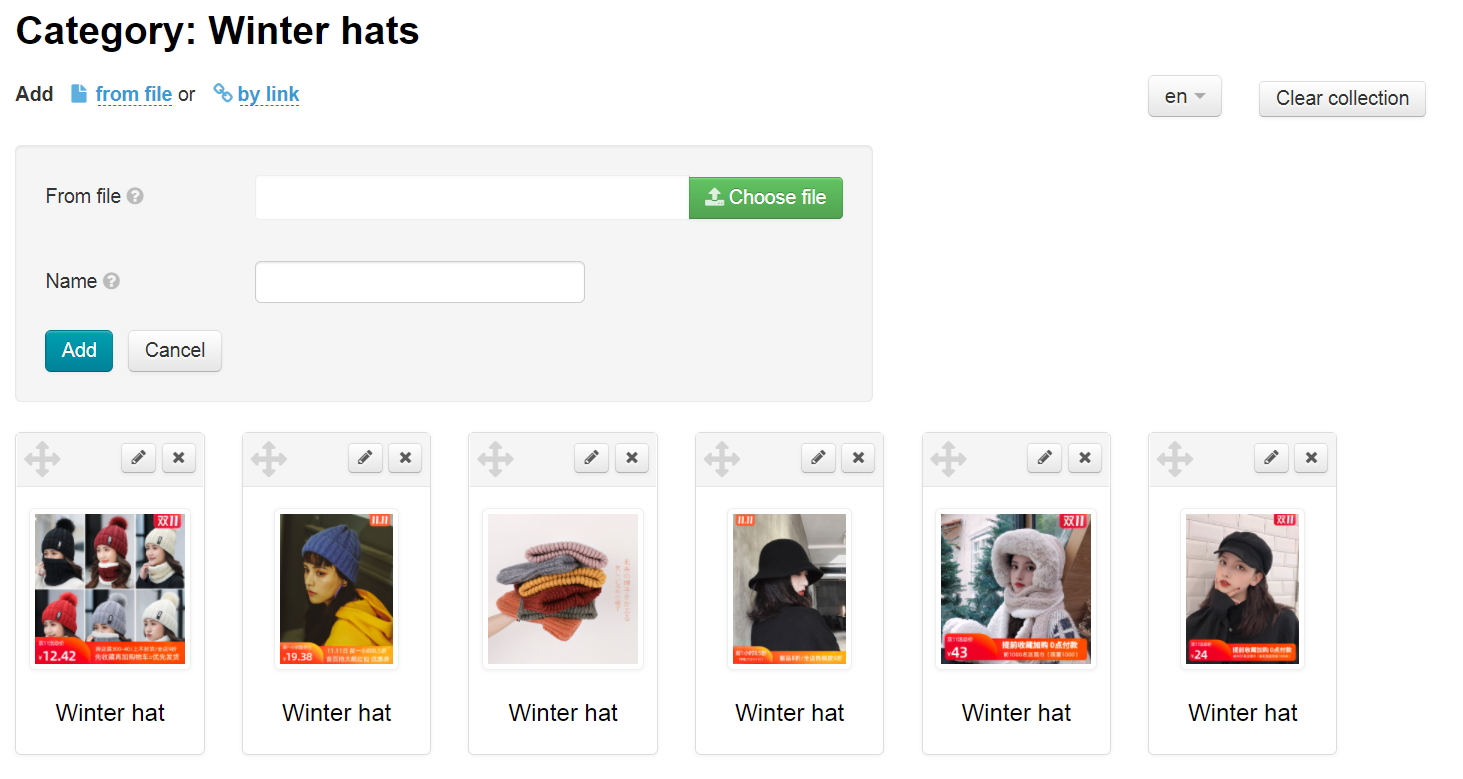
All products, links to which you have added, will be displayed below:
Set prices and margin for exported goods
The tab settings set goods price on the site. Here you can directly configure goods price: margin, price rounding and discounts.
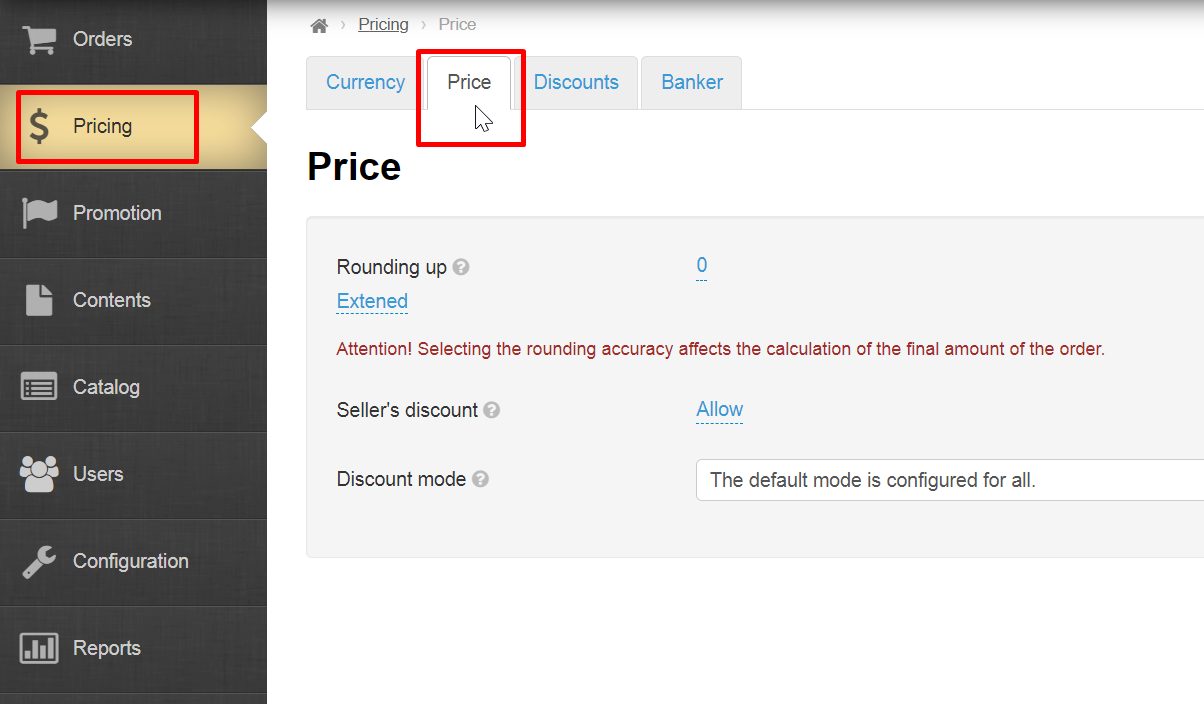
Price of each product is made up of individual parameters, namely: price rounding, discounts and minimum price.
Read detailed instruction in "Price" instruction.
Export into
...
Registration
Register account in Facebook. Click "Create New Account" for registration, fill in all fields in sign up form in a new window and click "Sign Up" button.
Log in if you already have an account and proceed to creating a group.
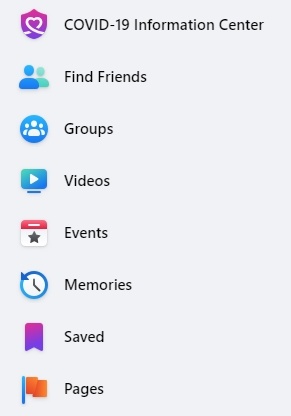
Create page for online shop
There are several options on the left of the page. Select "Pages" and click it.
Select "Create New Page" in new window.

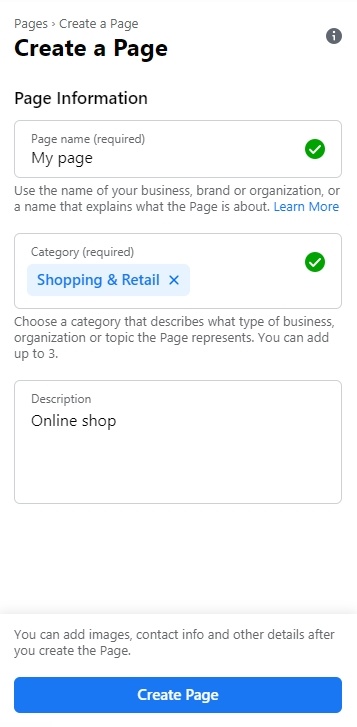
Fill in page Information. Write page name (use the name of your business, brand or organization, or a name that explains what the Page is about).
Choose a category that describes what type of business, organization or topic the Page represents. You can add up to 3.
Add description (write about what your business does, the services you provide, or the purpose of the Page).
Click "Create page" button after you finish.
You will see following message in the bottom of the page:
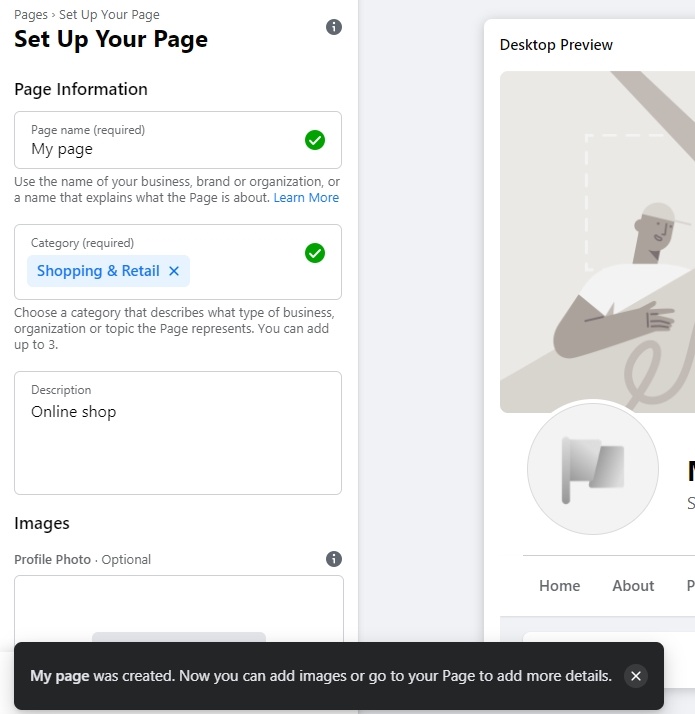
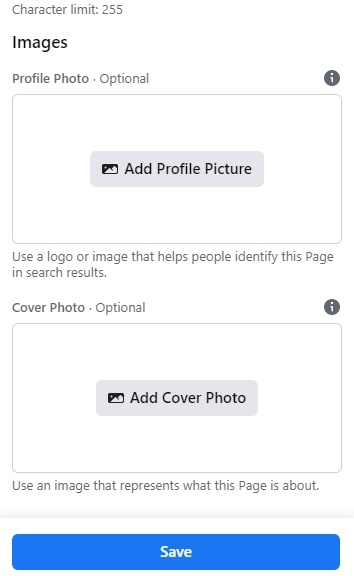
Set Up Your Page adding Profile Photo (Optional) and Cover Photo (Optional).
Use a logo or image for profile photo that helps people identify this Page in search results.
Use an image for cover photo that represents what this Page is about.
Go to "Page info" and add information about your shop
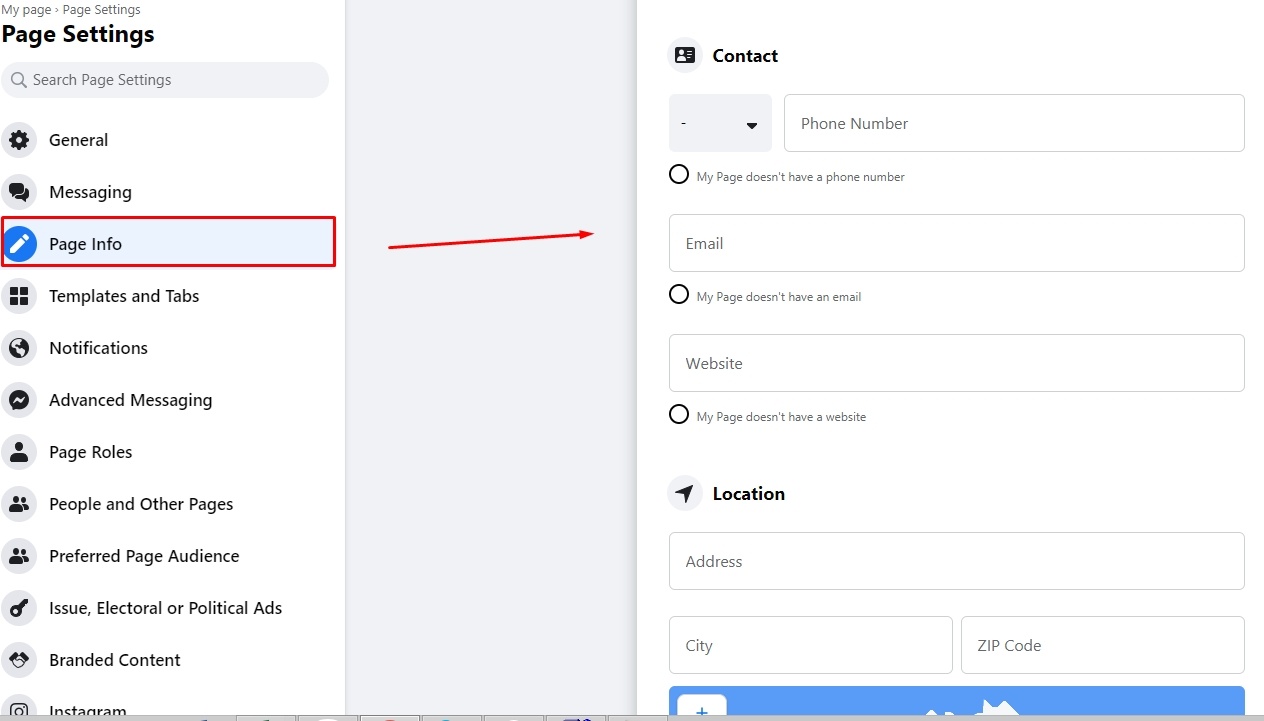
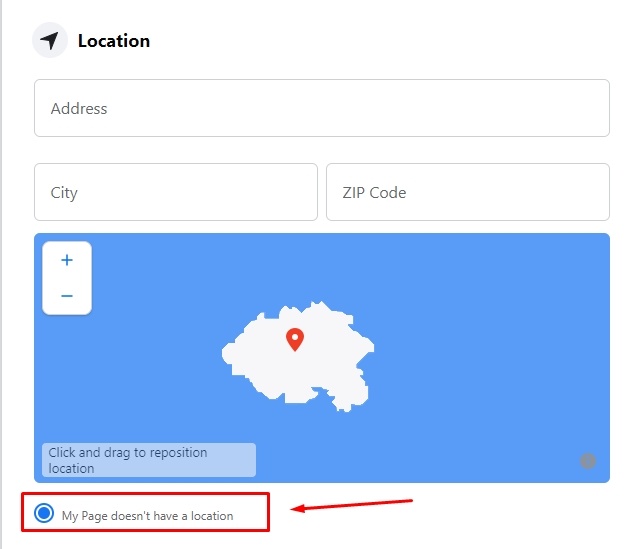
You can mark My Page doesn't have a location if you don't have offline shop or showroom.
Your changes will be automatically saved.
Также необходимо заранее создать альбом для фотографий товаров.
Когда находимся на созданной странице, нажимаем «Еще» слева снизу под фото страницы.
В списке выбираем «Фото».
Здесь создаем альбом, нажав «Создать альбом». Задаем ему название, которое потом добавим в админке Коробки ОТ. Также там требуется загрузить 1 фото для обложки.
Authorization in OT Box
Для настройки Exportа, а также для синхронизации необходимо авторизовать Коробку ОТ на Фейсбуке.
Ваши данные авторизации НЕ будут доступны никому, даже сотрудникам ОТ.
Нажимаем кнопку «Авторизоваться»
Откроется окошко, в котором необходимо разрешить Exportу Коробки ОТ авторизацию. Нажимаем кнопку «Продолжить как…». Если у вас предложен не тот аккаунт, с которым вы хотите работать, нажмите на надпись «Войти в другой аккаунт».
После нажатия на кнопку появится окошко, где вас попросят select страницы (если их несколько), которые будут доступны для работы Exportа Коробки ОТ. Выбираем страницы и нажимаем «далее».
Теперь необходимо разрешить Exportу Коробки ОТ все доступные действия, тк это напрямую влияет на работу Exportа.
В конце нажимаем кнопку «Ок».
Если все прошло удачно, после перезагрузки страницы админки Коробки ОТ у вас будет статус «Авторизован».
Настройка интеграции Фейсбук
Теперь поднимаемся чуть выше и настраиваем куда будут выгружаться товары во время Exportа
Кликаем по надписи «Не выбрано» и выбираем страницу из списка. Сохраняем выбор, нажав на кнопку с галочкой справа.
Пишем название альбома для товаров. Сохраняем название, нажав на кнопку с галочкой.
В Шаблоне описания можно указать какие данные будут выведены в карточку товара.
Кликайте в админке по красным надписям и они появятся в текстовом поле. Рекомендуем писать каждое значение с новой строки. Тогда и в карточке товара эти поля будут с новой строки. А можно и пустой строкой отметить для удобства.
Чтобы в вашей группе, при просмотре товара также отображалась ссылка на данный товар на вашем сайте, нужно в поле «Шаблон описания» прописать следующее:
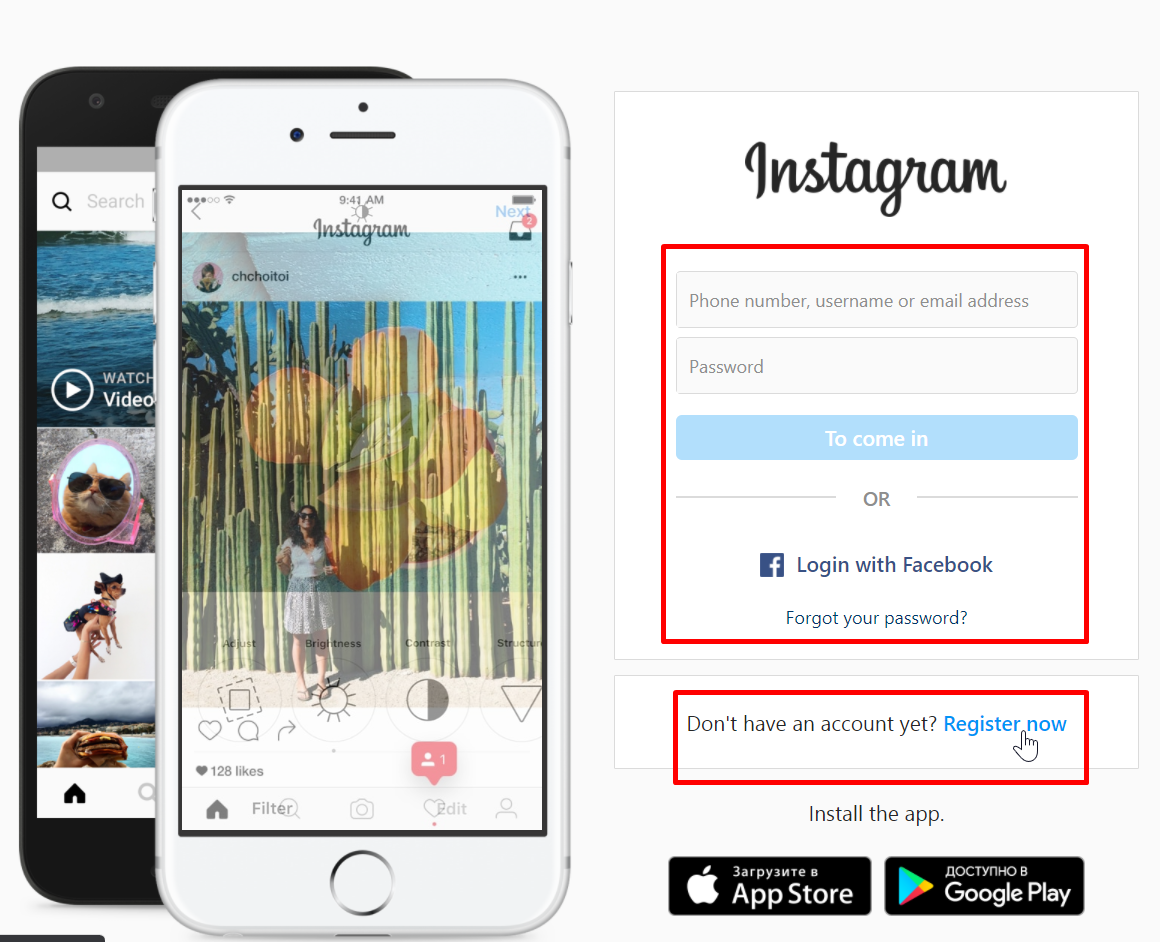
Instagram using "Register now" button. If you have an account, log in and skip registration.
Enter phone or email. Enter full name, username and password.
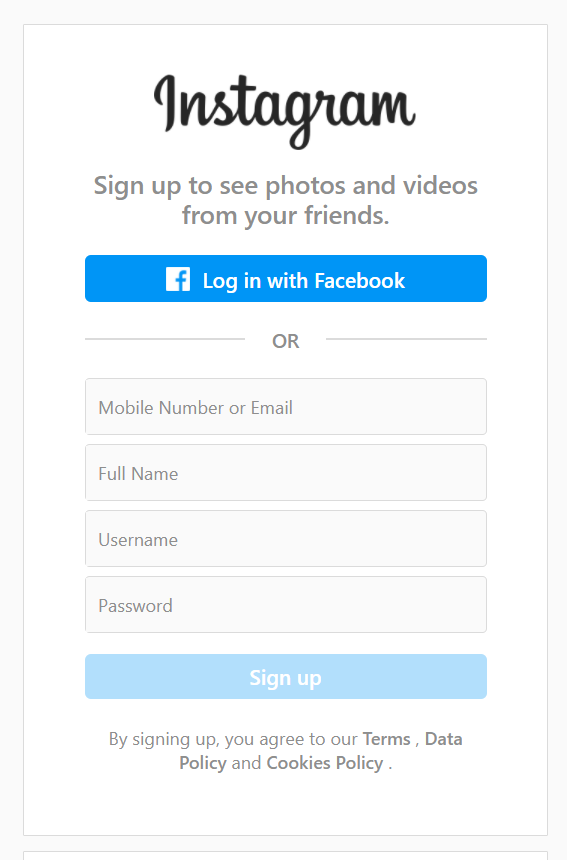
Click “Sign up”.
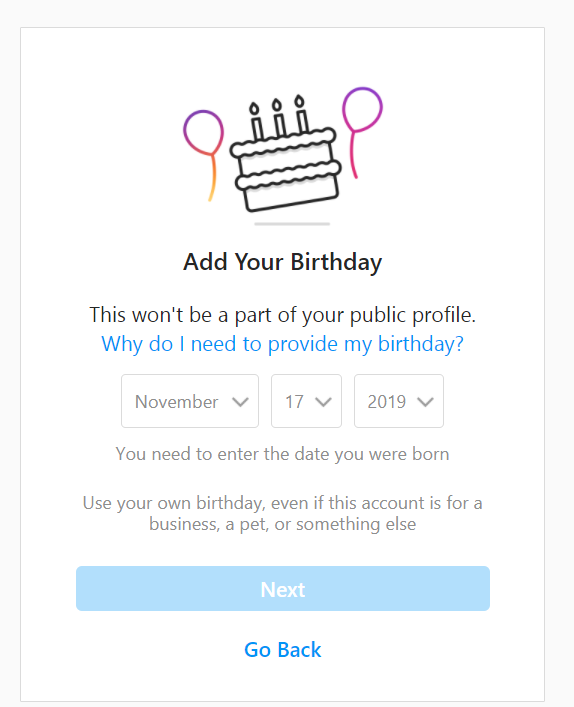
If you need, сlick "Continue and Sync Contacts" or "Continue Without Syncing Contacts".Add your birthday and click "Next".
Complete registration clicking "Next" button.
Log in and start goods export if you have registered an account.
Set Instagram integration
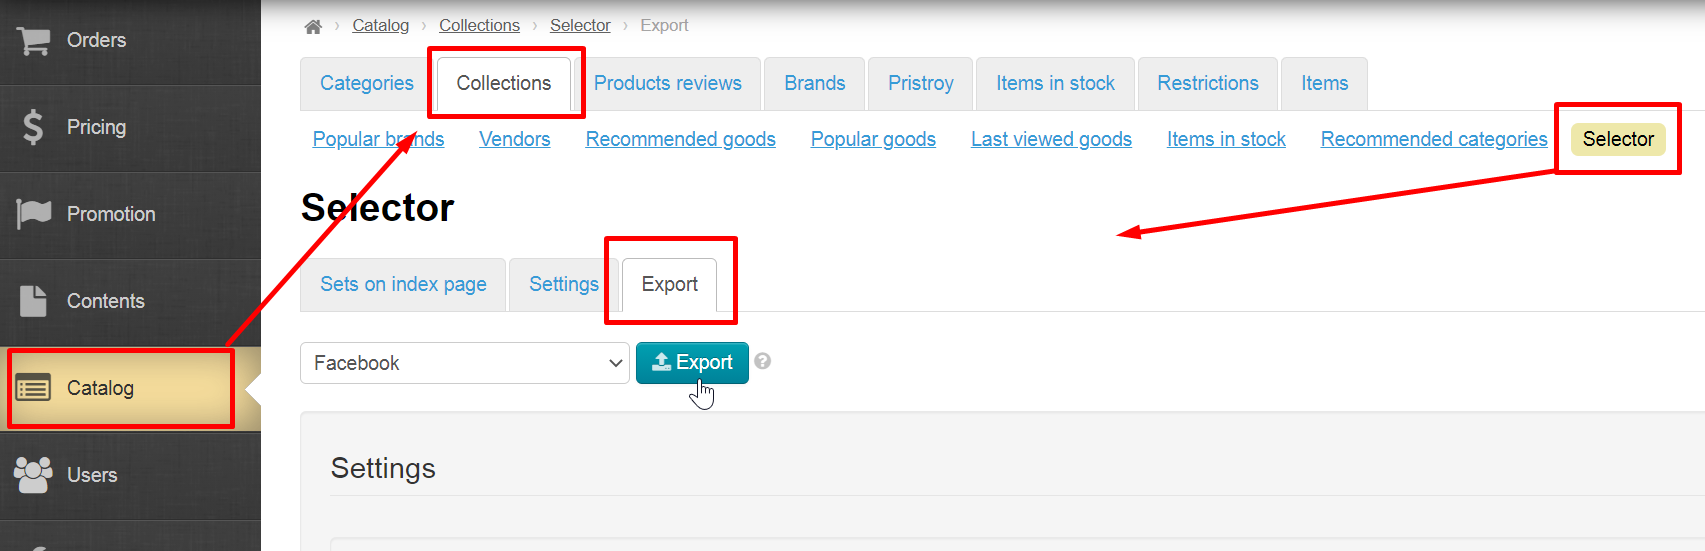
Log into admin panel of OT Box and go to Catalog → Collections → Selector → Export.

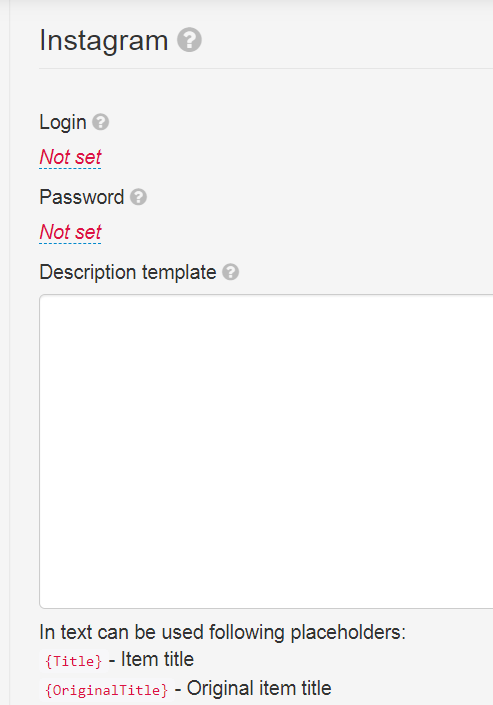
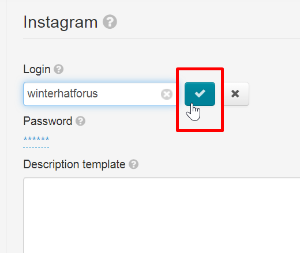
Scroll page to "Instagram" block. Click "Not set" to add Login and Password of your account.
Save clicking checkmark button on the right:
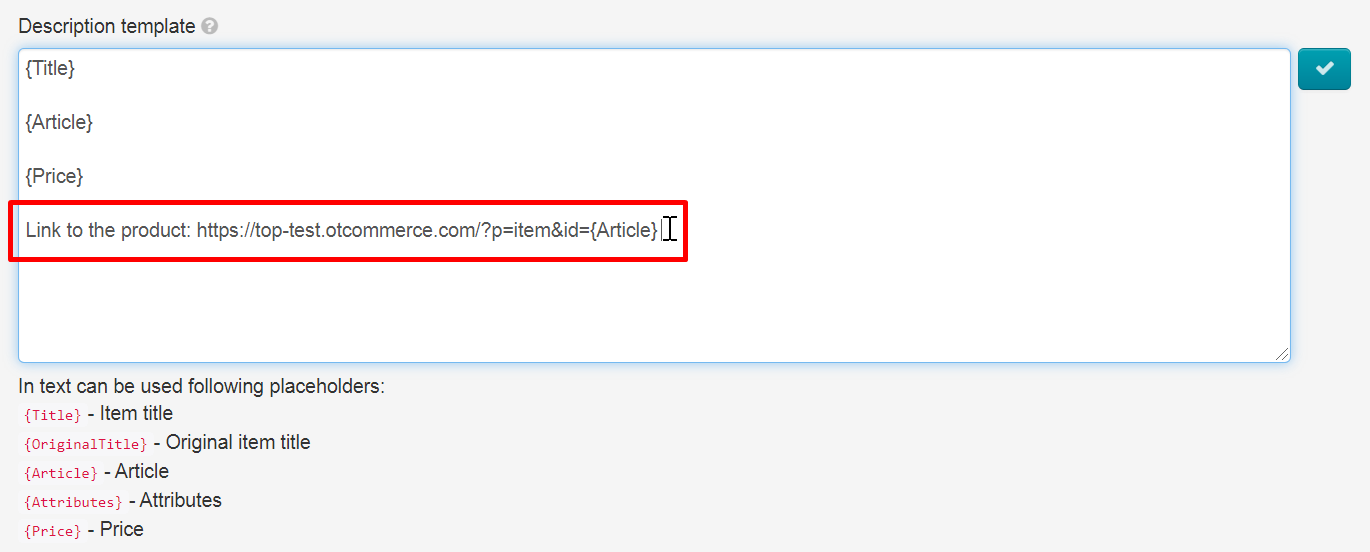
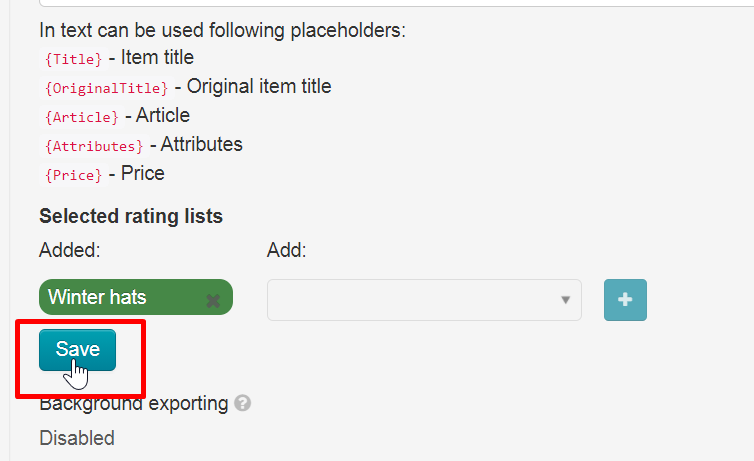
Description template allows to specify what data will be displayed in the product card.
Click red labels in admin panel and they will appear in the text field. We recommend you to write each value on a new line. Then in the product card, these fields will be on a new line. Or you can mark it with an empty line for convenience.
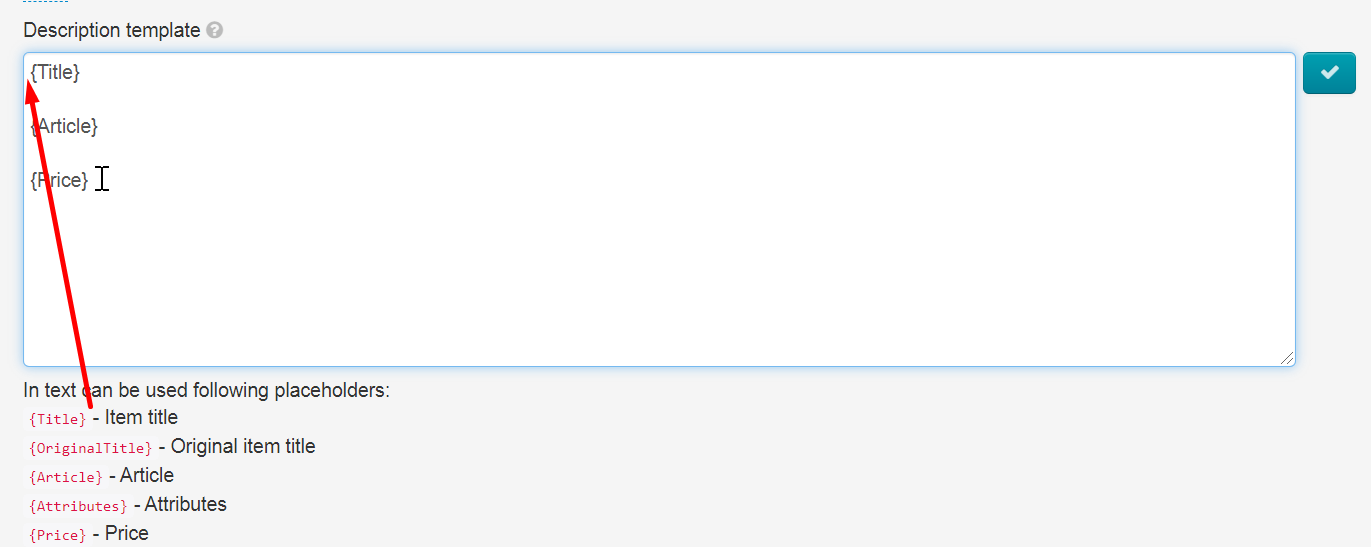
Write the following in "Description Template" field in order your group could have a link to this product on your website when viewing a product:
http://yourwebsitehttp://название_сайта/?p=item&id={Article}
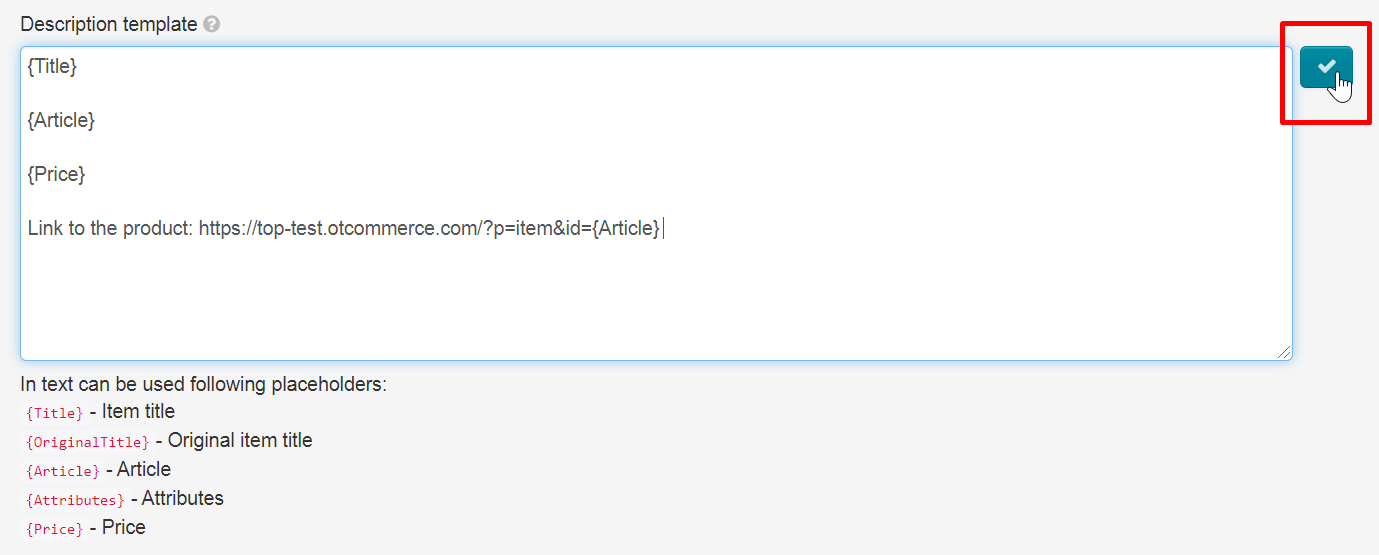
Сохраняем все изменения нажав на кнопку с галочкой.
Описание товара будет выглядеть вот так:
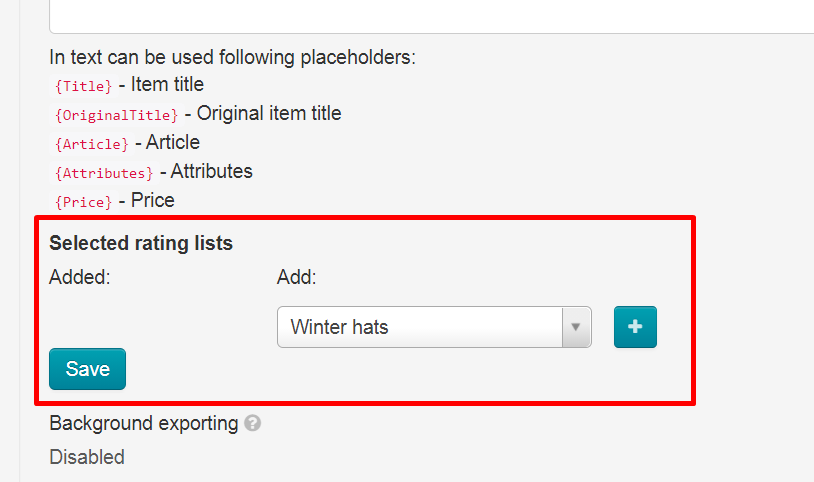
Затем выбираем категории, которые будут Exportированы. Если у вас нет этого блока, значит категории Selectorа пустые и их необходимо заполнить товарами.
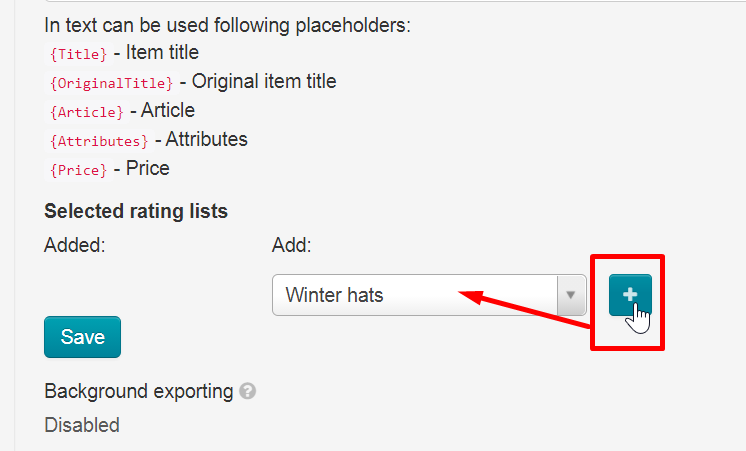
Кликаем по знаку + и когда все нужные категории будут в левой колонке, нажимаем «Сохранить».
Таким образом мы выбрали какие категории Selectorа будут Exportированы в альбом страницы на Фейсбуке.
Export goods
В админке Коробки ОТ открываем радел: Каталог → Подборки → Selector → Export
В списке социальных сетей for export выбираем «Фейсбук».
Нажимаем кнопку «Export».
Когда Export начнется, в админке откроется окошко с прогрессом загрузки.
Дожидаемся пока статус загрузки станет «Завершена» и закрываем окошко.
Export error
Если возникла такая ошибка, необходимо повторить авторизацию в админке Коробки ОТ.
Прокручиваем страницу до блока авторизации и нажимаем кнопку «Выйти»
После того, как страница автоматически обновится, нажимаем снова кнопку «Авторизоваться».
Теперь можно снова запускать Export.
Результаты Exportа будут сразу видны на Фейсбуке.
Synchronization
Для синхронизации товаров раз в сутки, необходимо включить «Фоновый Export».
Кликаем по надписи «Выключен», выбираем «Включен» и сохраняем выбор нажав на кнопку с галочкой.
Export в Инстаграм (в разработке)
Registration
Регистрируем аккаунт в Инстаграм с помощью кнопки «Создать новый аккаунт».
Выбираем имя пользователя и задаем пароль.
Завершаем регистрацию.
После успешной регистрации, Инстаграм предлагает связать аккаунт Инстаграм и Фейсбук. Если у вас оба аккаунта продающие товар, можно их связать. На работу Exportа товаров это никак не повлияет. Зато вы сможете сообщить своим покупателям о том, что теперь вы есть и в Инстаграм. Кроме того, вся реклама в Инстаграм идет через кабинет Фейсбука.
Если аккаунт у вас зарегистрирован, авторизуемся и переходим к Exportу товаров.
Настройка интеграции Инстаграм
В админке Коробки ОТ открываем радел: Каталог → Подборки → Selector → Export
Прокручиваем страницу вниз до блока «Настройки интеграции Инстаграмом». В этом блоке заполняем Логин и Пароль аккаунта.
Для заполнения кликаем по красной надписи «Не заполнено» и указываем данные для входа. После чего, нажимаем кнопку с галочкой для сохранения.
Заполняем поле «Пароль». Сохраняем его, нажав кнопку с галочкой.
В Шаблоне описания можно указать какие данные будут выведены в карточку товара.
Кликайте в админке по красным надписям и они появятся в текстовом поле. Рекомендуем писать каждое значение с новой строки. Тогда и в карточке товара эти поля будут с новой строки. А можно и пустой строкой отметить для удобства.
Чтобы в вашей группе, при просмотре товара также отображалась ссылка на данный товар на вашем сайте, нужно в поле «Шаблон описания» прописать следующее:
http://название_сайта/?p=item&id={Article}
Сохраняем все изменения нажав на кнопку с галочкой.
Описание товара будет выглядеть вот так:
Затем выбираем категории, которые будут Exportированы. Если у вас нет этого блока, значит категории Selectorа пустые и их необходимо заполнить товарами.
Кликаем по знаку + и когда все нужные категории будут в левой колонке, нажимаем «Сохранить».
Таким образом мы выбрали какие категории Selectorа будут Exportированы в Инстаграм.
Authorization in OT Box
Чтобы Export прошел успешно, необходимо авторизовать Коробку ОТ в Инстаграм.
Ваши данные авторизации НЕ будут доступны никому, даже сотрудникам ОТ.
Нажимаем кнопку «Проверить доступ».
После запроса проверки доступа страница обновится и появится форма введения кода подтверждения.
Когда код безопасности пришел на e-mail привязанный к Инстаграм, кликаем по красной надписи «Не установлено» и вводим код.
Если все прошло удачно, после перезагрузки страницы админки Коробки ОТ у вас будет статус «Авторизован».
Export goods
В списке социальных сетей for export выбираем «Инстаграм».
Нажимаем кнопку «Export».
Когда Export начнется, в админке откроется окошко с прогрессом загрузки.
Дожидаемся пока статус загрузки станет «Завершена» и закрываем окошко.
Export error
Если возникла такая ошибка, необходимо повторить авторизацию в админке Коробки ОТ.
Прокручиваем страницу до блока авторизации и нажимаем кнопку «Проверить доступ».
После запроса проверки доступа страница обновится и появится форма введения кода подтверждения.
Когда код безопасности пришел на e-mail привязанный к Инстаграм, кликаем по красной надписи «Не установлено» и вводим код.
После того, как страница автоматически обновится можно снова запускать Export.
Synchronization
Для синхронизации товаров раз в сутки, необходимо включить «Фоновый Export».
Кликаем по надписи «Выключен», выбираем «Включен» и сохраняем выбор нажав на кнопку с галочкой.
Save all changes clicking checkmark button on the right.
Select categories for export. If you do not have this block, then Selector categories are empty and must be filled with products.
Click + and "Save" when all the necessary categories are in the left column.
Thus, we have chosen which categories of Selector will be exported to the album page in Instagram.
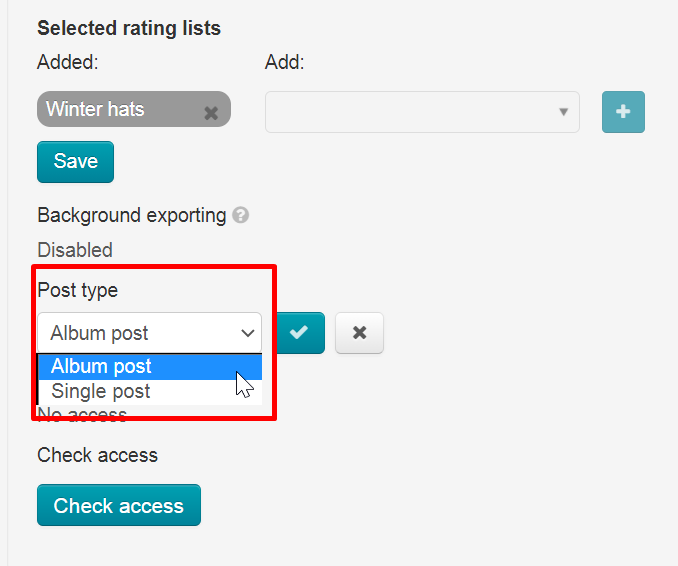
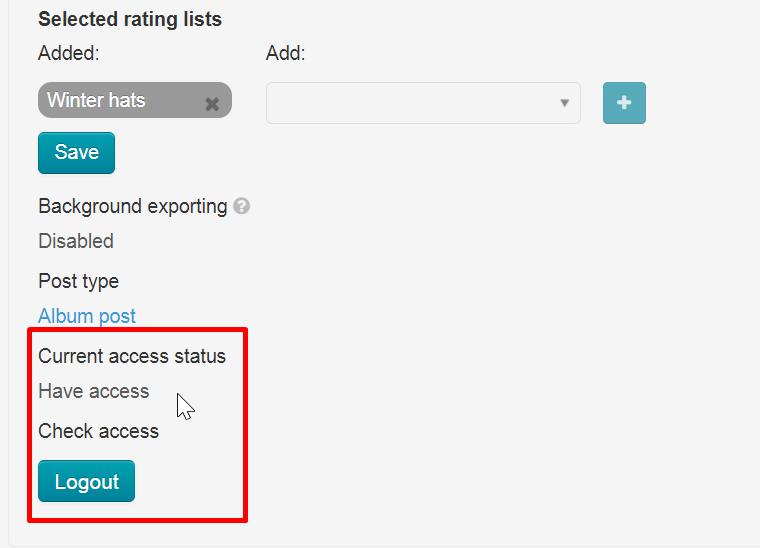
Post type
Select post type.
Save changes clicking checkmark button on the right.
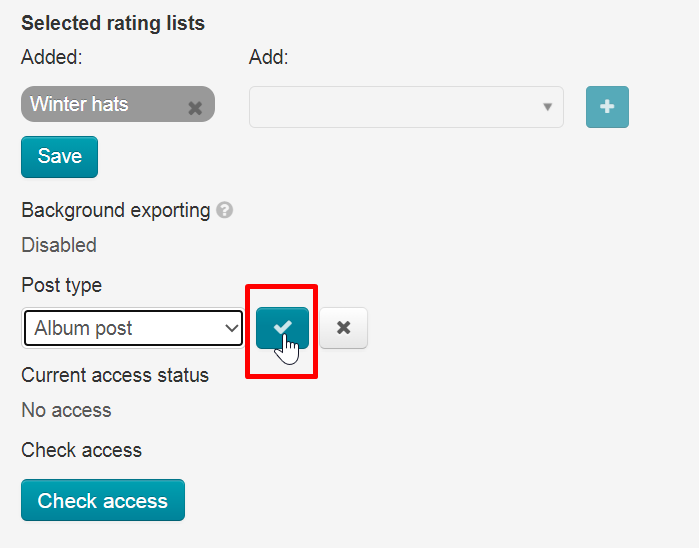
Authorization in OT Box
You need to authorize OT Box in Instagram to configure export, as well as for synchronization.
Your authorization data will NOT be available to anyone, not even OT staff.
Click "Check access" button.
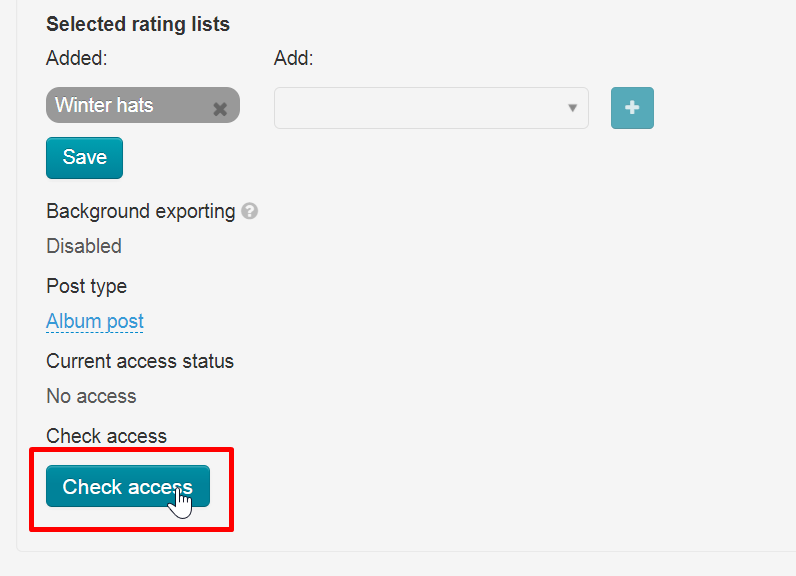
After requesting access verification, the page will be refreshed and confirmation code entry form will open.
Note! A confirmation code is not always required.
| Информация | ||
|---|---|---|
| ||
If you have two factor authentication enabled, then you will receive two security codes in sequence. We enter both codes in the “Security Code” window in the admin panel, as shown above. |
When security code came to email linked to Instagram, click "Not installed" and enter the code.
You will have "Authorized" status after reloading OT Box admin panel if everything was successful.
Export goods
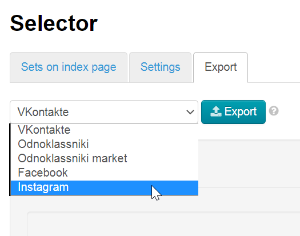
Select "Instagram" in the list of social networks for export.
Click "Export" button.

A window with download progress will open in admin panel when export starts.
Wait for status "Finished" and close the window.
Export error
You need to re-authorize in OT Box admin panel if such an error occurs.
Scroll page to authorization block and click "Logout" button.
After requesting access verification, page will be refreshed and a confirmation code entry form will appear.
When security code came to email linked to Instagram, click "Not installed" and enter the code.
| Информация | ||
|---|---|---|
| ||
If you have two factor authentication enabled, then you will receive two security codes in sequence. We enter both codes in the “Security Code” window in the admin panel, as shown above. |
Click "Authorized" button after page automatically refreshes.
Synchronization
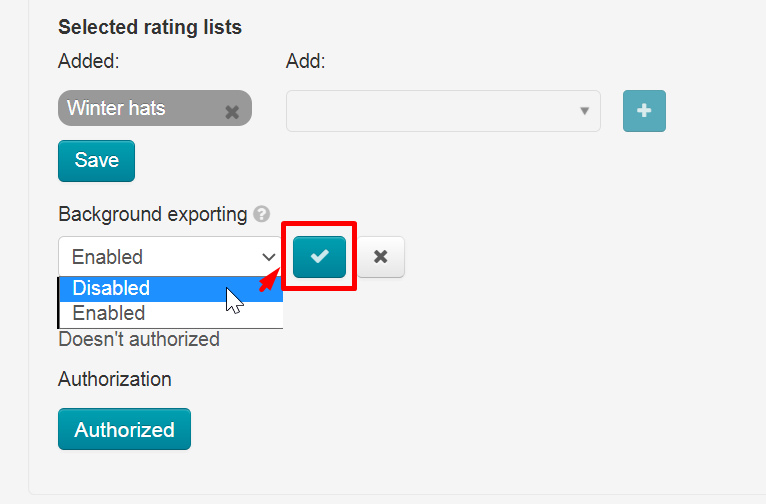
You need to enable "Background exporting" to synchronize products once a day.
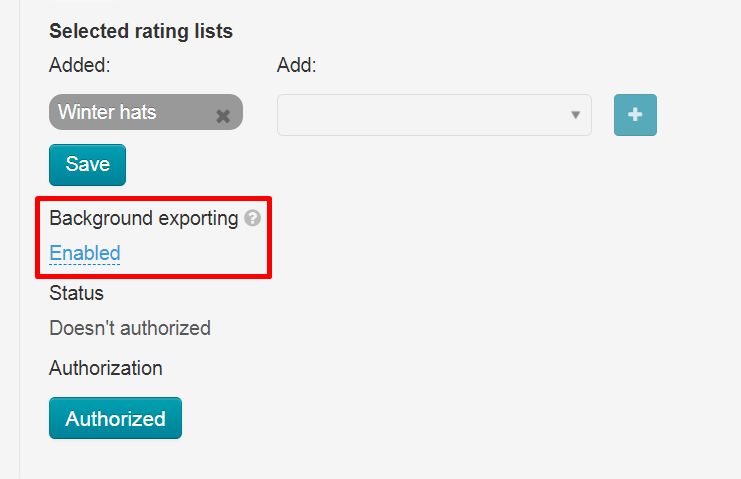
Click "Disabled", select "Enabled" and save choice clicking checkmark button on the right.