...
Where will we see these templates?
Во всех местах админки где есть экспорт, при клике на кнопку можно будет выбрать какой именно экспорт необходимо выполнить
Clicking "Export" button in all places of admin panel will allow you to choose which export to perform.
...
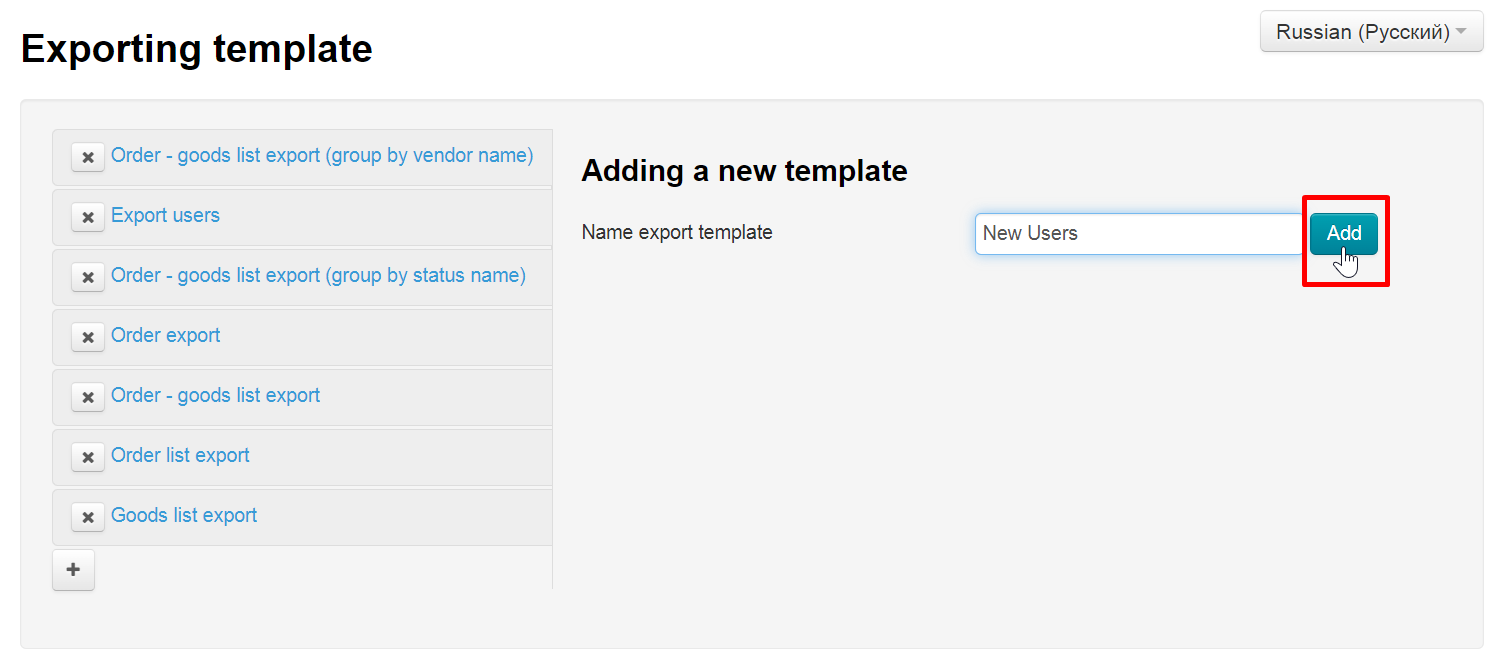
Click "Add" button
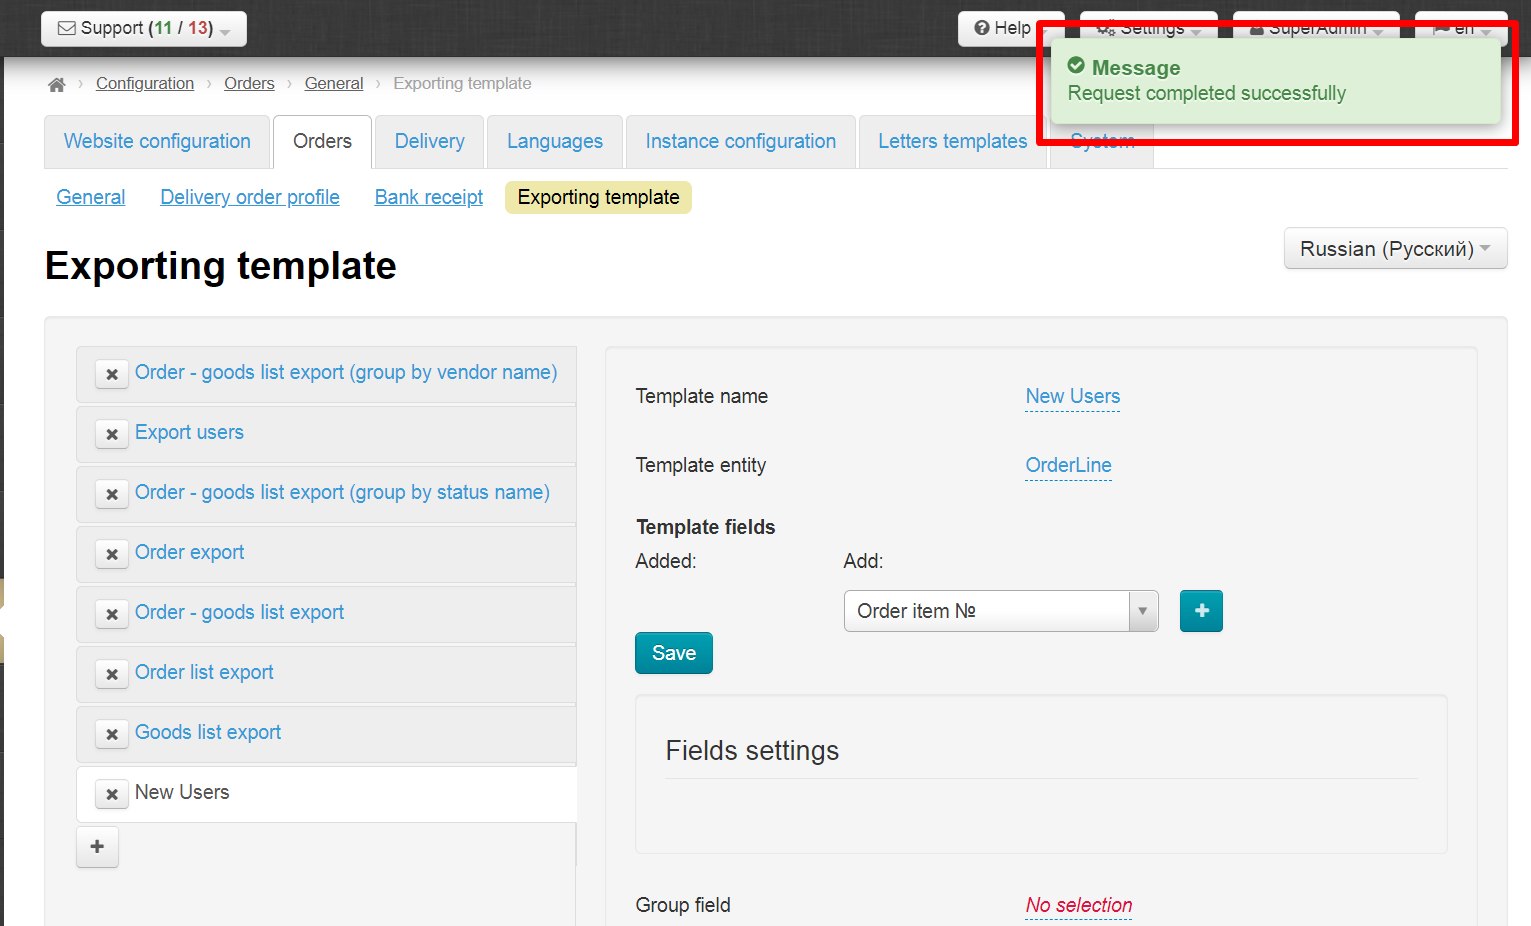
Template was created
Теперь будем его настраивать. Суть настройки: выбрать поля данных, которые будут нужны при экспорте. Надо выбрать те поля, которые помогут максимально эффективно работать с экспортируемыми данными. Чем удобнее будет файл, тем быстрее можно будет обработать информацию.
Обратите внимание на порядок полей template, а также на группировку полей.
We will configure it now. The point of the setting: select the data fields required for export. You need to select those fields that will help you work with the exported data as efficiently as possible. The more convenient the file is, the faster you can process information.
...
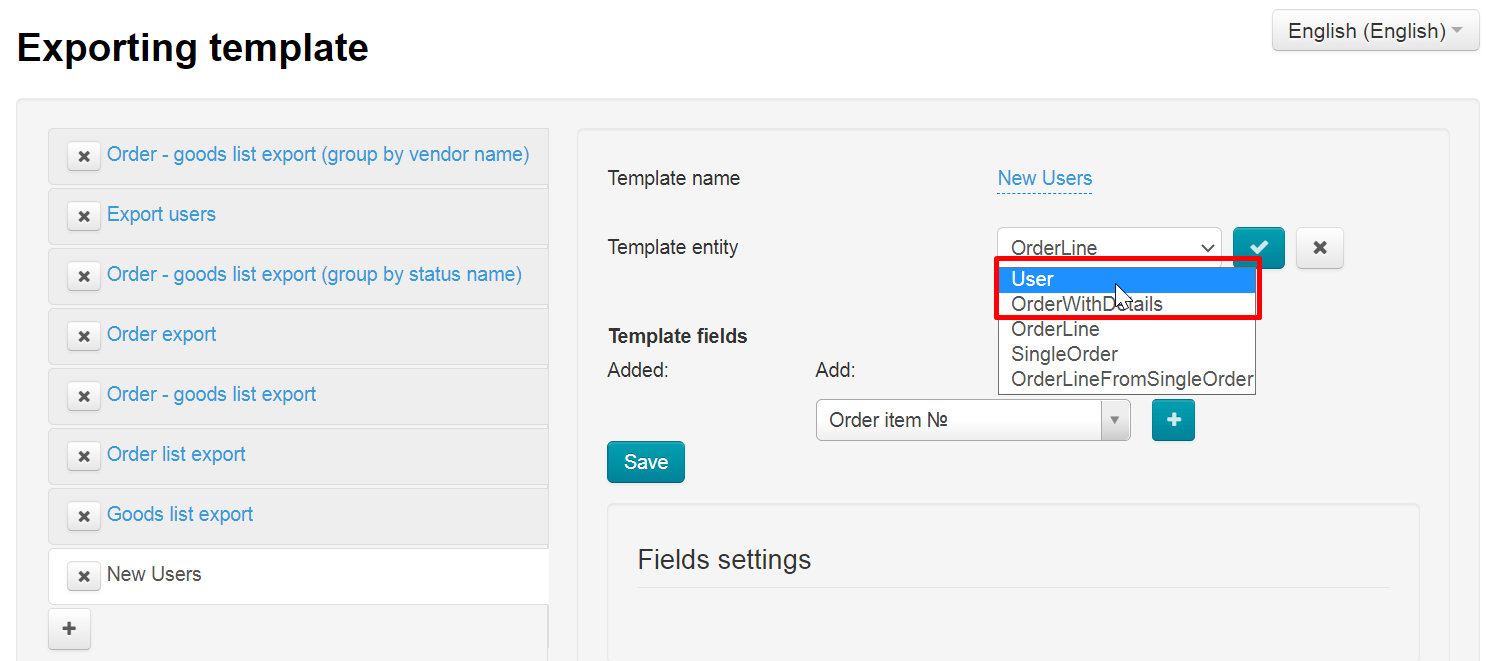
Select appropriate entity in drop-down list. It is necessary to show you all added templates during export. There are 5 places in total where you can export from and all these 5 places are template entities.
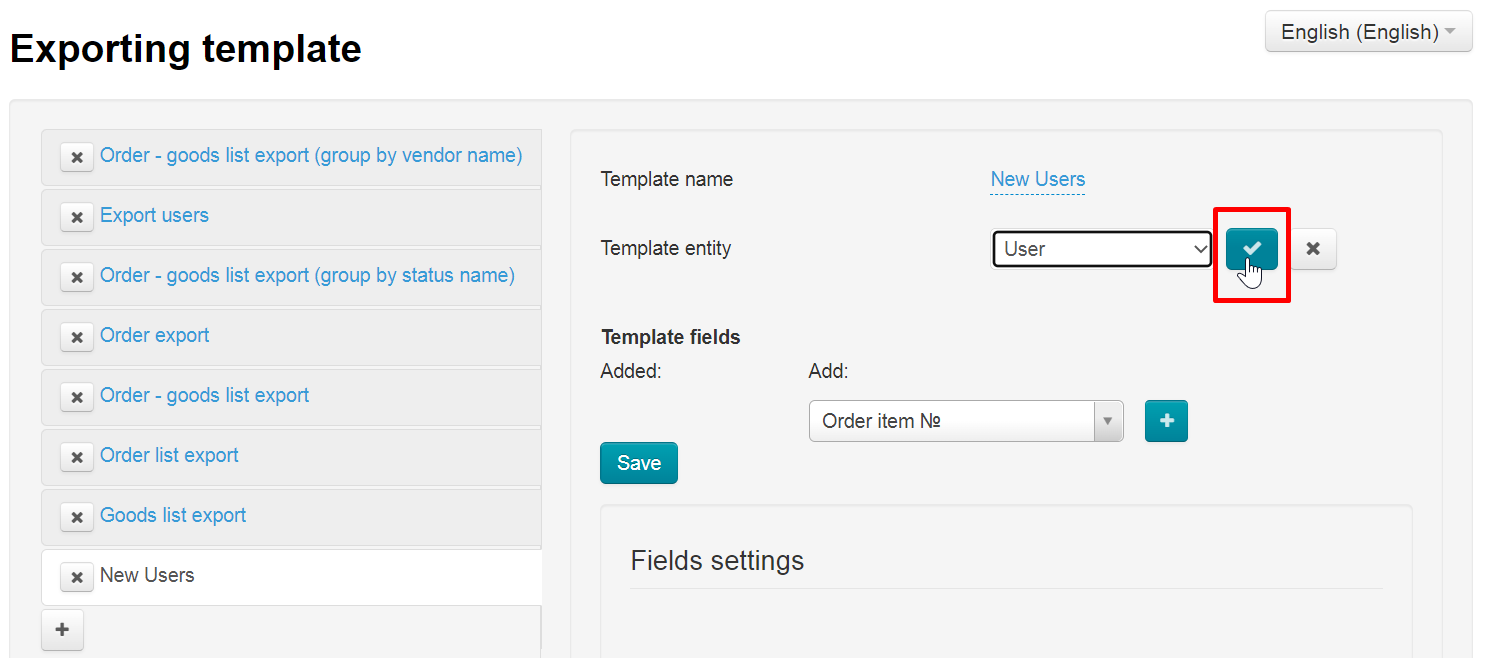
Save choice
Template fields
...
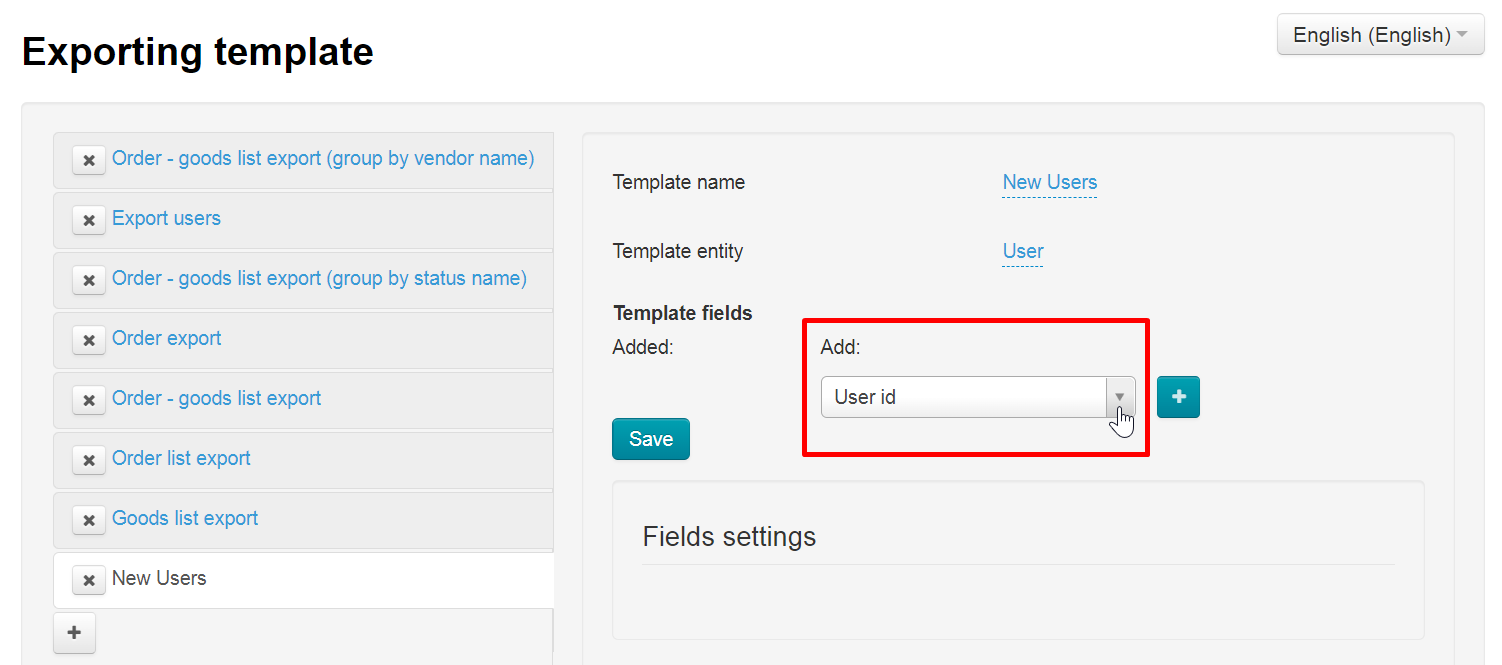
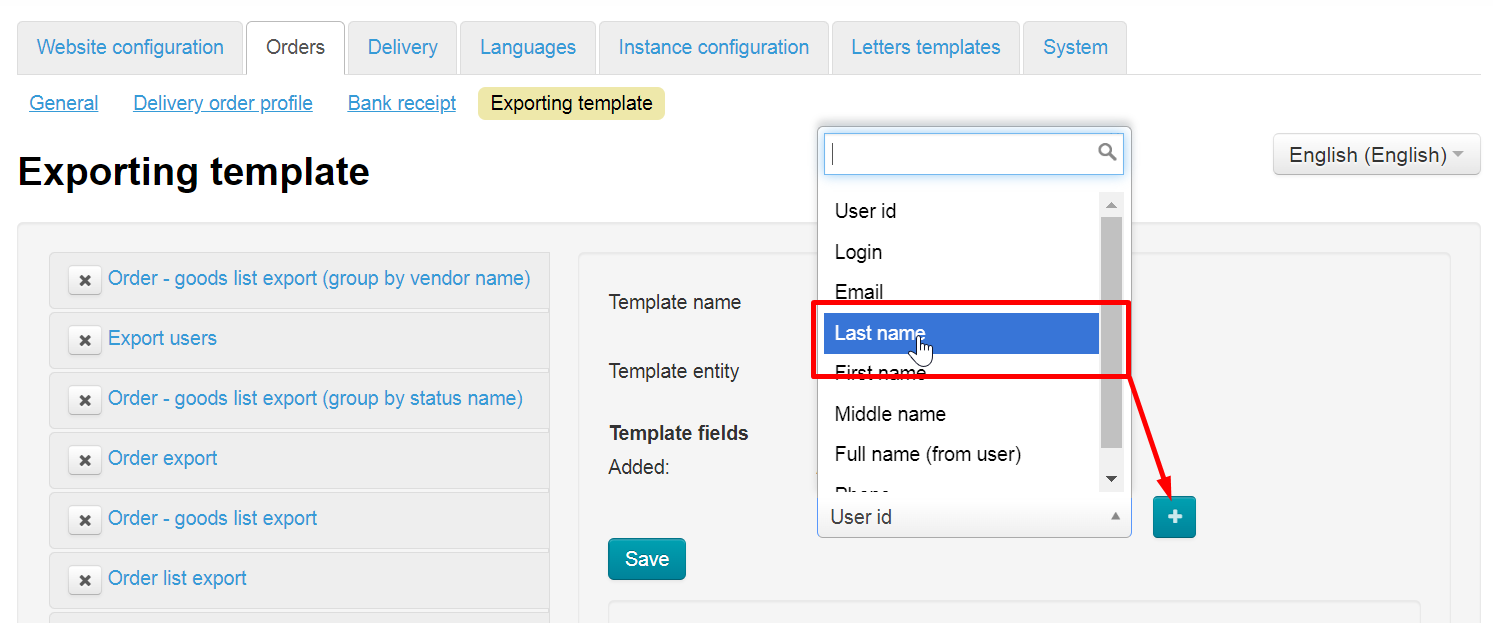
Select template fields from the list on the right
Click field title and press "+" button
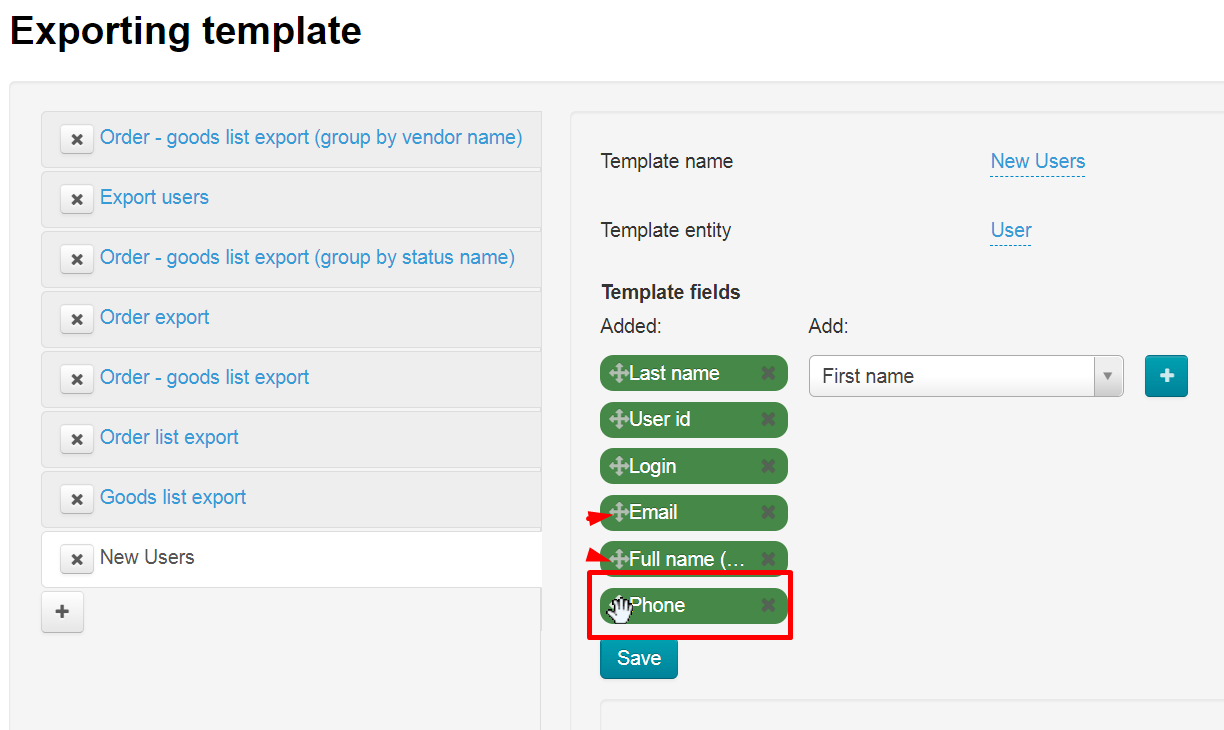
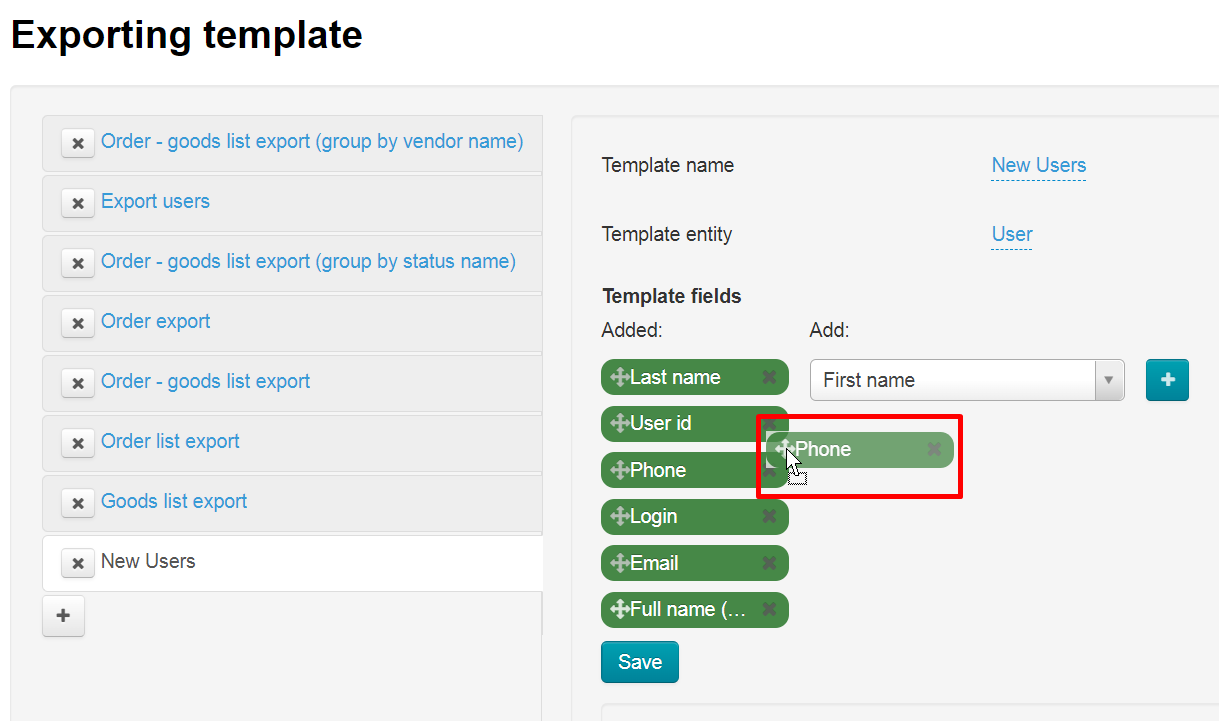
Fields can be swapped. Hold down the cross symbol with arrows to the left of the field name to do it
Hold the cross with the mouse and transfer to the right place
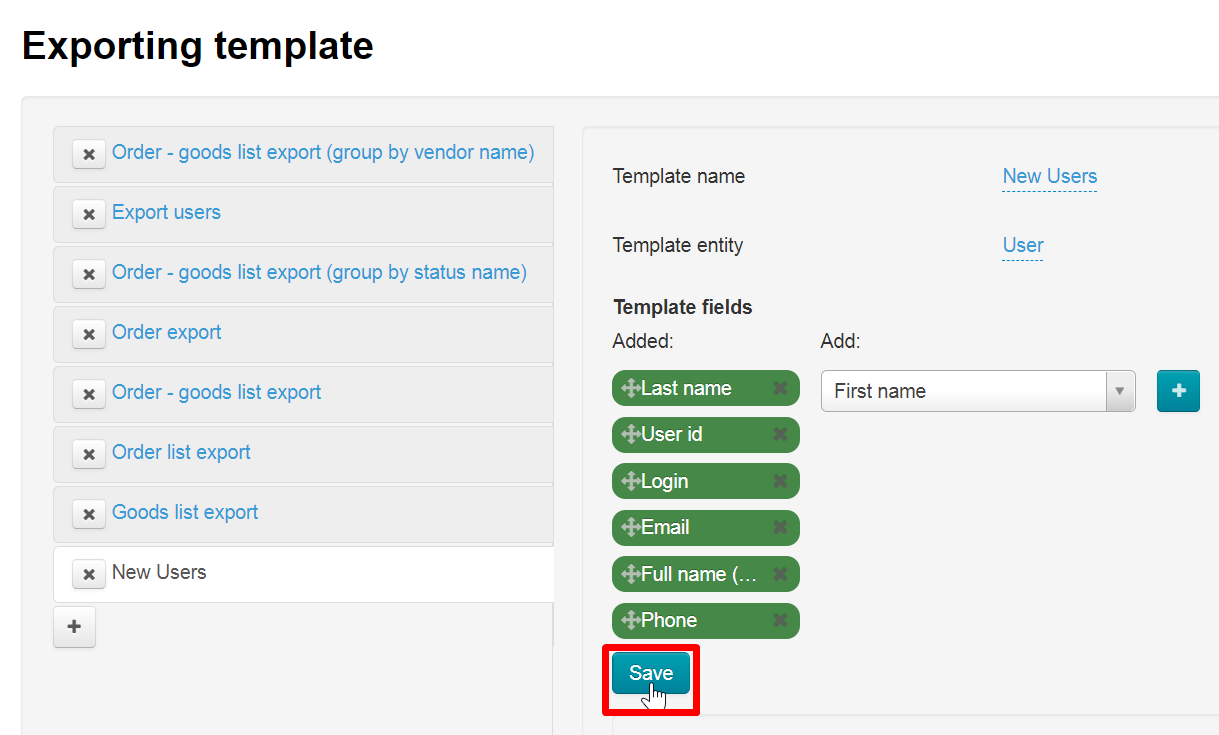
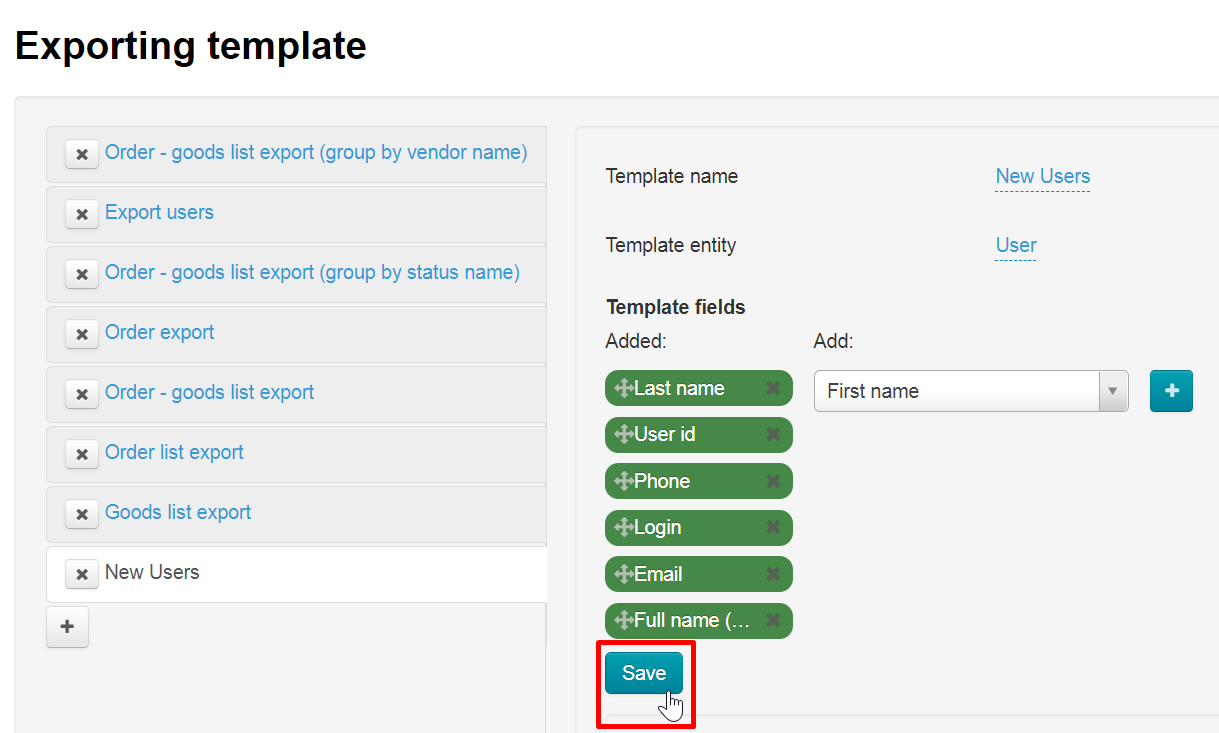
Save changes after that
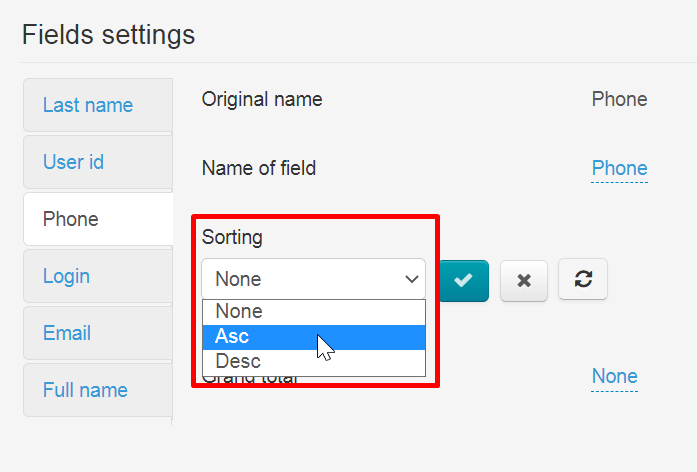
Fields settings
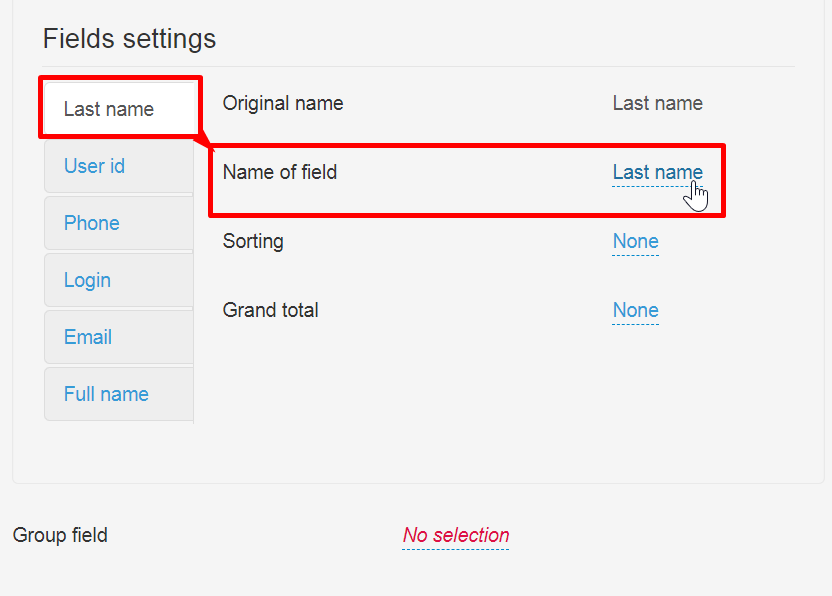
Each field has a separate setting. The set of settings may vary depending on the field type.
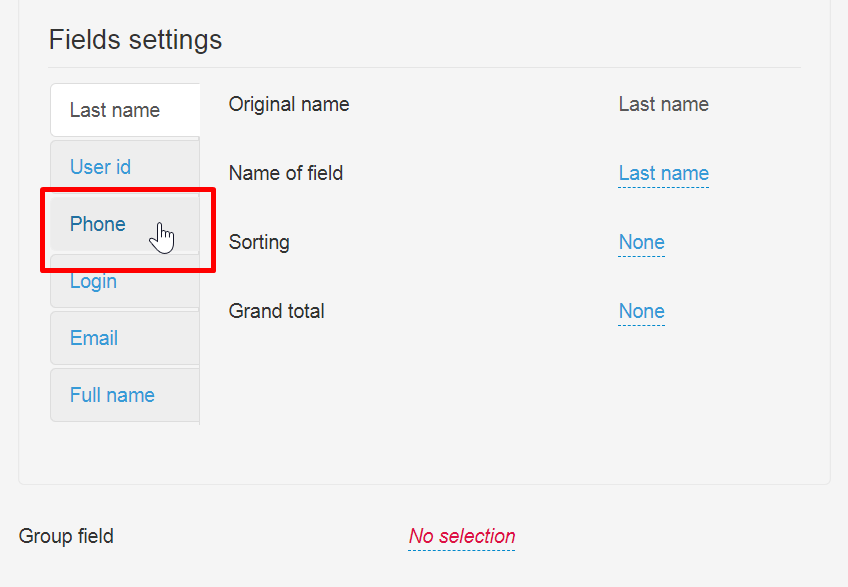
Click field names to open the settings
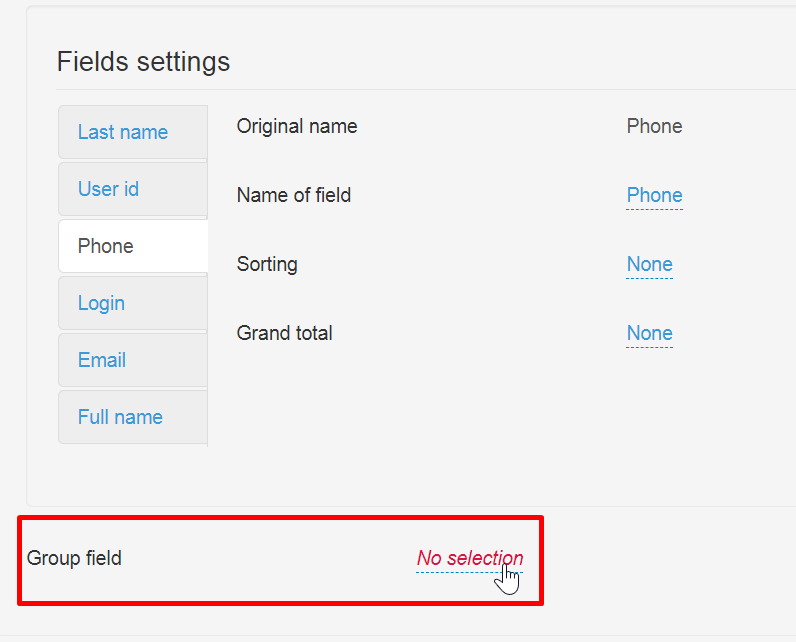
Grouping
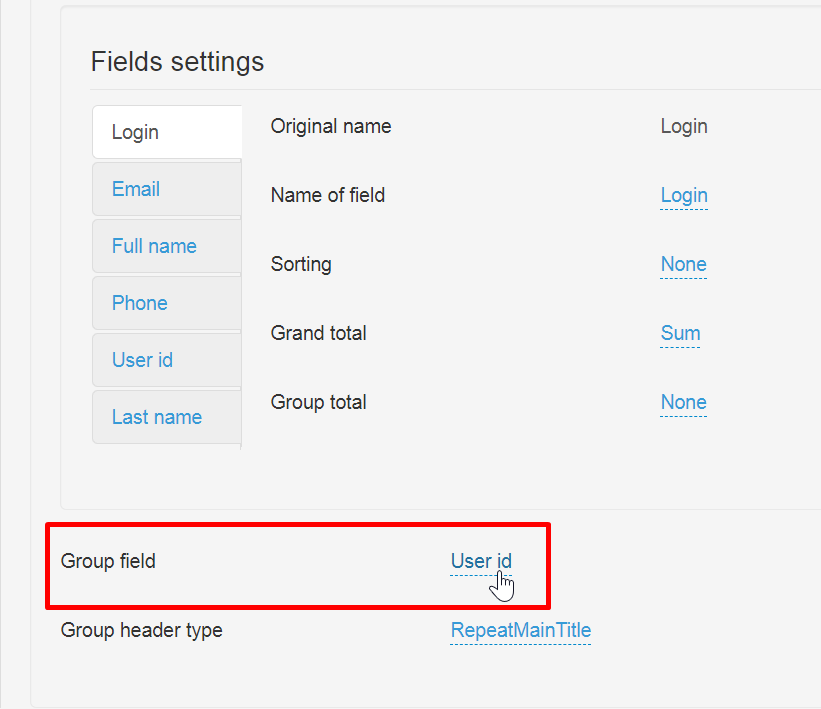
It is possible to group data in an export by some attribute. The grouping setting is at the bottom of the page after "Fields settings" block
Click "No selection" and select the field by which we want to group data. For example, you can group by Vendor ID (if we are talking about exporting orders) - all orders of each seller will stand side by side, which will simplify document processing
Edit
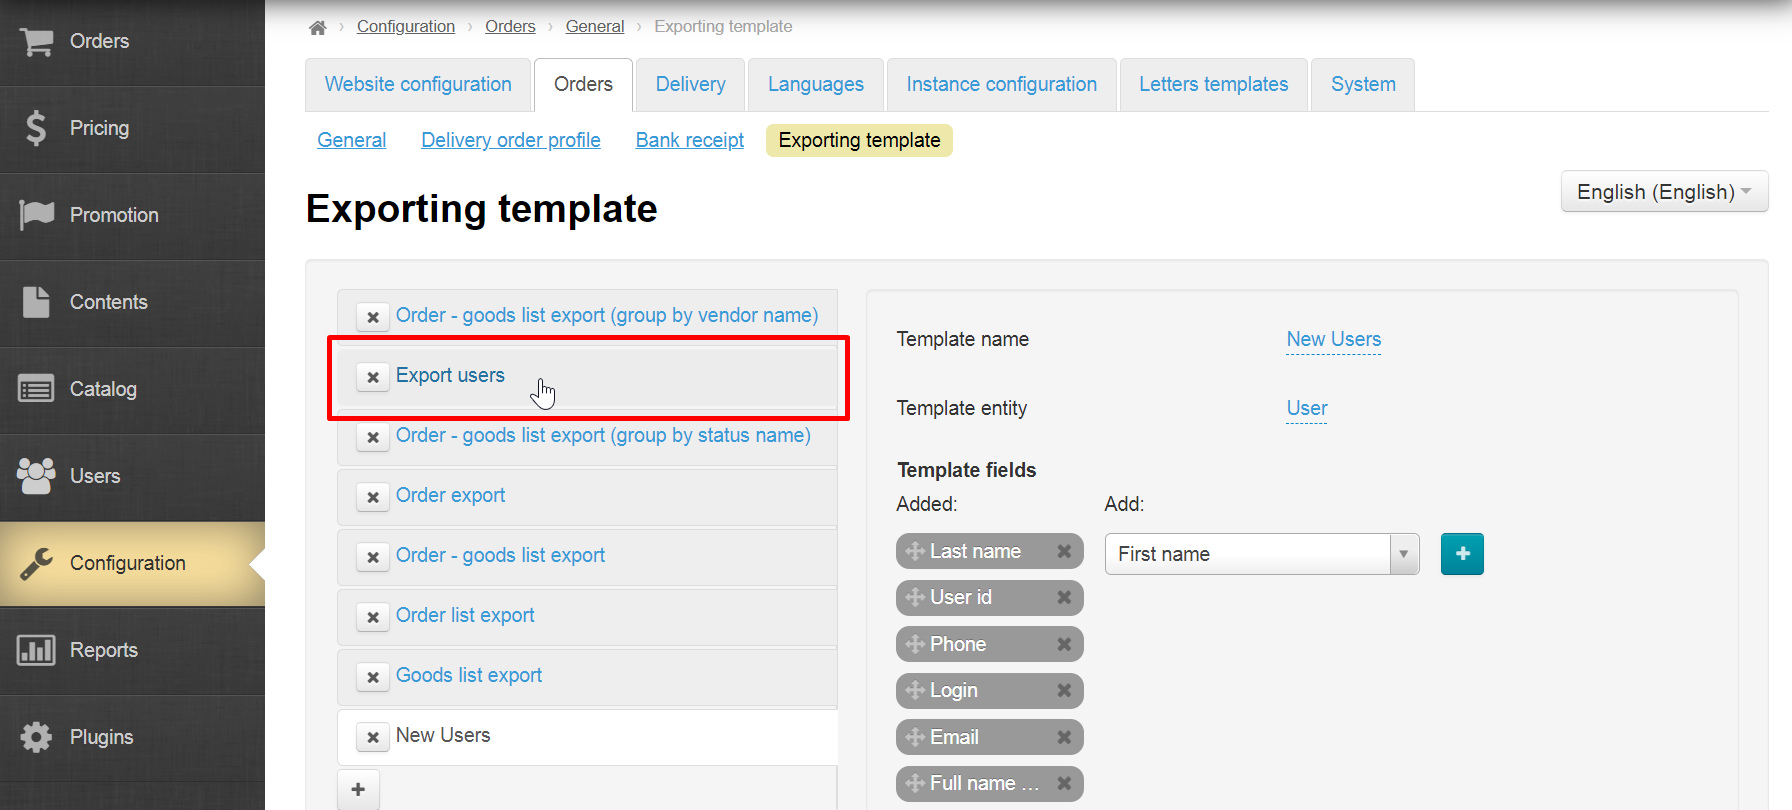
Select a template and click it to edit
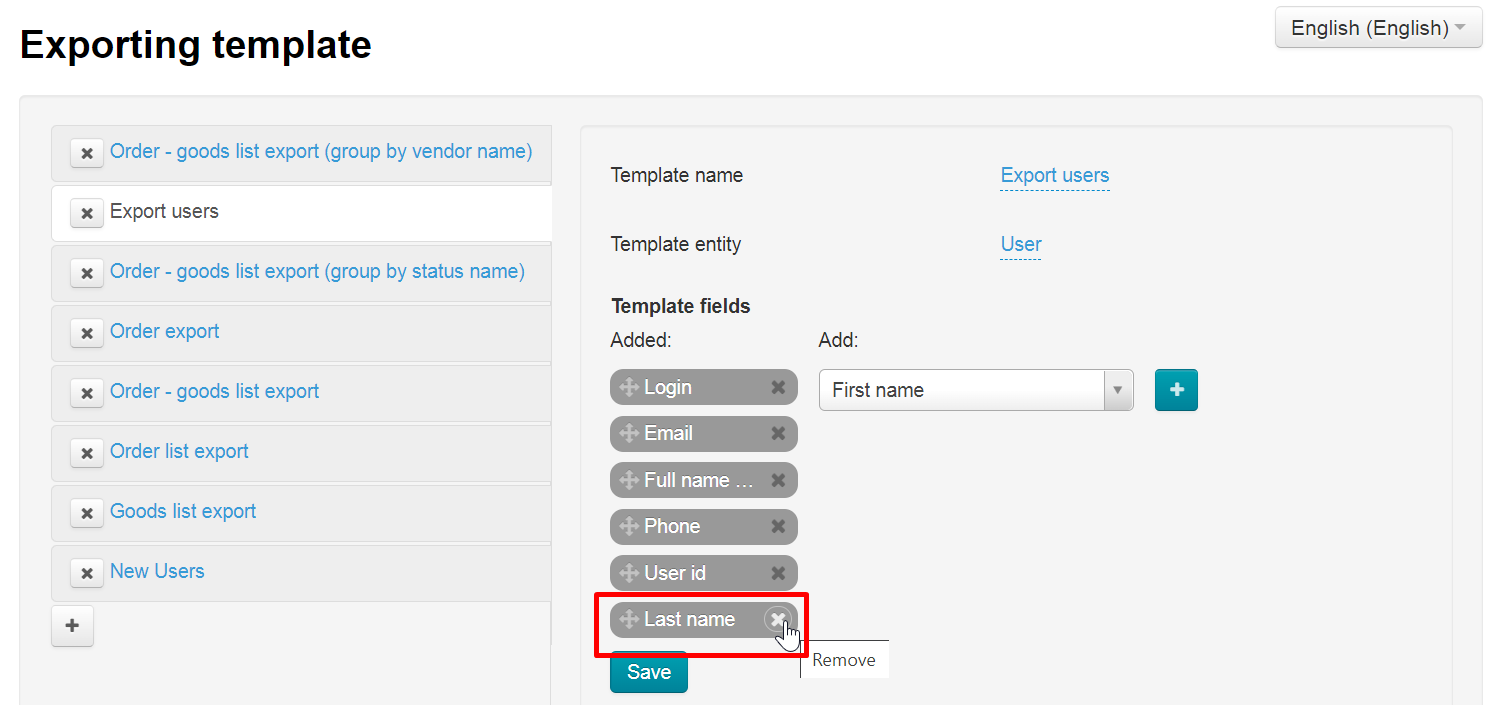
All fields that can be configured will open after clicking. For example, you can add or remove extra fields
Fields can be swapped. Hold down the cross symbol with arrows to the left of the field name to do it
Hold the cross with the mouse and transfer to the right place
Save changes after that
It is possible to change data grouping
Delete
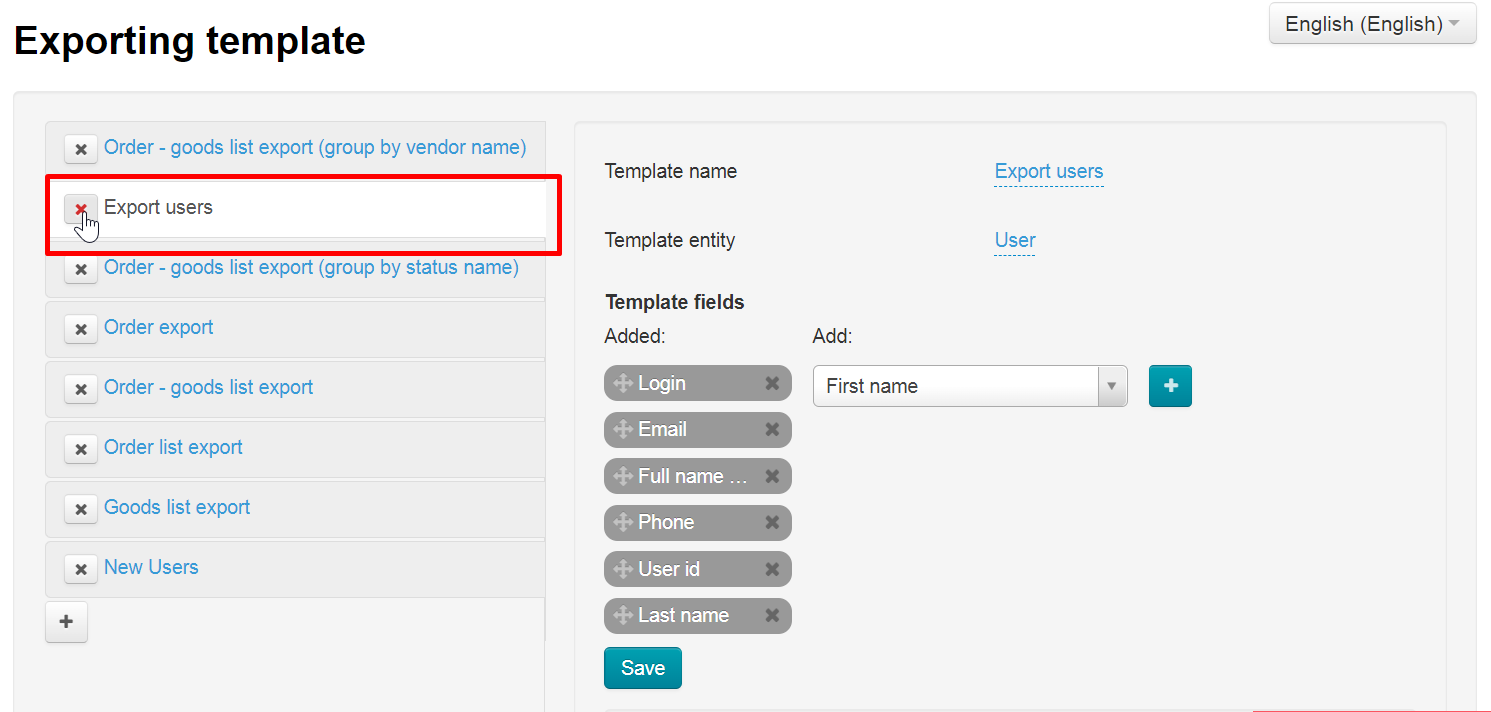
Select unnecessary template from the list and click the cross to the left of the template name
Template is permanently deleted, so you need to confirm the action. Click "Yes" if you are sure that the template is no longer needed
Теперь выбираем поля template из списка справа
Выбираем кликом мышки по названию поля и нажимаем кнопку «+»
Таким образом составляем полный список полей экспорта и сохраняем
Поля можно поменять местами. Для этого слева от названия поля зажимаем символ крестика со стрелками
Зажав мышкой крестик, не отпускаем и переносим на нужное место
Затем сохраняем изменения
Настройка полей
Для каждого поля есть отдельная настройка. В зависимости от типа поля, набор настроек может меняться.
Кликаем по названиям полей чтобы открыть настройки
Группировка
Можно сгруппировать данные в экспорте по какому-либо признаку. Настройка группировки находится внизу страницы после блока «Настройка полей»
Кликаем по надписи «Не выбрано» и выбираем поле по которому хотим сгруппировать данные. Например, можно сгруппировать по идентификатору Продавца (если речь идет об экспорте заказов) — все заказы каждого продавца будут стоять рядом, что упростит обработку документа.
Редактировать
Чтобы отредактировать созданные templateы, выбираем один и кликаем по нему мышкой
После клика откроются все поля, которые можно настроить. Например, можно добавить или удалить лишние поля
Поля можно поменять местами. Для этого слева от названия поля зажимаем символ крестика со стрелками
Зажав мышкой крестик, не отпускаем и переносим на нужное место
Затем сохраняем изменения
Можно изменить группировку данных
Удалить
Из списка templateов выбираем ненужный и нажимаем на крестик слева от названия template
template удаляется безвозвратно, поэтому необходимо подтвердить действие. Если уверены что template больше не нужен, нажимаем «Да»
