...
| Оглавление |
|---|
...
This page allows one to view details of orders. “Parcels” tab.
Location in admin panel: Orders > Order number in your website admin panel.
This page allows to view details of orders. The “parcels” “Parcels” tab.
Go toLocation in admin panel: Orders > Order number in the administrative area of your website admin panel.
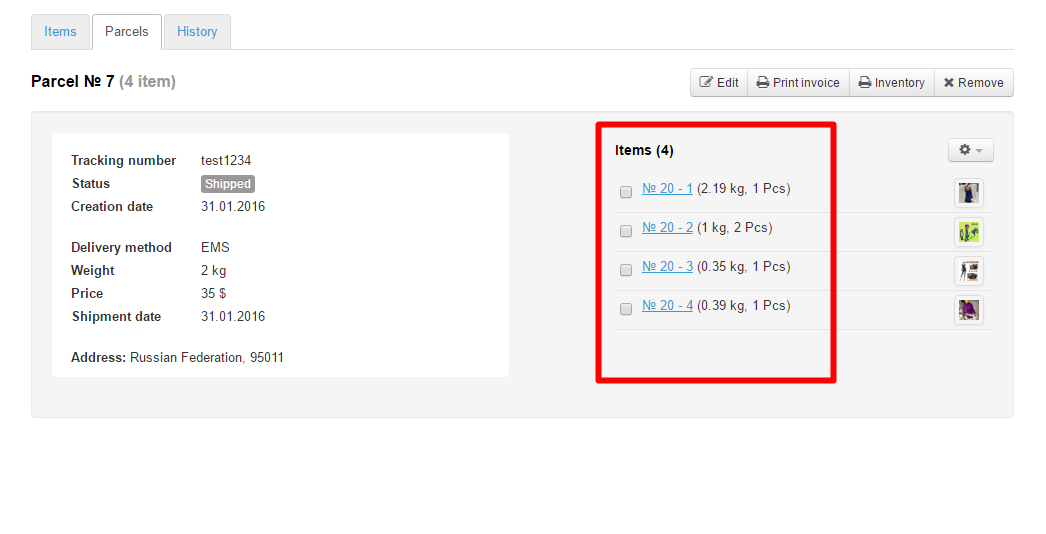
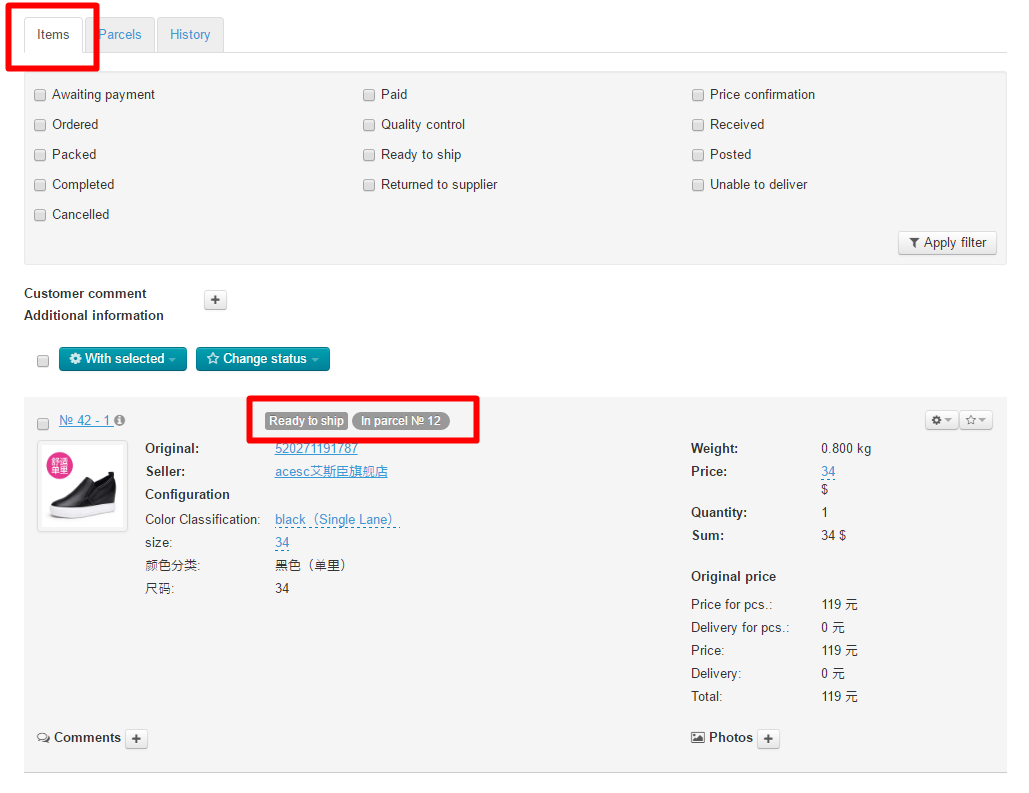
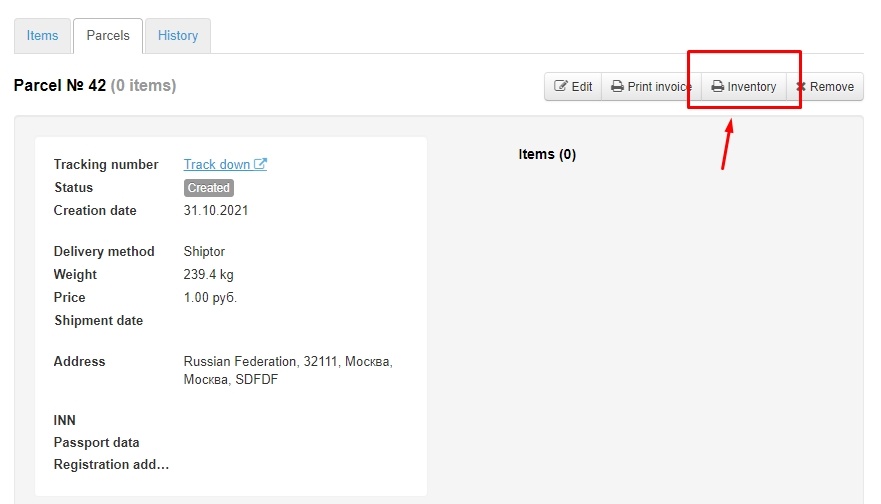
This tab displays parcels to be shipped to a customer.
...
Description
Every parcel has its parcel number and provides information about the items quantity of items it includes.
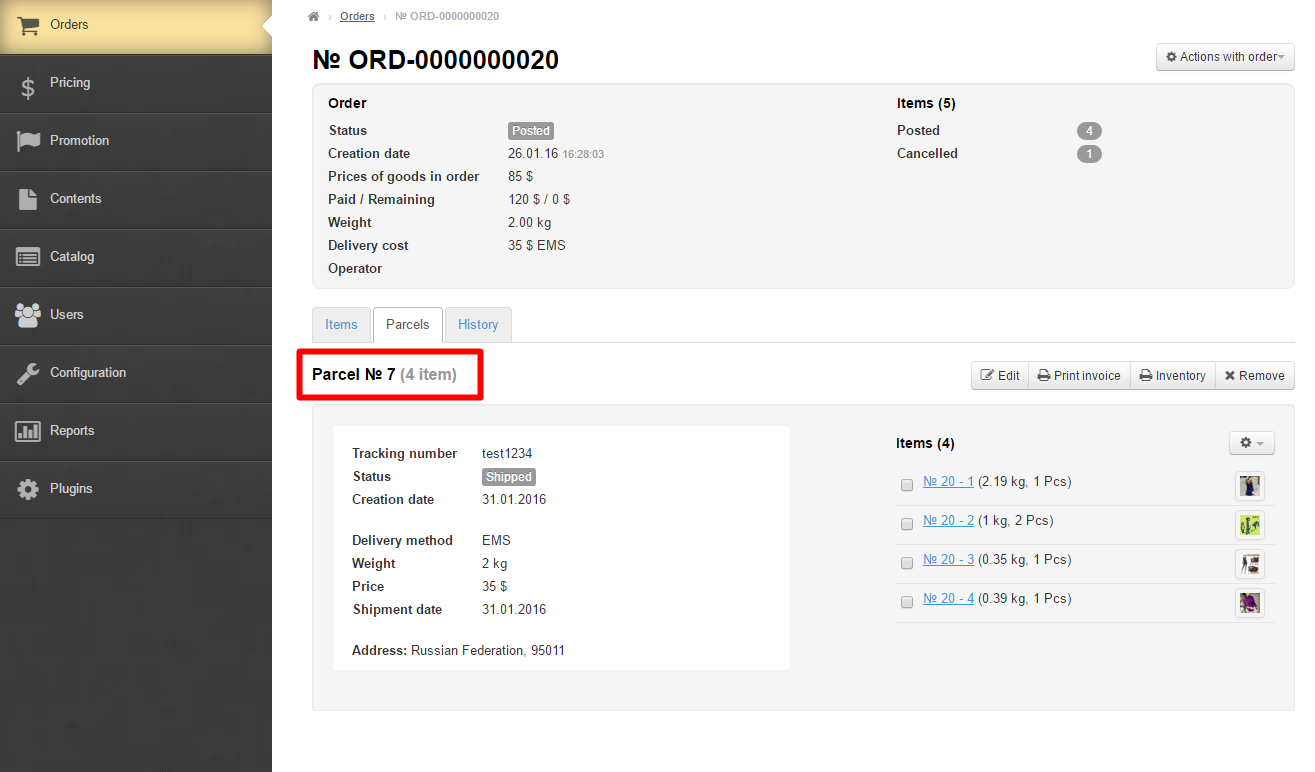
General information about the parcel information:
And also the list of items that the created this parcel includes:
There are two ways of creating to create a parcel:
Using the “parcels: “Parcels" tab.
Using the “Items” tab.
If Click “Create” button if you’d like to add all items to a single parcel you should click the “Create” button. If you’d like to add a part of items to a parcel you need to go to the tab that lists all items, select the ones you want to add and apply the group function “Create parcel”.
Create a parcel
...
into one parcel. Go to the tab with products list, select the products you need to add into the parcel and use "Create parcel" group function if you need to add some items into a parcel.
Create parcel
Create parcel with all items of the order
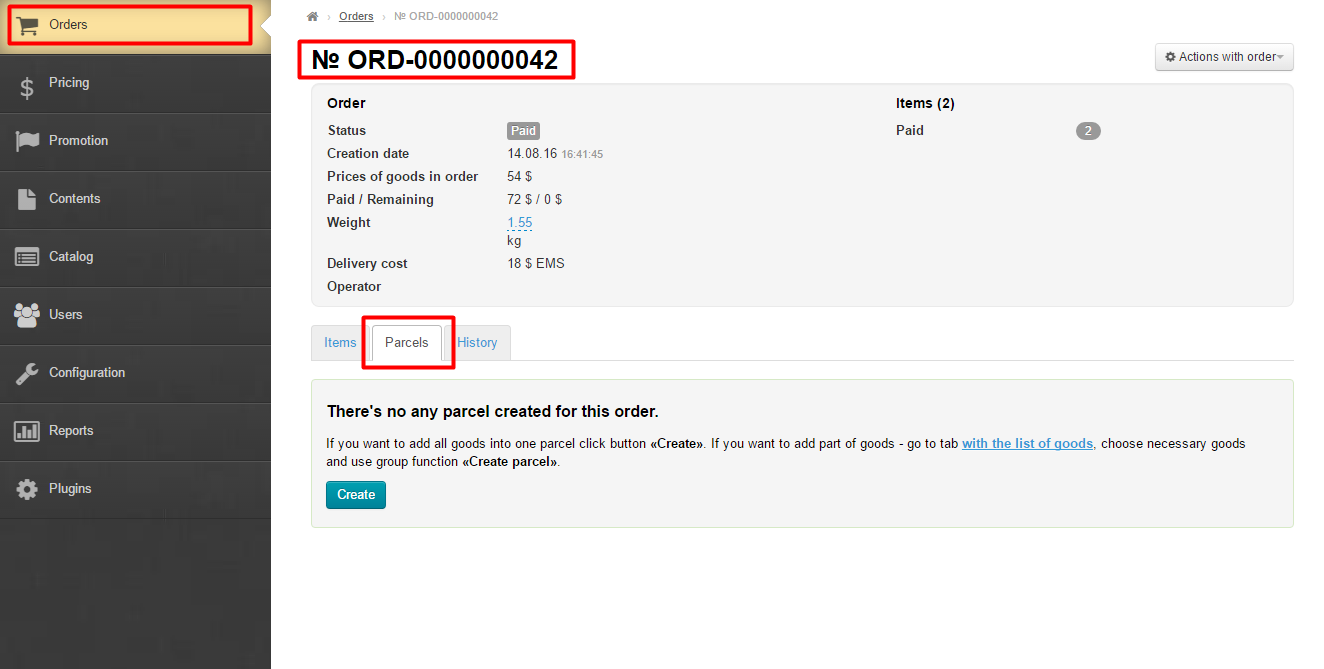
A parcel cannot be created if the status of items is any one but “Paid”, “Received at warehouse” or “Ready to ship”.
You can't create a parcel if goods status is any except: "Received at warehouse" or "Ready to ship".
Click “Create” button to make a parcelTo create a parcel you should click the “Create” button:
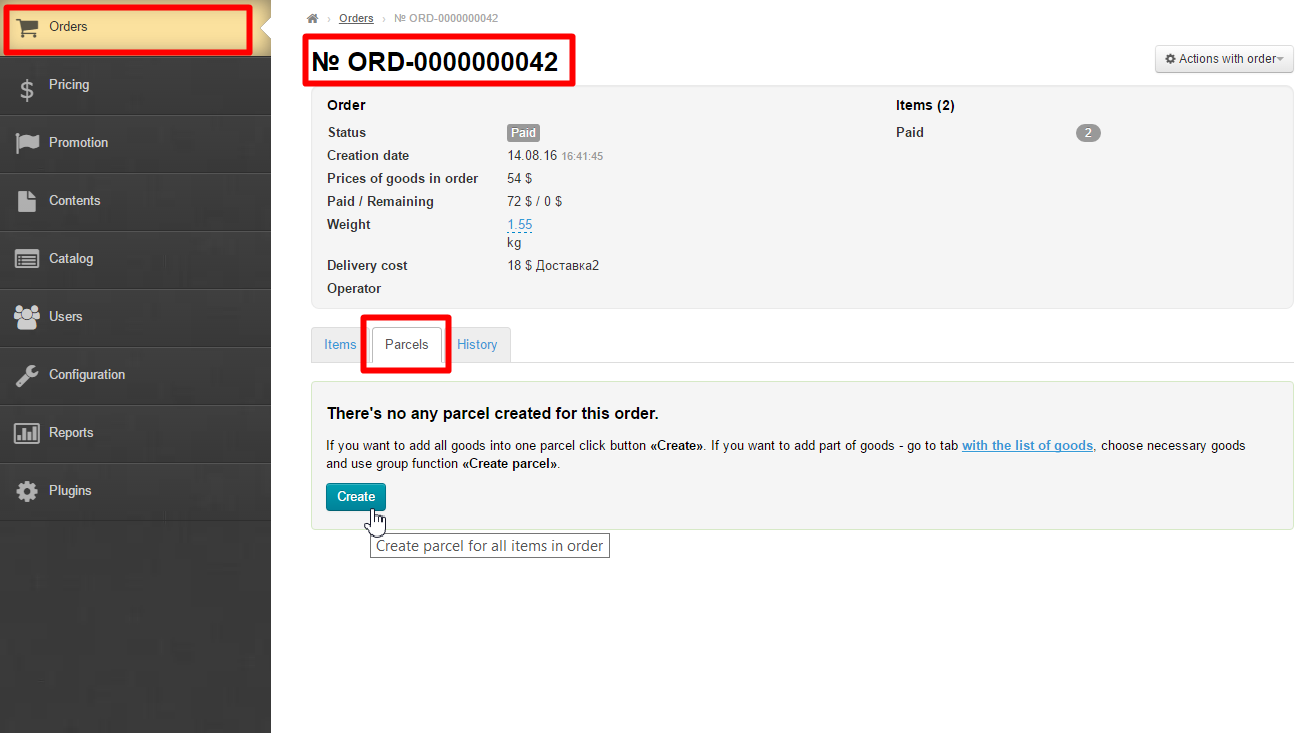
The A parcel has been was created successfully if the following block appears on the “parcels” “Parcels” tab.
...
Create parcel with some items of
...
the order
If Make the following steps if you need to create multiple parcels for a single sales order you should perform the following stepsseveral parcels from one order:
Create a parcel and move items and move goods to different parcels (for a detailed description see Moving see "Move an item to a new parcel").
Go to the “Items” tab and create a parcel by selecting items.
...
Manage parcels
...
Edit parcel
To Click "Edit" button to add or modify the edit parcel information please perform the following steps:
Click the “Edit” button.
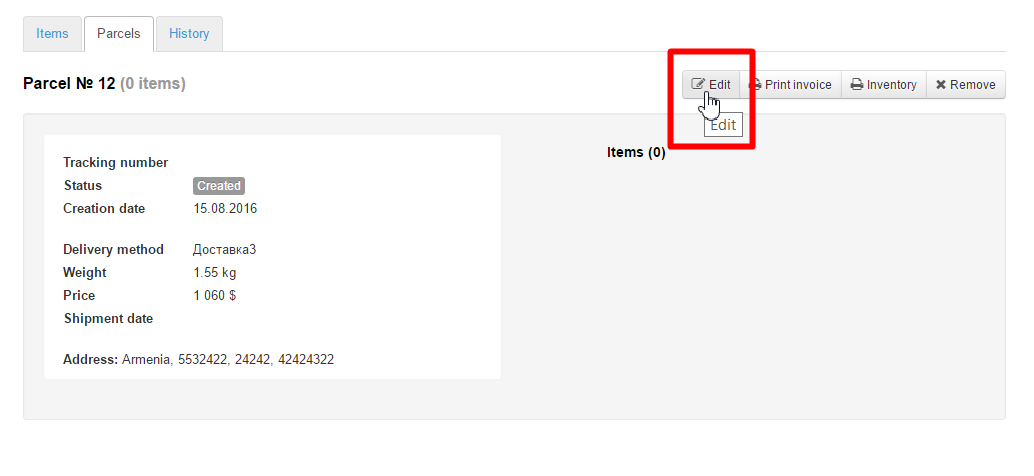
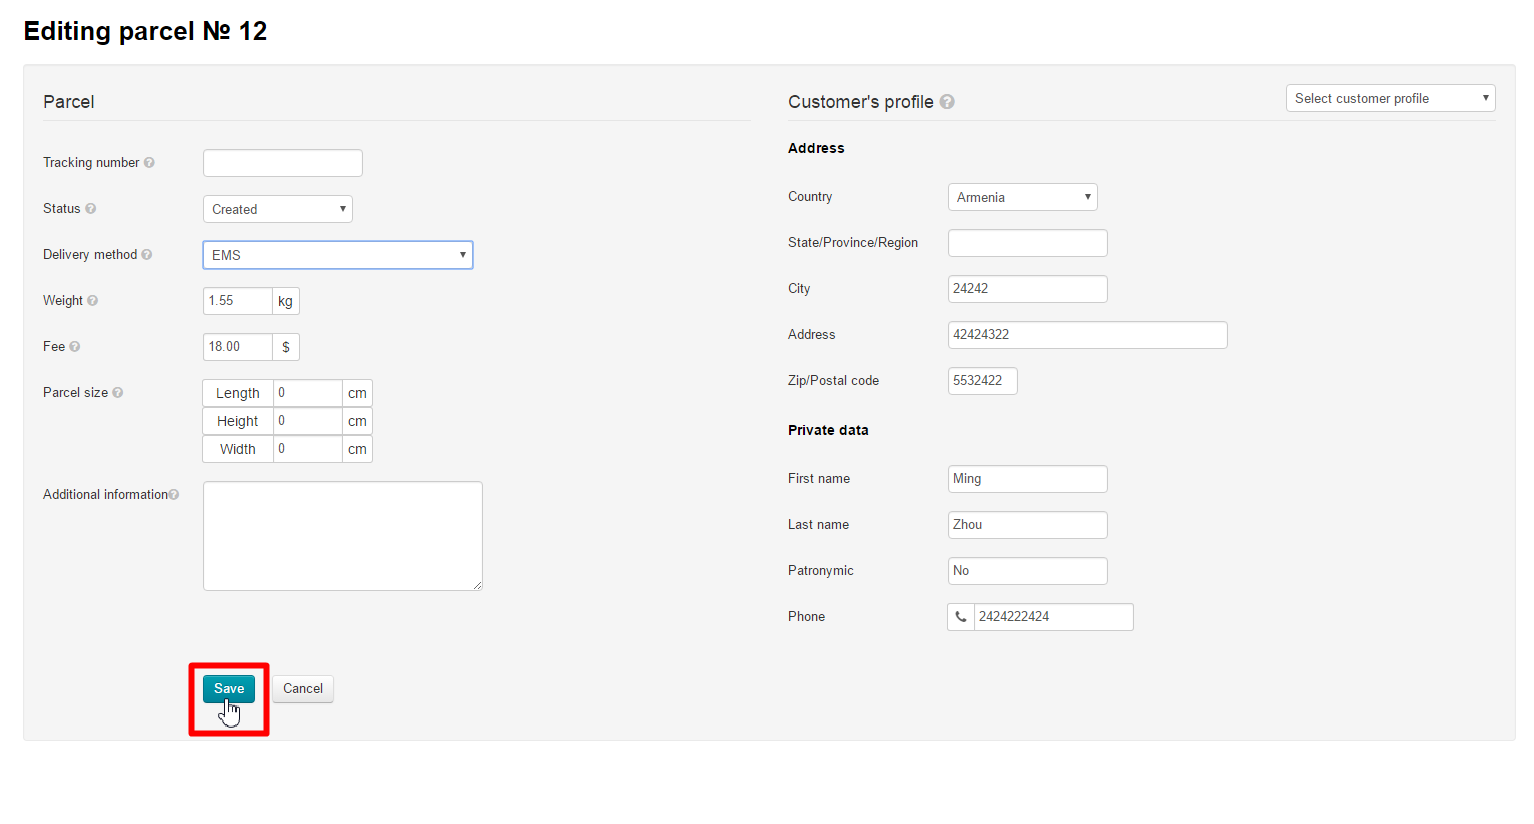
This will bring up a A form to edit the parcel information will open:
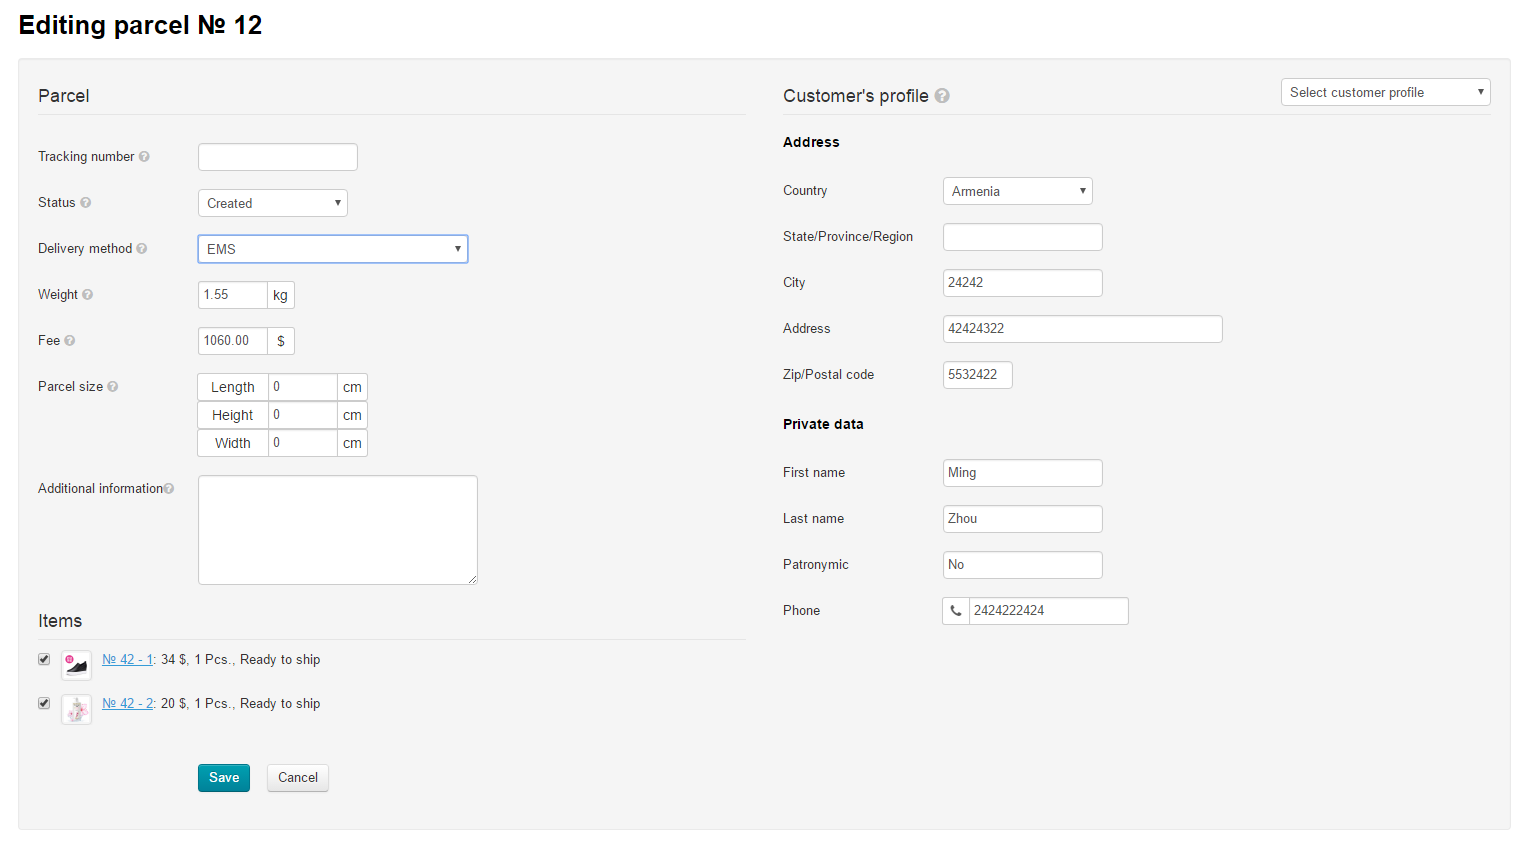
Enter or edit parcel information that follows:
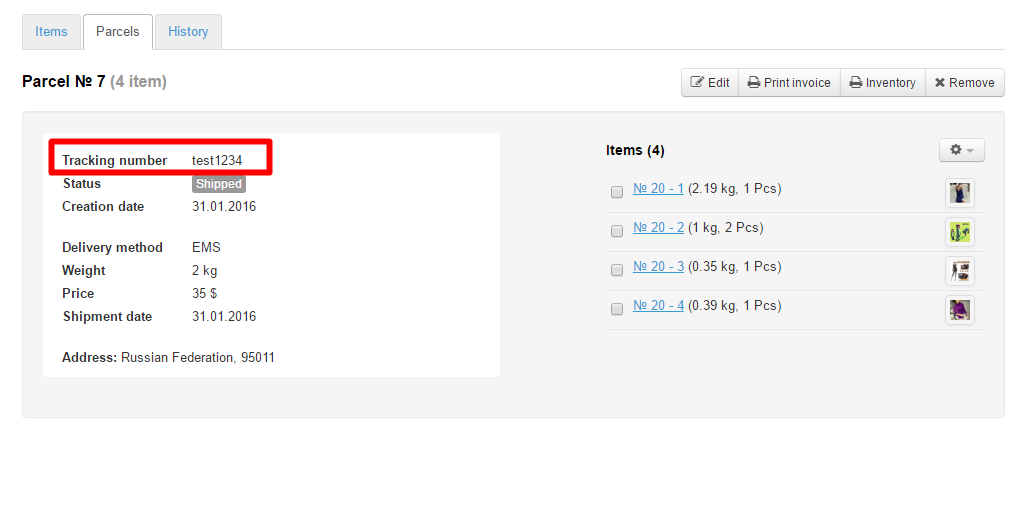
Tracking number (i.e. the number used to trace a to to track parcel in the delivery service).
Shipping Delivery method (You need to select the desired shipping select necessary delivery method from the dropdown listdropdown list to destination point(customer)).
Weight (You need to enter the weight if it differs from the stated one).Shipping cost
Fee (You need to specify the cost of shipping to a recipient if it is different from the one shownfor delivering parcel to destination point (customer)).
parcel dimensions (the dimensions of a parcel Parcel size (parcel size in centimeters).
Additional information (any special notes and so on, i.e. the parcel information not included additional information on a parcel not specified in other fields).
Добавить Трекинг-номер (номер для отслеживания посылки в службе доставки)
Открываем редактирование посылки:
В открывшейся форме ищем поле «Трекинг-номер»:
Вводим трекинг-номер в поле:
После внесения всех изменений, нажмите кнопку «Сохранить», чтобы изменения вступили в силу:
После сохранения трекинг-номер станет кликабельной ссылкой для вас и в Личном Кабинете покупателя.
Если кликнуть мышкой по трекинг-номеру, откроется сайт для отслеживания посылки.
Для удобства использования в админке есть возможность подключить интеграцию со службой доставки и тогда нажатие на трекинг-номер откроет вам окошко со всеми статусами посылки, не перекидывая на сторонний сайт.
Сменить Статус посылки
У посылки, так же как у товаров или заказа, можно изменять статус, отмечая этап обработки.
Открываем редактирование посылки:
В открывшейся форме ищем поле «Статус»:
Из выпадающего списка выбираем один из четырех статусов кликом мышки:
После клика, в поле «Статус» будет указан тот статус, который мы выбрали:
После внесения всех изменений, нажмите кнопку «Сохранить», чтобы изменения вступили в силу:
Способ доставки (выбираем из выпадающего списка нужную доставку)
Изначально способ доставки выбирает покупатель, но бывает так, что итоговая посылка не подходит для выбранной службы доставки (например, превышает максимальный вес или габариты).
Открываем редактирование посылки:
В открывшейся форме ищем поле «Способ доставки»:
Из выпадающего списка выбираем подходящий способ доставки:
После внесения всех изменений, нажмите кнопку «Сохранить», чтобы изменения вступили в силу:
Указать вес посылки
Открываем редактирование посылки:
В открывшейся форме ищем поле «Вес»:
Меняем вес, на более точный:
После внесения всех изменений, нажмите кнопку «Сохранить», чтобы изменения вступили в силу:
Стоимость доставки посылки до получателя
Открываем редактирование посылки:
В открывшейся форме ищем поле «Стоимость»:
Рассчитывается автоматически, в зависимости от того, как настроена Внешняя Доставка.
Если необходимо вручную внести изменения, правим стоимость:
После внесения всех изменений, нажмите кнопку «Сохранить», чтобы изменения вступили в силу:
Размеры посылки (габариты посылки в сантиметрах)
Открываем редактирование посылки:
В открывшейся форме ищем поле «Размеры посылки»:
После внесения всех изменений, нажмите кнопку «Сохранить», чтобы изменения вступили в силу:
Дополнительная информация
Открываем редактирование посылки:
В открывшейся форме ищем поле «Дополнительная информация»:
Add tracking number (number used to track parcel in delivery service)
Click "Edit" button in "Parcels" tab:
Find ":
Enter t:
Click "Save" button after making all changes:
After saving the tracking number will become a clickable link for you and your customer in his personal account.
Site for tracking the parcel will open if you click the tracking number.
For convenience, it is possible to connect integration with the delivery service in website admin panel which will allow to open a window with parcel status after clicking a tracking number, without throwing it to a third-party site.
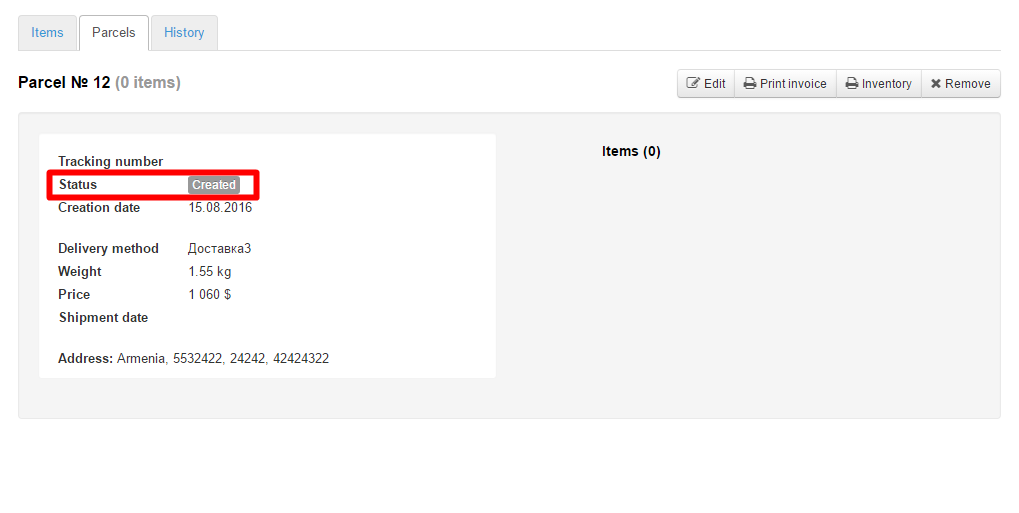
Edit parcel status
You can edit parcel status just like for goods or an order, marking processing stage.
Click "Edit" button in "Parcels" tab:
Find "Status:
Select one of four statuses from dropdown list:
Selected status will be shown in "Status" field, the status that we have chosen will be indicated:
Click "Save" button after making all changes:
Delivery method (select necessary delivery option from drop-down list)
Initially, customer selects delivery method but sometimes parcel is not suitable for selected delivery method (for example, it exceeds maximum weight or dimensions).
Click "Edit" button in "Parcels" tab:
Find "Delivery method" :
Select necessary delivery method from drop-down list:
Click "Save" button after making all changes:
Specify parcel weight
Click "Edit" button in "Parcels" tab:
Find "Weight" :
Change weight for a more accurate one:
Click "Save" button after making all changes:
Delivery cost of the parcel to recipient
Click "Edit" button in "Parcels" tab:
Find "Fee" :
It is calculated automatically depending on External Delivery settings.
Edit fee if you need to make changes manually:
Click "Save" button after making all changes:
)
Click "Edit" button in "Parcels" tab:
Find "Parcel size" field in the form and edit data:
Click "Save" button after making all changes:
Click "Edit" button in "Parcels" tab:
Find "" field in the form:
Click "Save" button after making all changesПосле внесения всех изменений, нажмите кнопку «Сохранить», чтобы изменения вступили в силу:
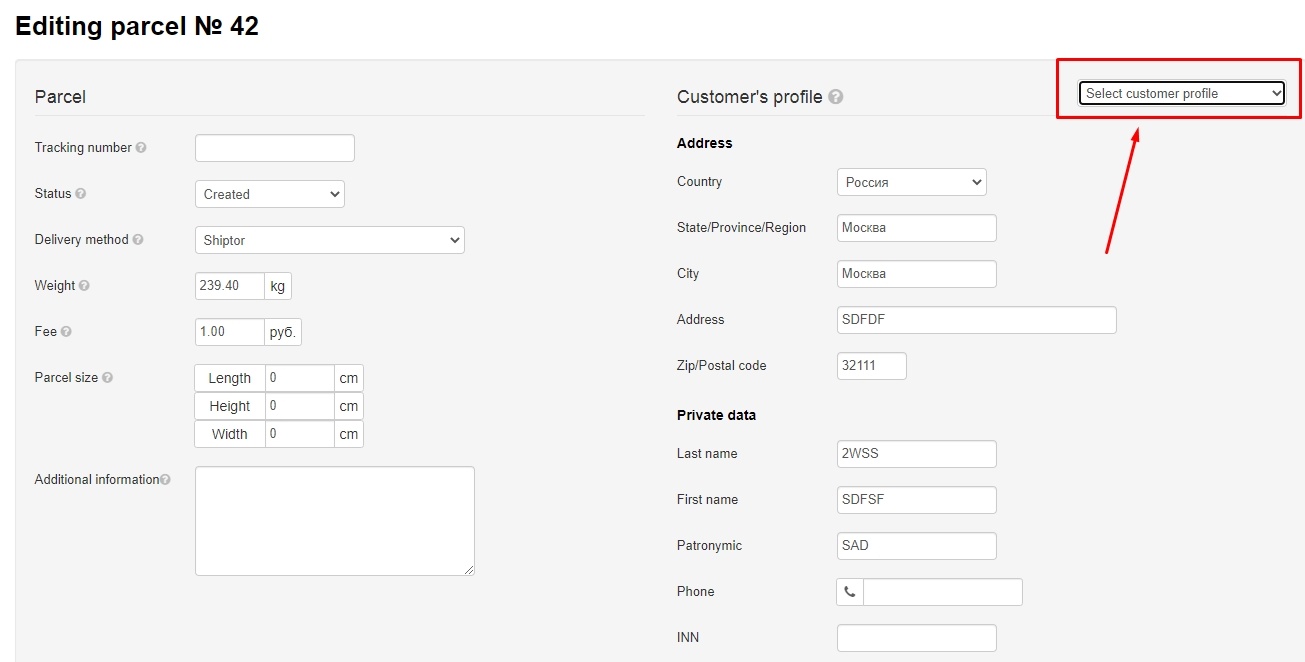
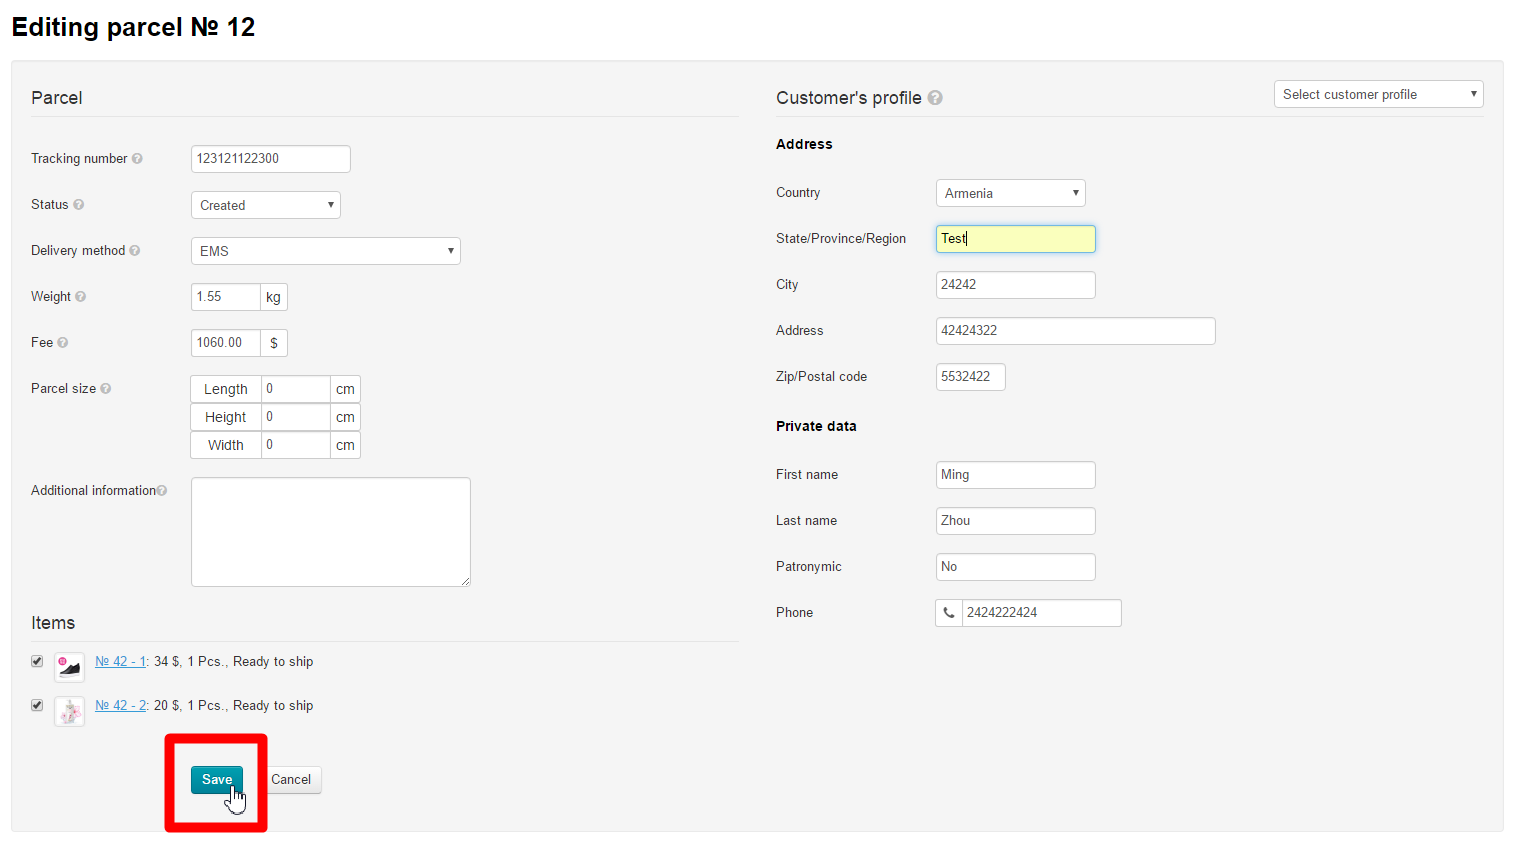
Recipient information
Make sure the address is correct:
Country.
.
City.
Address.
Zip/Postal code.
Make sure the recipient personal data customer's personal data is correct:
First Last name.Last
First name.
Patronymic.
Telephone.
Phone number.
INN (if available)
Passport data
Registration address
Edit info if required.
You can change customer's profile (with delivery address and other data) if he has several:
Click "Save" button after making all changes:
 Make modifications if required.
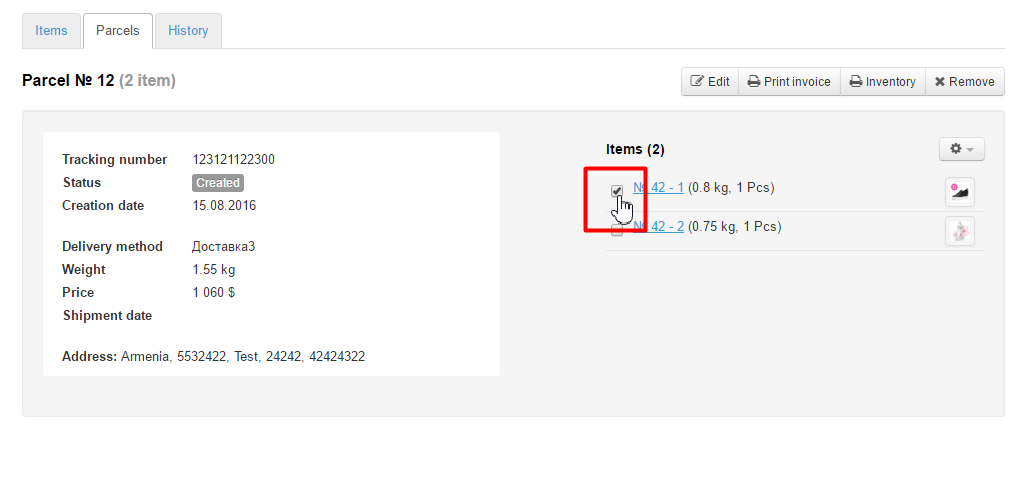
Items in the parcel: remove unnecessary items or check
Ensure that the goods list of items in a parcel is accurate and complete (uncheck the checkboxes in case you don’t need one or another item).
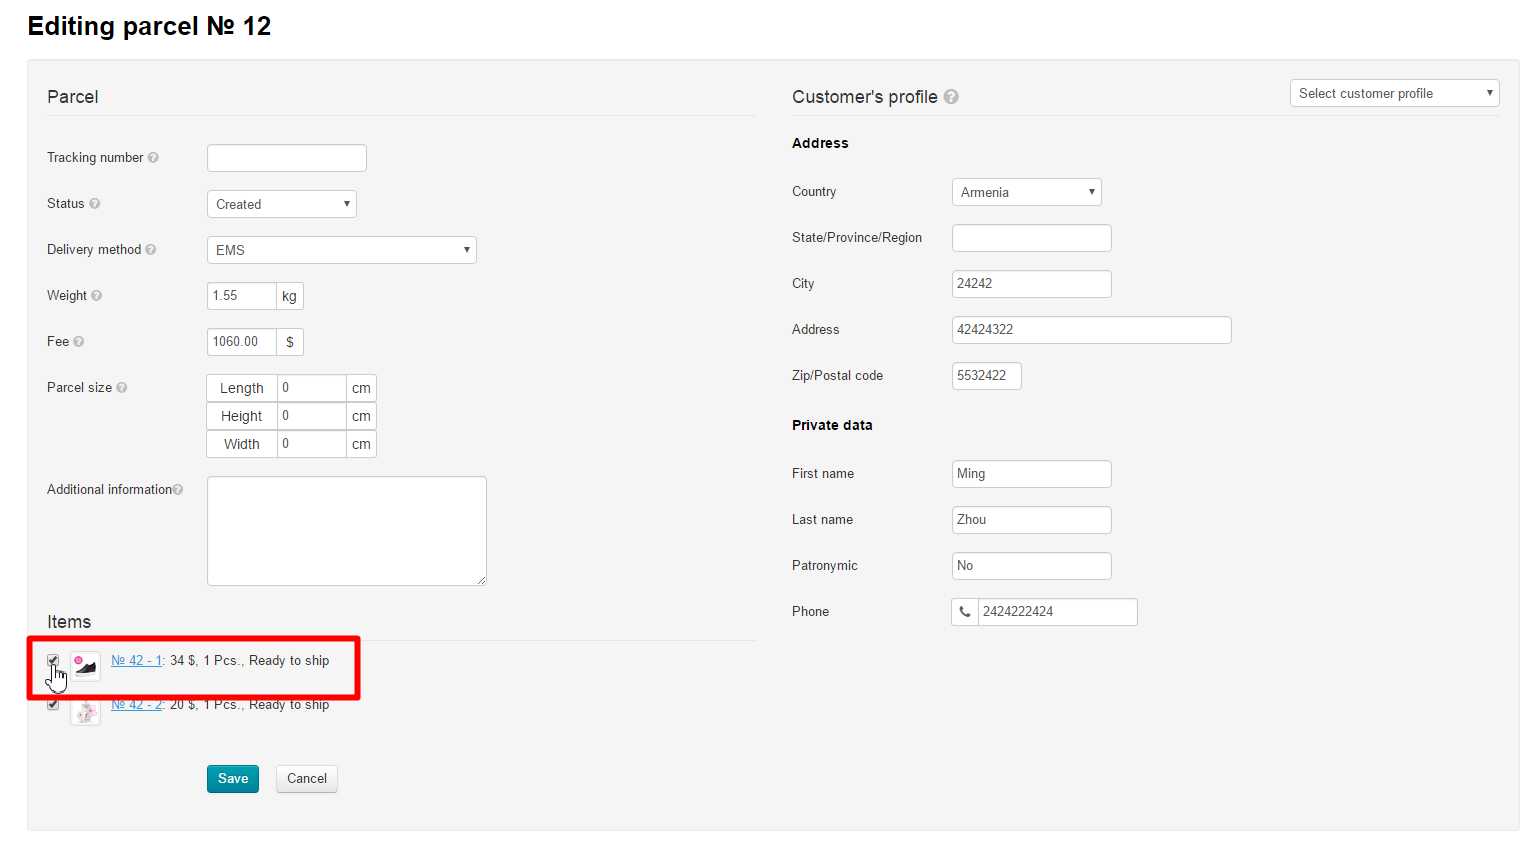
When the list of items is checked and edited click Click “Save” button at the bottom of the page when goods list is checked and edited.
...
Print invoice
You can print an invoice for a created parcel.
Click the “Print invoice” button:
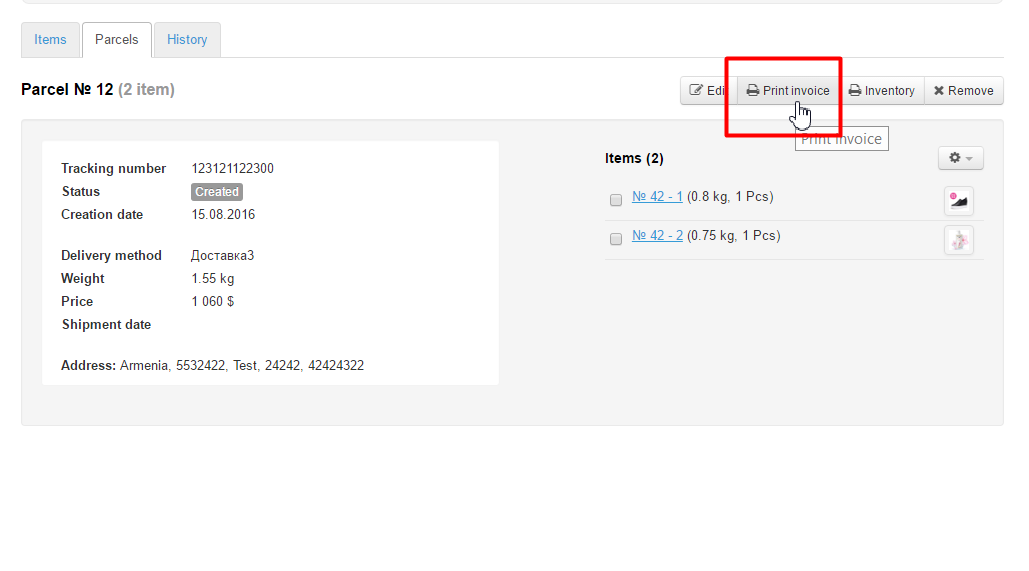
Once you’ve clicked this button the appropriate form will appear in the a new window.
Распечатать опись
Для того, чтобы распечатать опись посылки, нажимаем кнопку «Опись»:
Откроется страница с описью товаров:
Для распечатки нажмите две кнопки на клавиатуре сразу: Ctrl и P
Deleting a parcel
To delete a created parcel please perform the following steps:
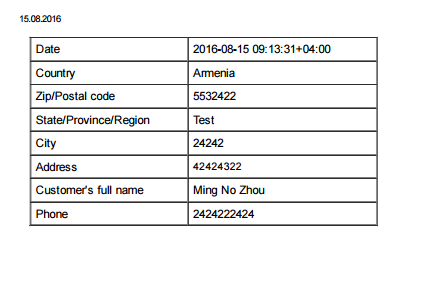
Print inventory
Click "Print inventory" button:
A page with an inventory of goods will open:
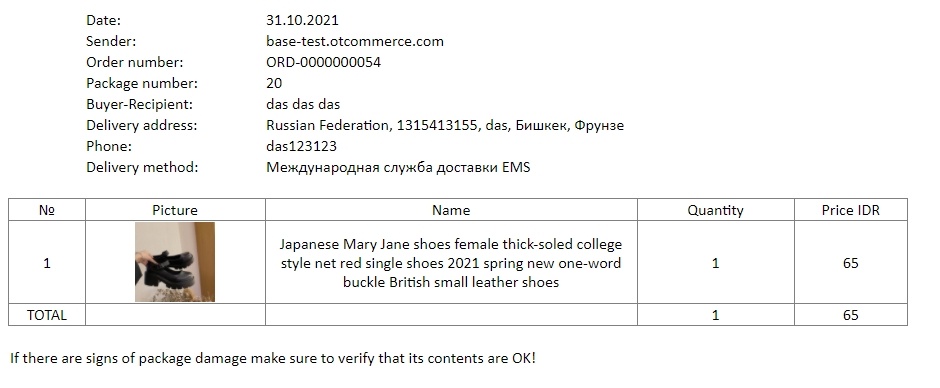
Press two buttons on the keyboard at once: Ctrl and P to print.
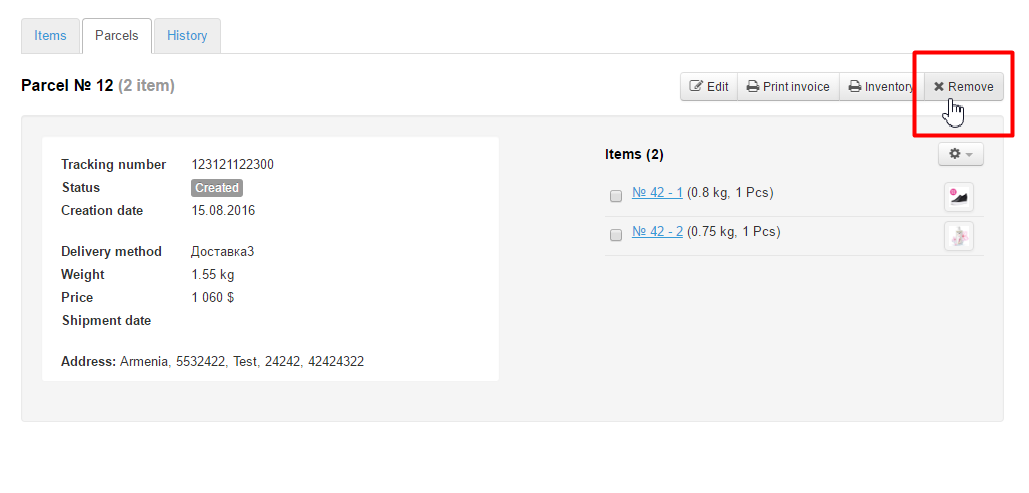
Delete parcel
Please perform the following steps to delete a parcel:
Click Click the “Remove” button.
If Click “Yes” if you are sure you want to delete the this parcel click “Yes”. If Click “Cancel” if you don’t need to delete it click “Cancel”.
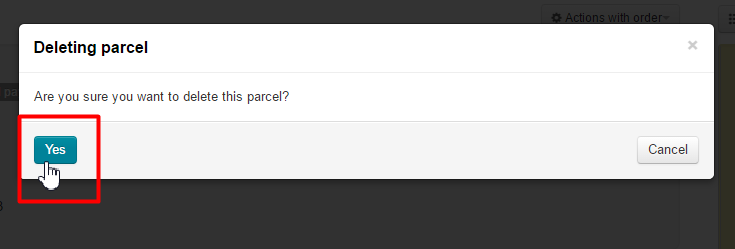
Once you’ve deleted the parcel the “parcels” “Parcels” tab will be empty and after you delete the parcel and you can create a new parcelone.
...
Move item to
...
new parcel
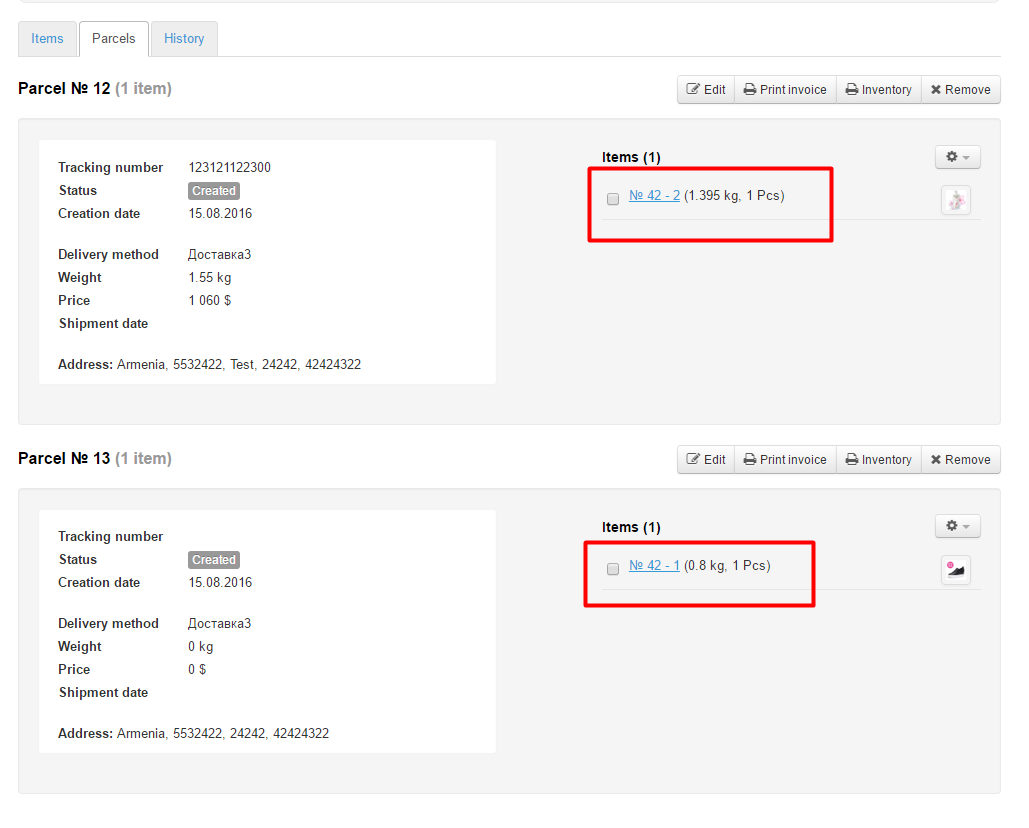
If Perform the following steps if you need to move an item to a new parcel or delete it from the created one do the following:
Choose the desired Select necessary item by ticking the checkbox next to it.
Click the gear button.
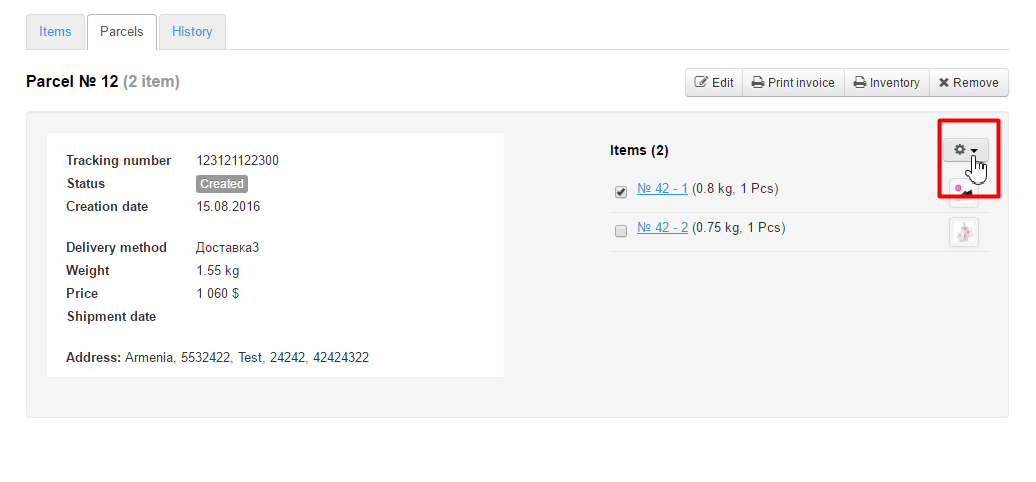
Click the “Move to new parcel” button.

Confirm your choice.

Once this is done, the new parcel is will be created automatically and there you can find it will contain the item you’ve just moved.