
WebView is a specific format for mobile applications. Website will be displayed exactly as in mobile version but without the ability to “walk” through the browser tabs and to other sites (your buyer will not accidentally go to other tabs).
In addition, this is an extended mobile version of your site which allows you, for example, to add push notifications about promotions and sales.Limitation: new applications will be available only for adaptive templates - website has a mobile version (It is Elastic template in OT Box)! |
An example of website design in WebView application |  |  |
|---|
Example of push-notification

Project will be created in Firebase. A developer account is required.
To purchase Google Play and Apple (iOS) developer account for legal entity, you will need to obtain a D-U-N-S number — an international identifier for legal entities. Information how to obtain D-U-N-S number can be found on the Internet (for example, https://www.dnb.com/duns/get-a-duns.html). |
Follow the link https://play.google.com/console/u/0/developers
Be sure to create a new account for work and business. Do not use a personal account.
Next, fill in all the information and enable two-step authentication when the account is created.
Create an account in Google Play Console. Select the type of organization and click "next":

Specify the developer name and company name:

Link a payment profile:
You will need to create a payment profile from the very beginning. DUNS number will be required — an international company identifier in Dun & Bradstreet database. Apple uses it to confirm that your company exists:
The application is considered from 7 to 30 days. Register at https://support.dnb.com/?CUST=APPLEDEV
You can read more here https://www.dnb.com/duns/get-a-duns.html
Once you get DUNS, enter it and Google will notify you that the payment profile has been created.
Enter required information and click "Next" everywhere. Tell about your experience when you reach "About You" screen. This is a required field.
Click "Create account and pay" after completing a few more steps:
Now you need to pay for account.
Информация для регистрации аккаунта:
ФИО ответственного за регистрацию;
Имя учетной записи разработчика;
Телефон разработчика (строго корпоративный номер, чтобы в случае увольнения сотрудника остался доступ);
Адрес электронной почты разработчика (обязательно на домене сайта разработчика — это нужно для подтверждения легитимности регистрации и для упрощения восстановления доступа, если вдруг обратятся с другой почты с аналогичным доменом);
ФИО контактного лица для связи с Apple;
Номер телефона контактного лица для связи с Apple;
Реквизиты организации (на английском);
Адрес сайта;
Количество сотрудников в организации;
Номер DUNS.
Аккаунт регистрируется до 30 дней.
Создайте новый Apple ID. Мы рекомендуем делать это с айфона, который поддерживает последние обновления iOS (если вы планируете оплачивать с баланса мобильного телефона);
Используйте корпоративные контакты сотрудника компании, на которого планируете зарегистрировать Apple ID (почту на домене сайта компании и номер телефона). Корпоративные контакты сохранят возможность восстановить доступ к аккаунту при смене ответственного сотрудника;
По окончании регистрации укажите номер телефона, баланс которого будет использоваться для оплаты.
Указывайте только актуальный и доступный вам номер телефона. С его помощью вы всегда сможете пополнить баланс, купить или продлить лицензию без помощи третьих лиц.
Для регистрации Apple Developer на юридическое лицо, нужен номер DUNS. Это международный идентификатор юридических лиц. Apple использует его, чтобы убедиться, что ваша компания существует.
Заявку рассматривают от 7 до 30 дней. Регистрация по адресу https://support.dnb.com/?CUST=APPLEDEV
Подробнее можно почитать тут https://www.dnb.com/duns/get-a-duns.html
После регистрации нового Apple ID, скачайте приложение Apple Developer, выберите таб «Account». Если регистрация корректна, в блоке APPLE DEVELOPER PROGRAM будет активна кнопка Enroll Now (в противном случае Disable);
По клику на Enroll Now переходим в режим ввода данных о компании. Название нужно указать латиницей, в четком соответствии с наименованием компании, присвоенном в рамках создания DUNS, иначе выдаст ошибку;
По аналогии с регистрацией в Google, вводим заранее подготовленные от клиента данные по ответственному лицу и контактам;
Подтверждаем полномочия, указывая:
контактное лицо, которое сможет подтвердить полномочия первого;
почту и номер телефона контактного лица, чтобы Apple мог связаться с ним для подтверждения полномочий ответственного лица.
После ввода на почту придет письмо о том, что Apple приняли заявку и проведут проверку в ближайшее время. Позже придет письмо о завершении проверки, если все окей.
А дальше вам предложат завершить регистрацию и оплатить проверку. После клика на «Purchase», оплата пройдет того с телефона, который был указан еще при регистрации Apple ID, поэтому первый шаг очень важен.
Чтобы вы могли публиковать и выпускать обновления в App Store, добавьте в ваш аккаунт Apple Developer. Заранее узнайте Apple ID разработчика.
Перейдите на страницу App Store Connect. Если нужно, авторизуйтесь с помощью Apple ID, созданного ранее.
Нажмите «Пользователи и доступ»:
На странице «Пользователи и доступ» на вкладке «Люди» нажмите на «+»:
Укажите имя — «Поддержка», фамилию — «Pyrobyte» (только вашу компанию) и Apple ID разработчика. Выберите «Администратор». Так разработчик сможет опубликовать приложение, обновлять его, получать информацию об ошибках и исправлять их. Если права доступа изменить, разработчик не сможет поддерживать приложение:
После этого нажмите кнопку «Пригласить». Блок «Дополнительные материалы» и «Приложения» заполнять не нужно.
Сообщите менеджеру, что отправили приглашение разработчику. После этого можете приступить к публикации мобильного приложения
Follow the link https://firebase.google.com/


Specify project name (1) - your website URL (domain name), put a tick next to the agreement (2) and click “Continue” button (3)
You can turn on Google Analytics at this stage (1), or you can do it later (optional). Click “Create project” (2)
Continue” button
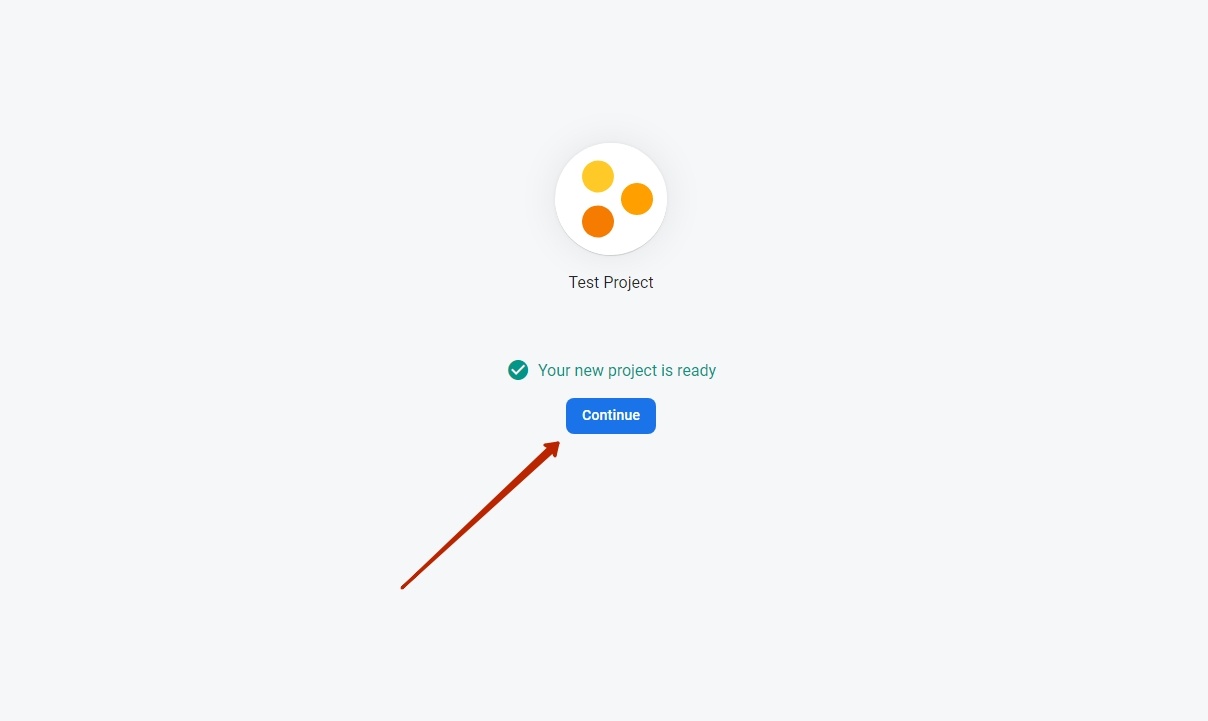
There is a choice here: create for Android or for iOS. The example shows how to create an Android application
Step 1
Make a unique application identifier (Bundle ID) in English in “Android package name” field (1) in the application store (App Store or Google Play).
How to make Bundle ID?
More examples:
Address/URL | Website name | Bundle ID |
|---|---|---|
| top-test.otcommerce.com | Top-test | com.otcommerce.toptest |
| https://www.google.com/ | search | com.google.search |
| https://tao-bao.mn/ | tao-bao | mn.taobao.taobao |
We recommend to specify name of your store based on the OT Box in “App nickname” (2) field.
Register application clicking “Register app” button (3)
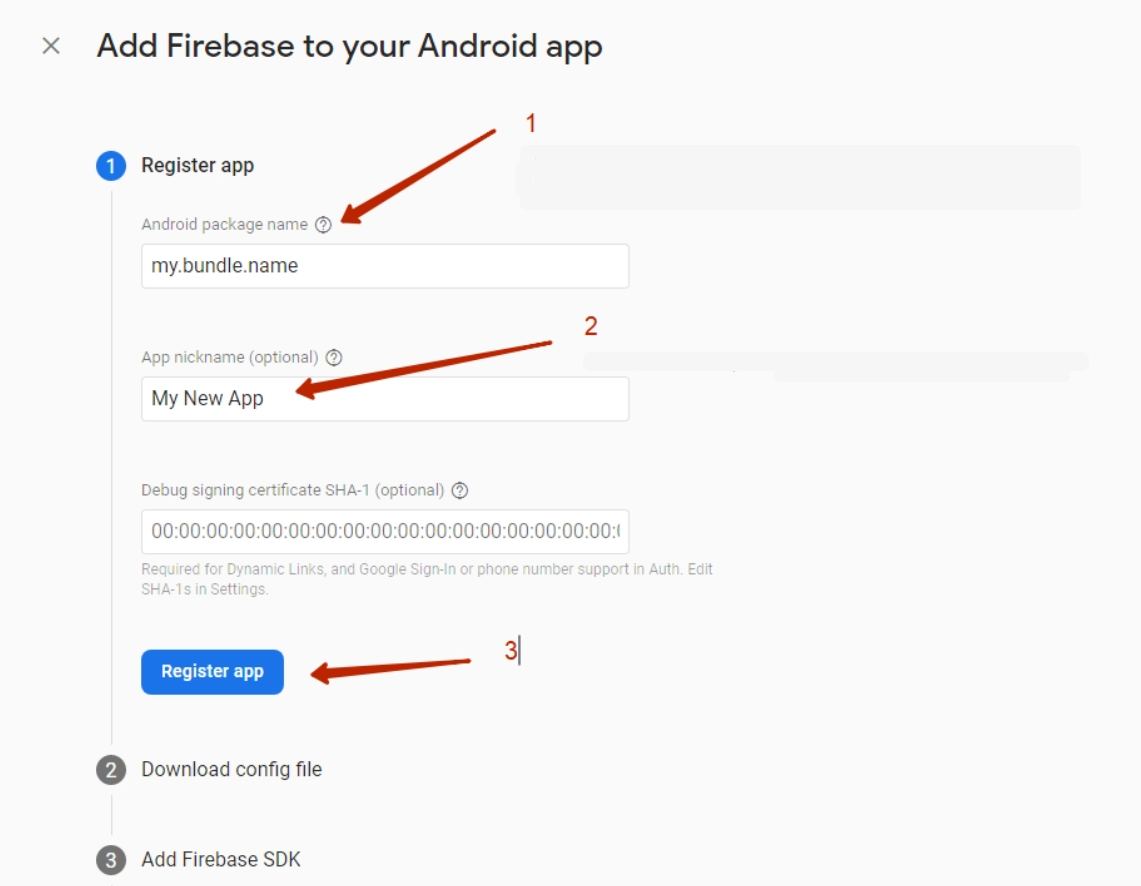
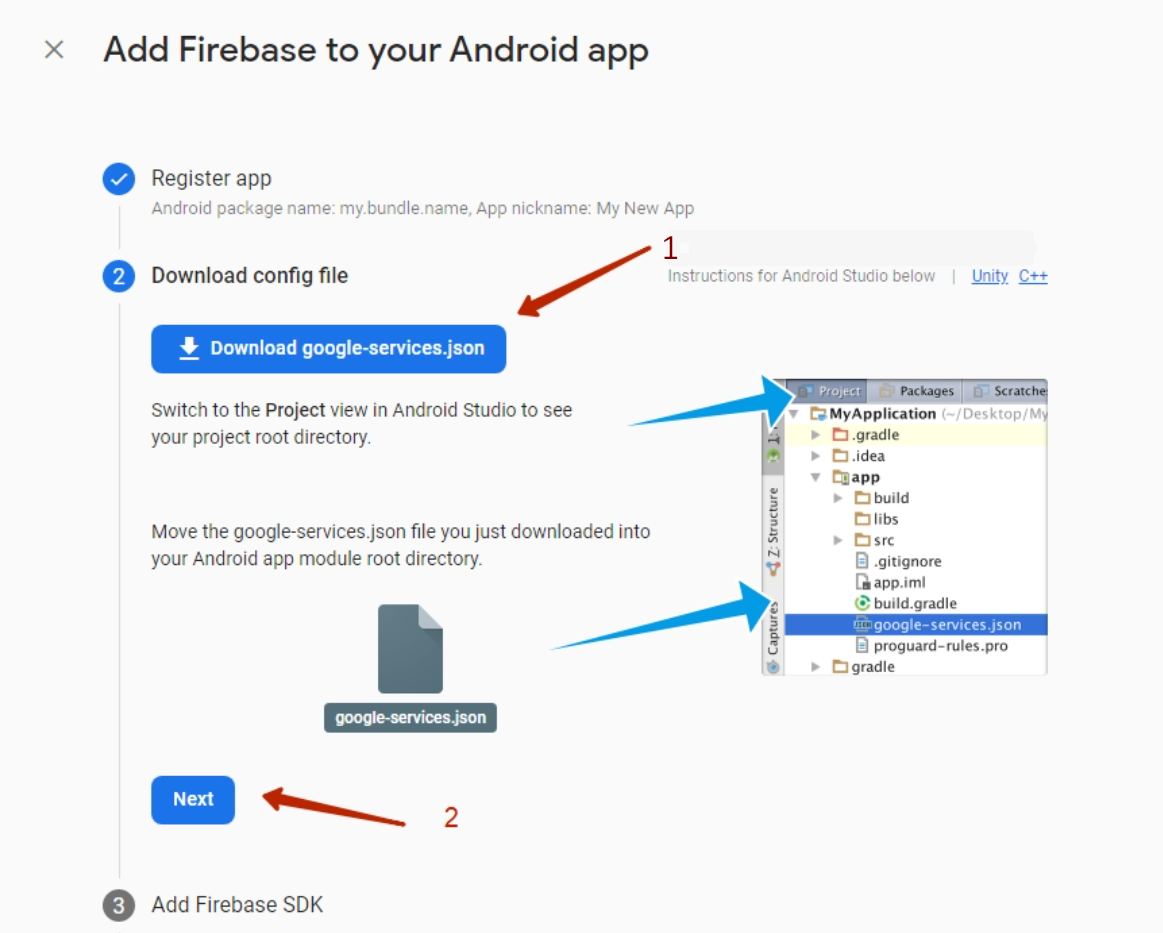
Step 2
Download *.json file to your PC clicking “Download google-services.json” (1)
Click “Next” button (2)
Step 3
Scroll down to “Next” button and click it. All fields will be filled in automatically and you do not need to add anything.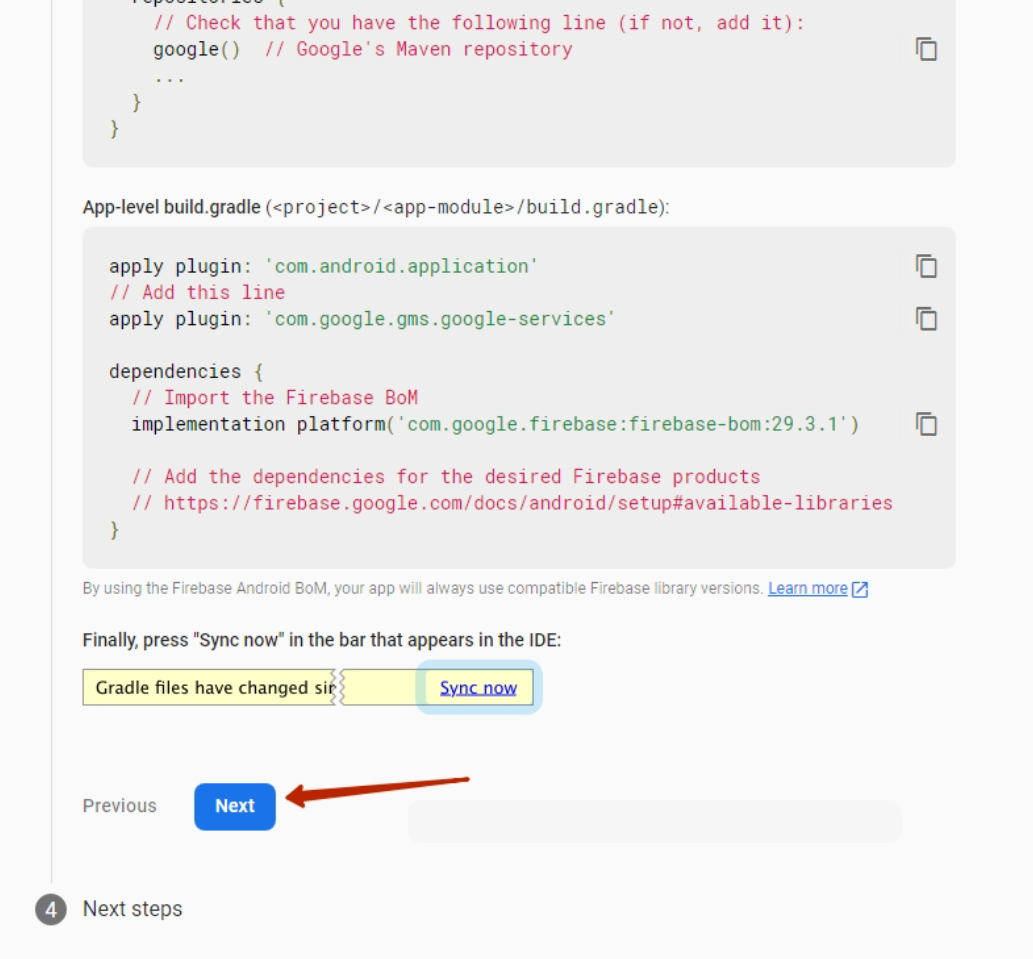
Step 4
Click “Continue to console”

Go to Cloud Messaging in the FireBase project created above


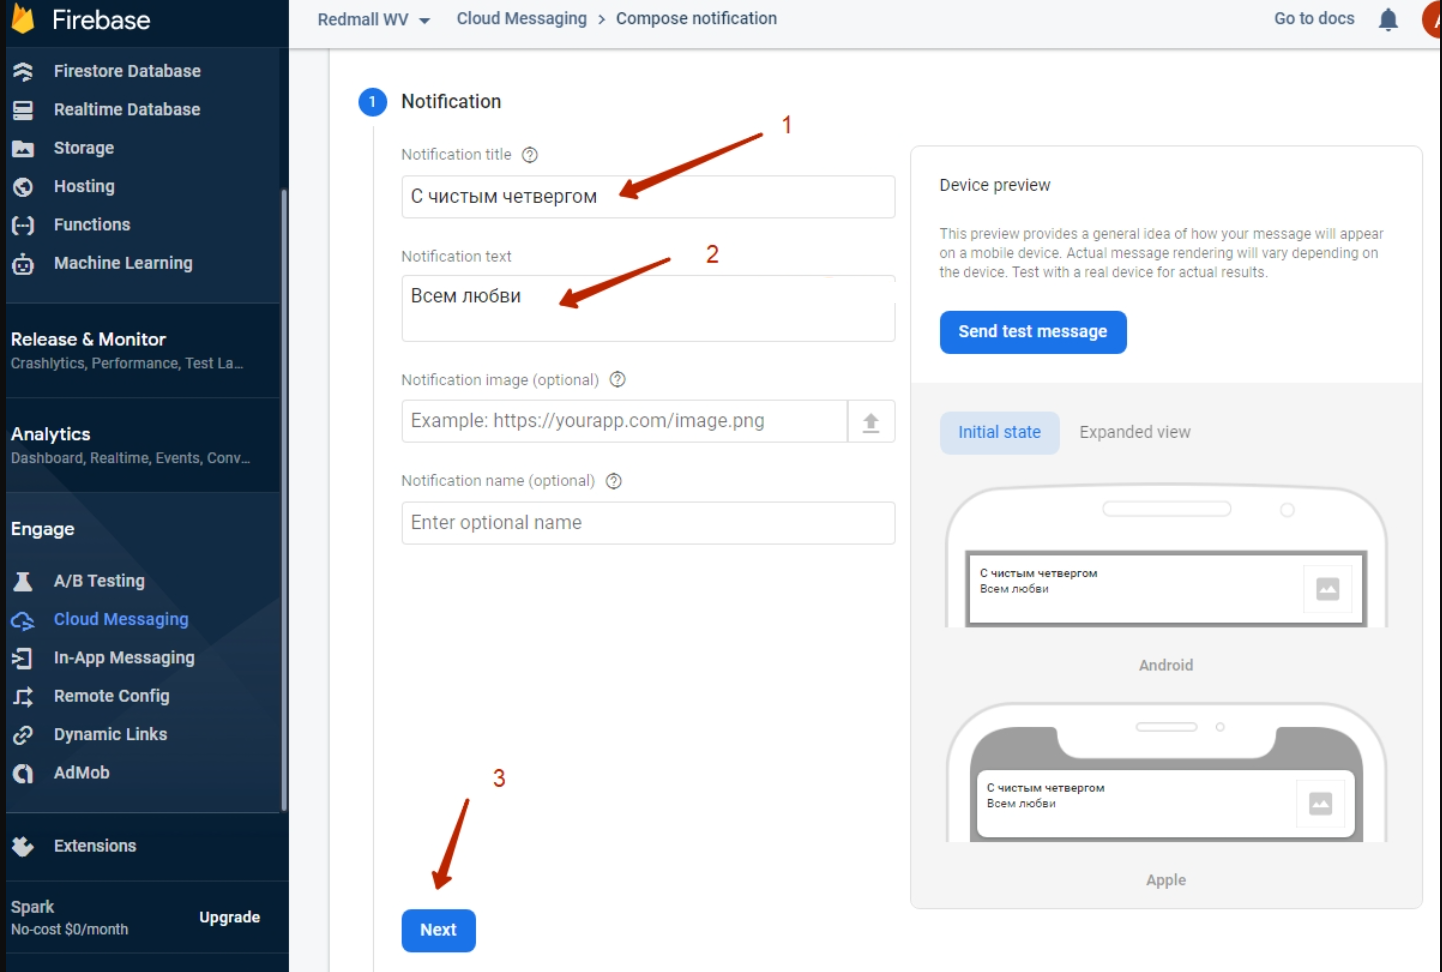
Fill in the title field “Notification title” (1) and the message text “Notification text” (2)Click “Next” button (3)
In the Target block select the application for which we are sending a Push message. One project can have several applications including Android and iOS (1)
Click “Next” (2)

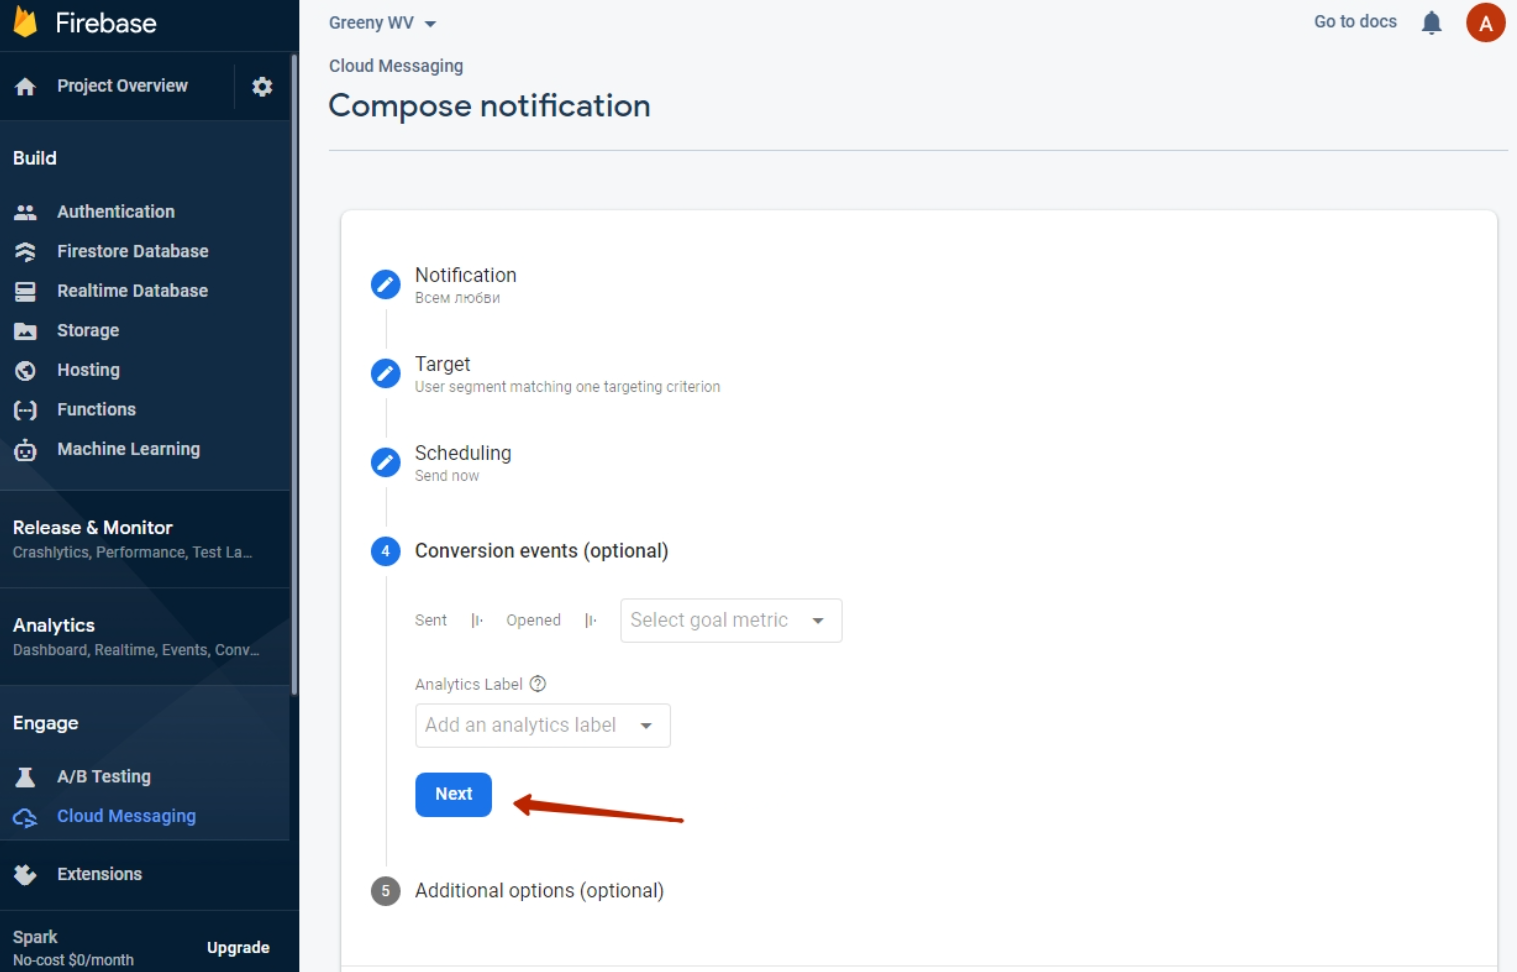
Don't change anything in 2 next steps and just click “Next” button both times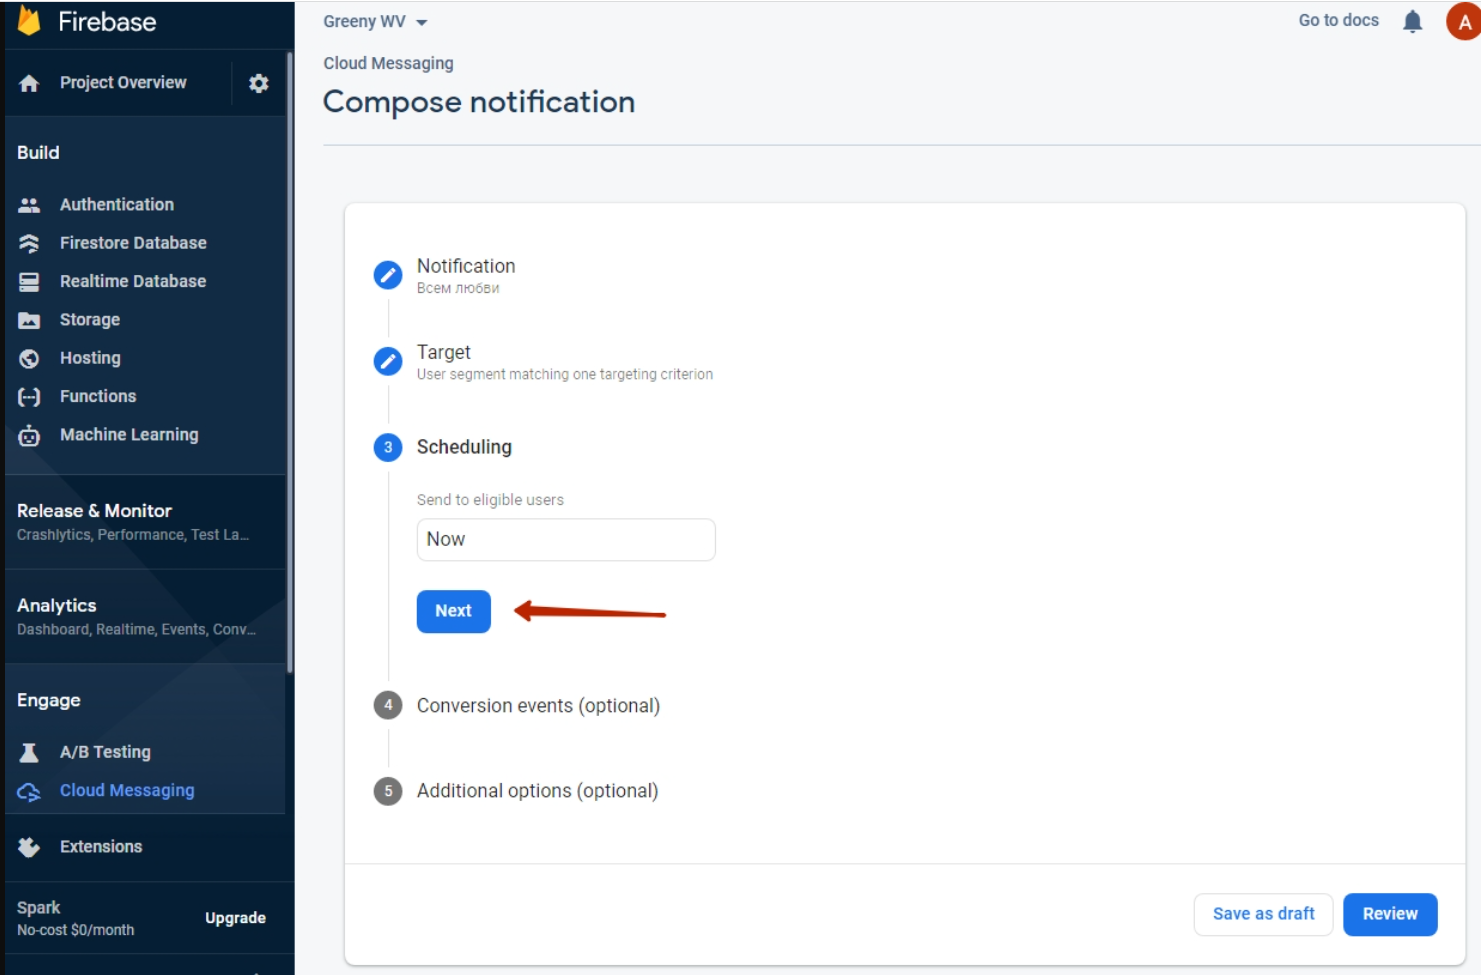
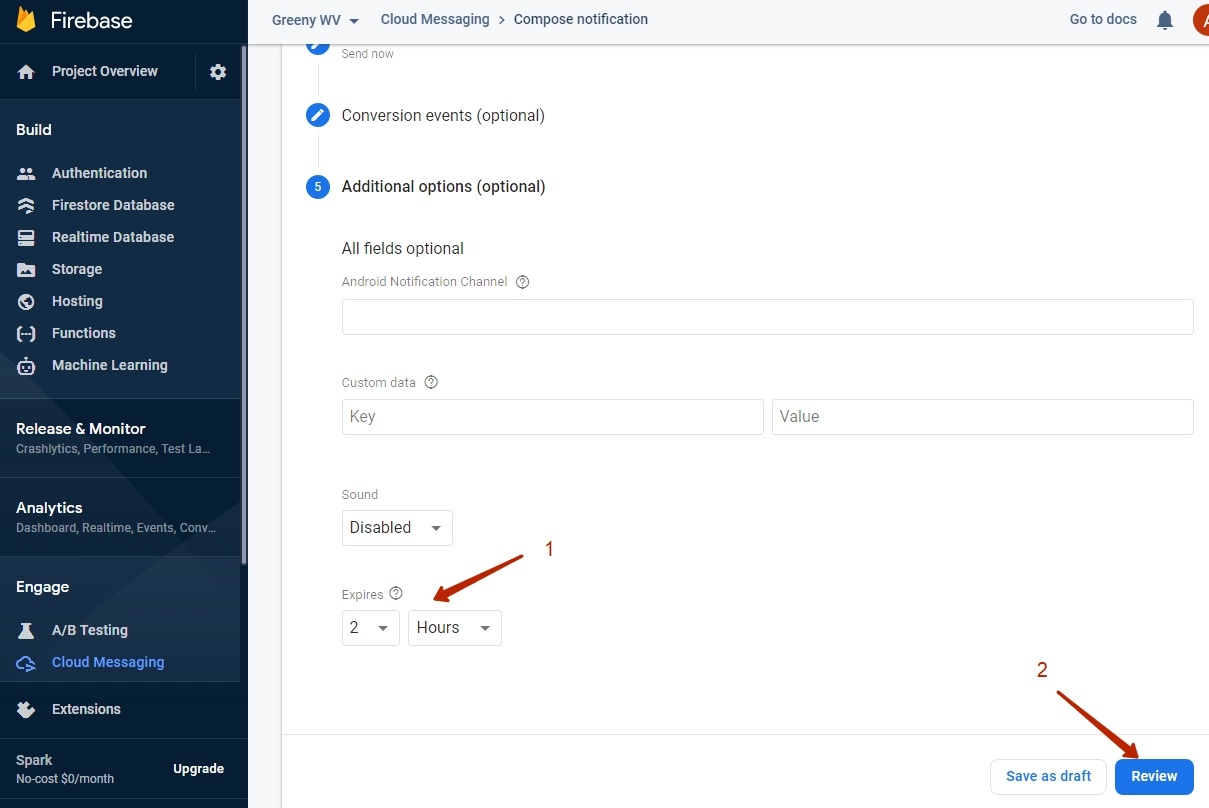
Select (1) message lifetime (how long it will be relevant and wait for the user when he appears on the network. This feature helps to set promotions and time-limited offers).Click “Review” button after that (2)
Check settings after that and click “Publish” button.
It is ready


Limitation: new applications will be available only for adaptive templates (It is Elastic template in OT Box)! |