This subsection discusses how to set the sales price of the products on the website.
See a detailed description of how this functionality can benefit your business here http://docs.otcommerce.com/pages/viewpage.action?pageId=22644375
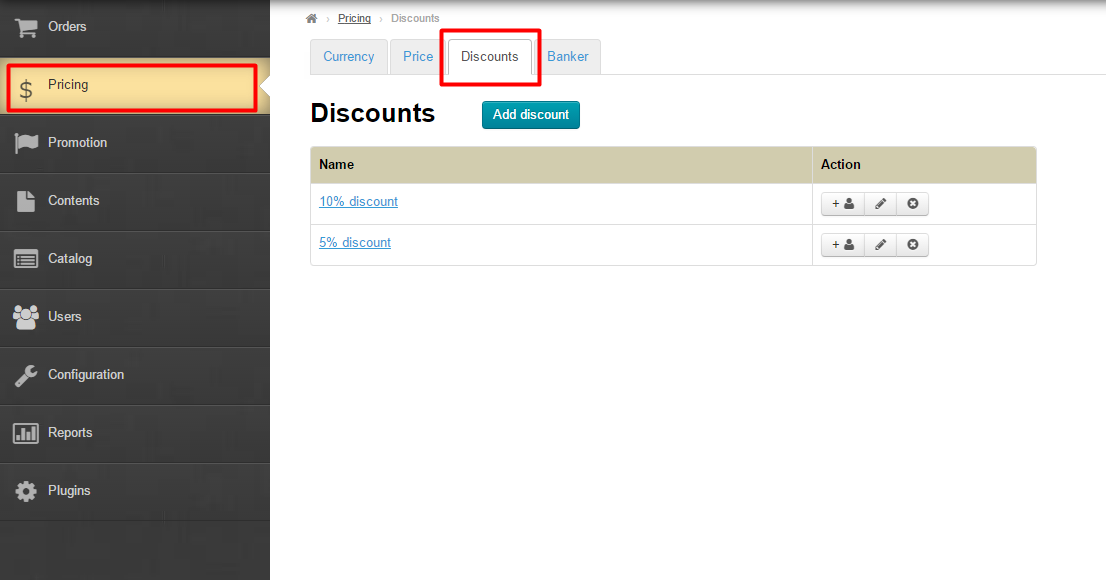
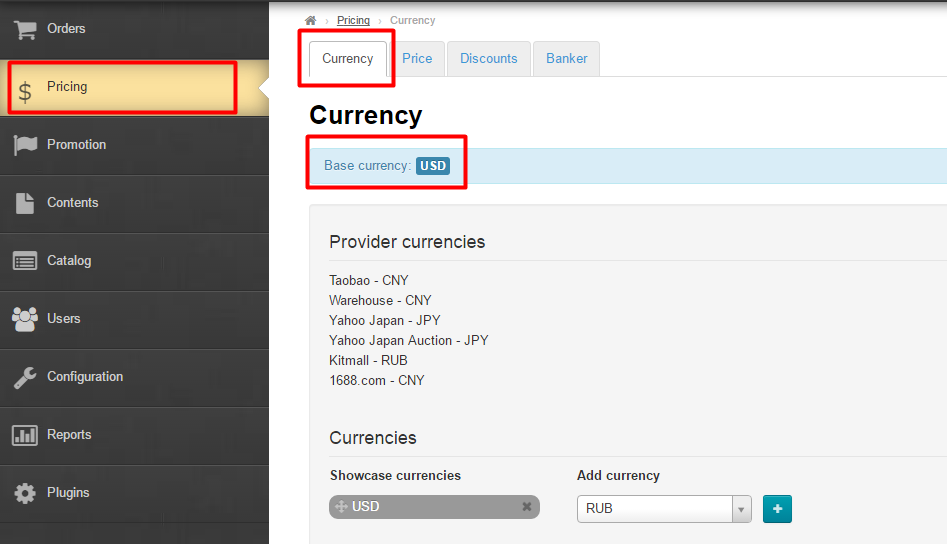
Go to: Pricing > Discounts in the administrative area of your website.
Description
The “Discount” subsection lets you offer discounts to buyers when they spend a certain amount. For example, your website customer Ivanov bought more than 20 000 roubles worth of merchandise and you would like to give him VIP purchase discount.
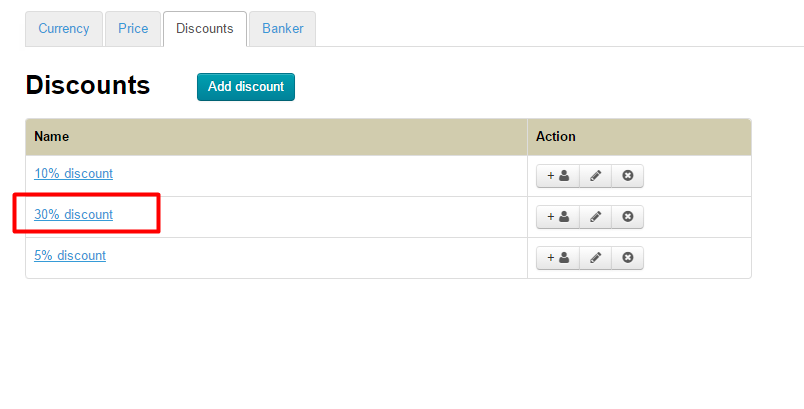
The “Discount” tab contains the following:
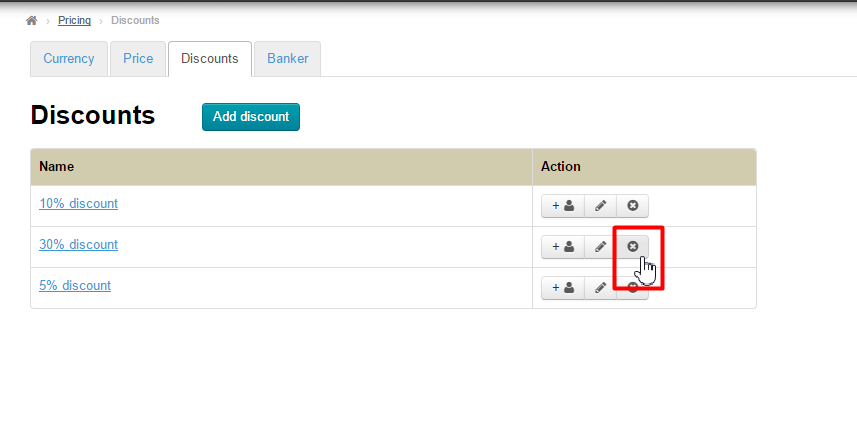
- The “Add discount” button.
- Discount names (Clicking on a discount name will take you to the discount users list.)
- Discounts actions:
- How to add a discount
- How to edit a discount
- How to delete a discount
Managing discounts
How to add a discount
To add a discount you should click on the “Add discount” button.

Next, fill out the fields on the form for adding a discount:
- Discount name.
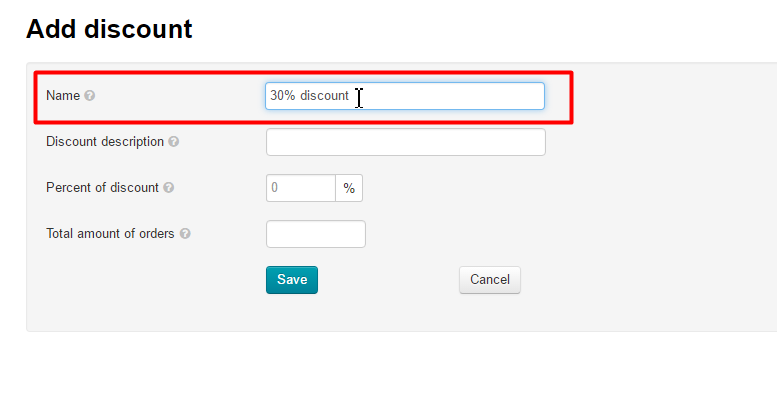
- Discount description.
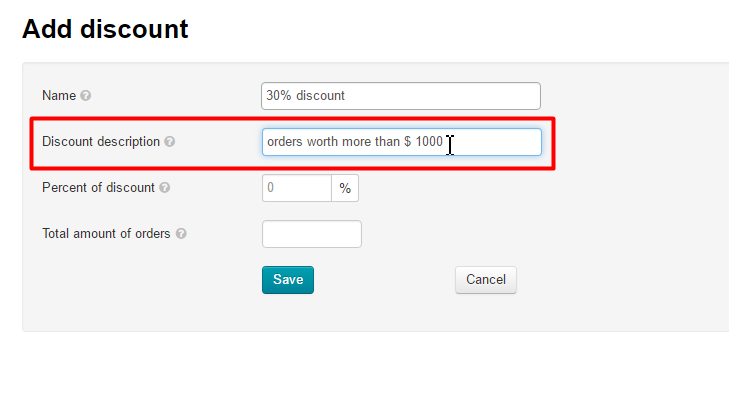
- Percentage discount.

- Discount is only applicable for orders over to the specified amount (in website’s base currency)

For the website’s base currency, see ”Pricing” section on the “Currency” tab.
Once you’ve filled out all the fields you should save the changes by clicking the “Save” button.
After saving the new discount will appear in the list of existing discounts.
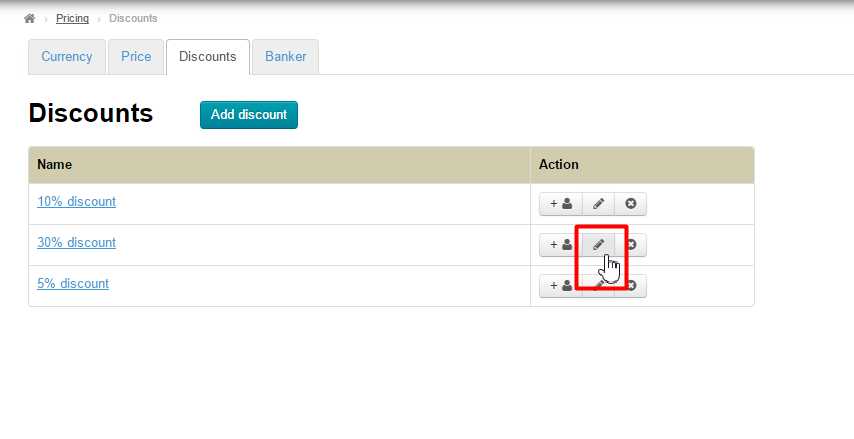
How to edit a discount
To edit a discount please perform the following steps:
Click on the pencil button if you are on the “Discount” tab.
Click on the “Edit” button if you are viewing the users list.
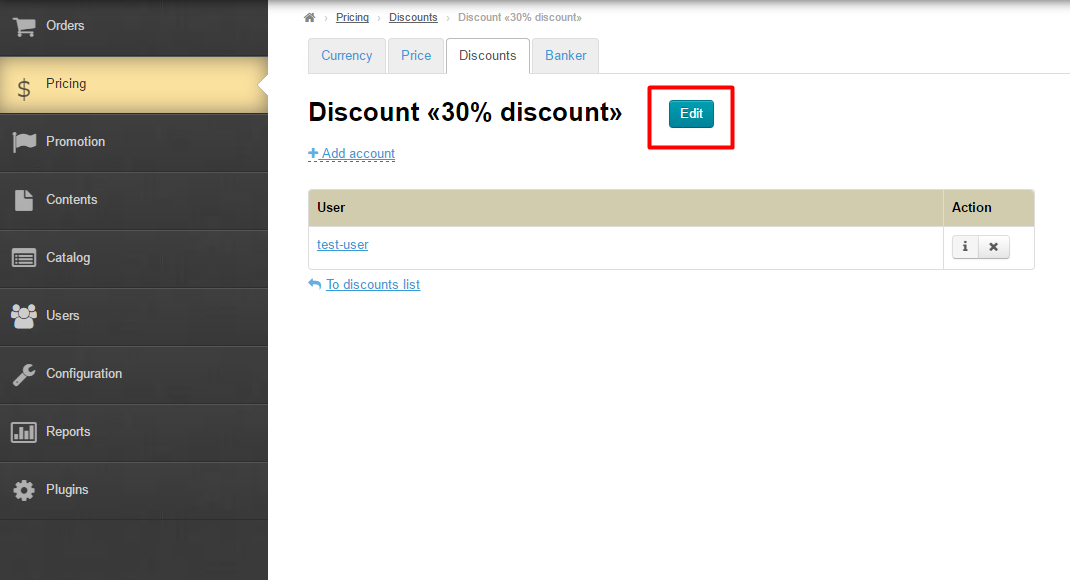
This will take you to the edit form:
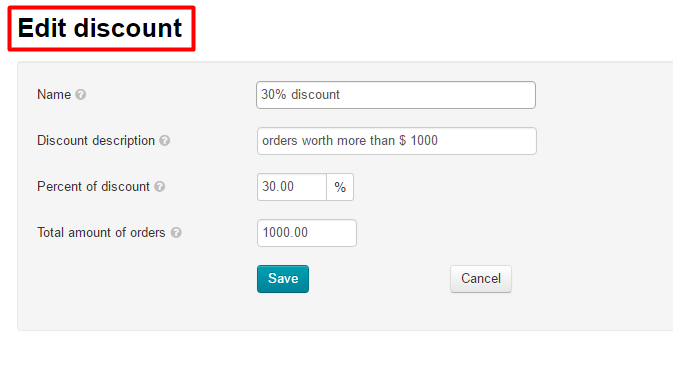
Make all the necessary changes and click the “Save” button.

Once that’s done, the discount data will be updated.
How to delete a discount
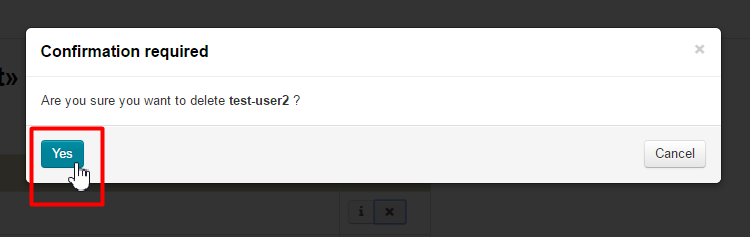
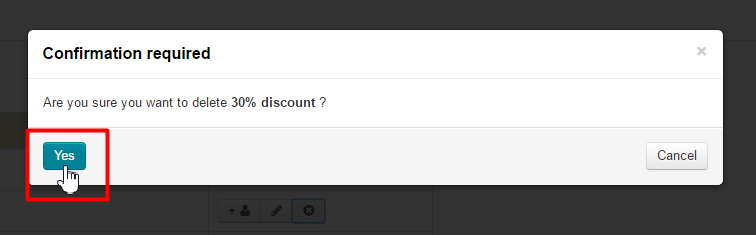
To delete a discount you need to click on the “Close” (X) button opposite the discount.
A confirm screen will appear asking if you are sure you want to delete a discount. Once you click “Yes” the user will be deleted.
Managing the “Discount” section users
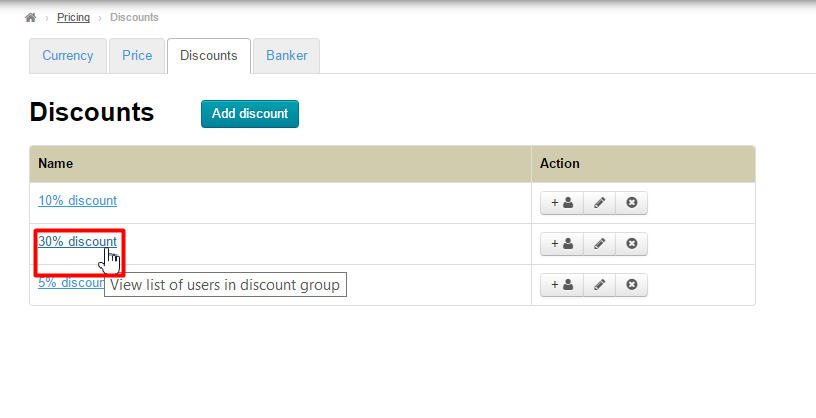
How to view users
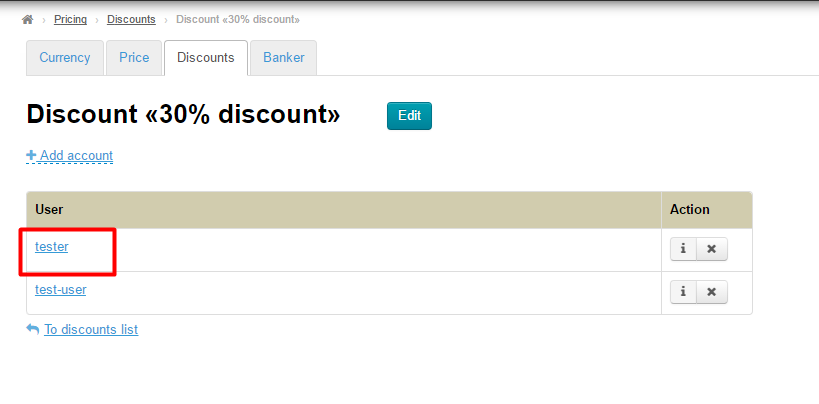
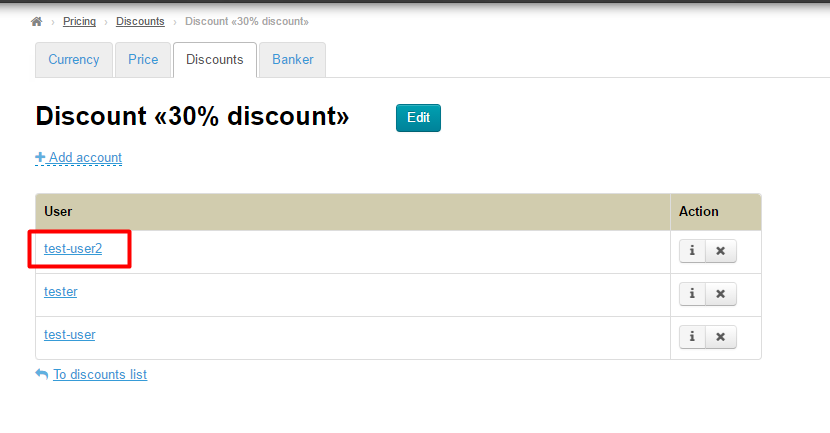
The “Discount” tab lists existing discounts. To view a single discount you need to click on a discount name.
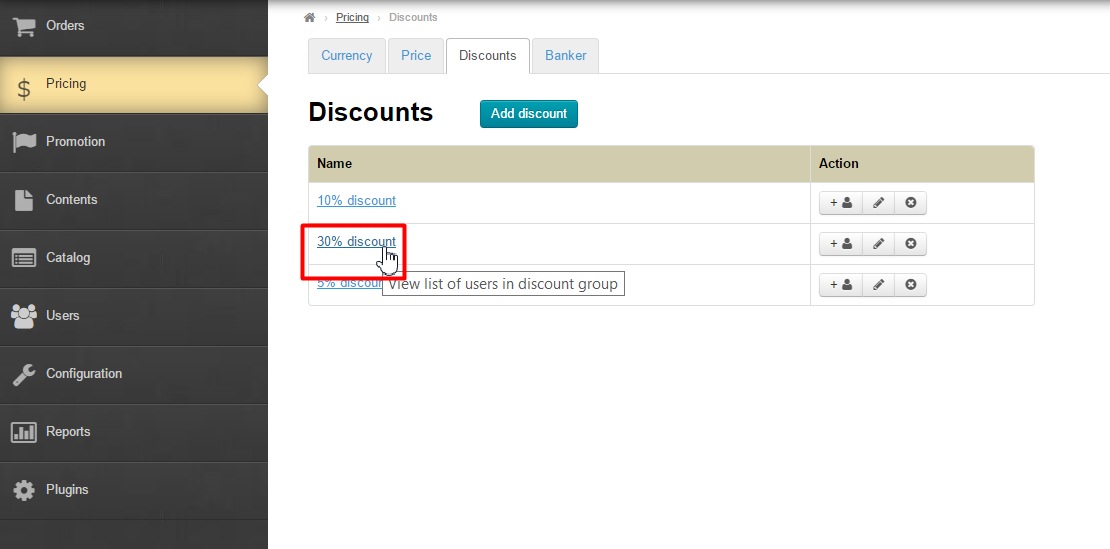
This will open a list of users the discount is actually given to.

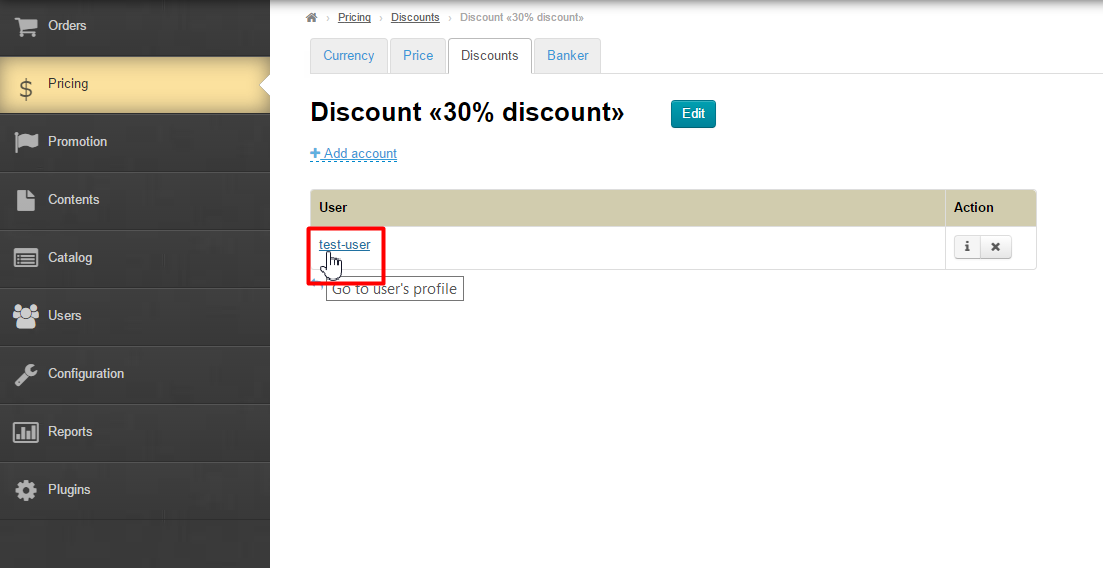
Once you click on a username you can view complete information about a user on his/her profile in the administrative area.
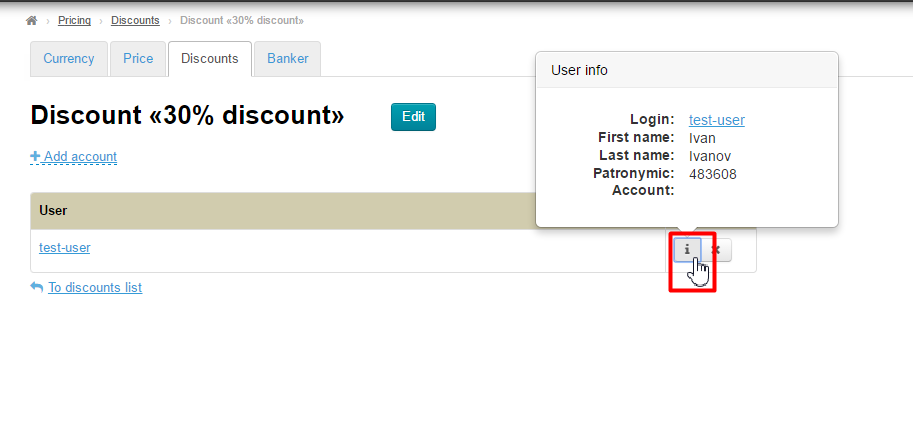
To display a summary of that user you should click the information (“i”) icon opposite the username.
How to add a user
There are two methods to add a user to the list of those the discount is allowed to.
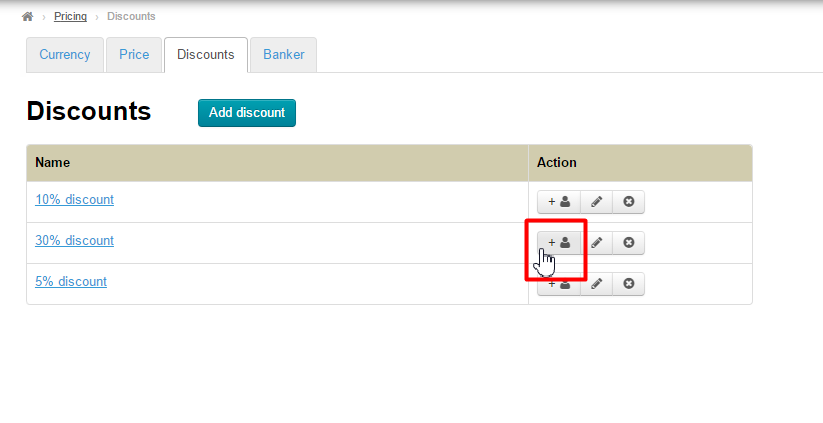
Method 1
Click on the “Add user” icon while being on the “Discounts” tab.
This will open a pop-up window.
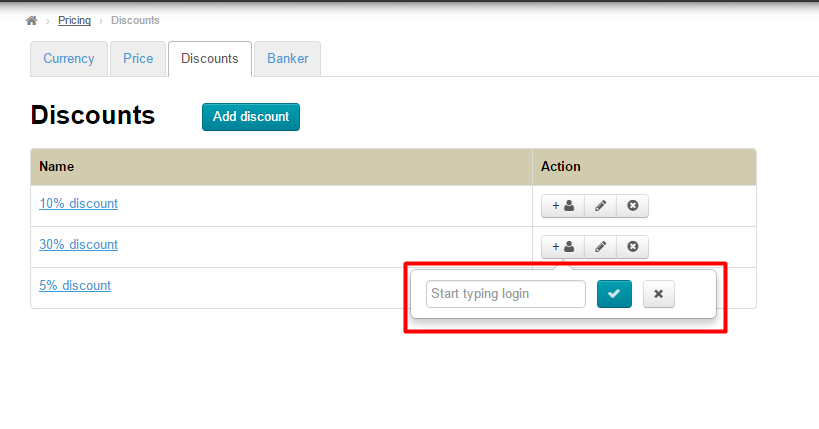
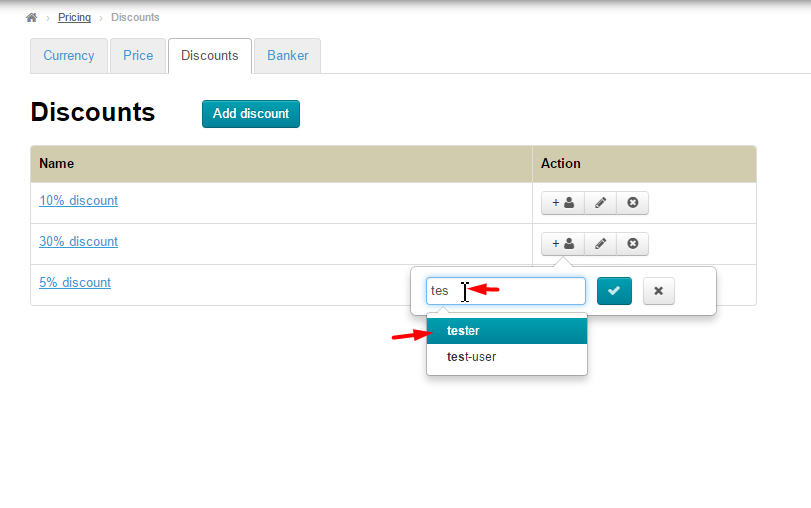
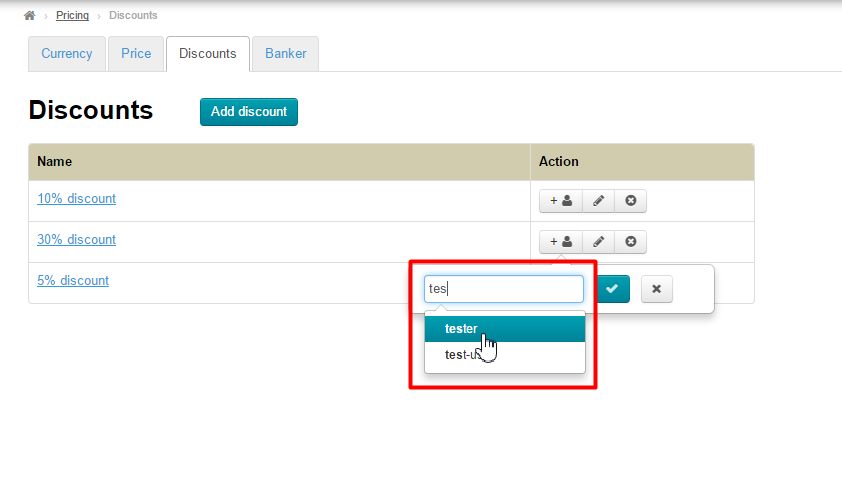
Type a user login and add it to the list by clicking on the check mark button.
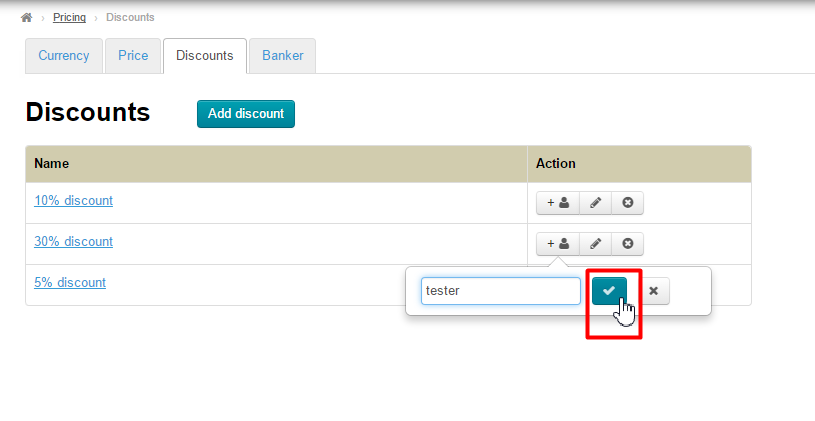
After that, the user will be added to the list of customers the discount is allowed to.
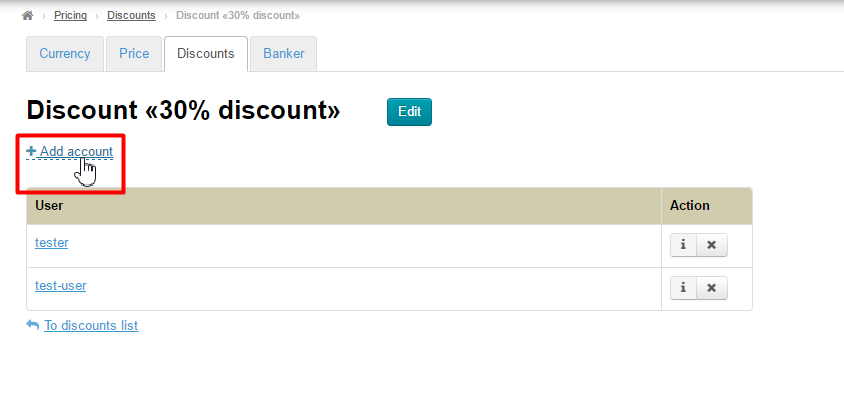
Method 2
Click the “+ Add account” link while viewing a discount (after you’ve clicked on the discount name).
This will open a pop-up window.
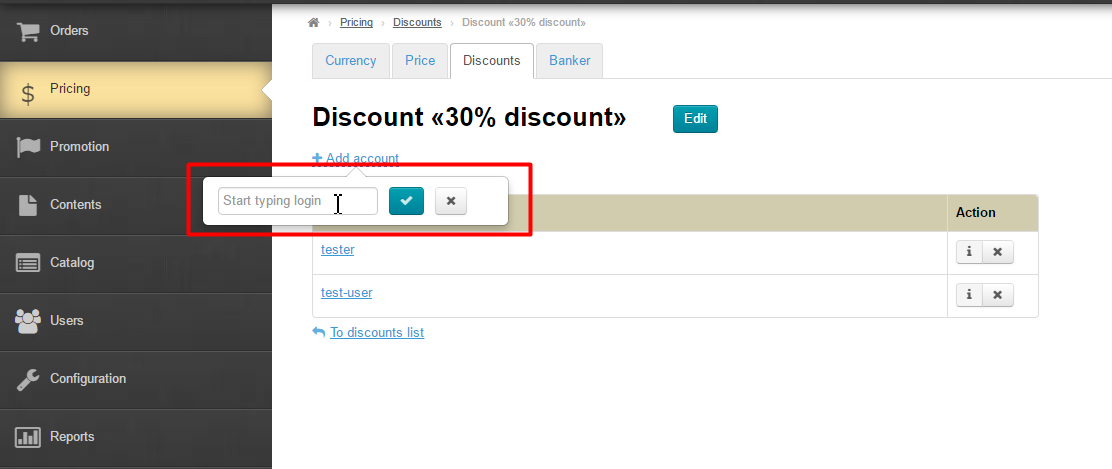
Type a user login and add it to the list by clicking on the check mark button.
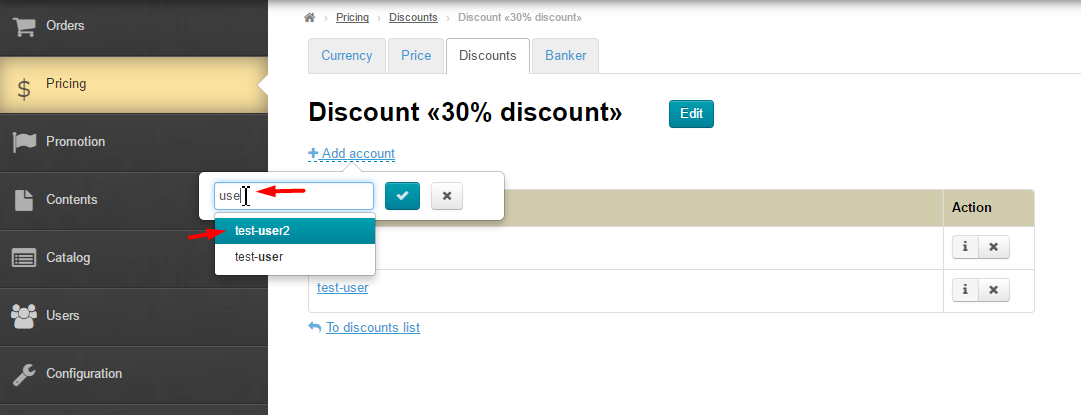
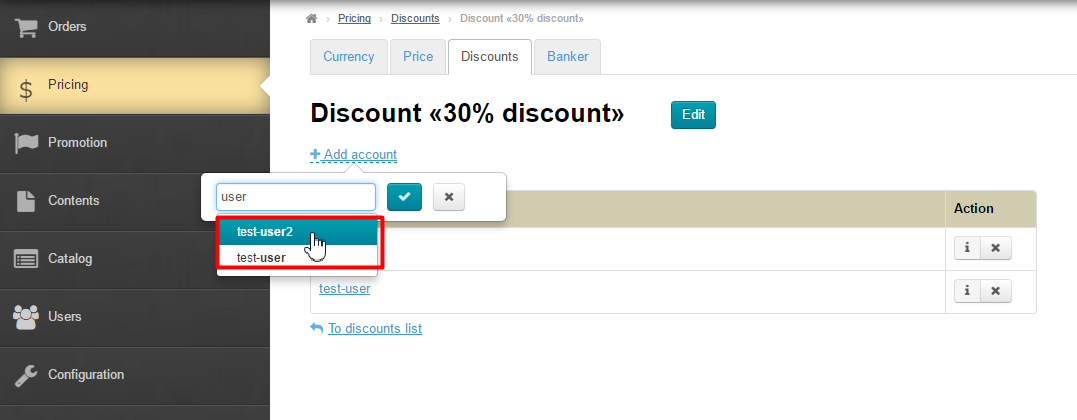
After that, the user will be added to the list of customers the discount is actually given to.
How to delete user
To delete user you need to click on the “Close” (X) button.

A confirm screen will appear asking if you are sure you want to delete a user. Once you click “Yes” the user will be deleted.