
Connecting SMS service gives 2 convenient ways for customer to interact with your online store.
- SMS regitration — customer adds phone number instead of e-mail and receives confirmation code.
- SMS notification — customer receives notification when order status changes, for example about changing the order status.
Sending news, promotions and discounts by SMS is not provided by OT Box functionality. However, such a service is provided by third-party SMS services.
You can set up SMS registration for your customers, as well as the ability to send various SMS notifications about order or shopping cart status starting from admin version 1.12.2.
It's necessary to follow the steps to set SMS registration:
Select and configure SMS service
Make settings in OT Box (You should update OT Box if admin panel version is lower than 1.12.2. Then make all the described site settings)
Set SMS registration
Optionally enable SMS notifications about order and shipping cart status
Registering and configuring Twilio SMS service
Service of sending SMS in English. Therefore, all data is indicated in English. A complete list of countries is available. Website is available in three languages: English, German and Japanese.
Registration
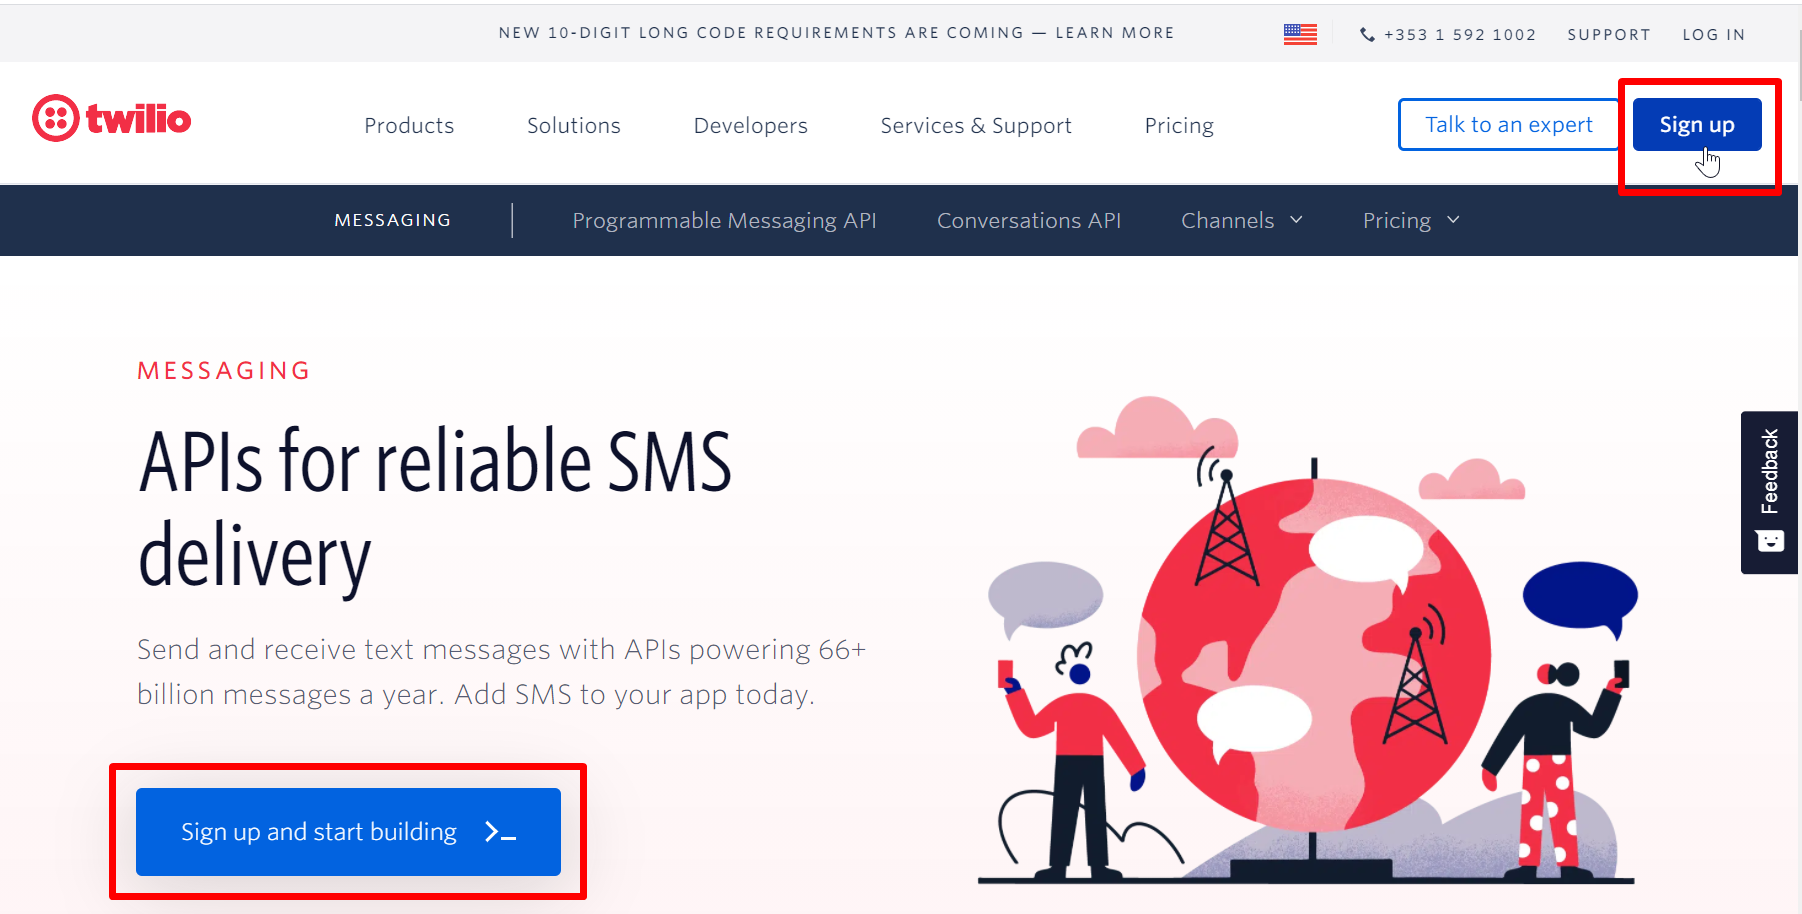
Go to https://www.twilio.com/SMS and click “Sign up” button
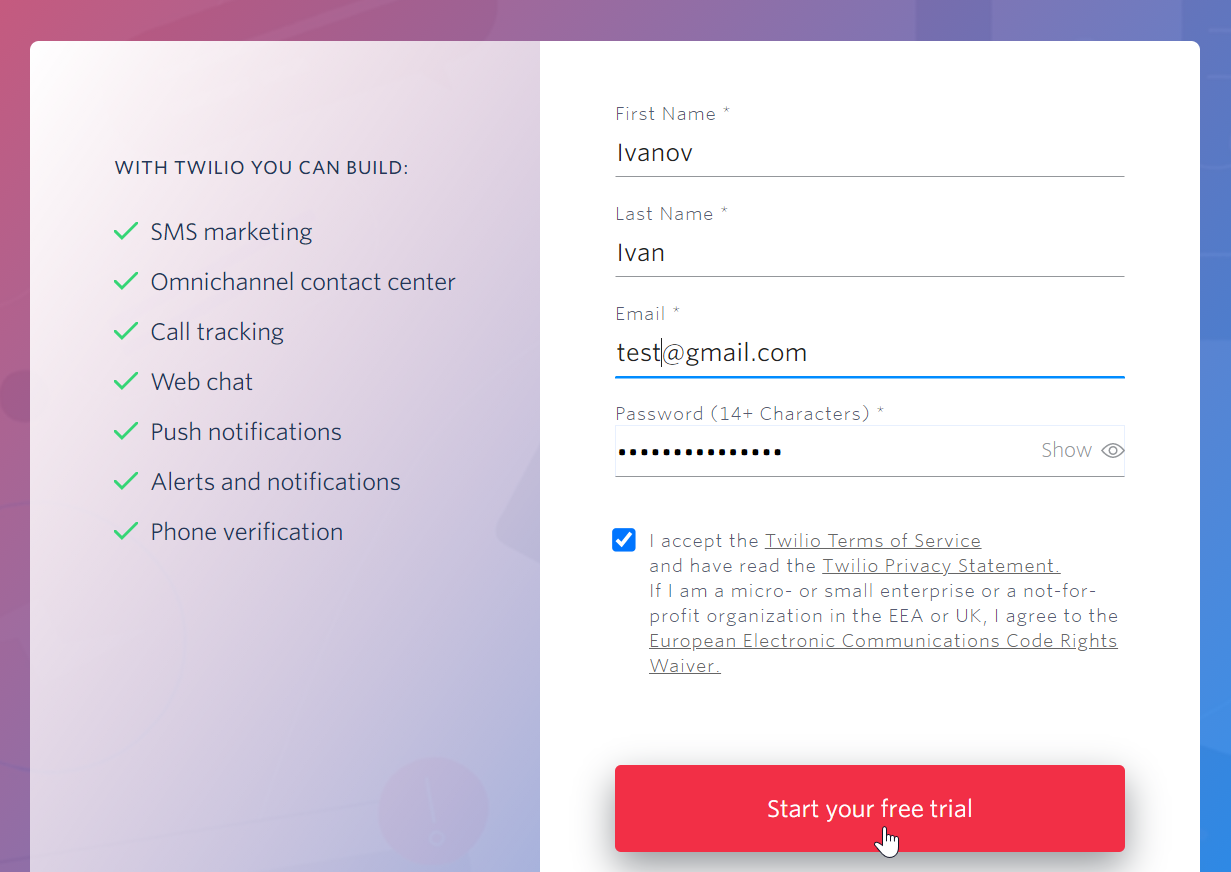
Fill in registration form.
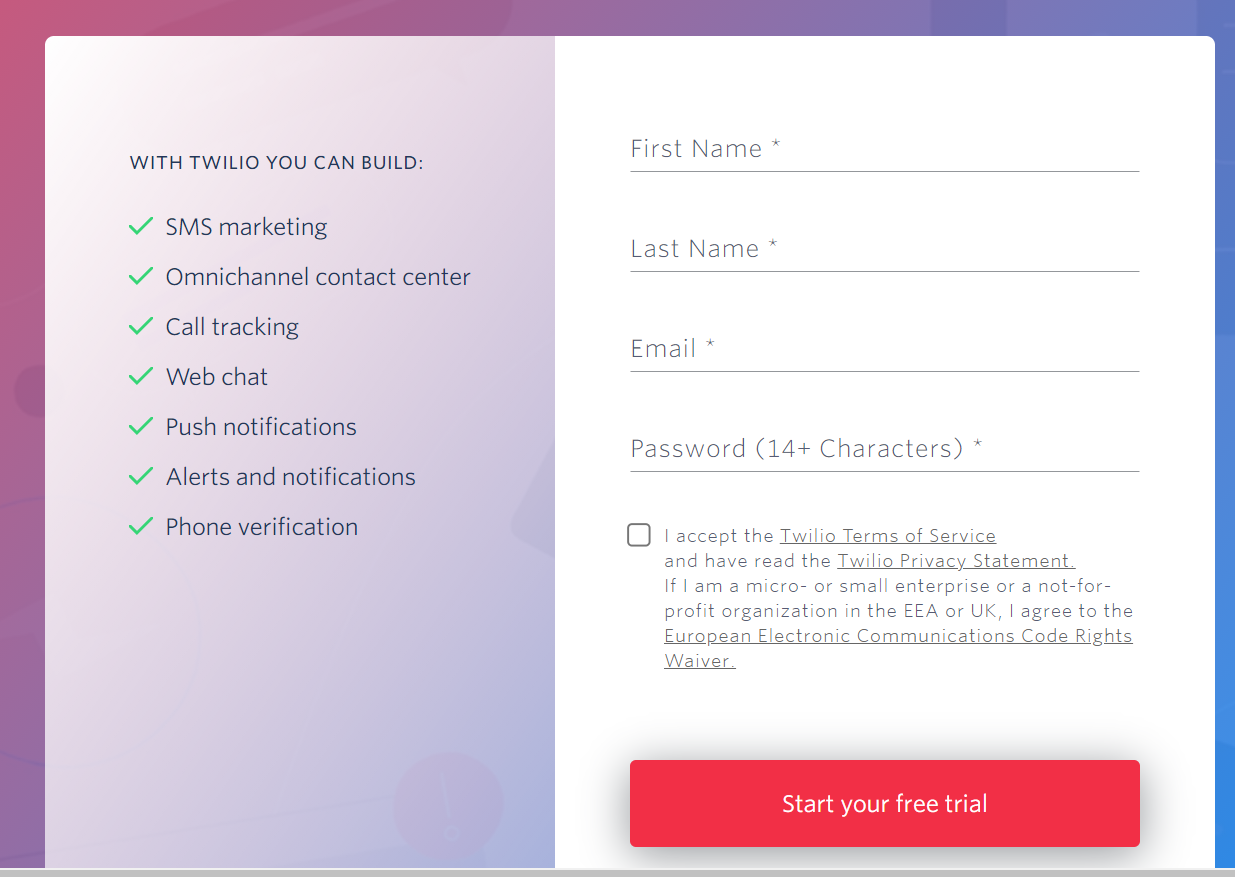
When all the fields are filled in, put a tick, agreeing to the privacy policy and click “Start your free trial” button.
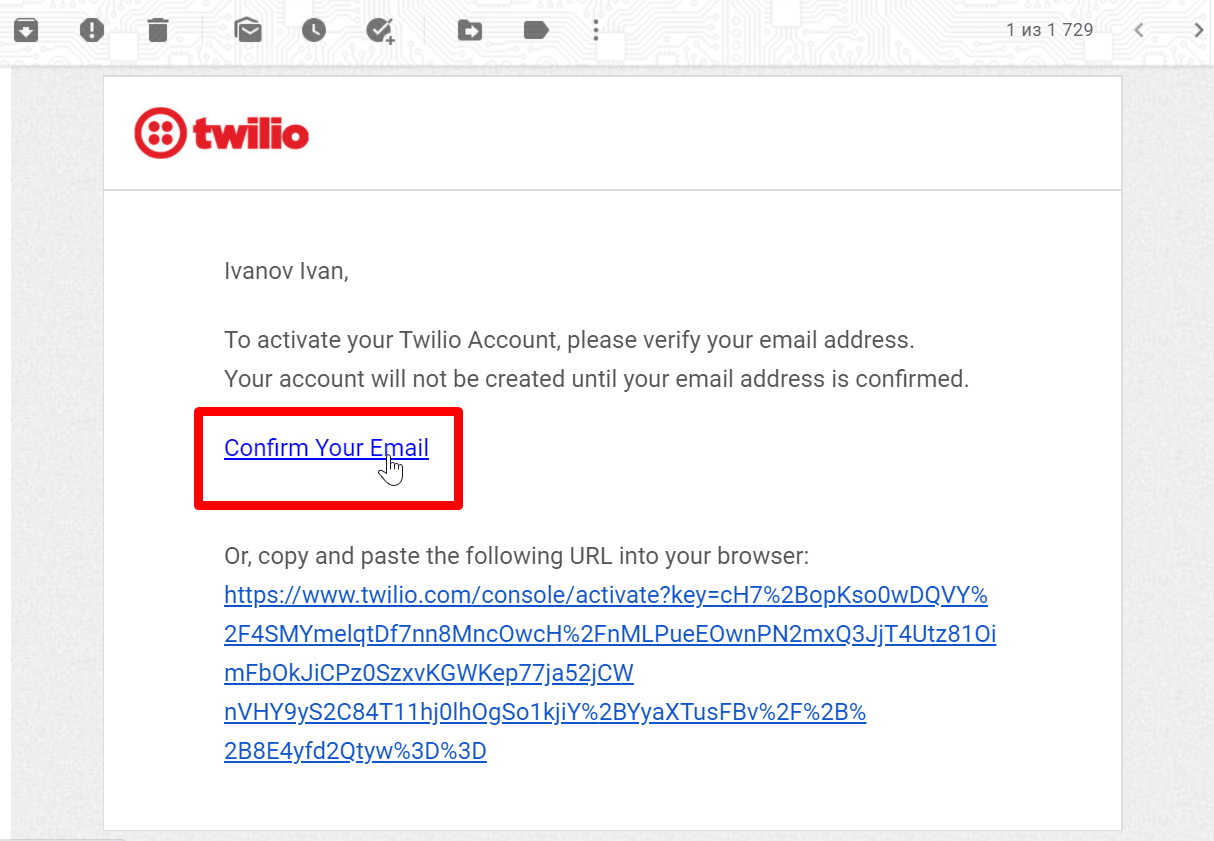
Confirm email.
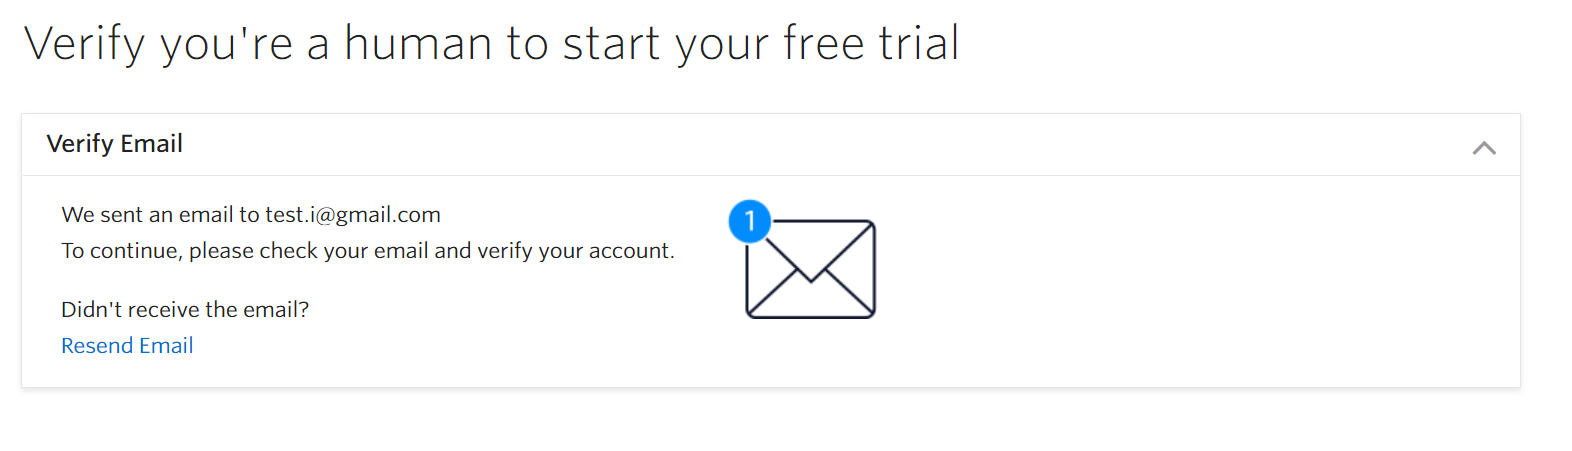
An email with a link will be sent to your email address. Follow the link.
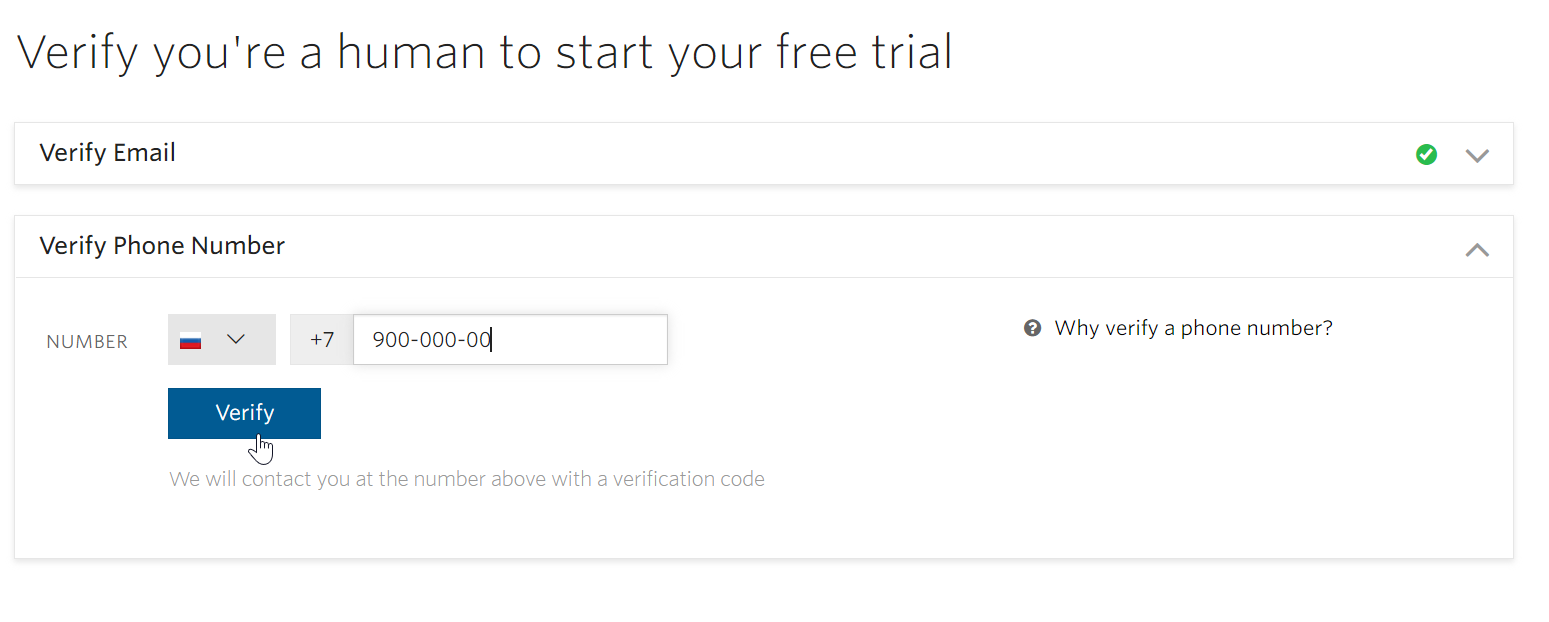
Enter your phone number, country code is selected on the left.
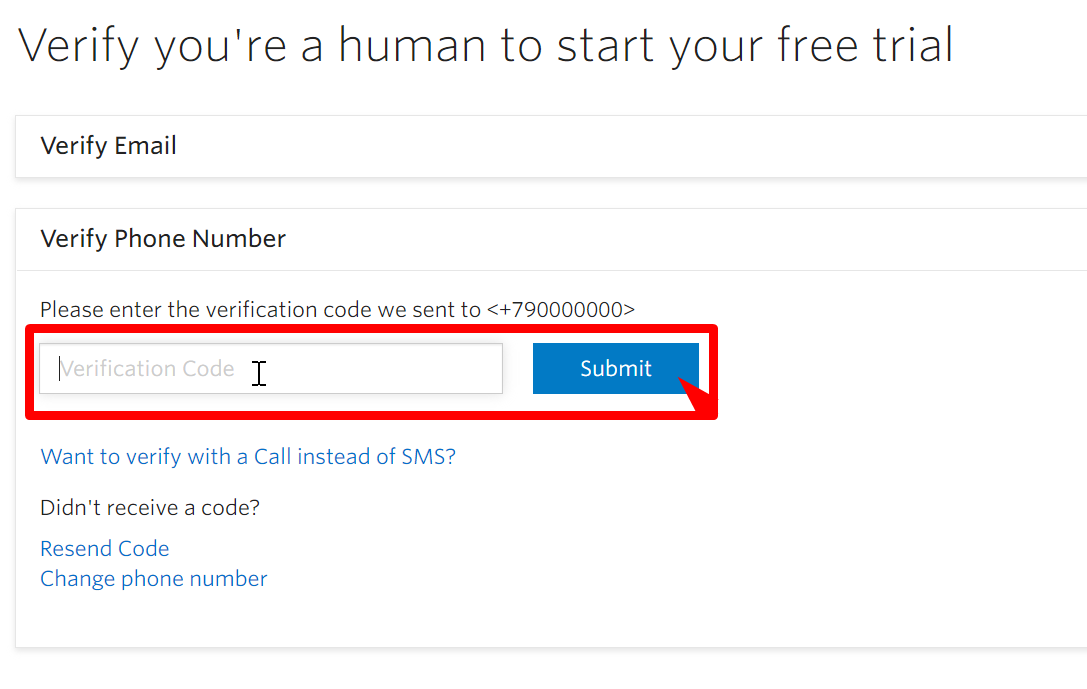
SMS with a code will be sent to specified number. Enter the code in a special field and click “Submit”.
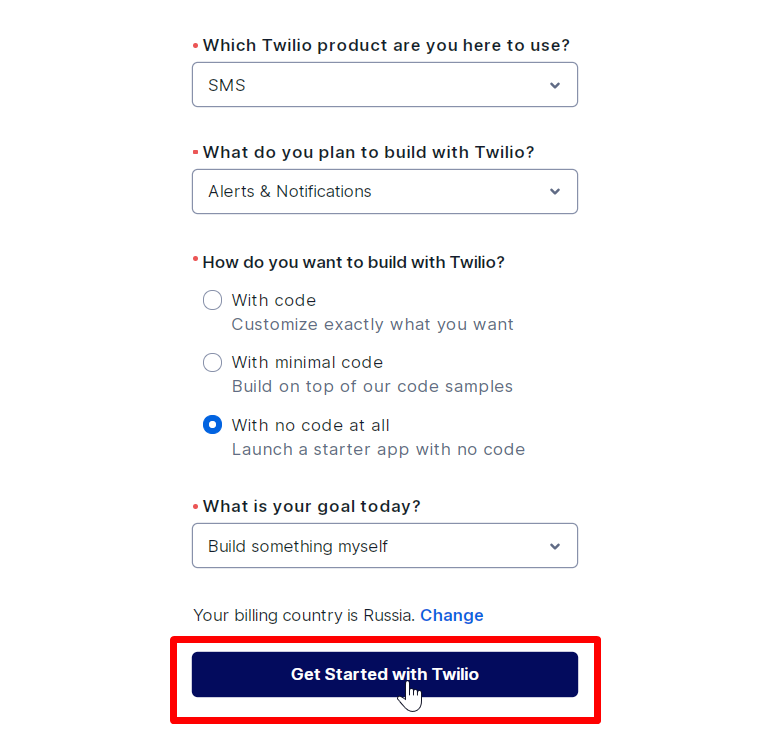
After registration, fill out the form as shown in the screenshot.
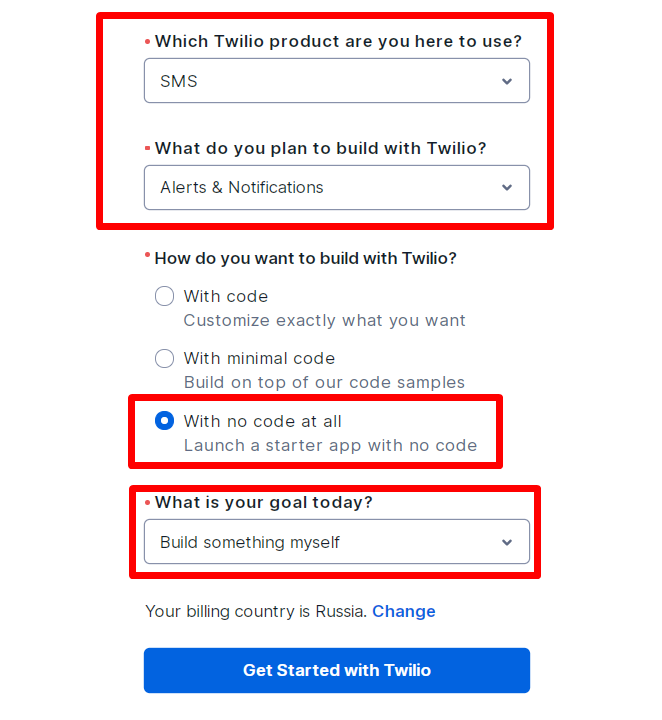
Click “Get Started with Twilio” button when all the fields are filled:
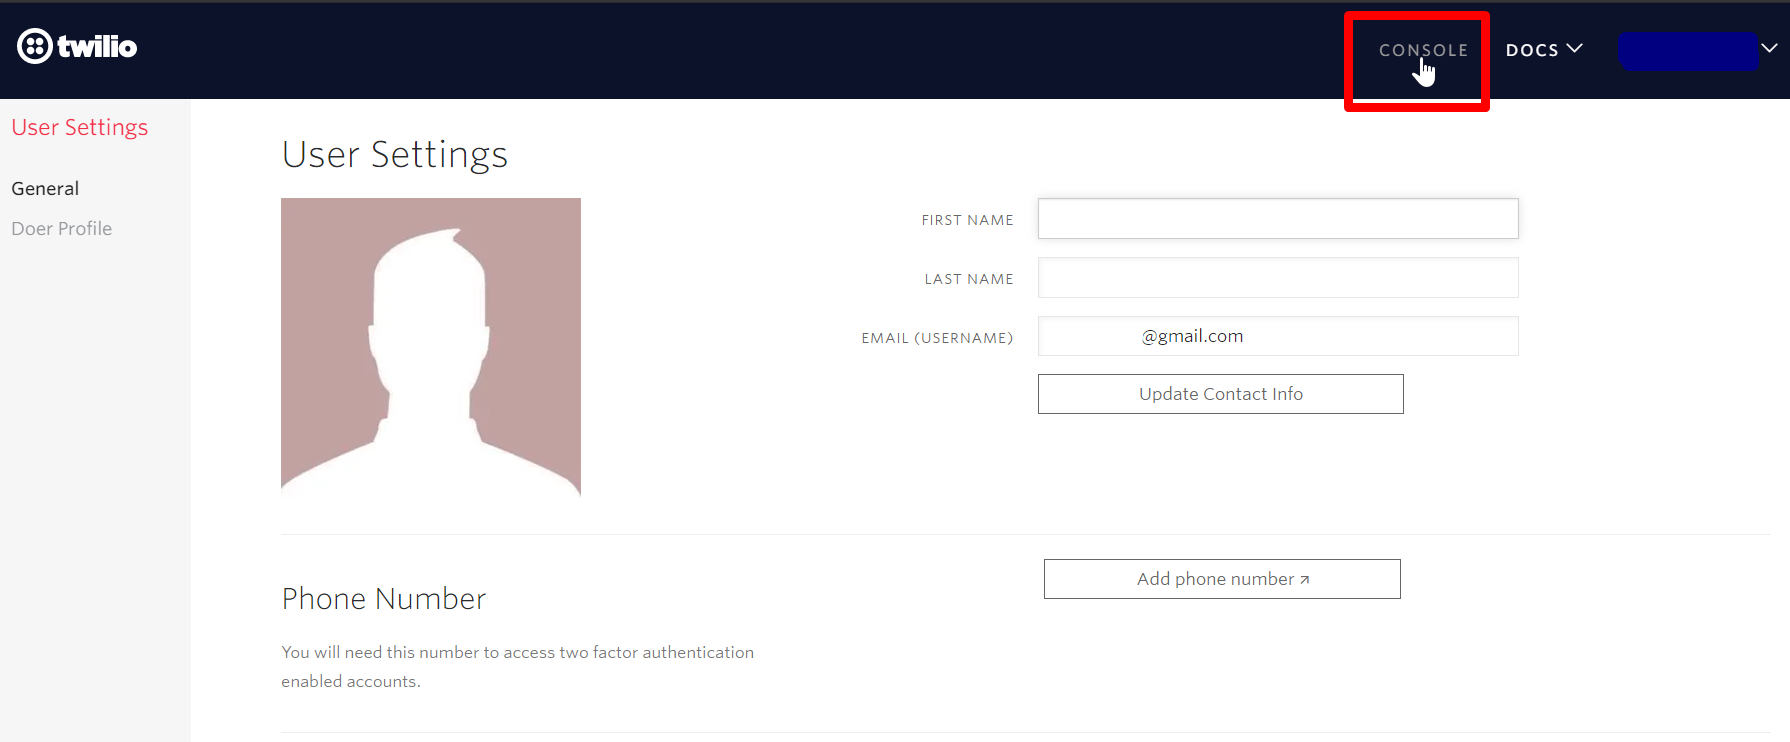
You need to create Twilio phone number after registering and confirming your account. Go to Console section from your account page.
You will see "Get a trial phone number" button on this page.

Data from Twilio service for OT admin panel
Go to Console section from your account page.
Copy ACCOUNT SID clicking "Copy" button.
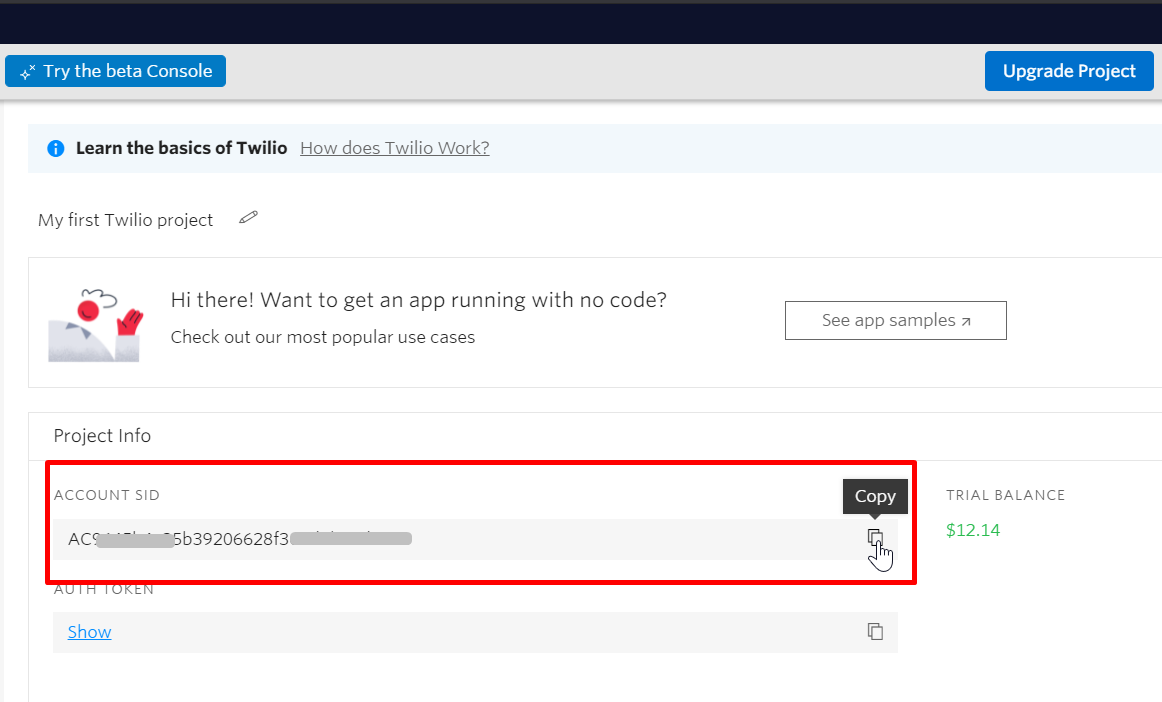
Copy AUTH TOKEN clicking "Copy" button.
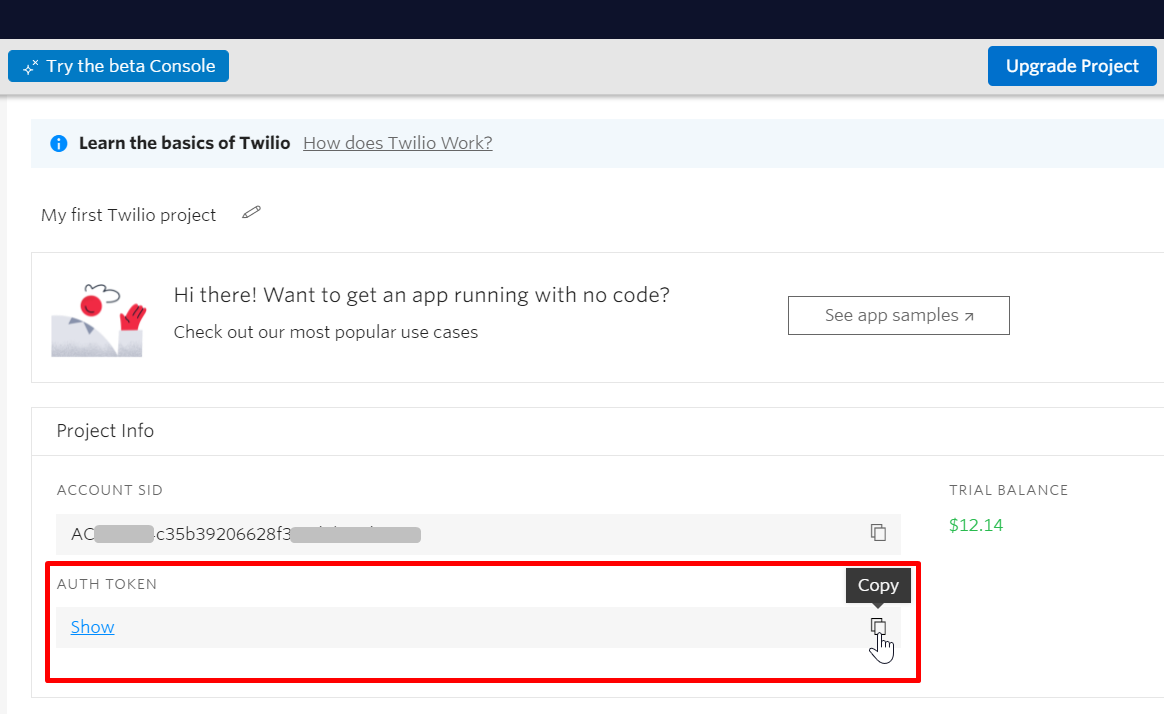
Copy TWILIO PHONE NUMBER that was received in profile settings or Alphanumeric Sender ID that was registered earlier in the personal account
Service configuration is complete. We proceed to settings in OT admin panel.
Setting up services in OT admin panel
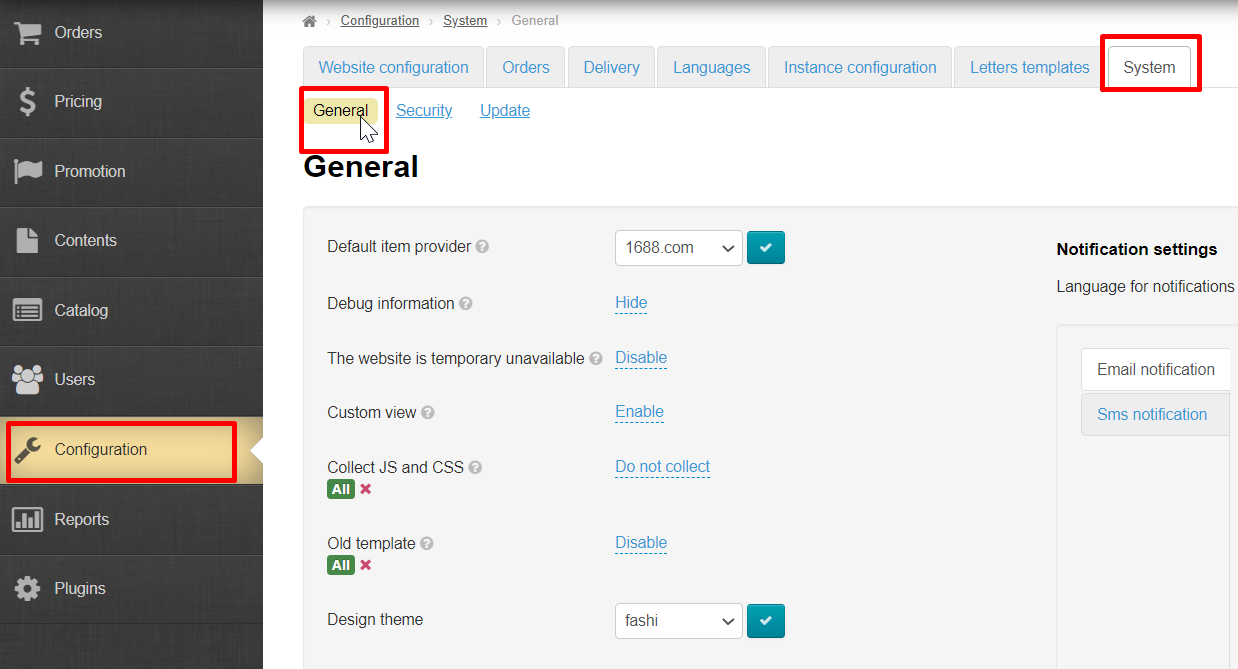
Go to “Configuration → System → General” section in admin panel
Scroll down “General” page to the bottom of “SMS service settings” heading. This is the section where we will enter data from SMS services.
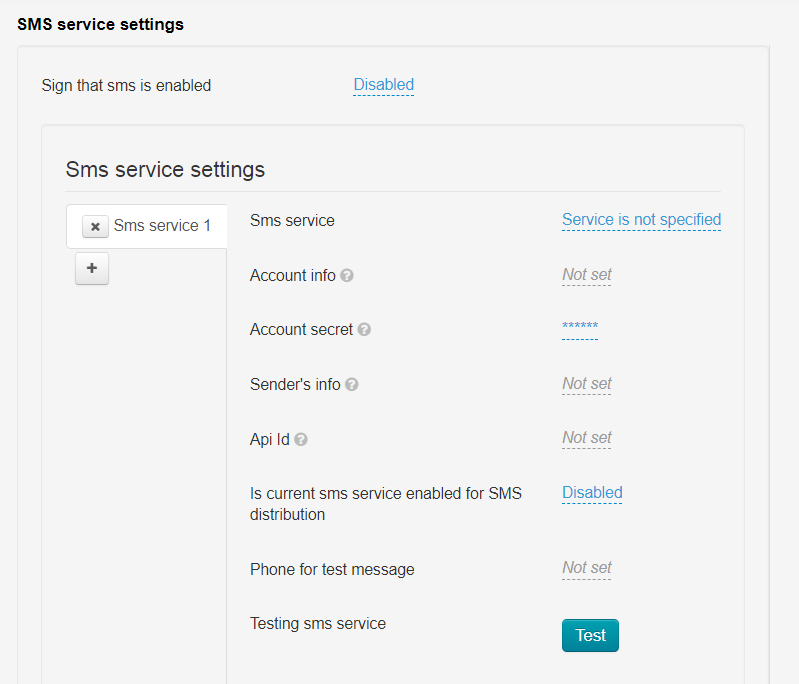
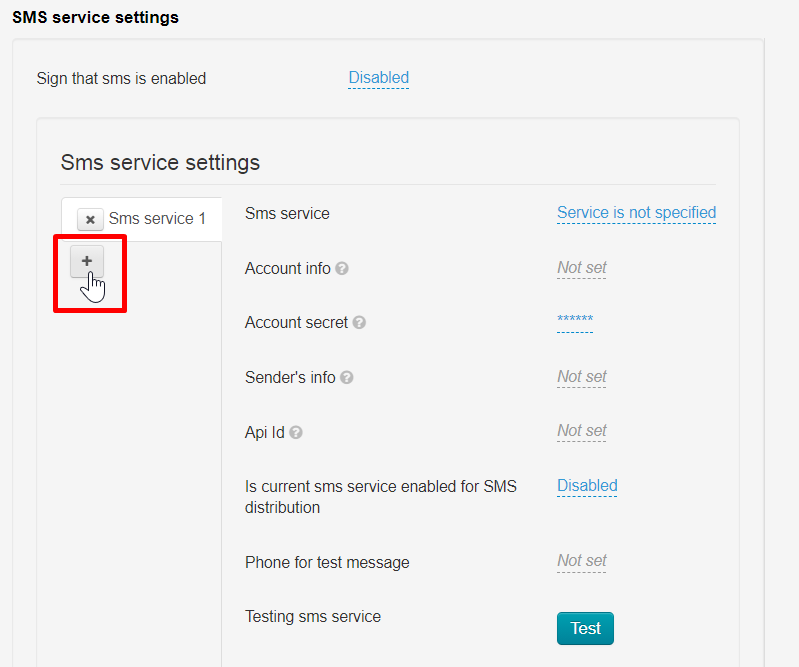
It's necessary to create own tab with settings for each SMS service. "SMS service 1" tab is a default one. Click + button to create a second tab
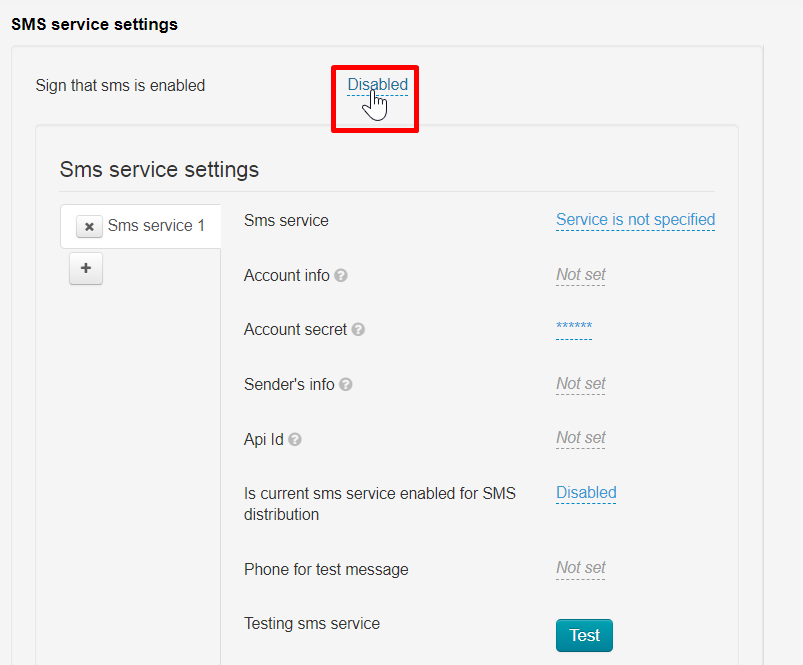
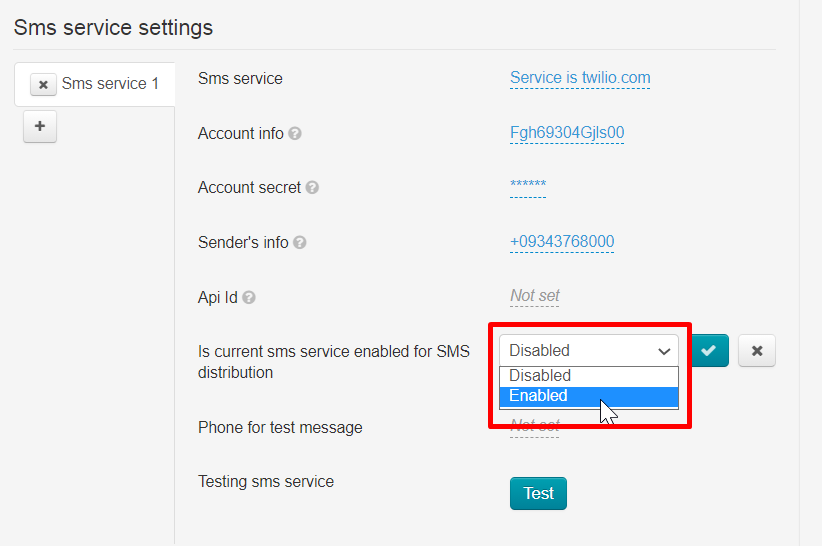
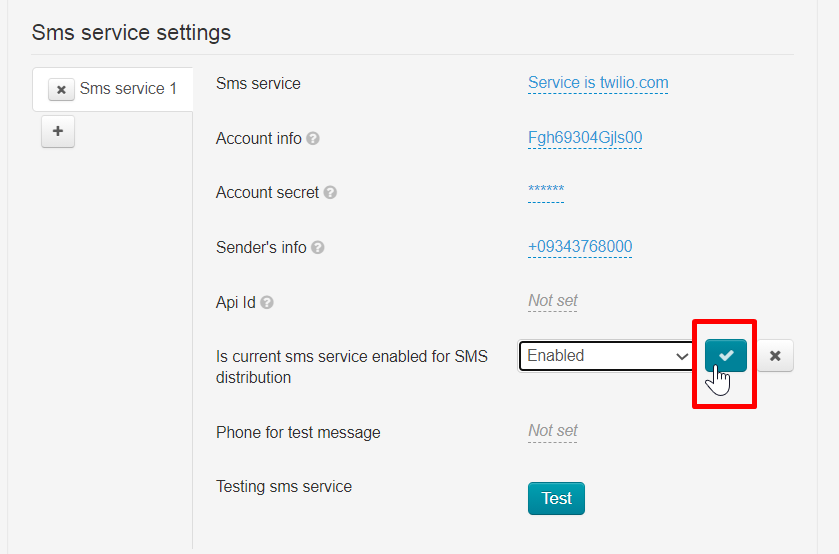
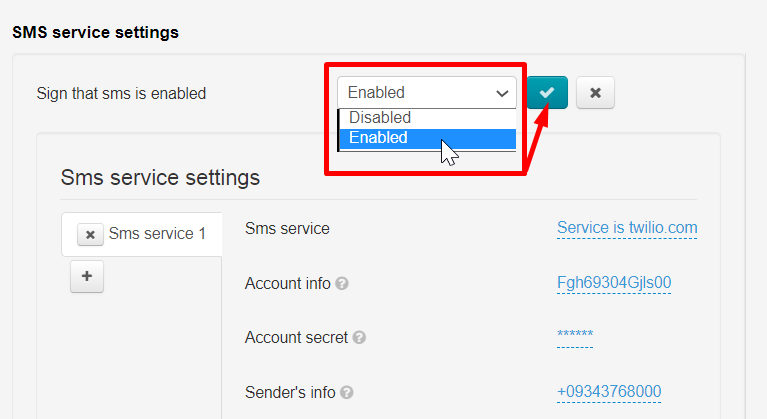
Enable SMS service
Enable service to test SMS service on your website, as well as start using SMS for notifications about customers' registration as well as order and shopping cart. Click “Disabled”.
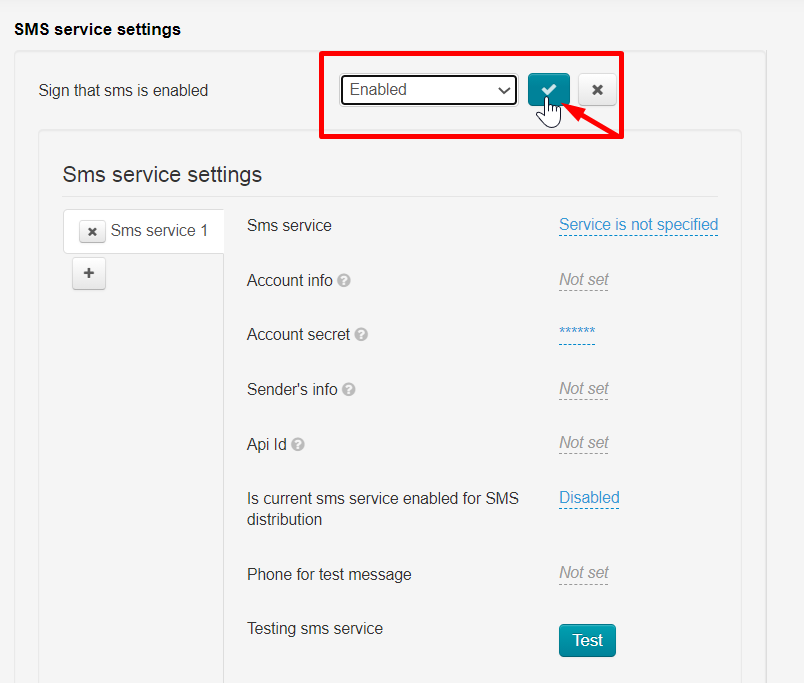
Select “Enabled” in drop-down list and save choice.
We recommend to configure services for sending SMS before enabling.
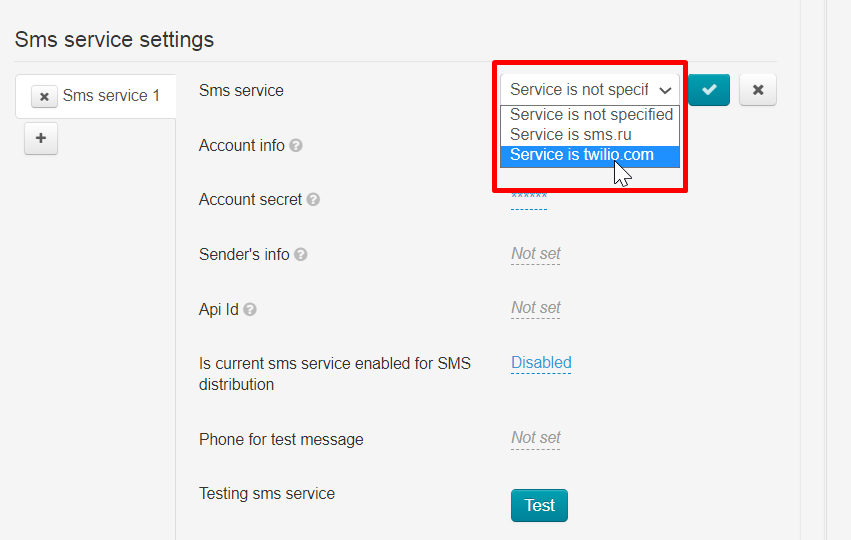
SMS service setup
Select “Service is twilio.com” from drop-down menu in “SMS service” field
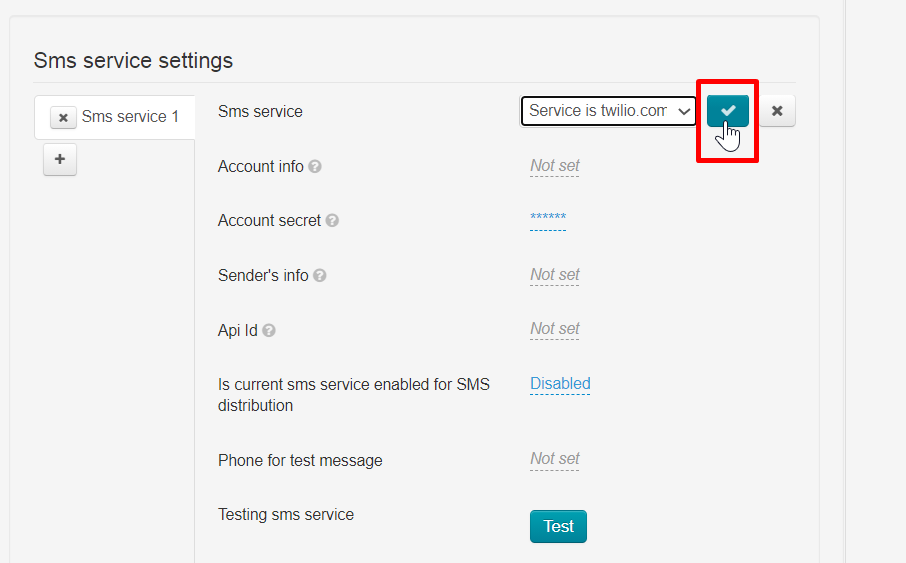
Click "Save" button
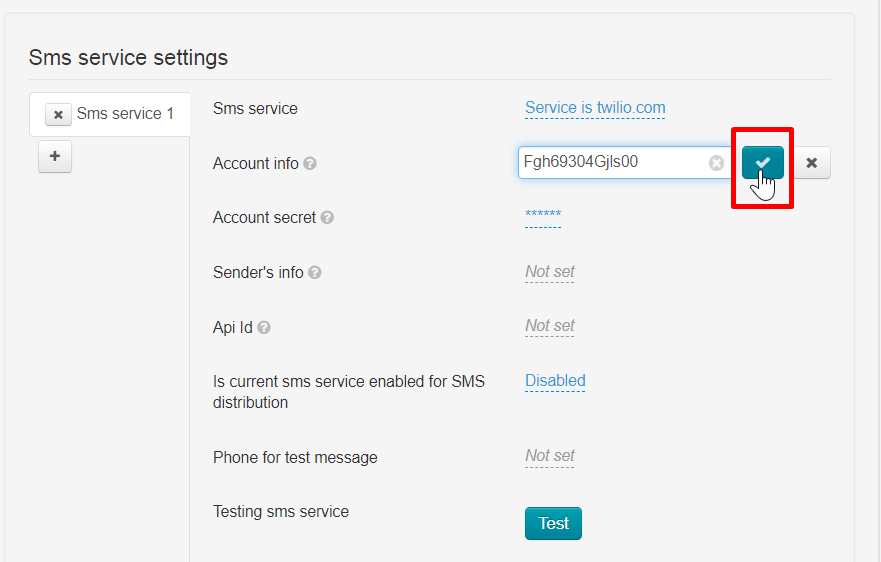
In "Account info" field write what you copied in the service from ACCOUNT SID field.
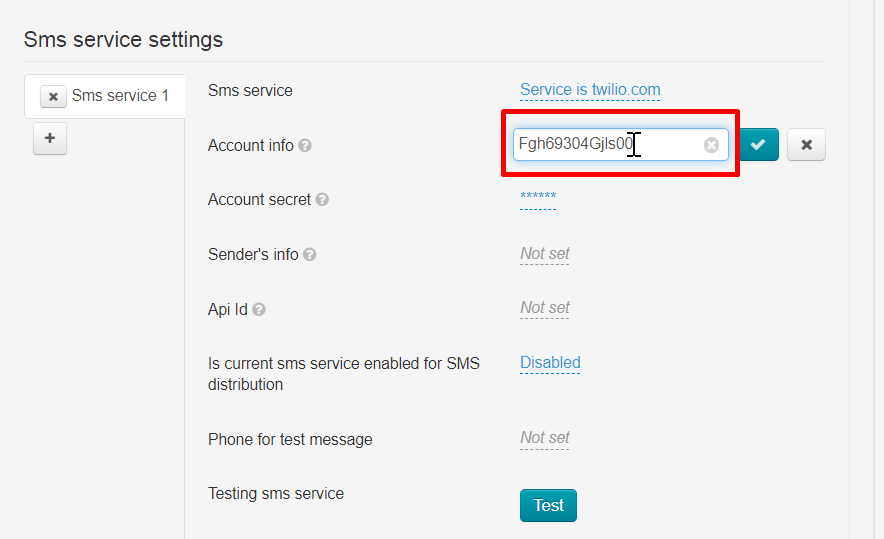
Click "Save" button
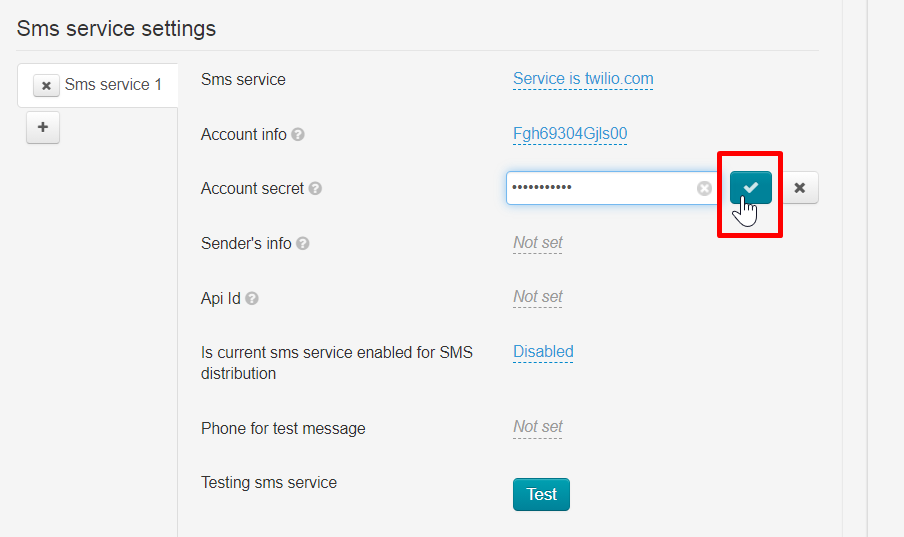
Next field is “Account secret”. Write here what you copied in the service from AUTH TOKEN field
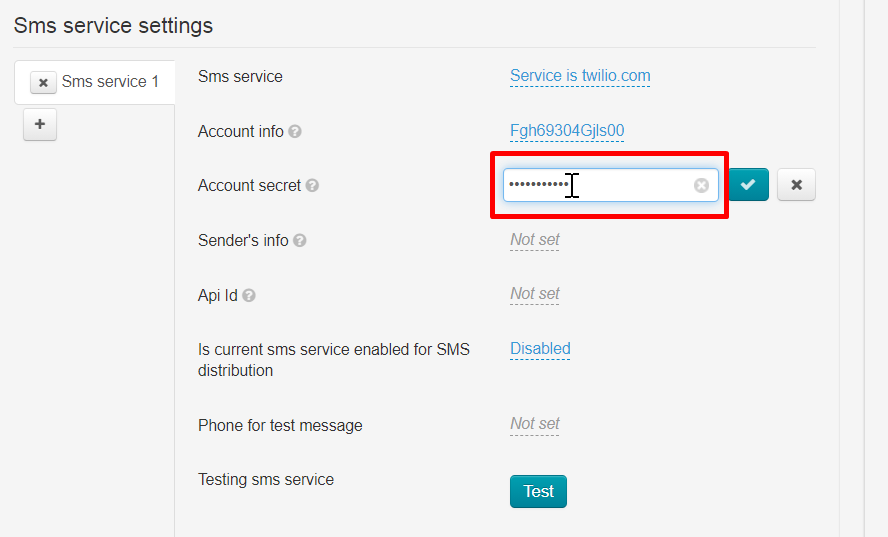
Click "Save" button
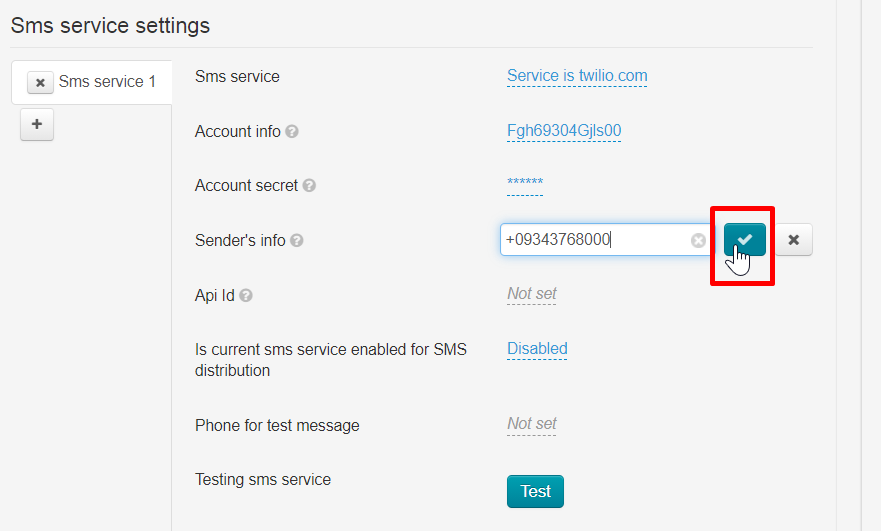
Next field is “Sender's info”. Write here what you set up in TWILIO PHONE NUMBER service (mandatory receipt of Twilio number) or Alphanumeric Sender ID (which was previously registered in your personal account).
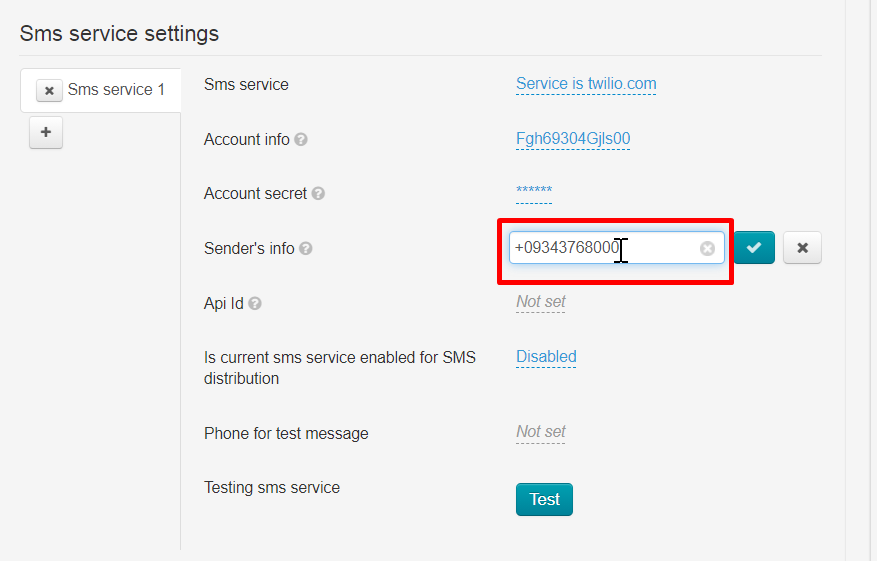
Click "Save" button
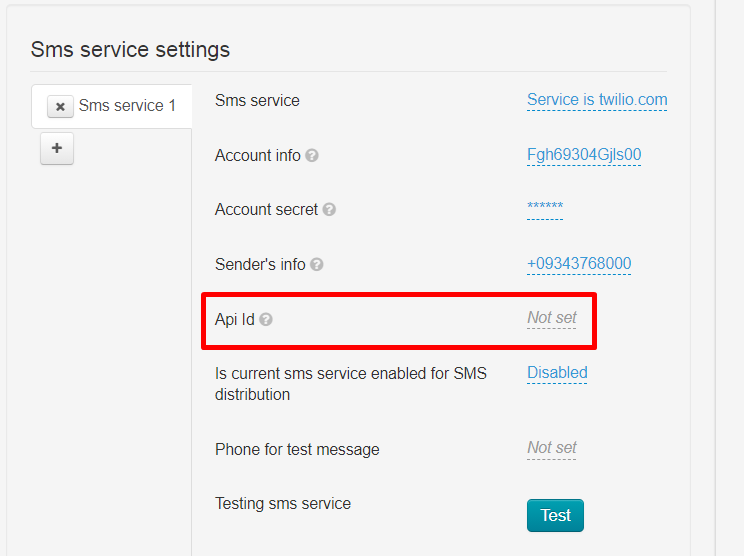
Leave “Api Id” field without changes.
SMS services can be used for customers registration, as well as for notifications about order and shopping cart status. Select "Use" in the field "Use this service for sending SMS" if the service will be used for notifications. Don't make any changes if SMS notifications are not required.
Save choice clicking "Save" button.
The use of service in mailing lists can be enabled or disabled at any time.
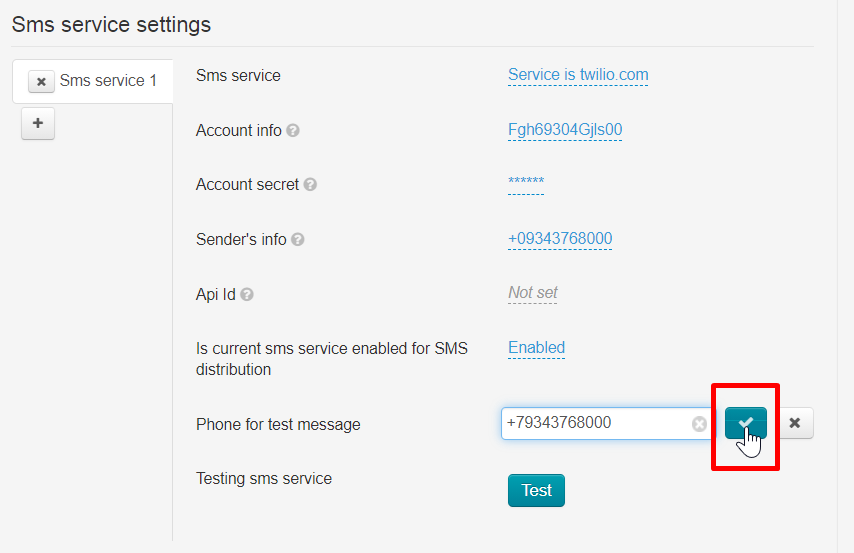
Add your own phone number to test service work.
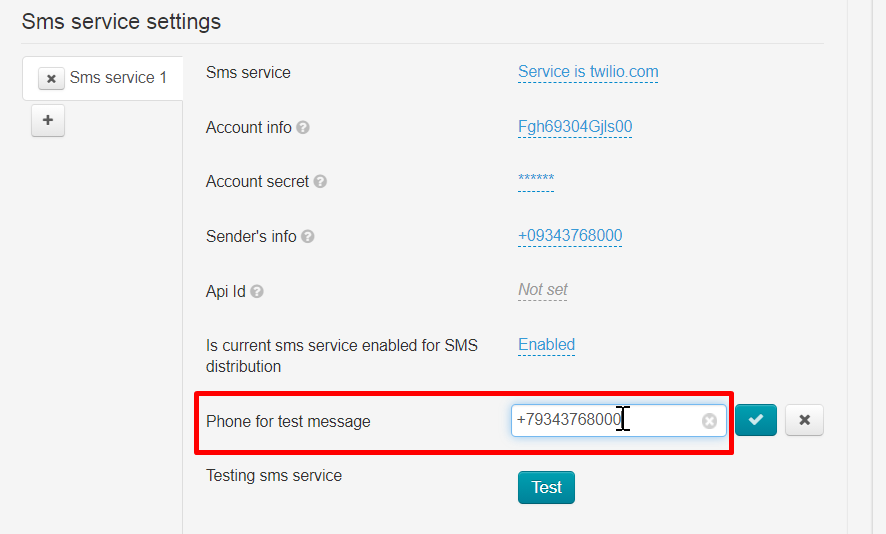
Click "Save" button.
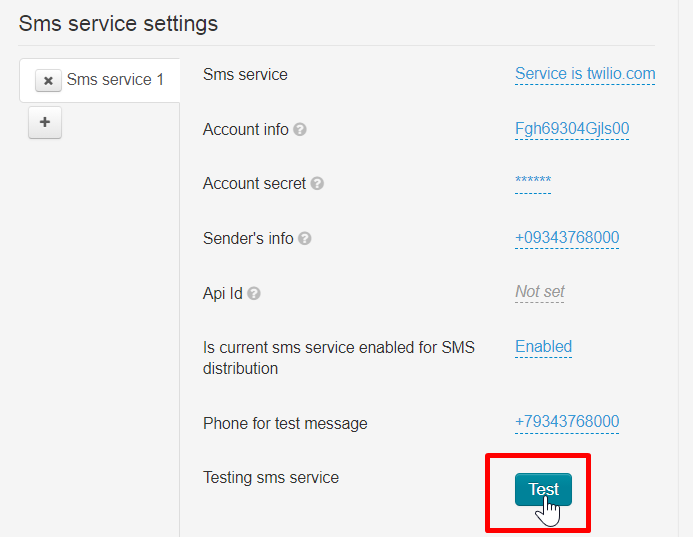
Then click “Test” button and wait for a message to specified number.
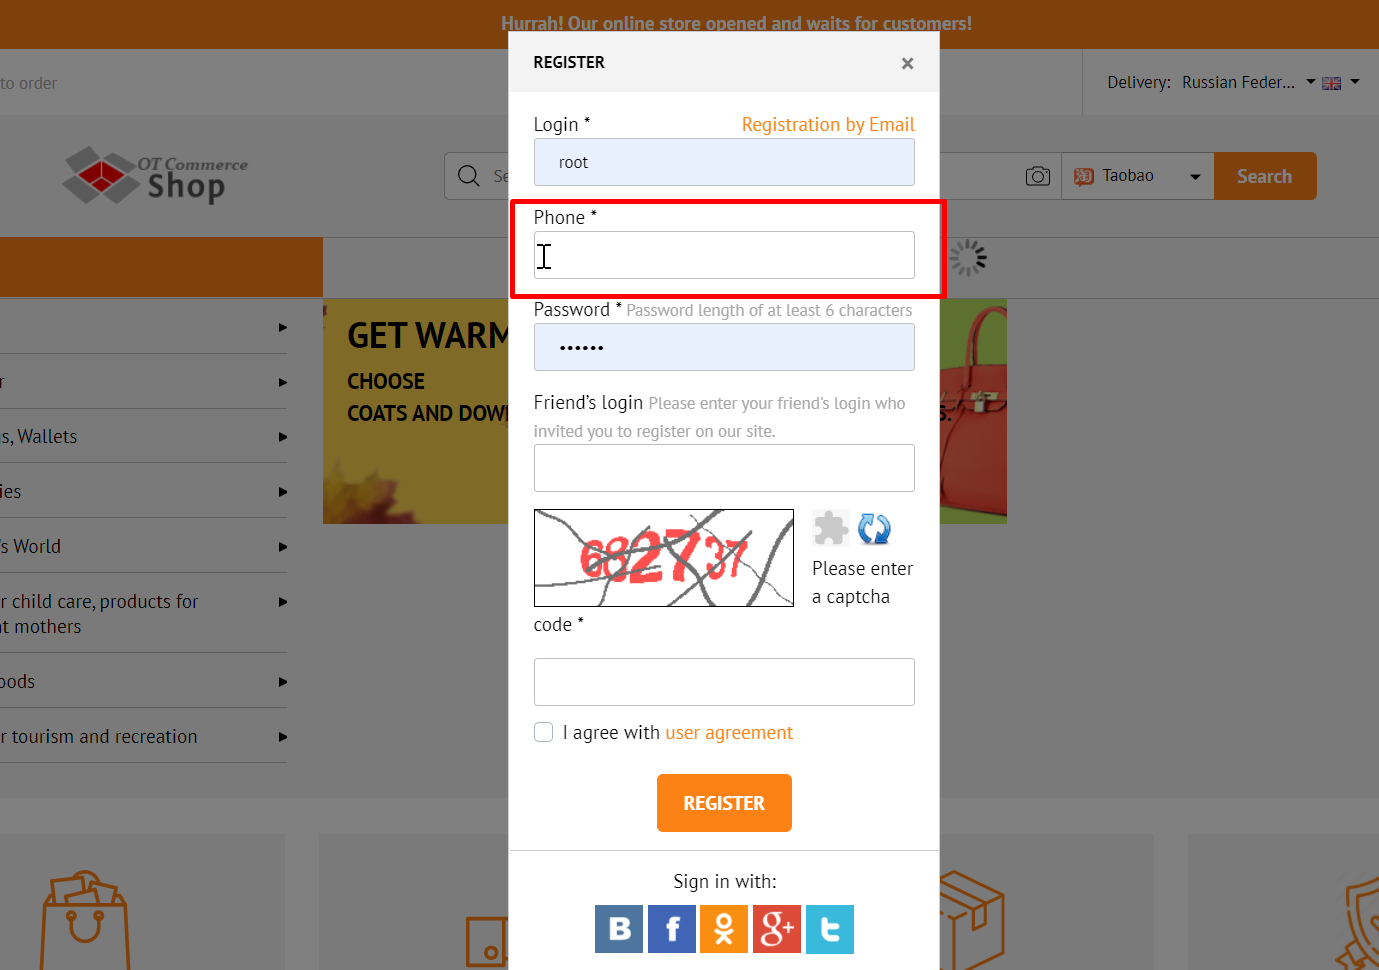
Enable registration by SMS
Your customers indicate their phone number where confirmation code will be sent. The phone number, like other data about the buyer, will be indicated in his profile.
Open "Users → Settings” section
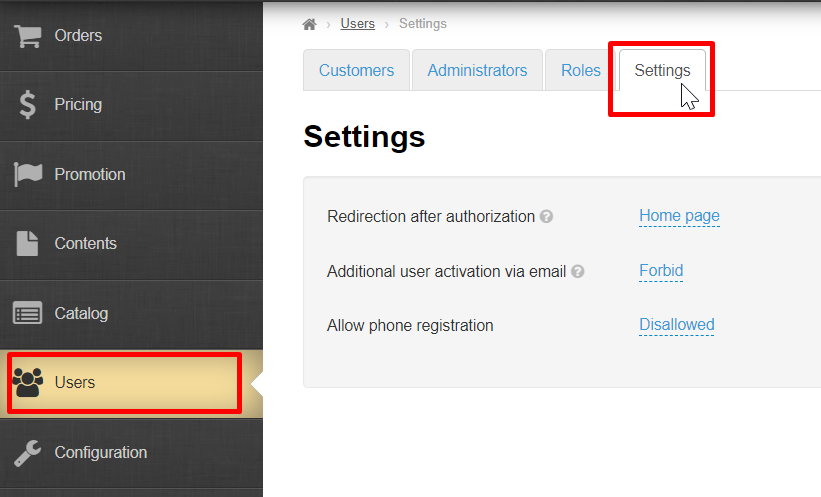
Find "Allow phone registration" field.
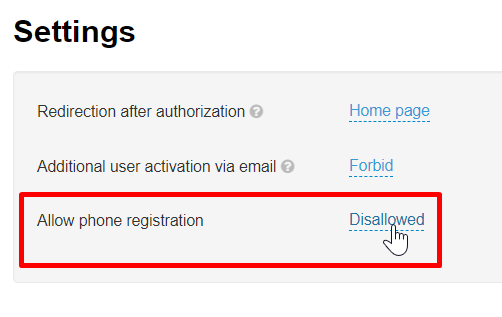
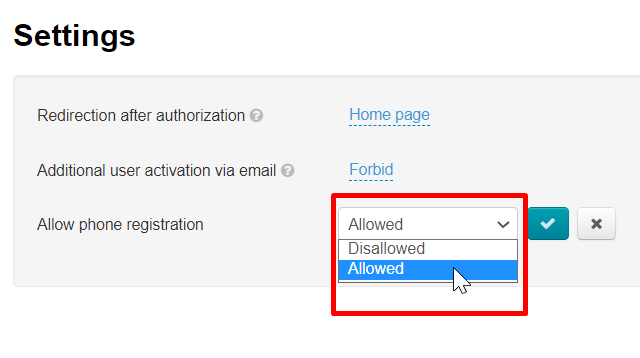
Click "Disallowed" and select "Allowed" in drop-down menu.
Click "Save" button.
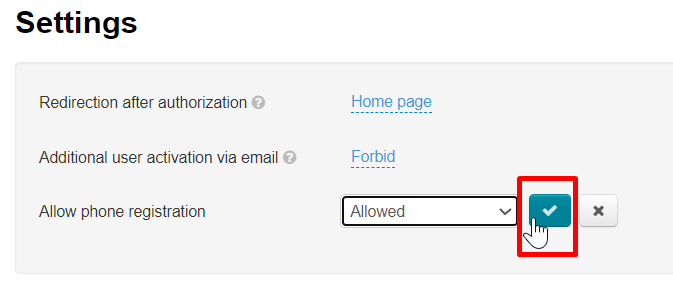
Now everyone who registers on your site will use the phone to register.
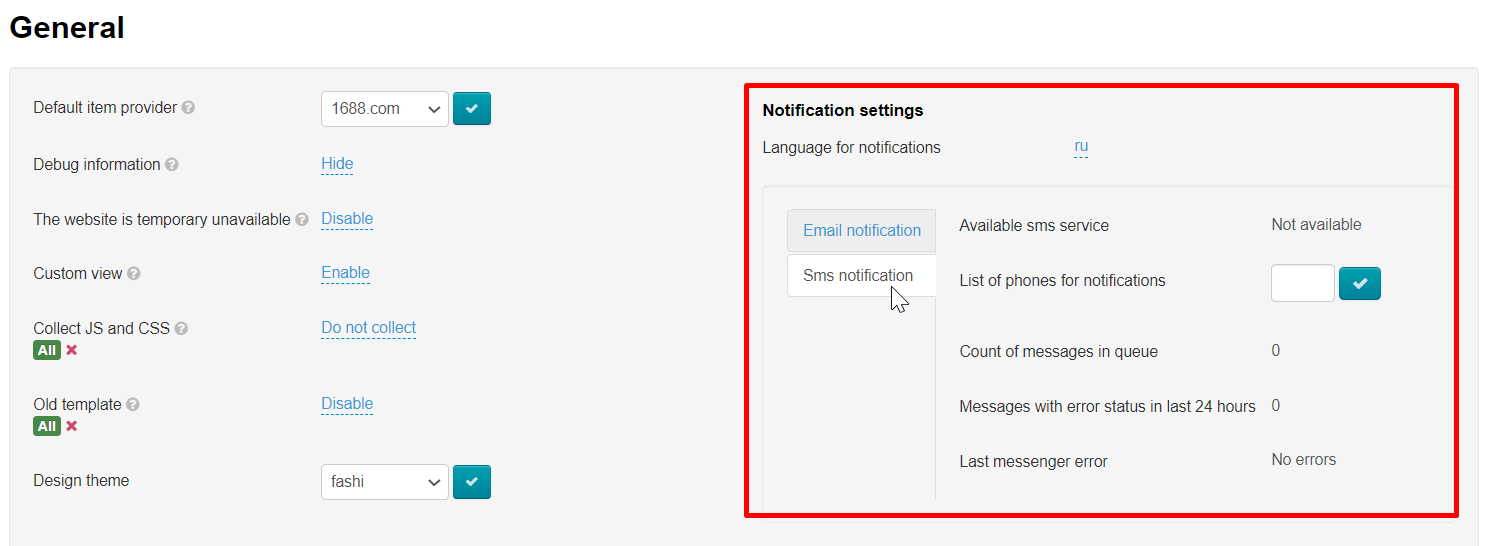
Enable SMS notifications
Notifications from admin panel, users or website will be sent to specified phone numbers.
Open “Configuration → System → General” section in admin panel
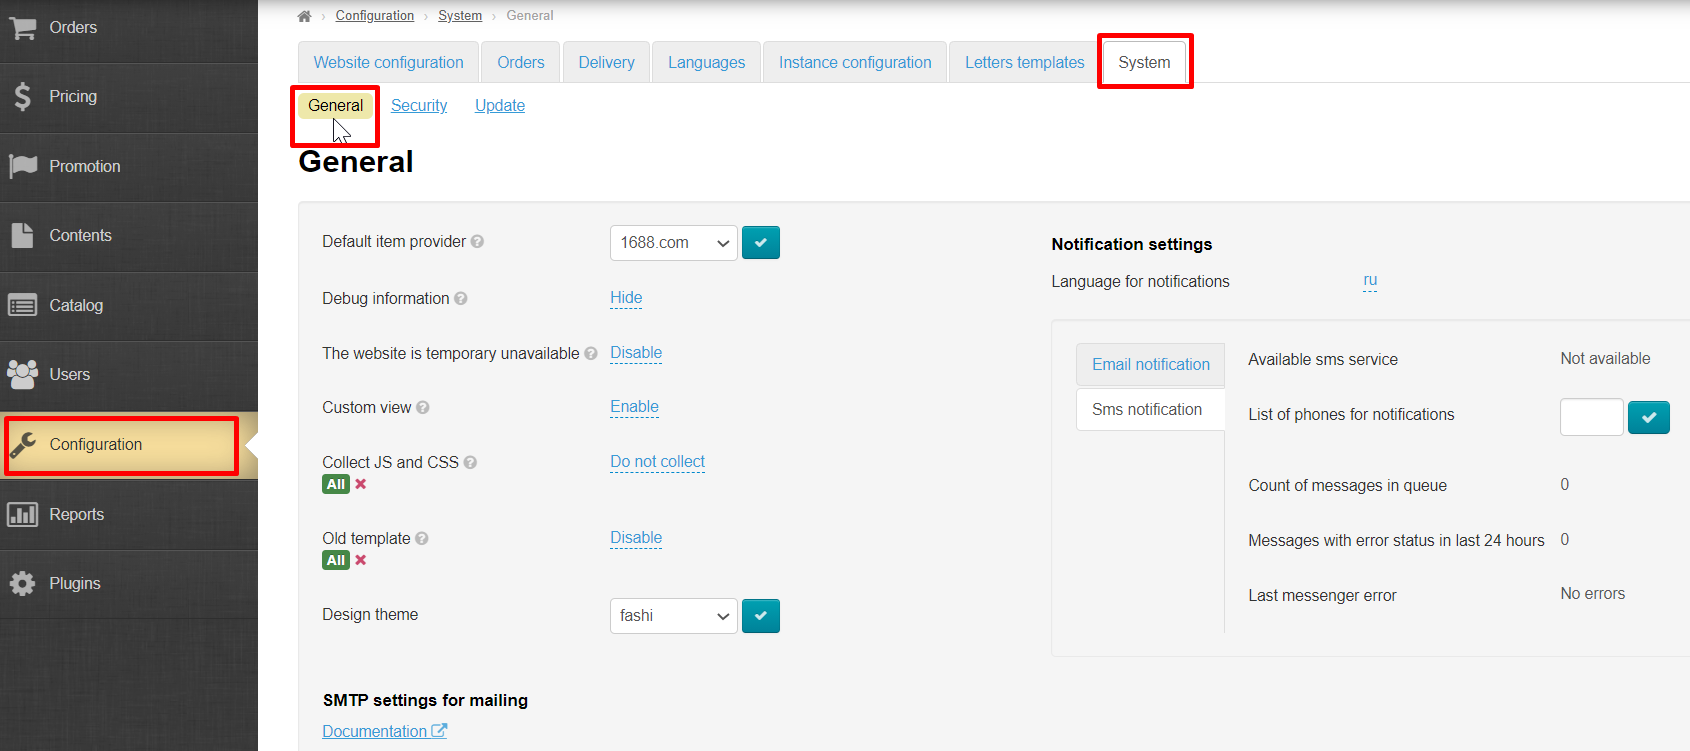
Find "Notification settings" block on the right and click "SMS notifications" tab
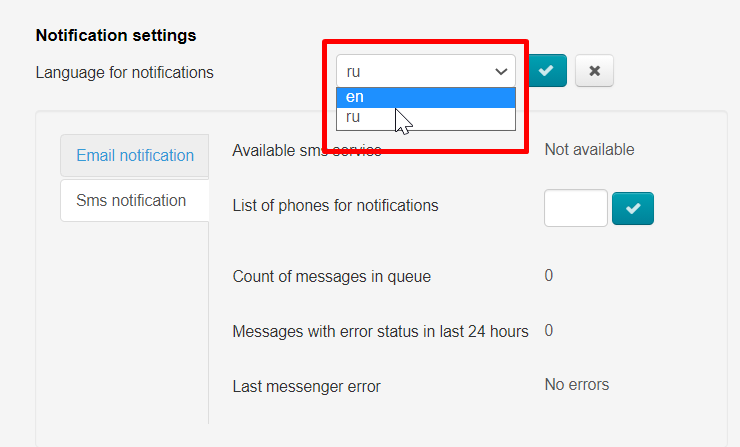
It's possible to select Russian or English languages for notifications.
There is only one setting here: phone list. Click “List of phones for notifications” field.
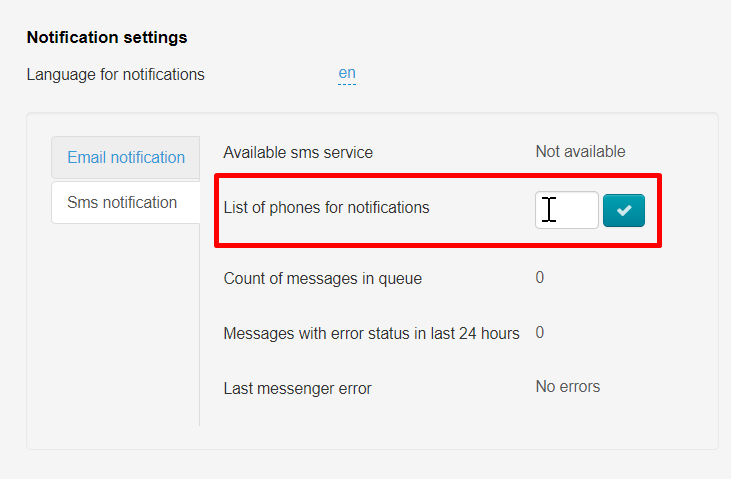
Indicate phone numbers with the country code. Each number should be entered on a new line (ENTER button).
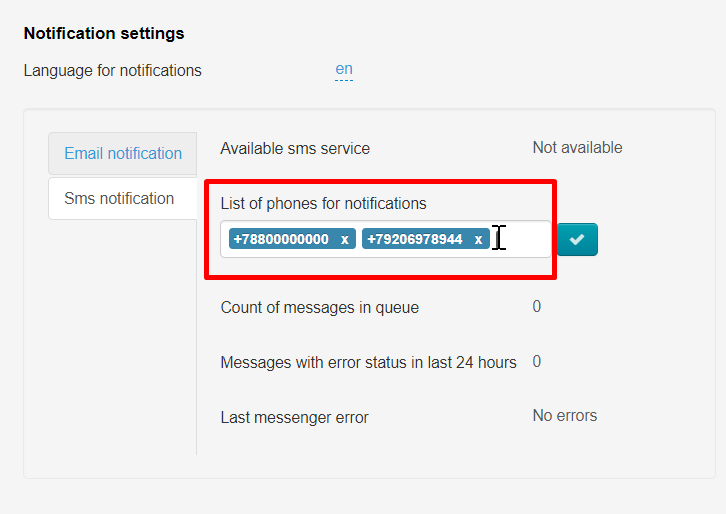
Click "Save" button
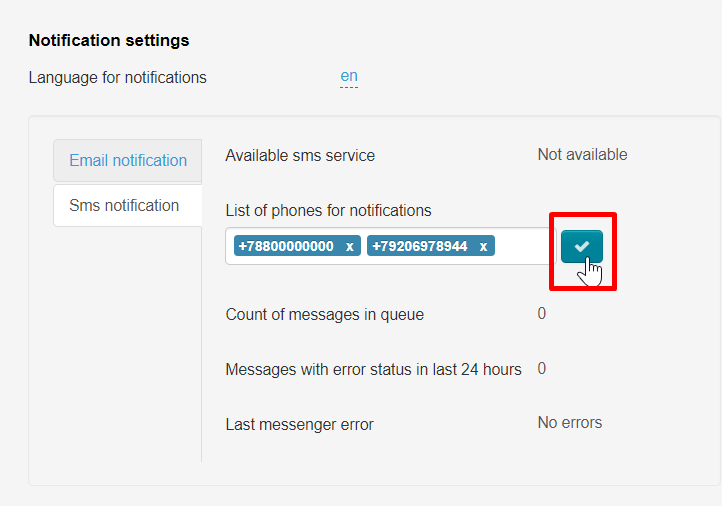
It's possible to edit the list of phone numbers at any time. Click cross to the right of the number and "Save" button to delete irrelevant phone numbers.

Setting up SMS service templates
Important!
1 SMS in Latin can hold up to 160 characters.
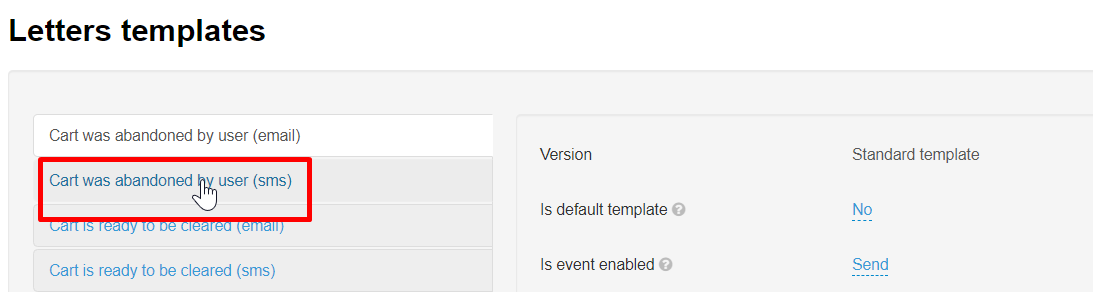
Open Configuration → Letters templates section
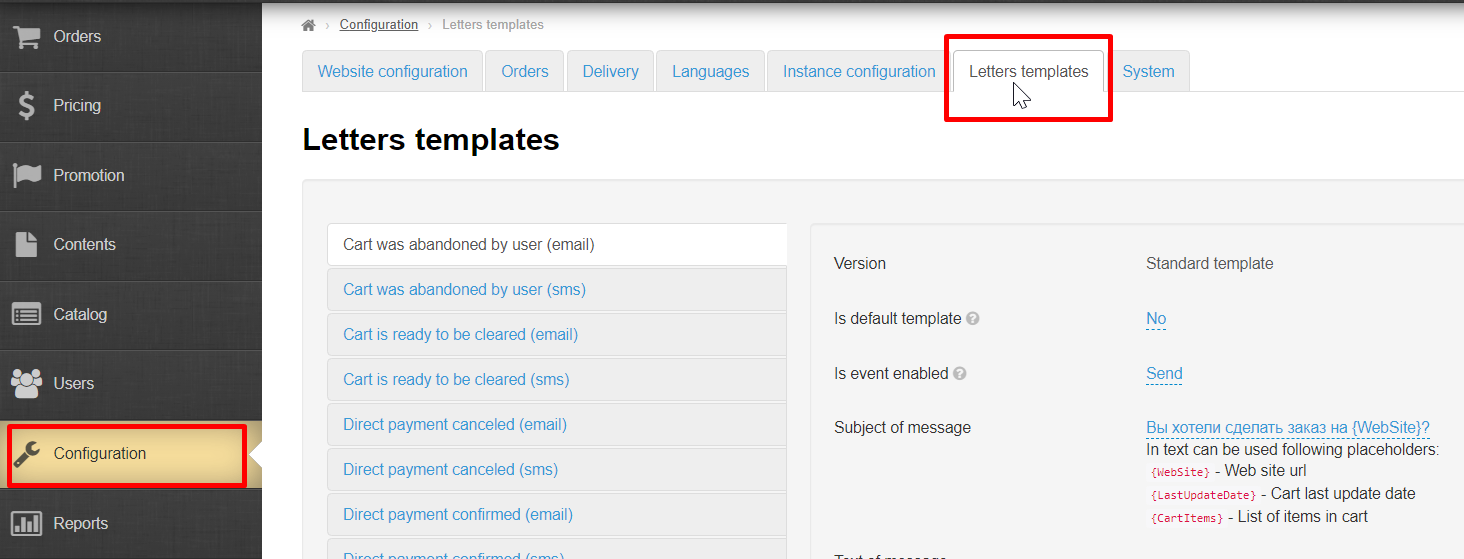
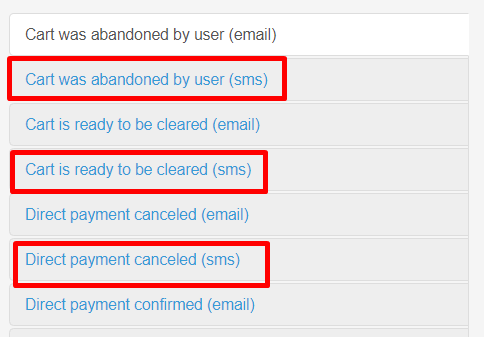
We are interested in those templates that have (SMS) at the end
You must enable the use of SMS services if you do not have such templates (scroll down “Configuration → System → General” and select “Enabled”)
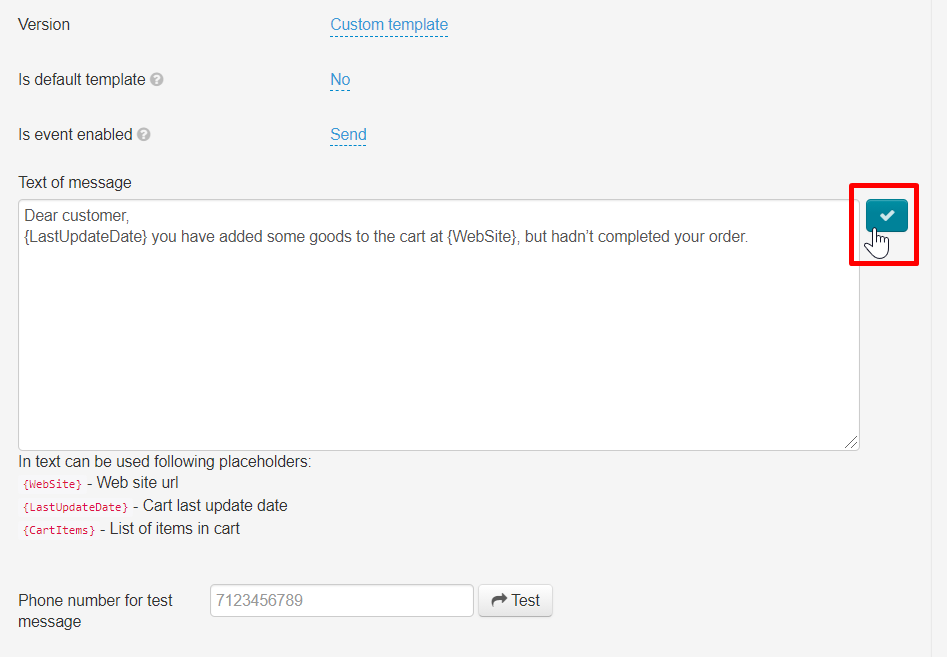
Click necessary template to edit SMS template.
Interface for editing template will open
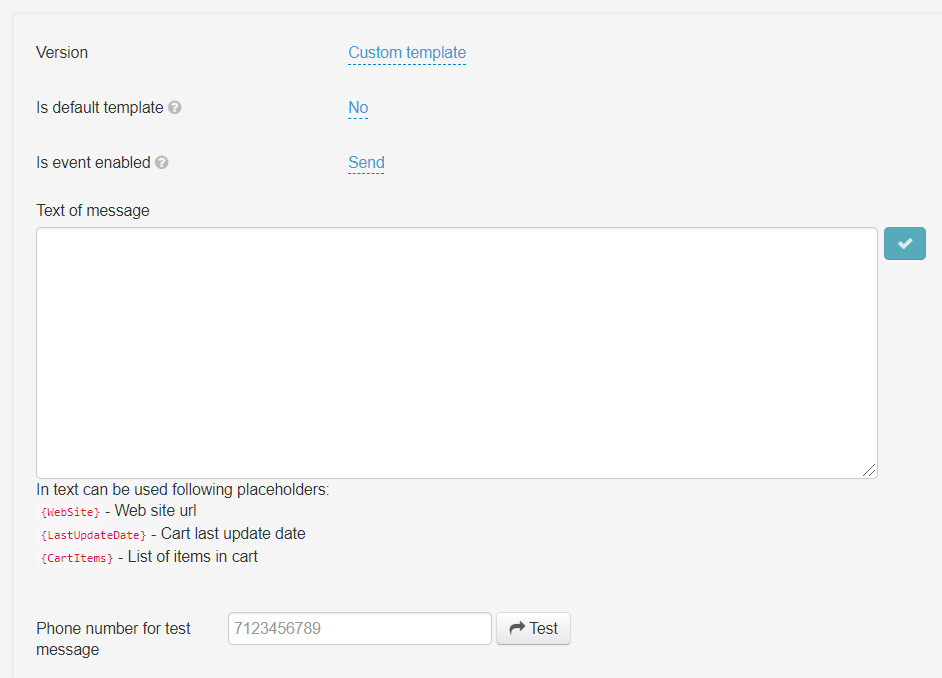
It's important to remember that 1 SMS in Latin can hold up to 160 characters.
There are also auxiliary constructs. They are marked red and inserted into the text of SMS when clicked.
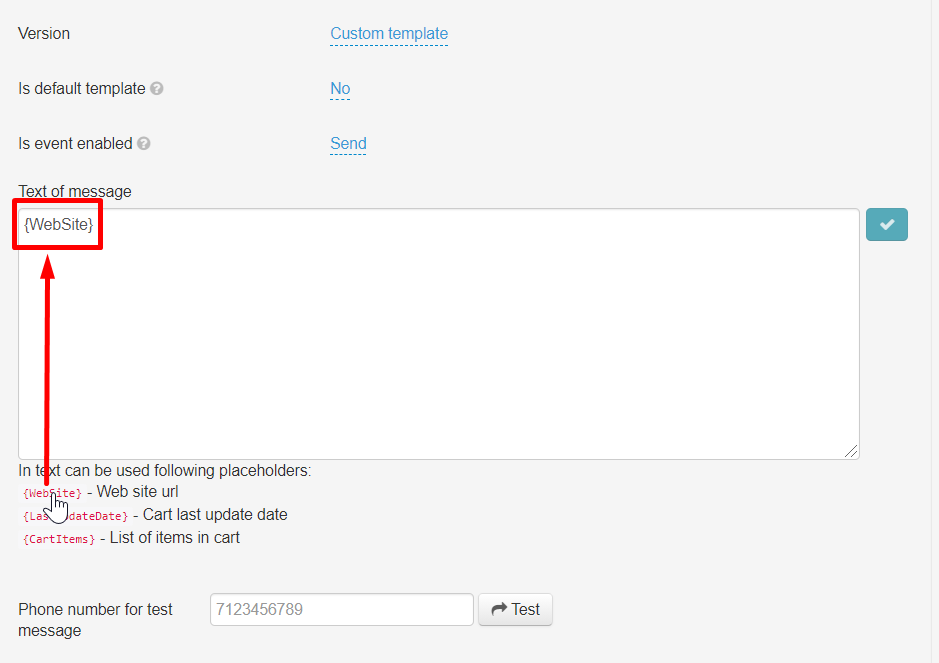
This helps to make messages versatile and they are configured to specific recipient.
Write message text and save it clicking "Save" button
It's necessary to customize all message templates in the same way.
We recommend to plan SMS text in text editors for convenience where characters are counted.
Add / edit customer's phone number
You can add or edit customer's phone number if necessary.
In addition, customer can personally add or change phone number through Personal Account.
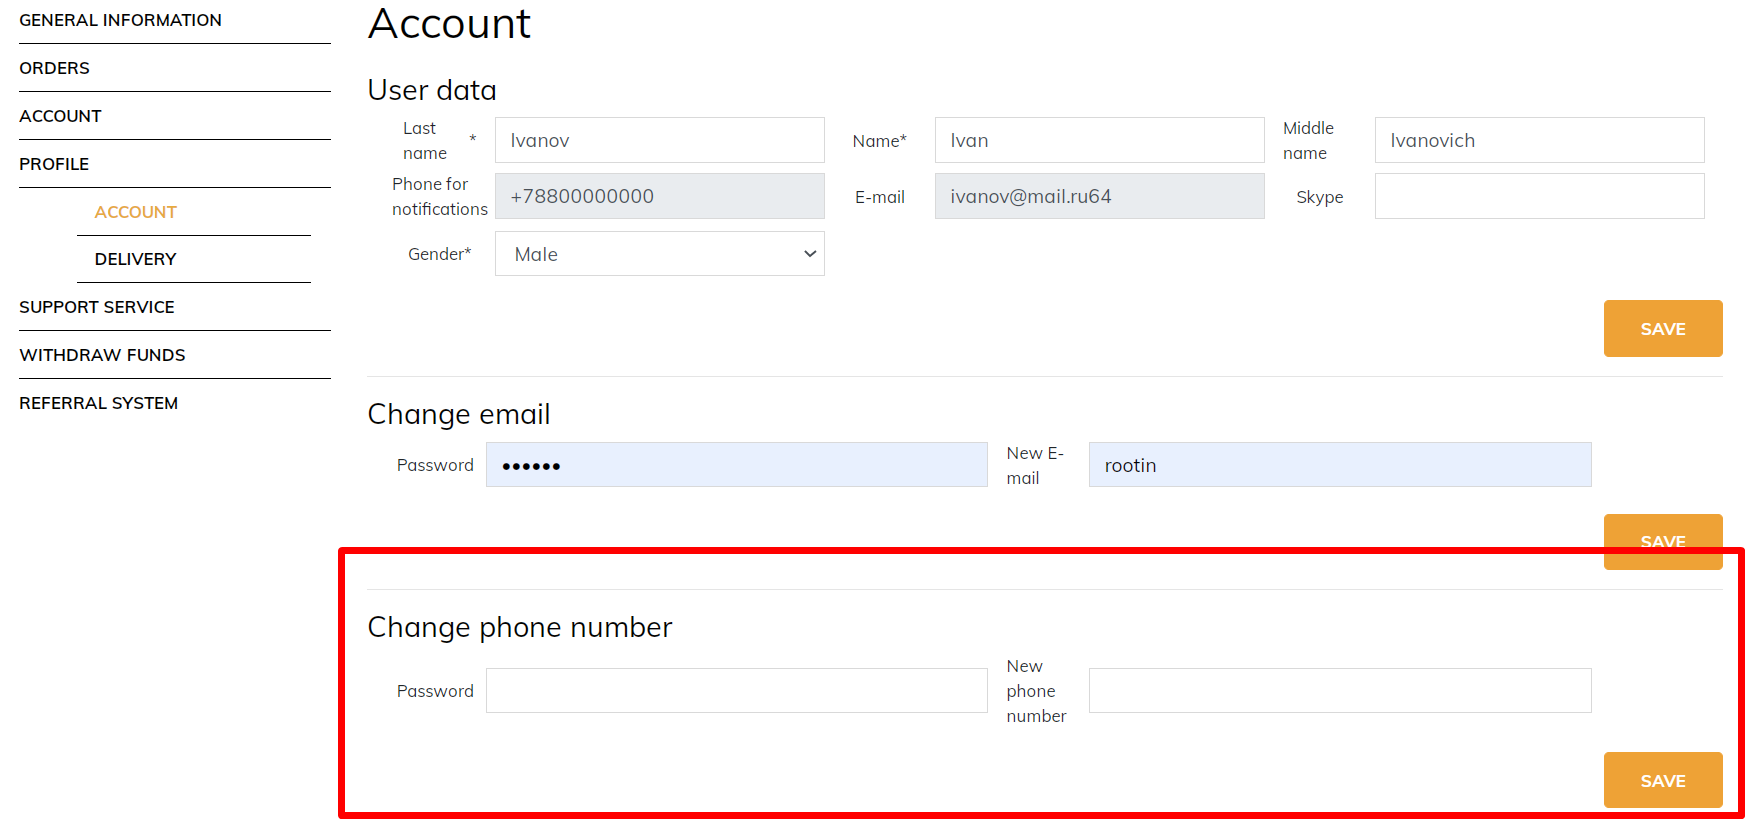
Customer will receive SMS for confirmation after changing or adding the phone number.
Go to "Users → Customers" to add customer's phone number through the admin panel
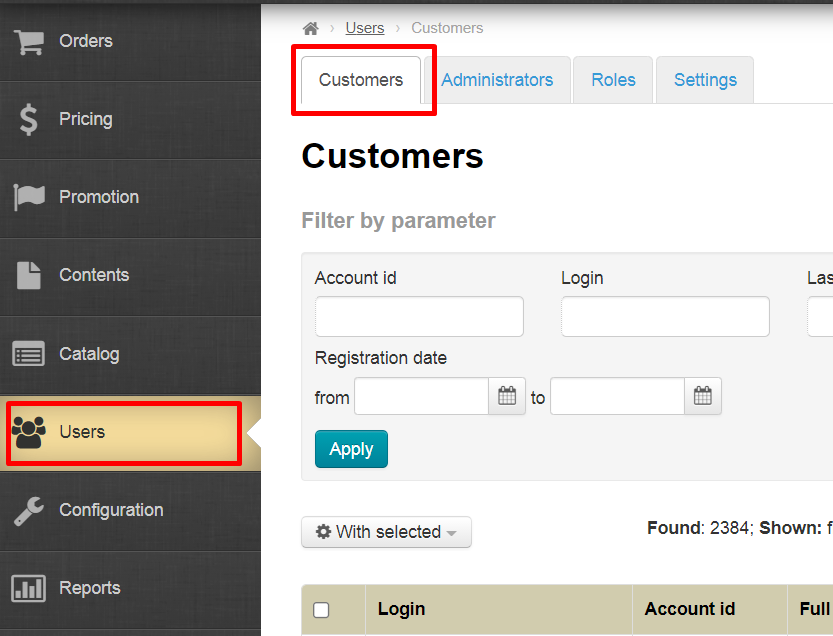
Select user who needs to add or edit the phone number.
Click gear button in “Actions” column and select “Edit” button from the list.
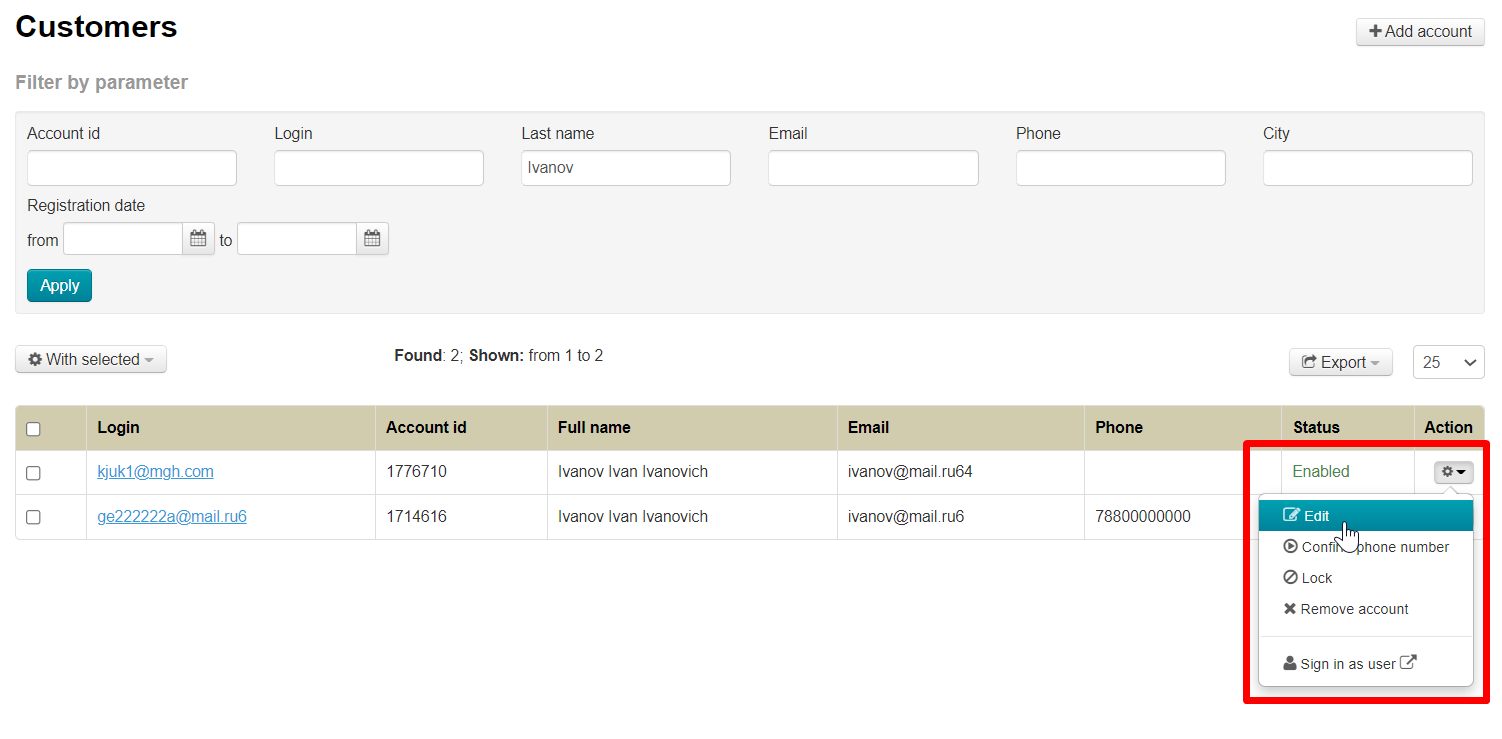
Add customer's phone number (or edit) in the "Phone" field.

Save changes.

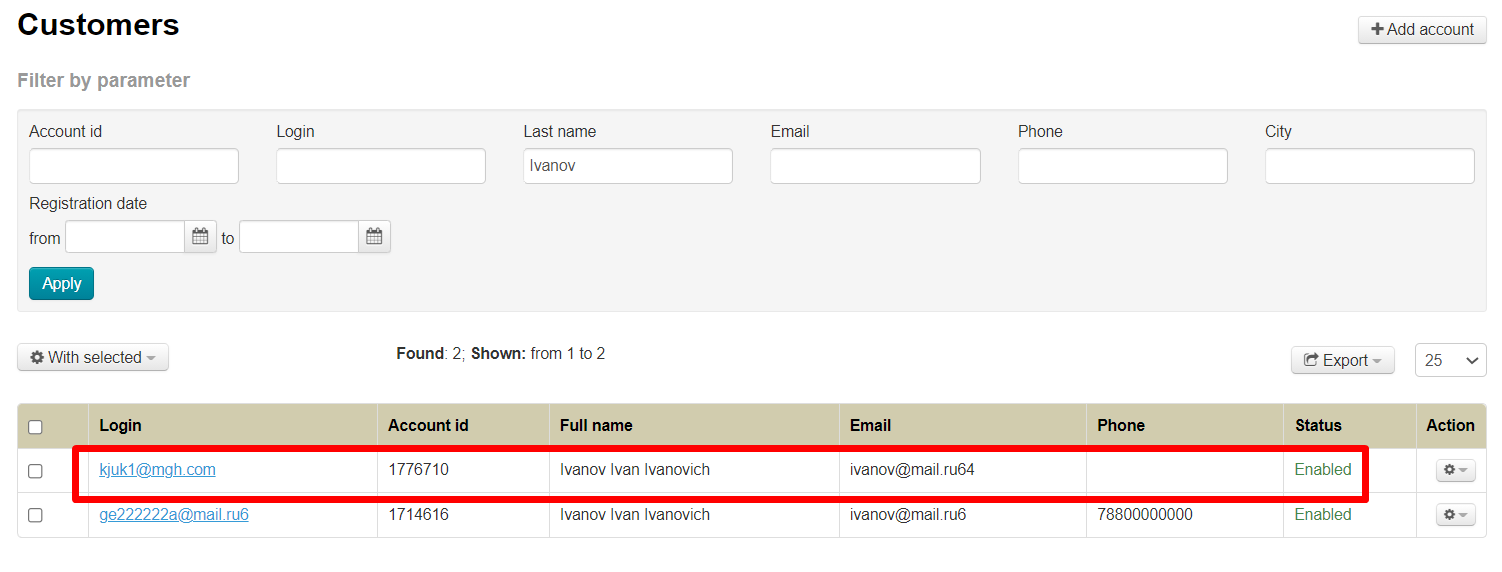
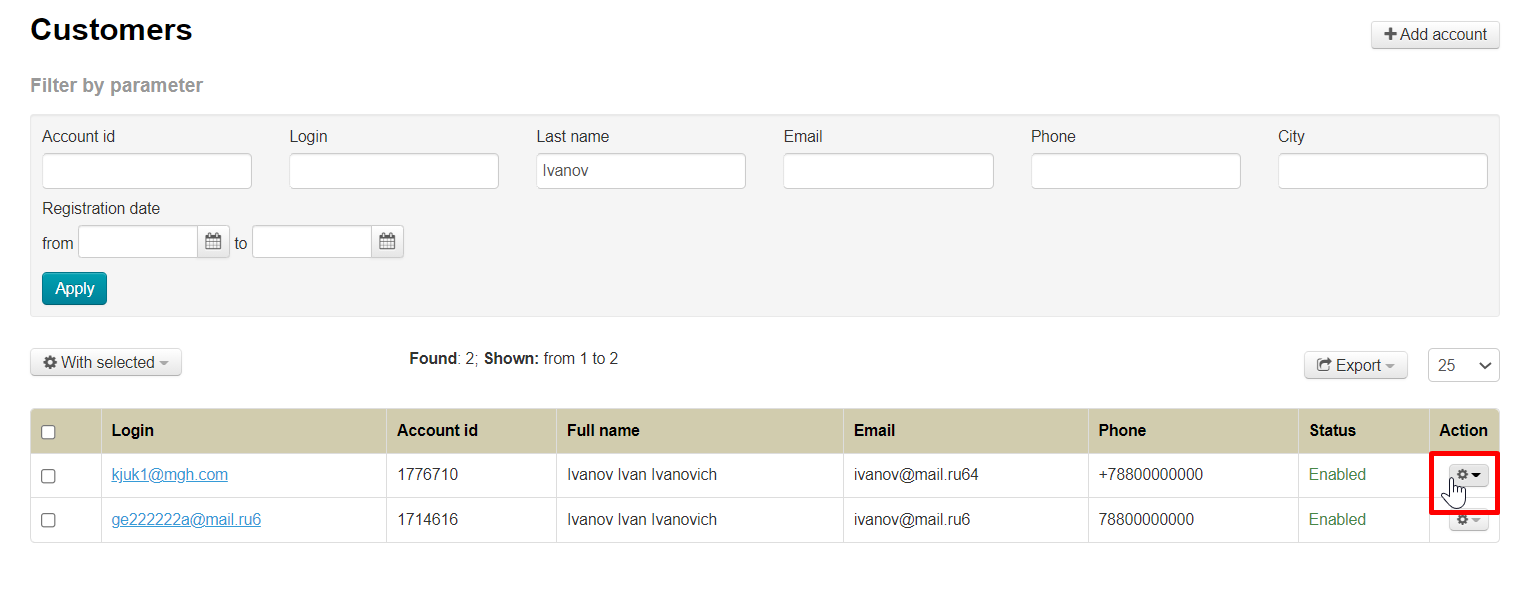
Find this customer again and click gear button in "Actions" column
Select "Confirm phone number"
Customer will receive SMS notifications after confirming the number. No action from customer is required from the buyer himself in this case.
Confirm customer's phone number
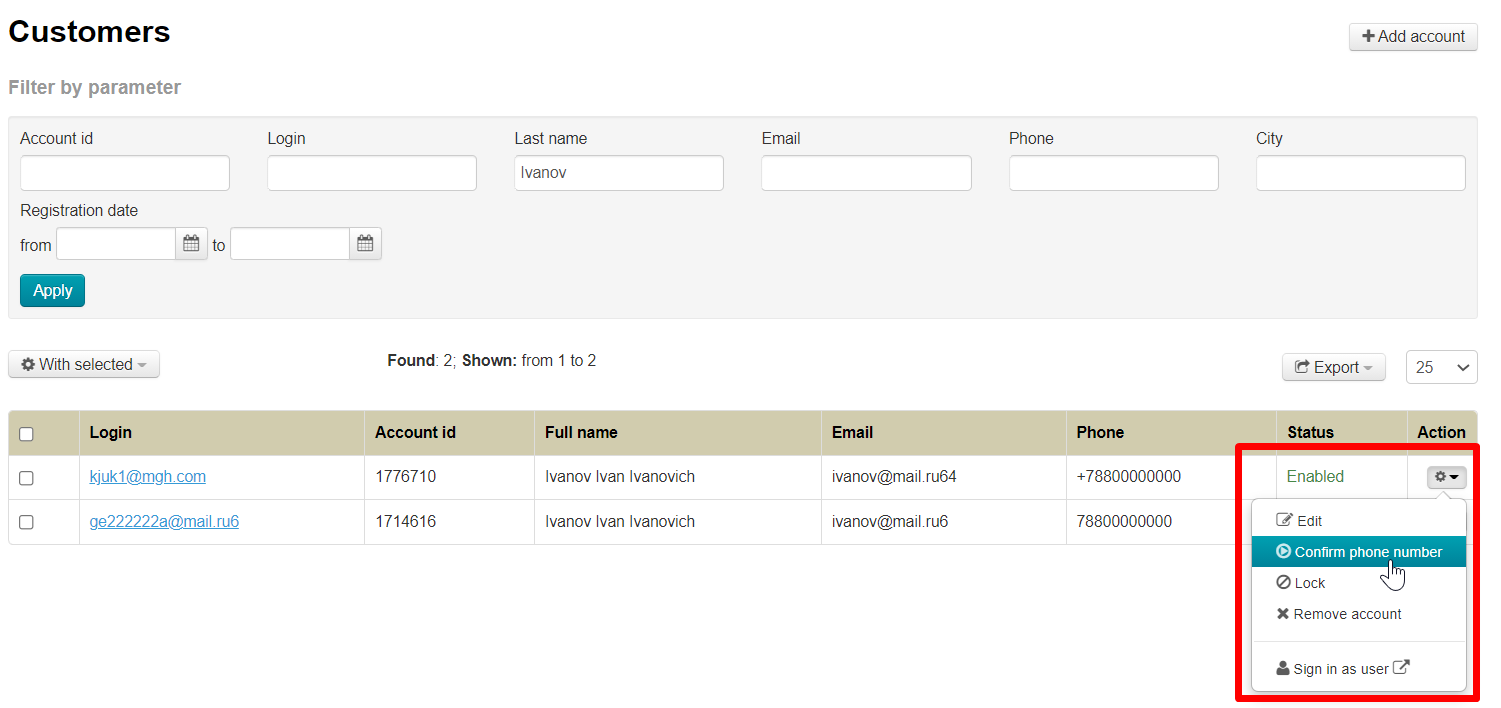
Go to "Users → Customers" section to confirm customer's phone number in admin panel
Select user whose phone number needs to be confirmed.
Click gear button in "Actions" column
Select "Confirm phone number"
Customer will receive SMS notifications after confirming the number. No action from customer is required from the buyer himself in this case.
Custom sms service
For custom sms service implementation you need:
1. Account info - "For custom, you need to specify send message url."
2. Account secret - "For custom, you need to specify secret for send message."