
If you want to modify the look and feel of your Sellfree you need to navigate to the “Configuration > Website Architecture” section in the admin area.

Select what you want to change and go ahead!
Website Header
This subsection focuses on how to customize the appearance of the website header.

Logo
The recommended size is 300 px in width by 100 px in height.
The recommended image format is png with a transparent background.
Allowed image formats are gif, jpg.
Click on the Change button.
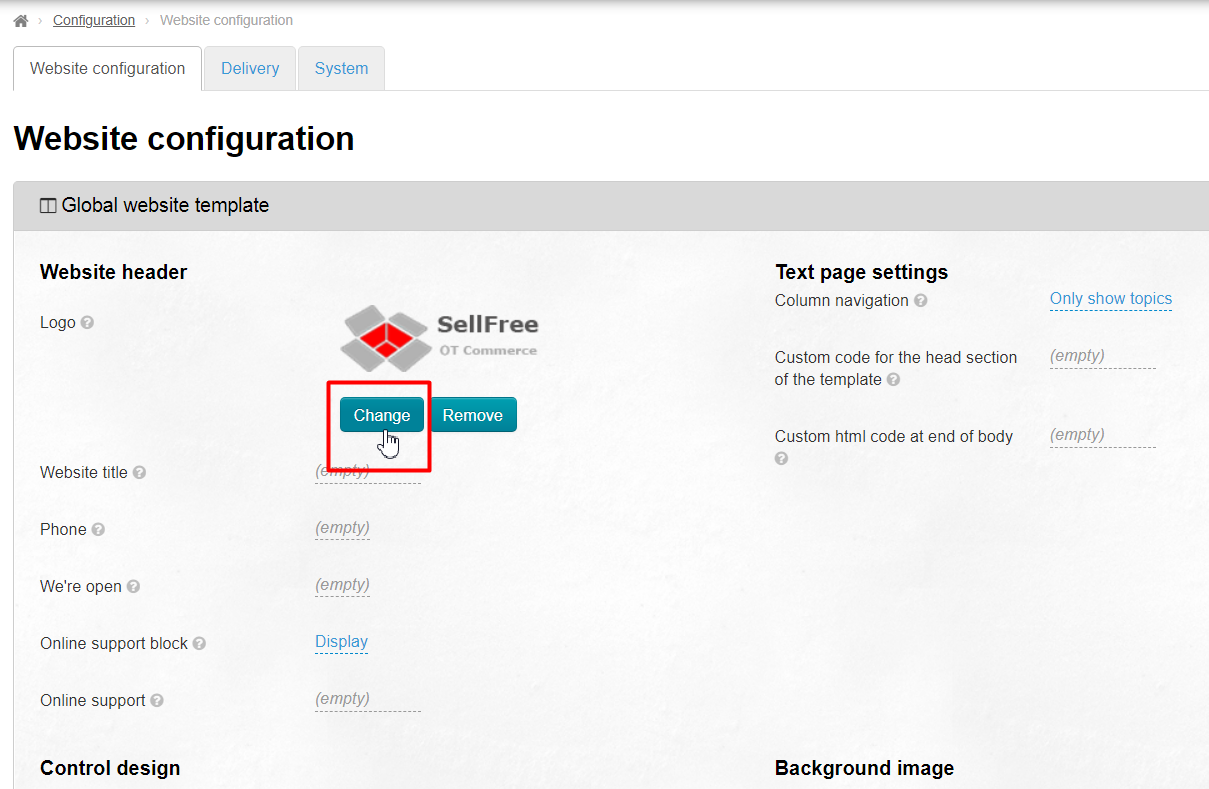
Select the desired logo image on your computer. The logo will be saved automatically.
The logo you have selected will appear on the website immediately after saving.
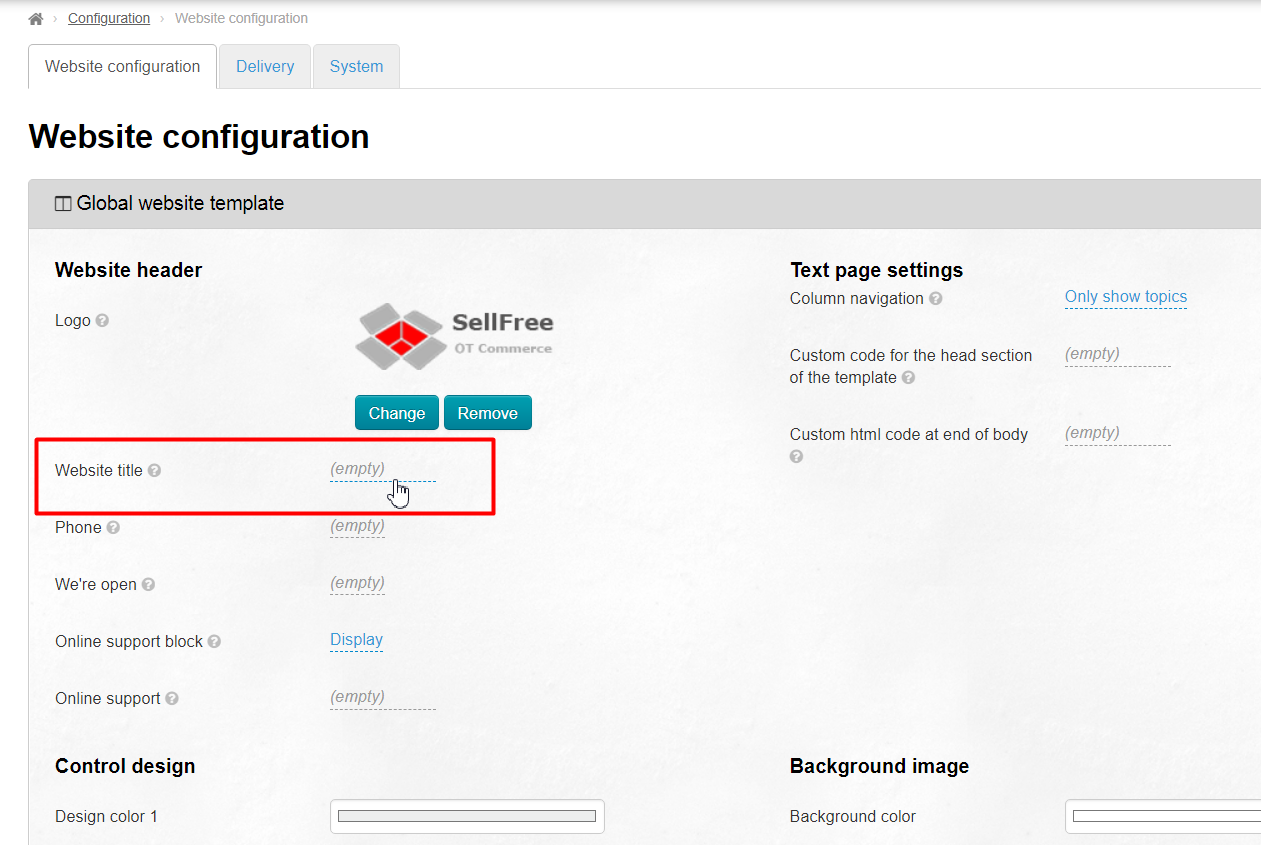
Website Title
This is where we type a text to be displayed in the website header.
Click on the dashed underline.
In the text area that appears type the website header text (in our example you can see “Sellfree is your online store to buy from China)” (change this slogan to the one you need).
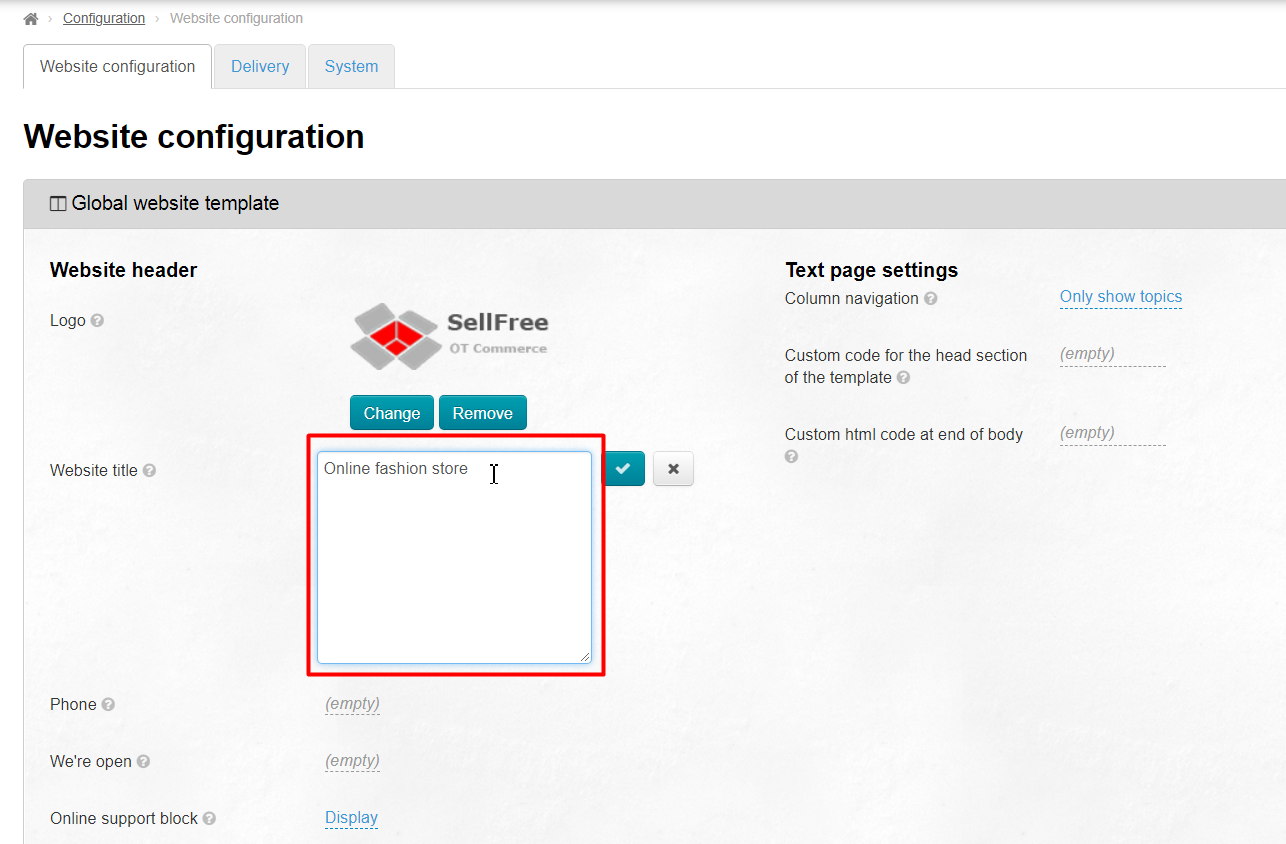
Save the text by clicking the checkmark button.
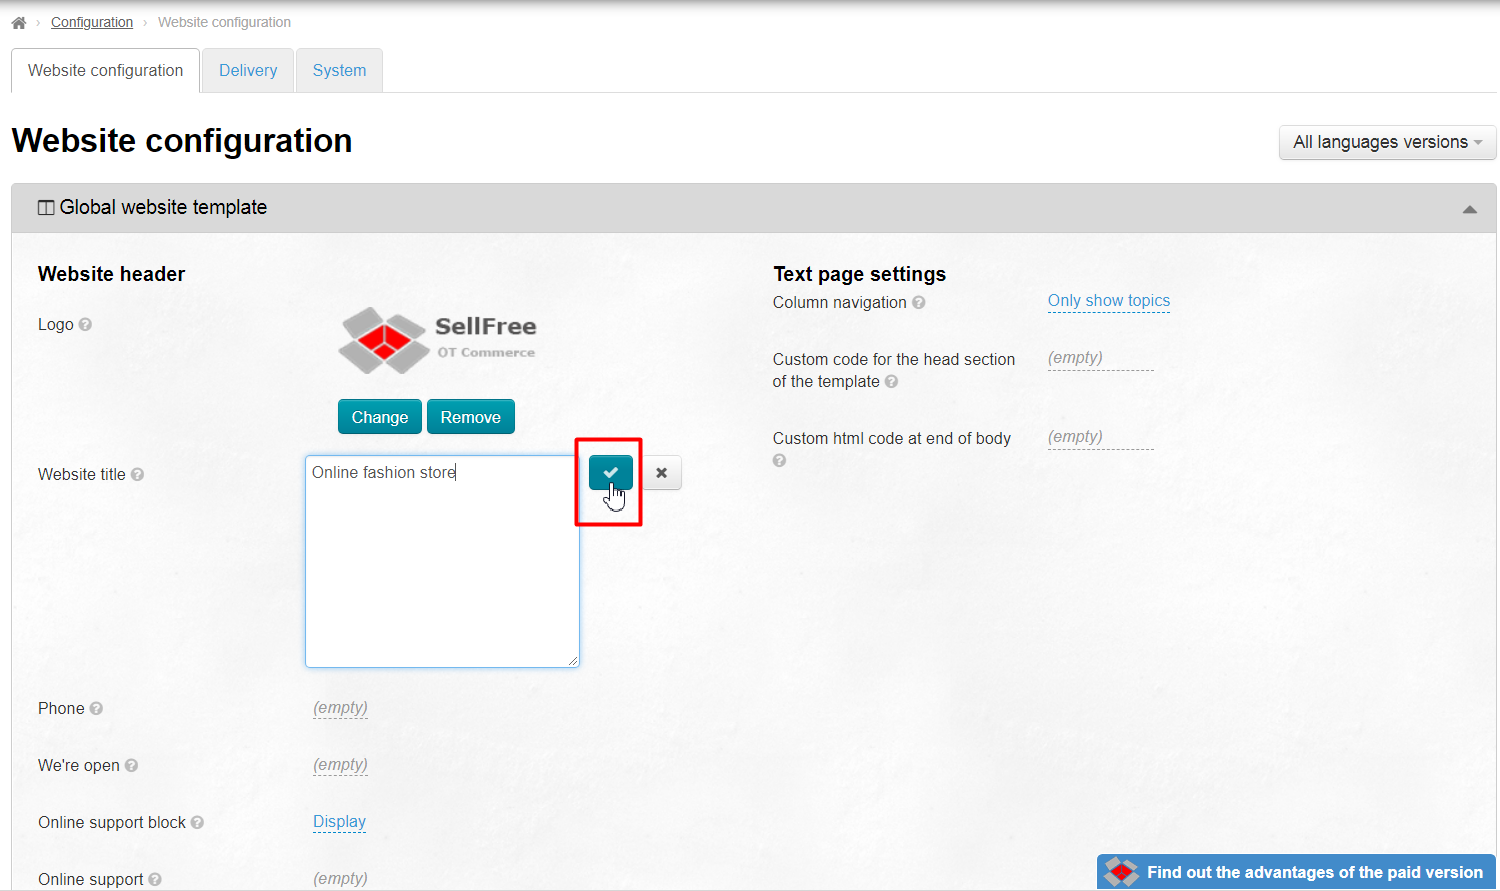
The text will appear on the website immediately after saving.
Telephone
Click on the dashed underline.

In the subsequent textbox enter your contact telephone number (in our example you can see “8-800-000-000”).

Save the telephone number by clicking on the checkmark button.

The telephone number will appear on the website immediately after saving.
Opening Hours
This is where you can specify the hours of operation, order processing and call answering.
Click on the dashed underline.

In the field that appears enter the hours of operation (in our example one can see “We’re open: 8 a.m. – 9 p.m.”

Save the text by clicking on the checkmark button.

The hours of operation will appear on the website immediately after saving.
Online Support Section
In case you have the online support service available, we recommend that you enable “Online support section” in the website’s header. It is used in conjunction with the “Online support” option.
Click on the dashed underline.

Click the down arrow and select the desired option (“Display” or “Hide”).

Save the settings by clicking on the checkmark button.

The online chat will appear on the website immediately after saving.
Online Support
Used in conjunction with the “Online support” setting.
Currently there are a lot of services which allow you to set up an online chat on your website. For its operation a special code is provided to be placed on your website. There is an area in the right-hand corner of the header for this purpose (as you can see above).
With the special code at hand you need to:
Click on the dashed line.

In the text area that appears paste the online chat code.

Save the settings by clicking the checkmark button.

Web Pages Customization
One can add web pages (for example, “About us” or “FAQ”) to the website using the instructions given in the Content section.

Sidebar Navigation
This is where you can select a display mode of the navigation menu on the website’s web pages. By default the navigation menu is displayed on the left. There are three display modes:
1. Show all pages | 2. Only show topics | 3. Hide left menu |
 |  |  |
To select a menu display mode one should do the following:
Click on the dashed underline.

Select a display mode from the drop-down menu by clicking the down arrow.

Save the settings by clicking on the checkmark button.

Your Code in the Head and Body Section of Website Template
Sometimes there is a need to place a code in the head and body section of website template (counters, Yandex or Google statistics and other services). This is what this block is meant for. By default it is empty.
To add a code one should do the following:

Click on the dashed underline.

In the text area that appears paste a html-code.

Save the settings by clicking on the checkmark button.

Managing your e-store design
In this section we will show you how to tailor your Sellfree to fit your taste and business objectives. Below are given the settings used for changing the colors on the website.


Changing a color
If you want to change the color of any section on your website you need to click on a color.

This will bring up a window where you can select a desired color from the color palette.

You can also choose a color from the color box on the right hand side. Once the color (on the right-hand side) is selected please click the “Add to custom colors“ button to make it appear in the custom colors palette.

After the color has been selected you need to click the “OK” button.

Once you’ve changed all the colors you want you should click the “Save” button to make them visible on the website.

Setting a Website Background Image or Color
In addition, you can set a website background image or color. To do this, please refer to the section on the right-hand side.
The background color is set just like setting colors for sections within your website (see above).
Next, find out how to set a background image. Click on the “Change” button.

This will bring up a window that allows you to select a background image. Please make your choice. The background image will be saved automatically.

Next, you need to choose whether the background image should be fixed or it follows you when you scroll. The table below shows how each setting looks like. A small image showing a flower is taken as an example.
Creating a repeating background image

Setting | How it looks like on the website |
|---|---|
No Repeat |
|
Repeat |
|
Horizontal repeat |
|
Vertical repeat |
|


Position of a background image
Sets the starting position of the background image.

Let’s take the “Tile Vertically” setting as an example.
Setting | How it looks like on the website |
|---|---|
Center |
|
Left |
|
Right |
|


Configuring a static or scrolling position for a background image
The “fixed” background image always stays fixed in the position you selected, so the image doesn't move when you scroll through your page.

In the example below we will show a background image positioned on the left and how it will look like on the page.
Setting | Top of the page | Bottom of the page |
|---|---|---|
Fixed (Look after the position of a flower at top left) |
|
|
Scroll (Look after the position of a flower at top left) |
|
|


All modifications need to be saved. So, make sure that you click on the “Save” button after you have completed making your changes.

In case the modifications don’t appear on the website (after a page has been refreshed) you should clear your browser’s cache by pressing Ctrl + F5.
Your CSS Сode (for experienced users)
If you have CSS experience or you know somebody who is a professional in this area the design of your website can also be modified.
In such a case, the css-file content should be copied and pasted into the appropriate section.

Be sure to save modifications by clicking the “Save” button.
