
Description
WebView is a specific format for mobile applications. Website will be displayed exactly as in mobile version but without the ability to “walk” through the browser tabs and to other sites (your buyer will not accidentally go to other tabs).
In addition, this is an extended mobile version of your site which allows you, for example, to add push notifications about promotions and sales.IMPORTANT
Limitation: new applications will be available only for adaptive templates - website has a mobile version (It is Elastic template in OT Box)!
An example of website design in WebView application |  |  |
|---|
Example of push-notification

Setup for App Store and Google Play
Project will be created in Firebase. A developer account is required.
To purchase Google Play and Apple (iOS) developer account for legal entity, you will need to obtain a D-U-N-S number — an international identifier for legal entities. Information how to obtain D-U-N-S number can be found on the Internet (for example, https://www.dnb.com/duns/get-a-duns.html).
Google Play developer account
Follow the link https://play.google.com/console/u/0/developers
Be sure to create a new account for work and business. Do not use a personal account.
Next, fill in all the information and enable two-step authentication when the account is created.
Create an account in Google Play Console. Select the type of organization and click "next":

Specify developer name and company name:

Link a payment profile:
You will need to create a payment profile from the very beginning. DUNS number will be required — an international company identifier in Dun & Bradstreet database. Apple uses it to confirm that your company exists:
The application is considered from 7 to 30 days. Register at https://support.dnb.com/?CUST=APPLEDEV
You can read more here https://www.dnb.com/duns/get-a-duns.html
Once you get DUNS, enter it and Google will notify you that the payment profile has been created.
Enter required information and click "Next" everywhere. Tell about your experience when you reach "About You" screen. This is a required field.
Click "Create account and pay" after completing a few more steps:
Now you need to pay for account.
App Store developer account
Information for account registration:
- Full name of the person responsible for registration;
Developer account name;
Developer phone number (strictly a corporate number, to have access in case the employee is fired);
- Developer email address (required on developer's website domain - this is necessary to confirm registration legitimacy and to simplify access restoration if someone suddenly contacts you from another email with a similar domain);
- Full name of the contact person for communication with Apple;
- Phone number of the contact person for communication with Apple;
Organization credentials (in English);
Website address;
Number of employees in the organization;
DUNS number.
NOTE! Account name (Apple ID) must match the data you fill in when pay for the developer account (for example bank card).
The account is registered up to 30 days.
Create Apple ID
Create new Apple ID. We recommend doing this from iPhone supporting the latest iOS updates (if you plan to pay from your mobile phone balance);
- Use corporate contacts of company employee for whom you plan to register an Apple ID (email on company website domain and phone number). Corporate contacts will retain the ability to restore account access if the responsible employee changes;
- Upon completion of registration, please indicate the phone number whose balance will be used for payment.
Please provide only a current and accessible phone number. With its help, you will always be able to top up your balance, buy or renew a license without the help of third parties.
Get DUNS number if you don't have one
DUNS number will be required to register Apple developer account as a legal entity. This is an international company identifier in Dun & Bradstreet database. Apple uses it to confirm that your company exists.
The application is considered from 7 to 30 days. Register at https://support.dnb.com/?CUST=APPLEDEV
You can read more here https://www.dnb.com/duns/get-a-duns.html
Register developer account
Download Apple Developer after new Apple ID registration and select "Account" tab. "Enroll Now" button will be active in APPLE DEVELOPER PROGRAM block if registration is correct. Otherwise "Disable";
Clicking "Enroll Now" button and go to company data entry mode. Company name must be specified in Latin, in strict accordance with the company name assigned during the creation of DUNS, otherwise an error will be generated;
- Similar to registering with Google, enter client’s previously prepared data on responsible person and contacts;
- Confirm authority by indicating:
a contact person who can confirm the authority of the first one;
email and phone number of the contact person so that Apple can contact him to confirm the responsible person authority.
After entering, you will receive a letter to your email stating that Apple accepted your application and will conduct a review soon. Later, you will receive a letter stating that the review is complete if everything is OK.
After that you will be asked to complete registration and pay for verification. After clicking "Purchase" button payment will be made from the phone specified when registering Apple ID, so the first step is very important.
Add developer into account
To publish and release updates to App Store, add Apple Developer account to your account. Find out developer's Apple ID in advance.
Go to App Store Connect page. If necessary, sign in using the Apple ID you created earlier.
Click "Users and Access":

Click "+" on "Users & Access" page on "People" tab:

Enter name - "Support", last name - "Pyrobyte" (your company only) and developer's Apple ID. Select "Administrator". This will allow the developer to publish the app, update it, receive information about errors, and fix them. The developer will not be able to support the app if you change permissions:

Click "Invite" button after that. "Additional Materials" and "Appendices" blocks are not required.
Inform manager that you have sent an invitation to developer. After that, you can start publishing mobile application.
Create project
(For Apple: first, OT Commerce programmer must create a certificate with which the application will be signed (since he must provide the necessary data) and then we can proceed to creating the project)
Follow the link https://firebase.google.com/


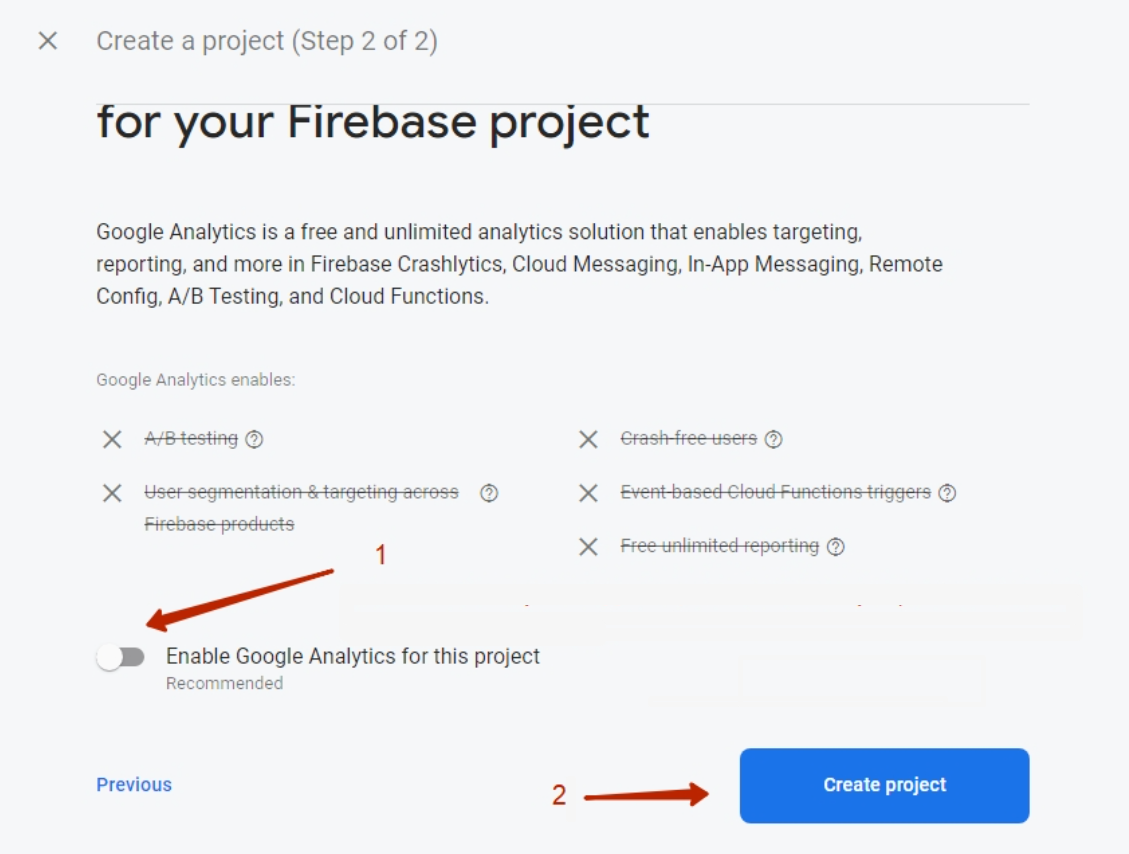
Specify project name (1) - your website URL (domain name), put a tick next to the agreement (2) and click “Continue” button (3)
You can turn on Google Analytics at this stage (1), or you can do it later (optional). Click “Create project” (2)
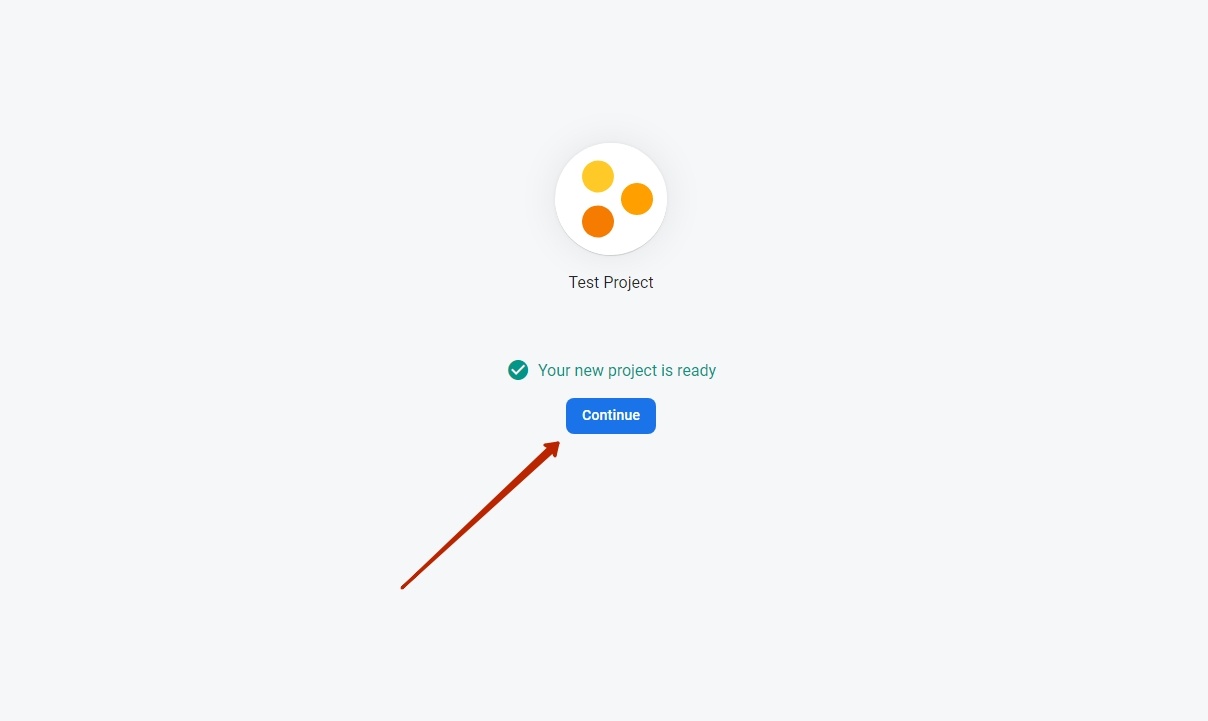
Continue” button
Create application
There is a choice here: create for Android or for iOS. The example shows how to create an Android application
Step 1
(For Apple, OT Commerce programmer provides the data for "Apple bundle ID" and "Apple nickname" fields. "App Store ID" field can be left empty.)
Make a unique application identifier (Bundle ID) in English in “Android package name” field (1) in the application store (App Store or Google Play).
How to make Bundle ID?
- Take your website URL (for example, bundle.my)
- Take your website name in Latin (Name)
- Combine option1 and option2 by writing through a dot: firstly, the end of domain my (you can have any: com, ru, org, etc.), then the second part of domain bundle (you get com.bundle) and finally, the store name in Latin: Name (you get my.bundle.name)
More examples:
Address/URL | Website name | Bundle ID |
|---|---|---|
| top-test.otcommerce.com | Top-test | com.otcommerce.toptest |
| https://www.google.com/ | search | com.google.search |
| https://tao-bao.mn/ | tao-bao | mn.taobao.taobao |
We recommend to specify name of your store based on the OT Box in “App nickname” (2) field.
Register application clicking “Register app” button (3)
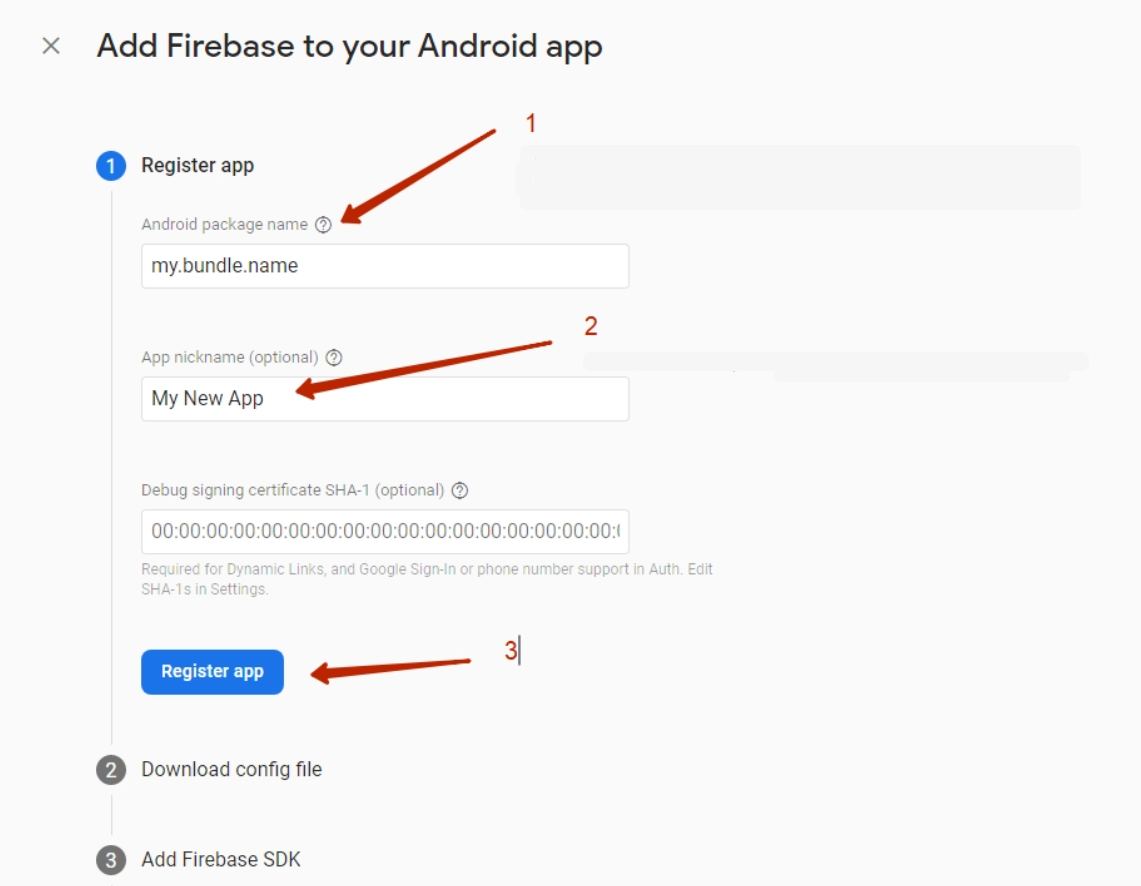
(For Apple - it isn't necessary to fill in App Store ID).
Step 2
Download *.json file to your PC clicking “Download google-services.json” (1)
Click “Next” button (2)
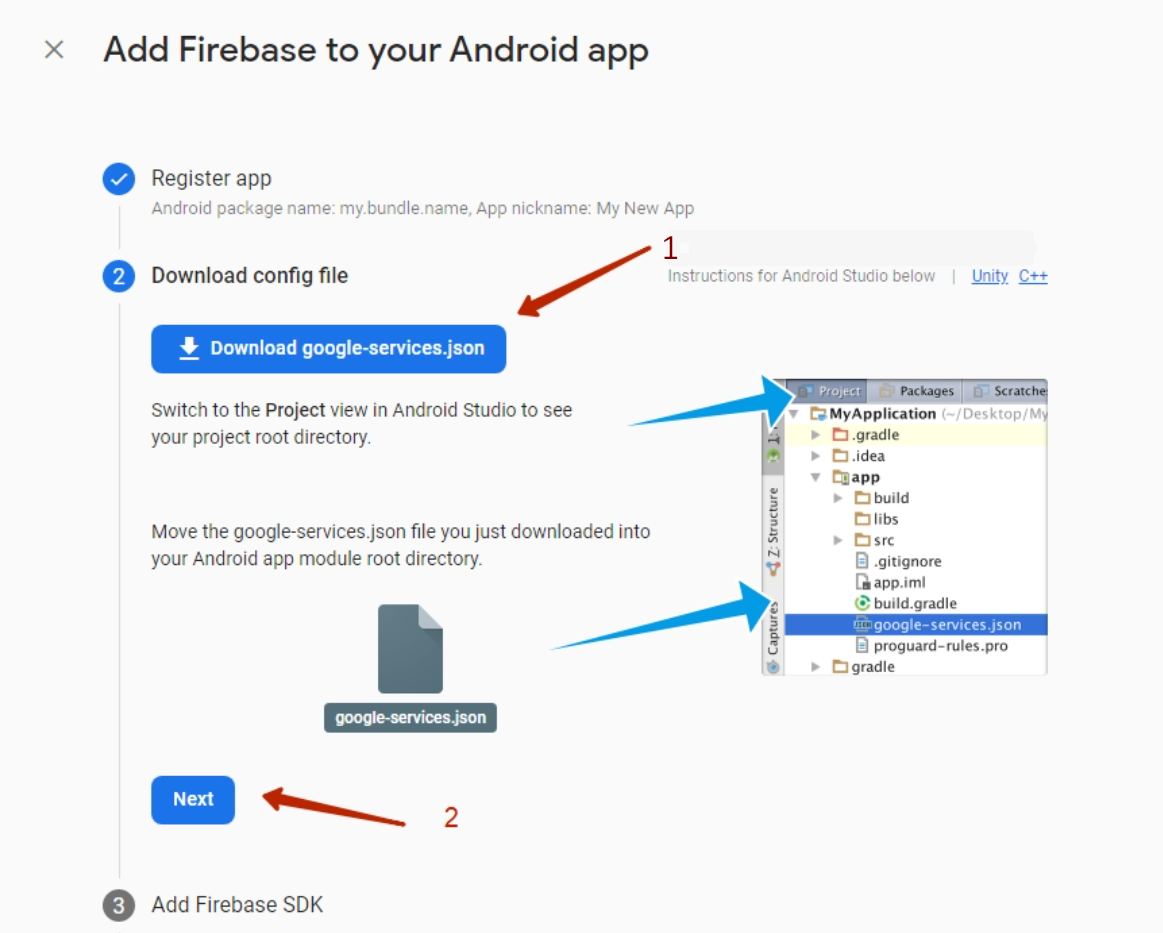
(For Apple download the file and after that you can close the window)
Step 3
Scroll down to “Next” button and click it. All fields will be filled in automatically and you do not need to add anything.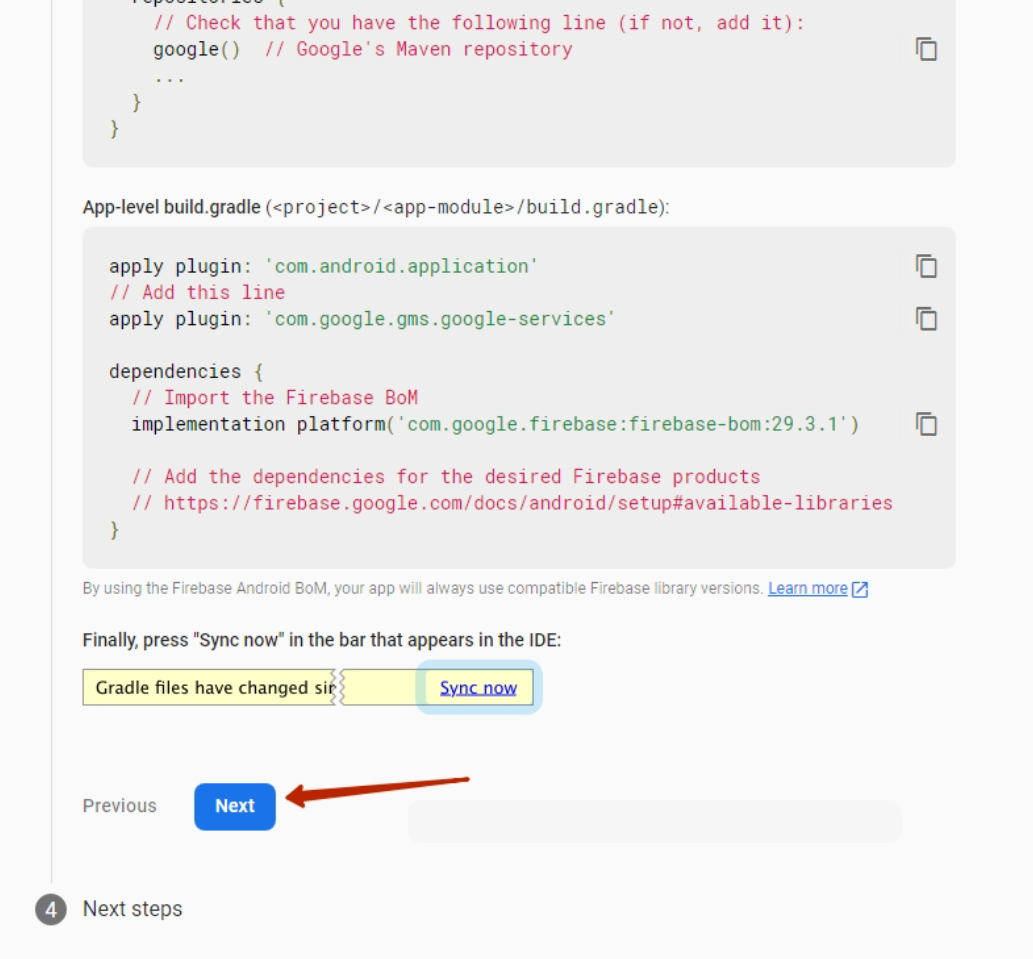
Step 4
Click “Continue to console”

Add PUSH notifications
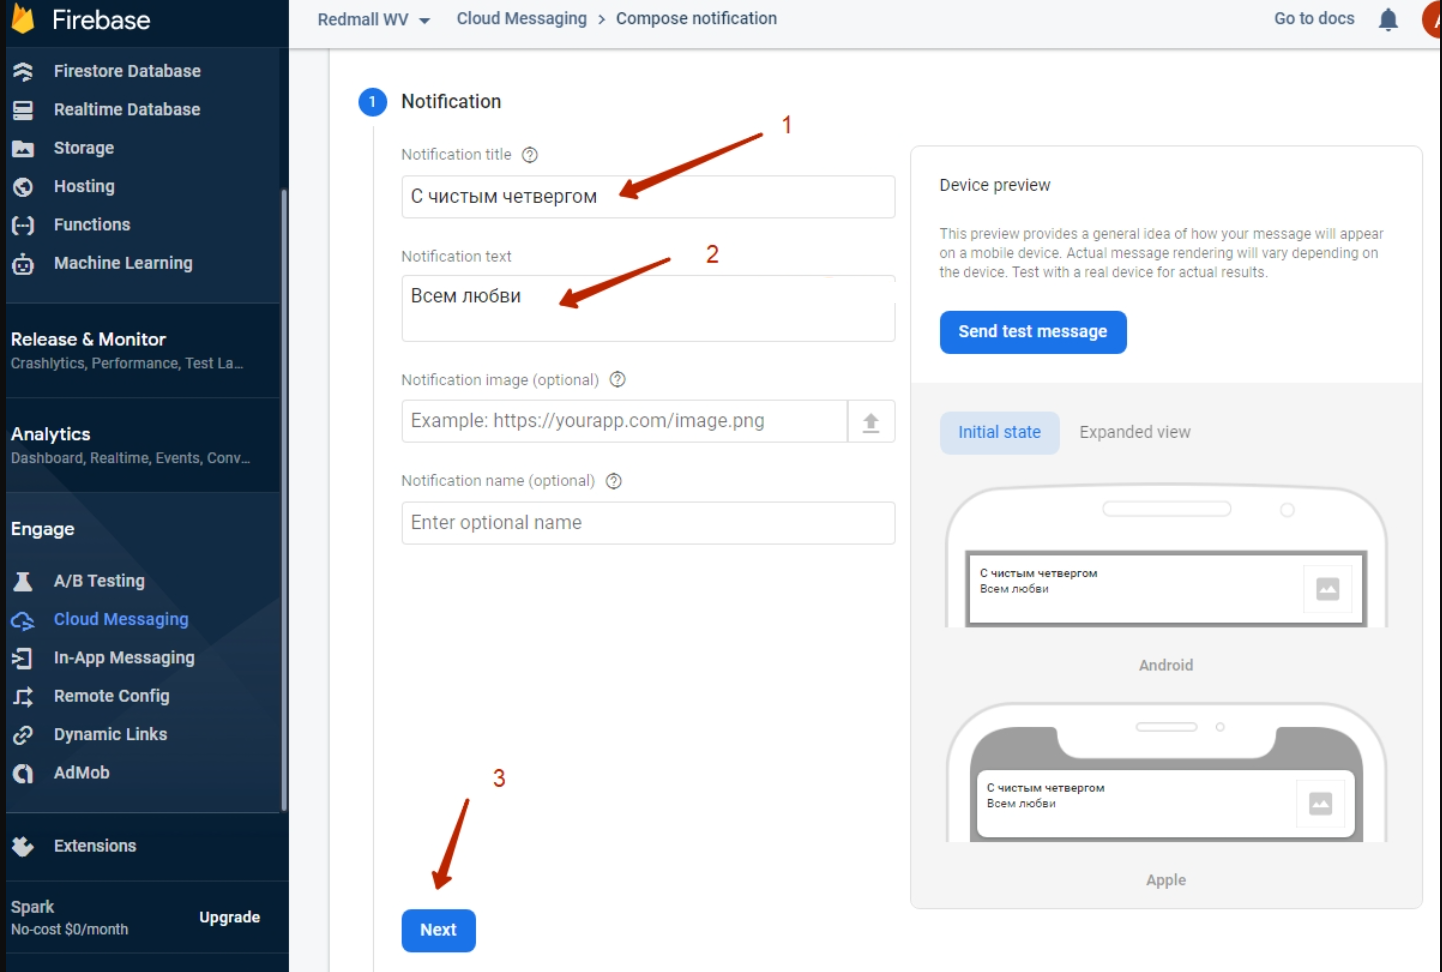
Go to Cloud Messaging in the FireBase project created above


Fill in the title field “Notification title” (1) and the message text “Notification text” (2)Click “Next” button (3)
In the Target block select the application for which we are sending a Push message. One project can have several applications including Android and iOS (1)
Click “Next” (2)

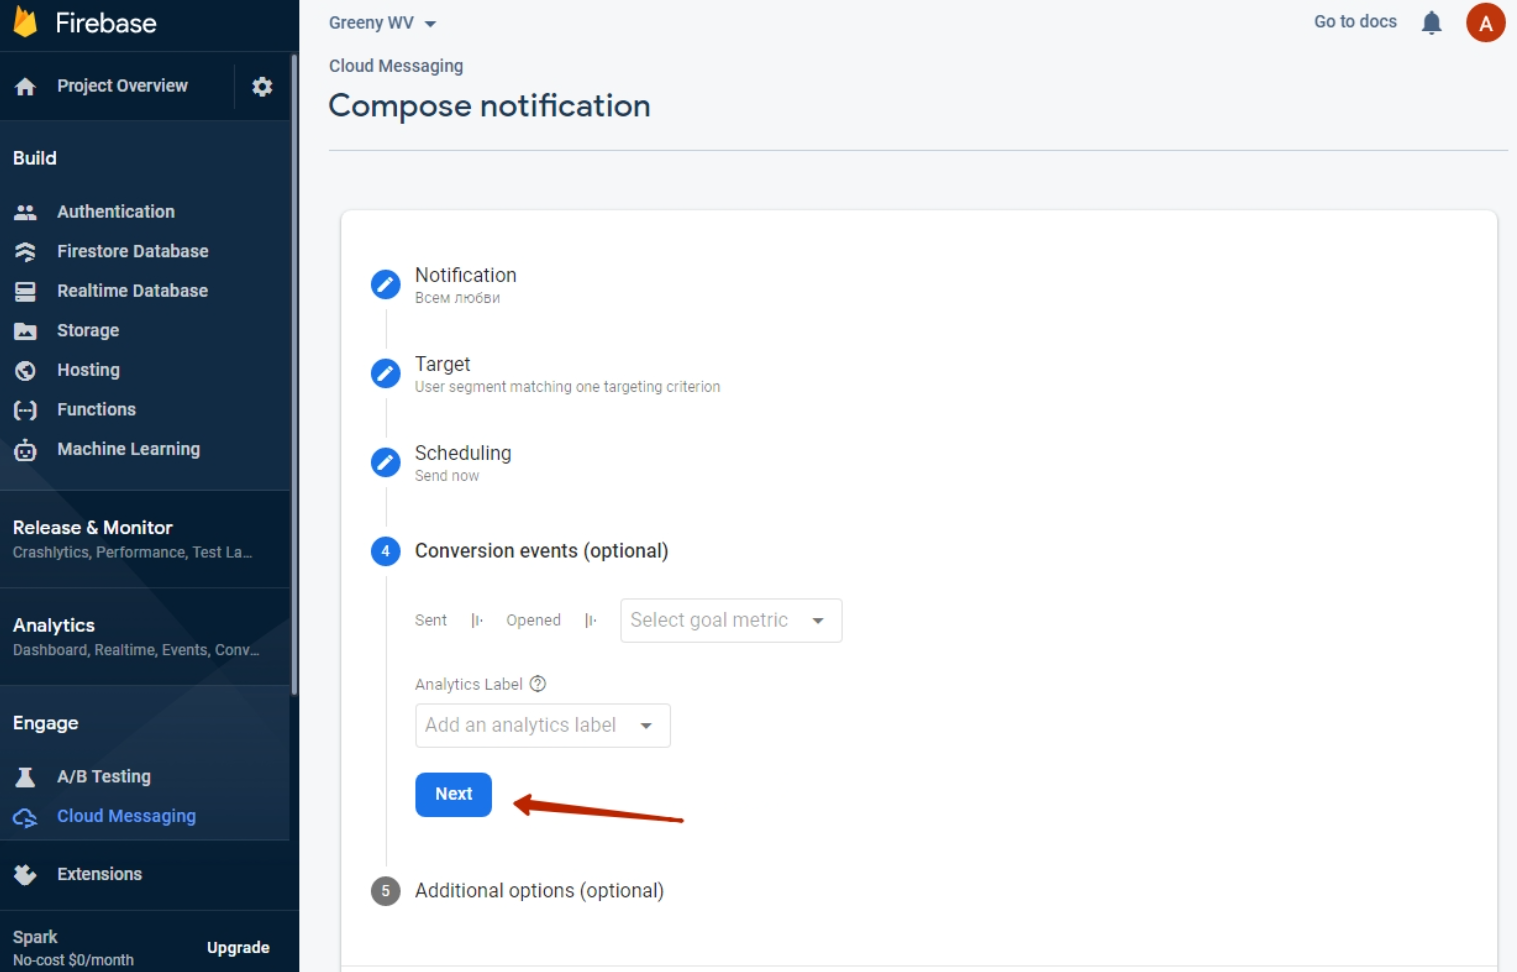
Don't change anything in 2 next steps and just click “Next” button both times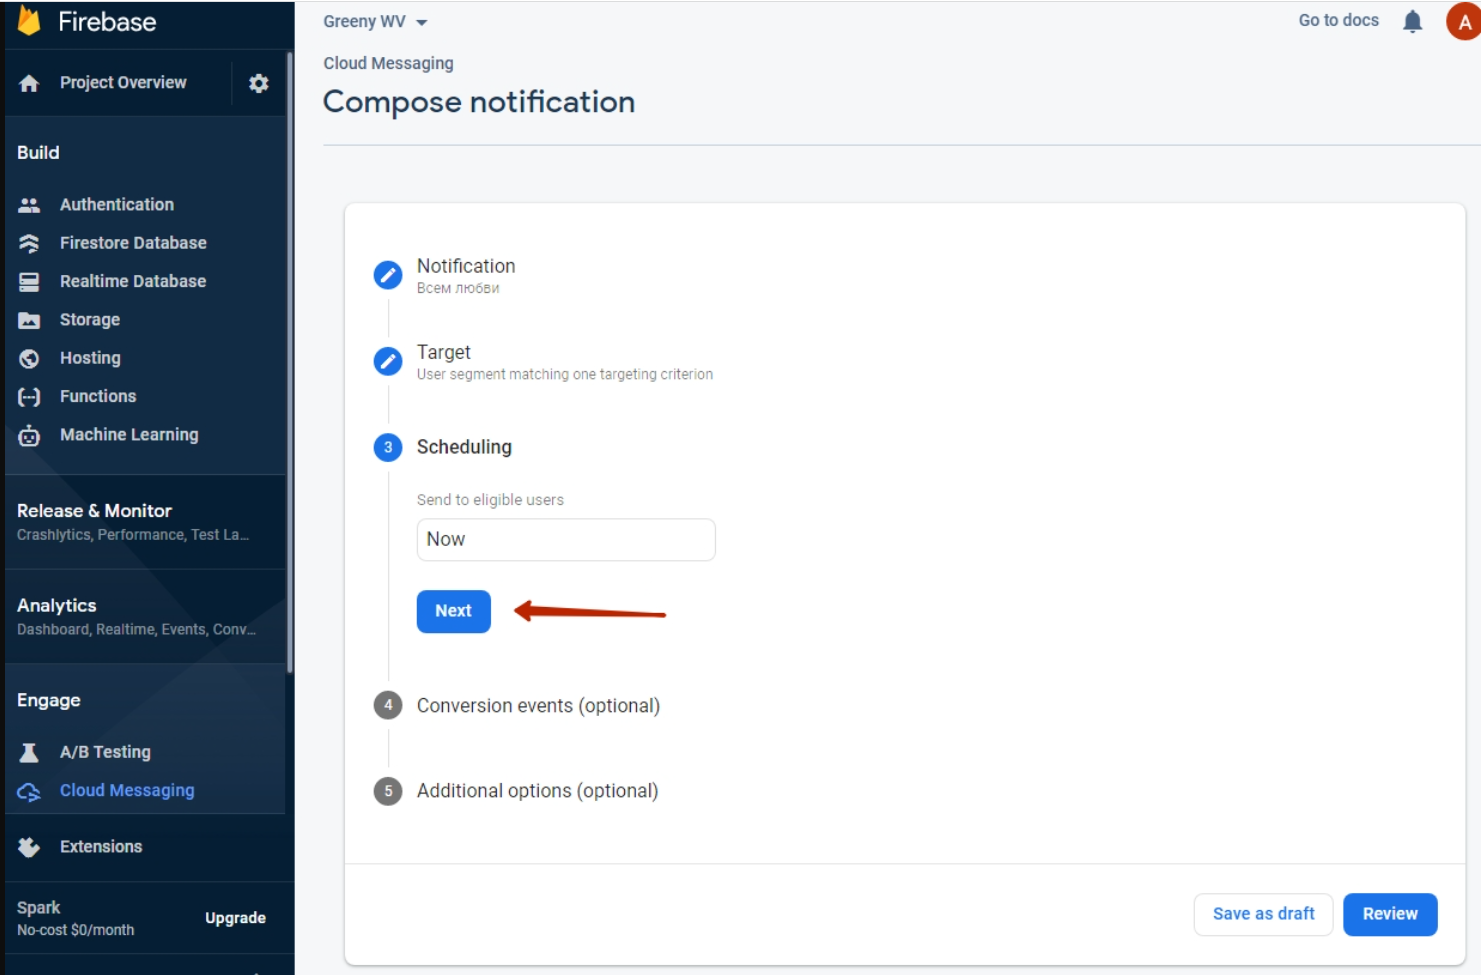
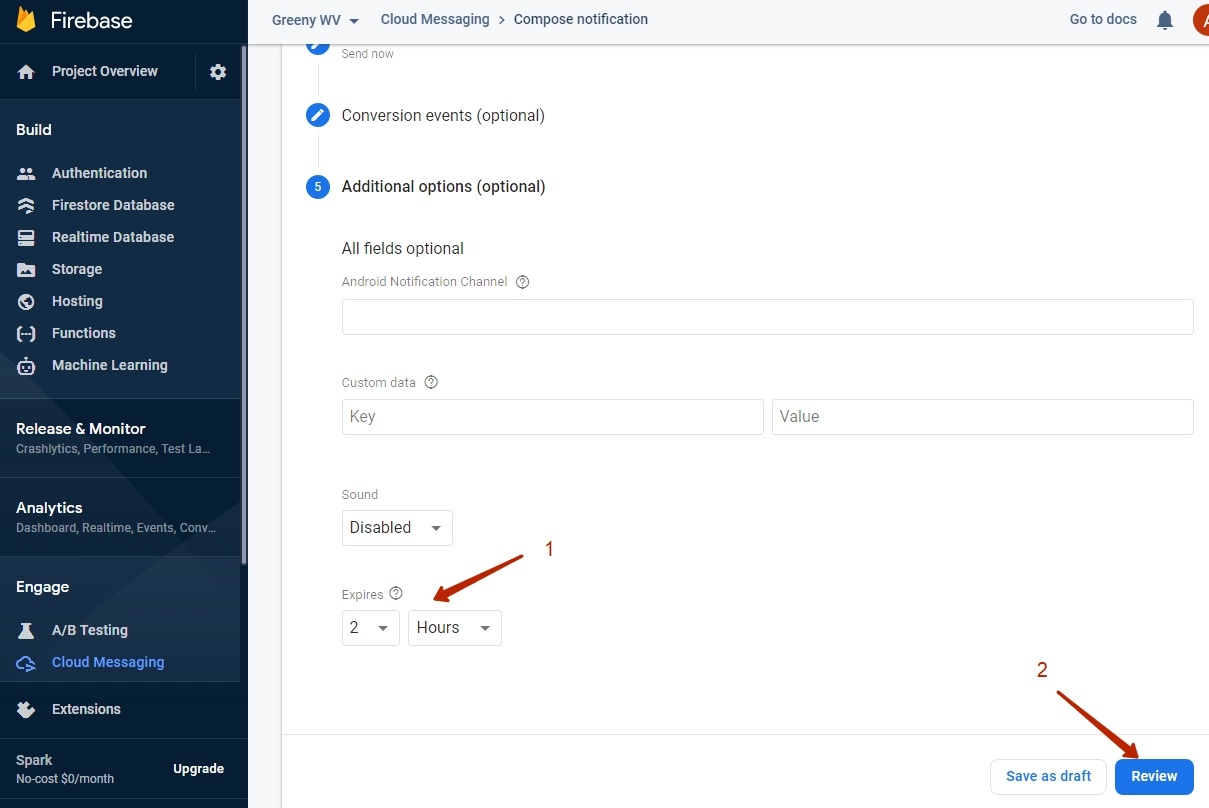
Select (1) message lifetime (how long it will be relevant and wait for the user when he appears on the network. This feature helps to set promotions and time-limited offers).Click “Review” button after that (2)
Check settings after that and click “Publish” button.
It is ready

IMPORTANT
Limitation: new applications will be available only for adaptive templates (It is Elastic template in OT Box)!