...
You buy goods clicking "Book" button in admin panel after buyers paid for orders:
All money transactions are made on Dropwow website in your personal account. Therefore, for purchase you need to login to Dropwow personal account and pay for the goods.
...
Log into admin panel and choose "Plugins" section:
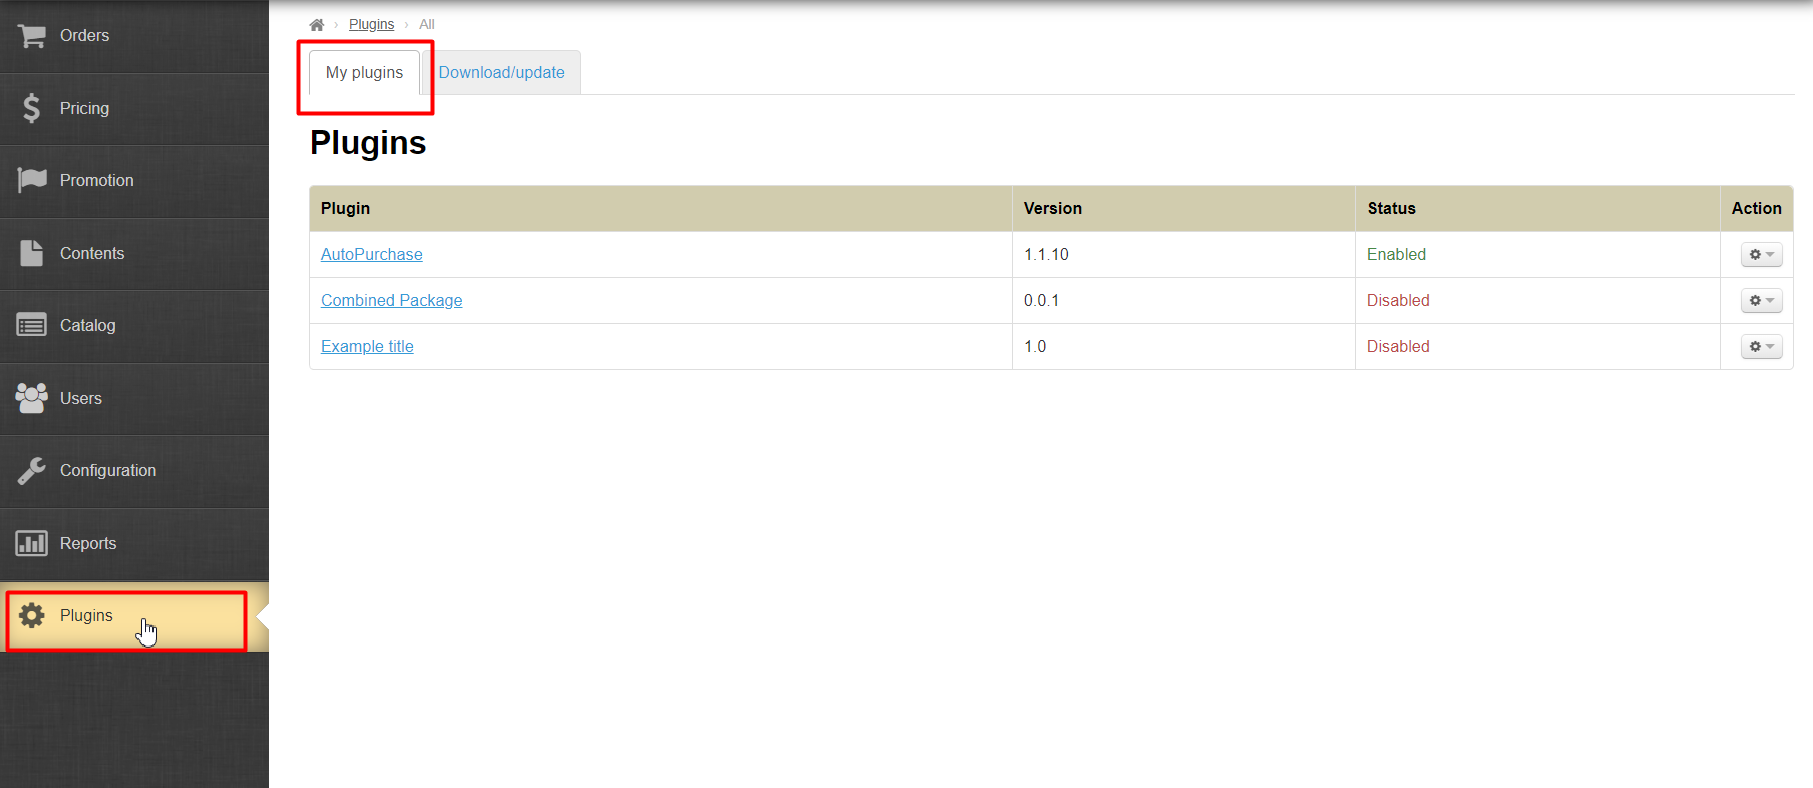
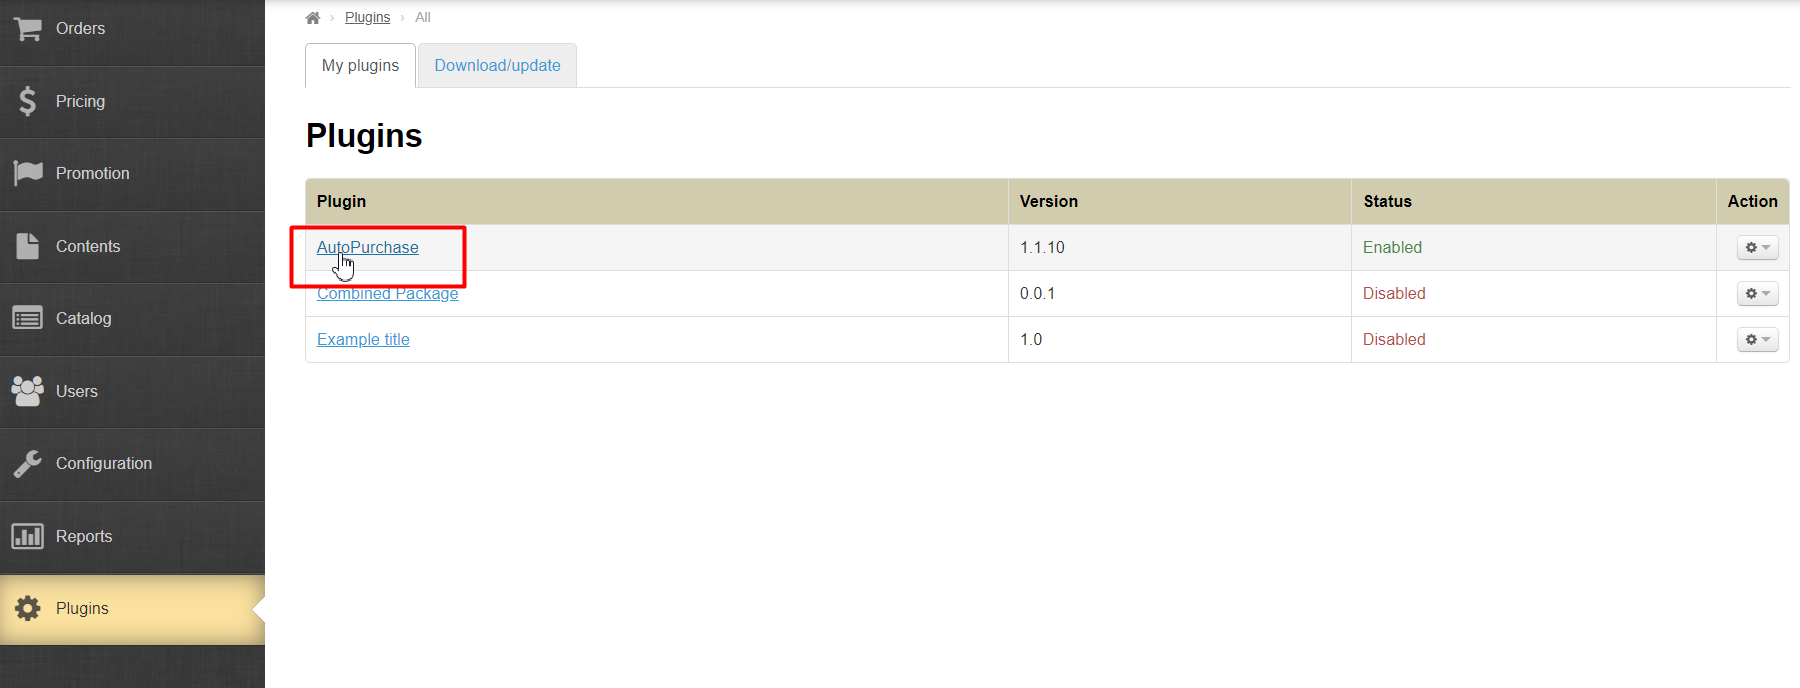
Choose "Autopurchase" plugin in the list and click it:
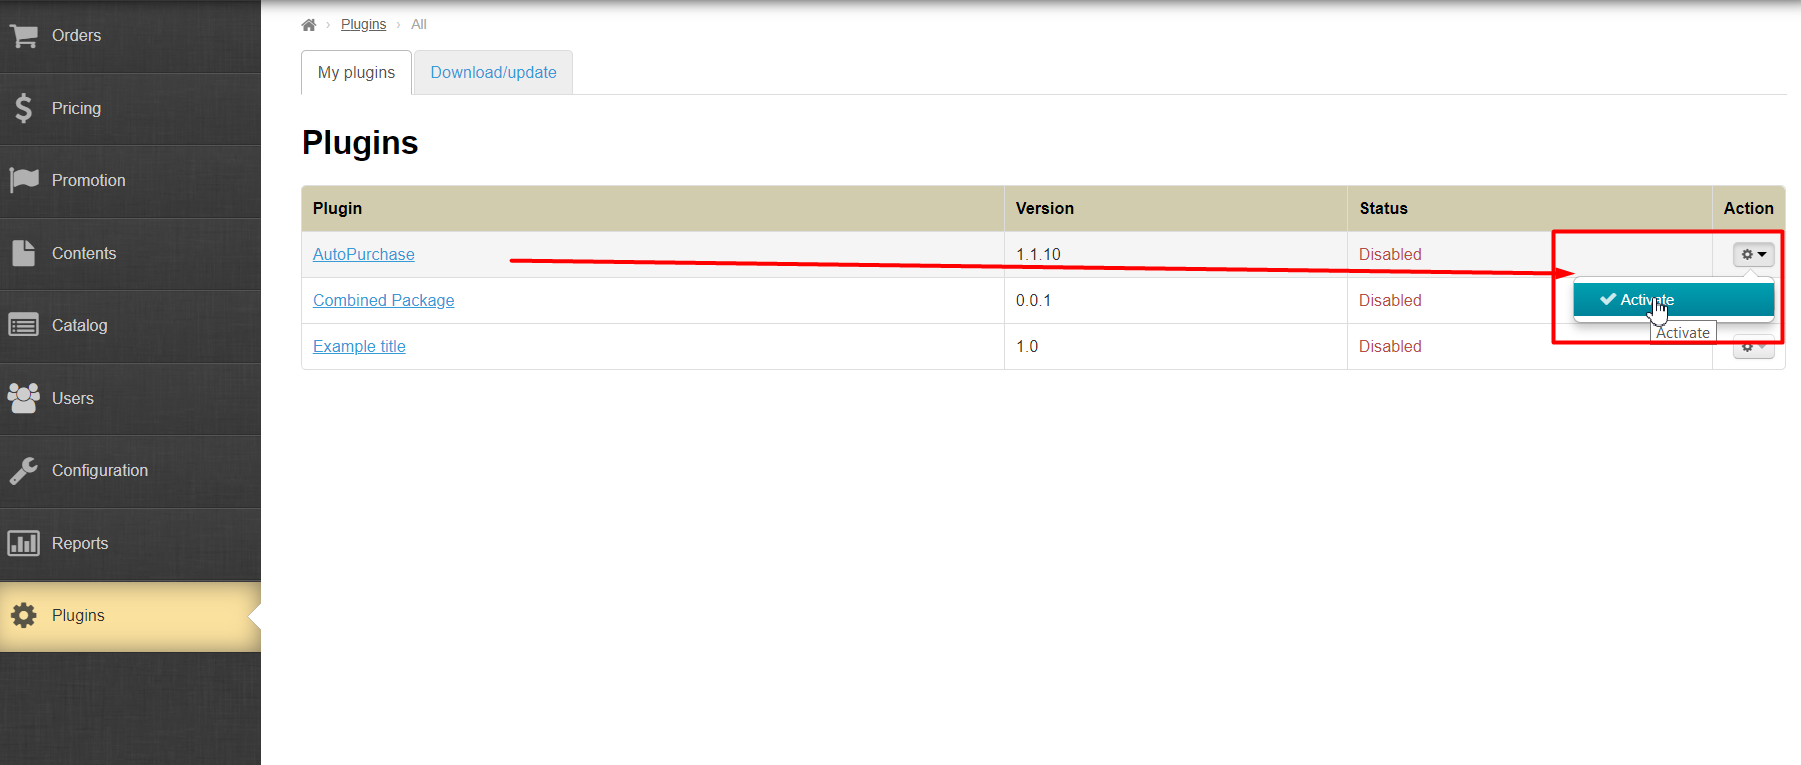
Click gear on the right and select "Activate" if plugin is inactive:
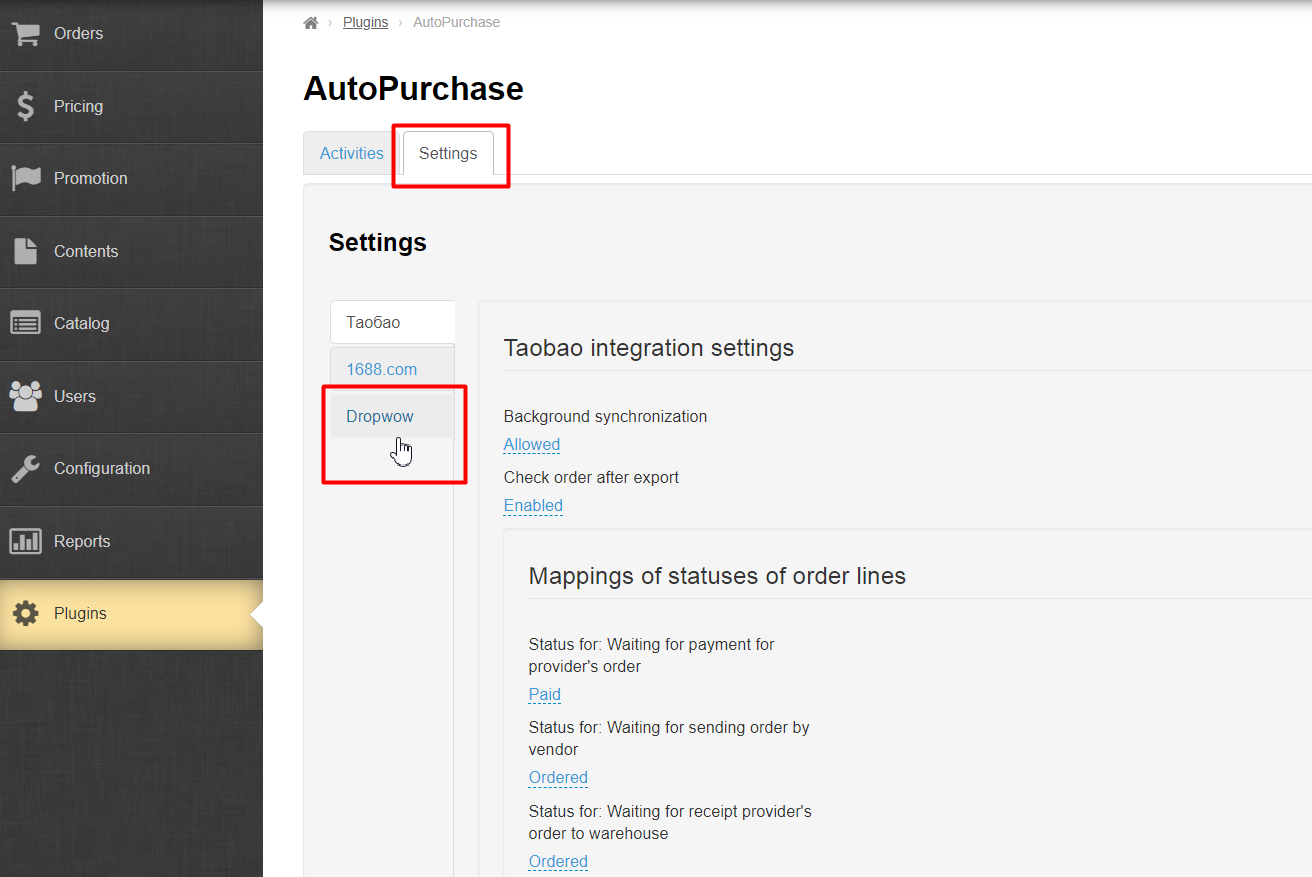
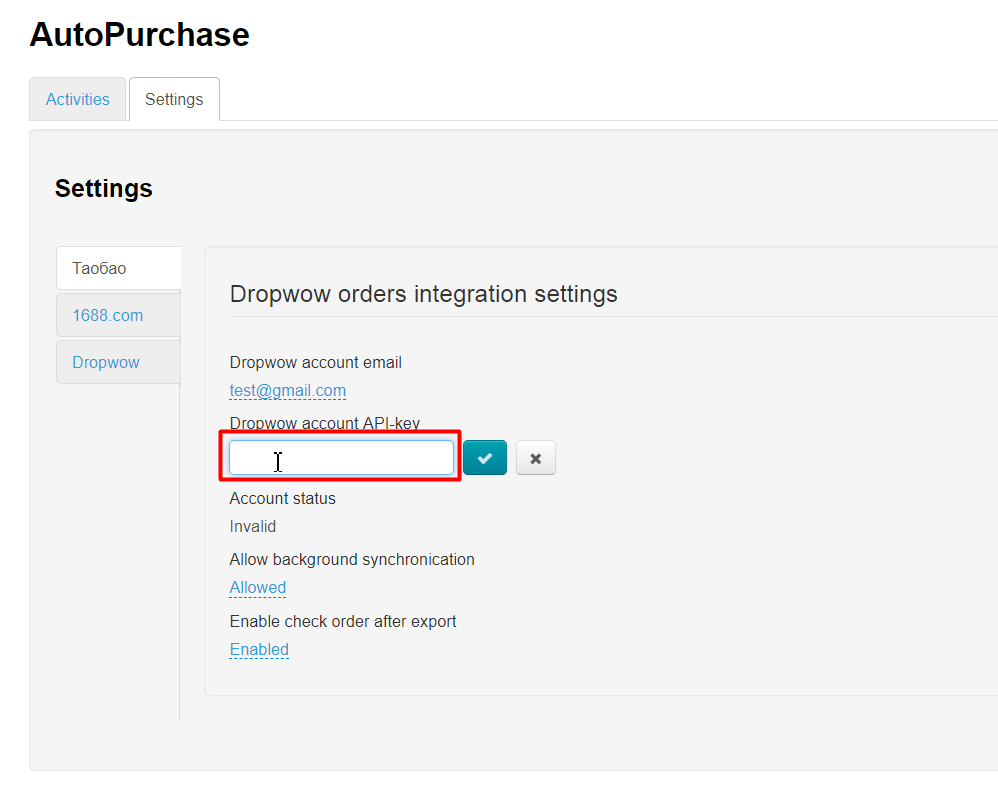
Choose "Settings" tab:
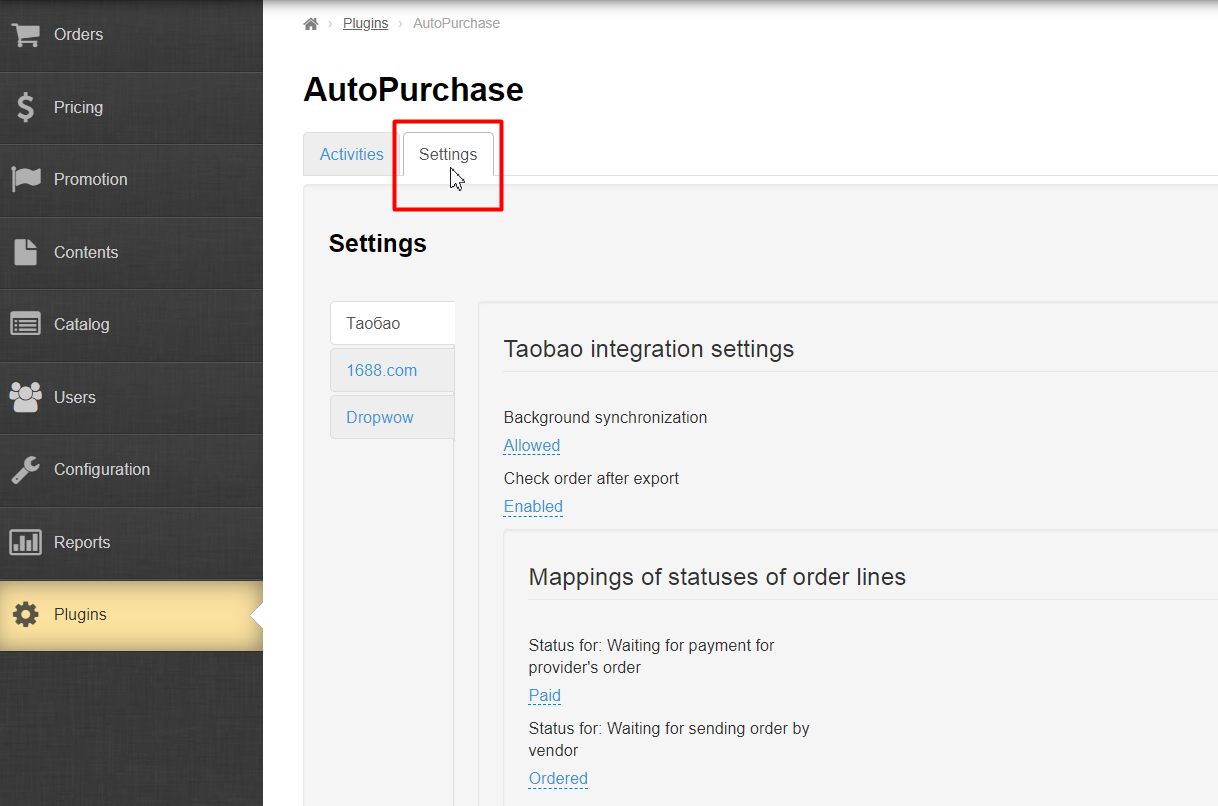
"Settings" tab lists all trade providers for which auto-purchase is enabled. Choose Dropwow:
Check email you used for registration on Dropwow website:
...
Paste it in OT Box admin panel in "Integration with Dropwow settings" under Dropwow email account:
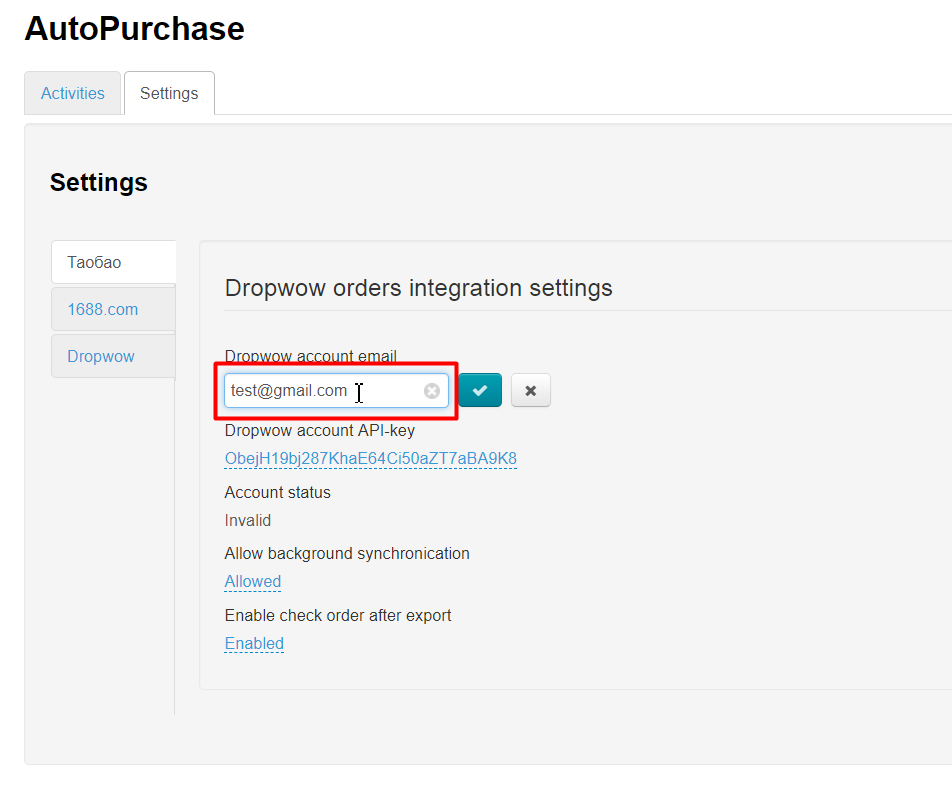
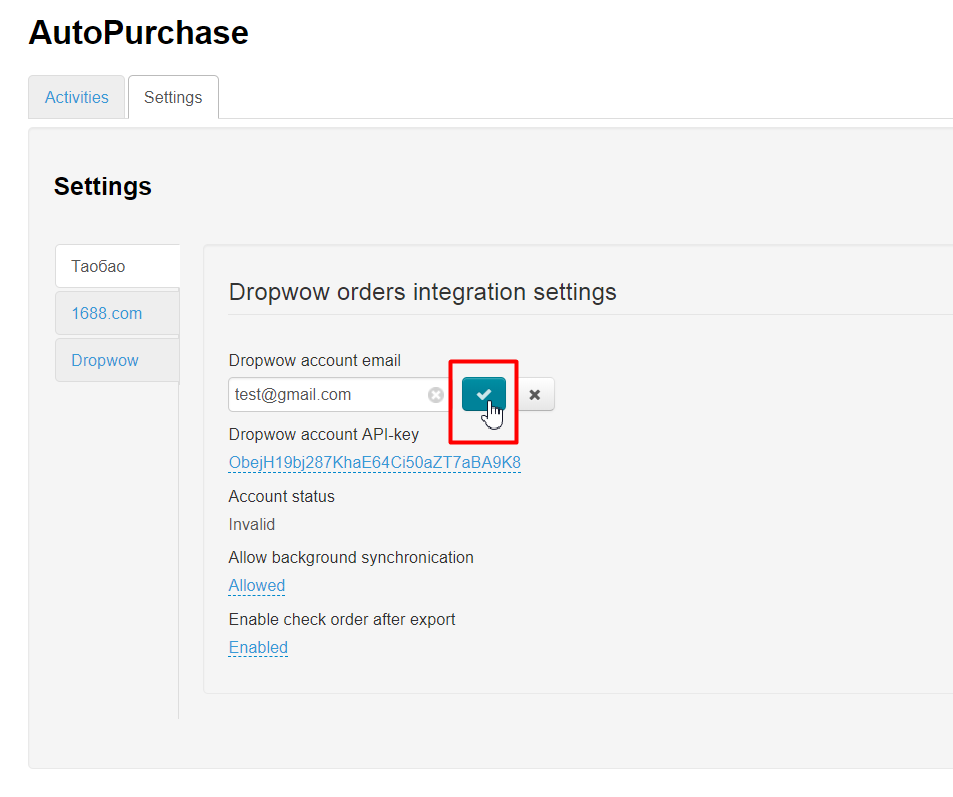
Save data clicking checkmarked button:
Copy API Key from profile details on Dropwow website:
...
Paste API Key into special field in OT Box admin panel
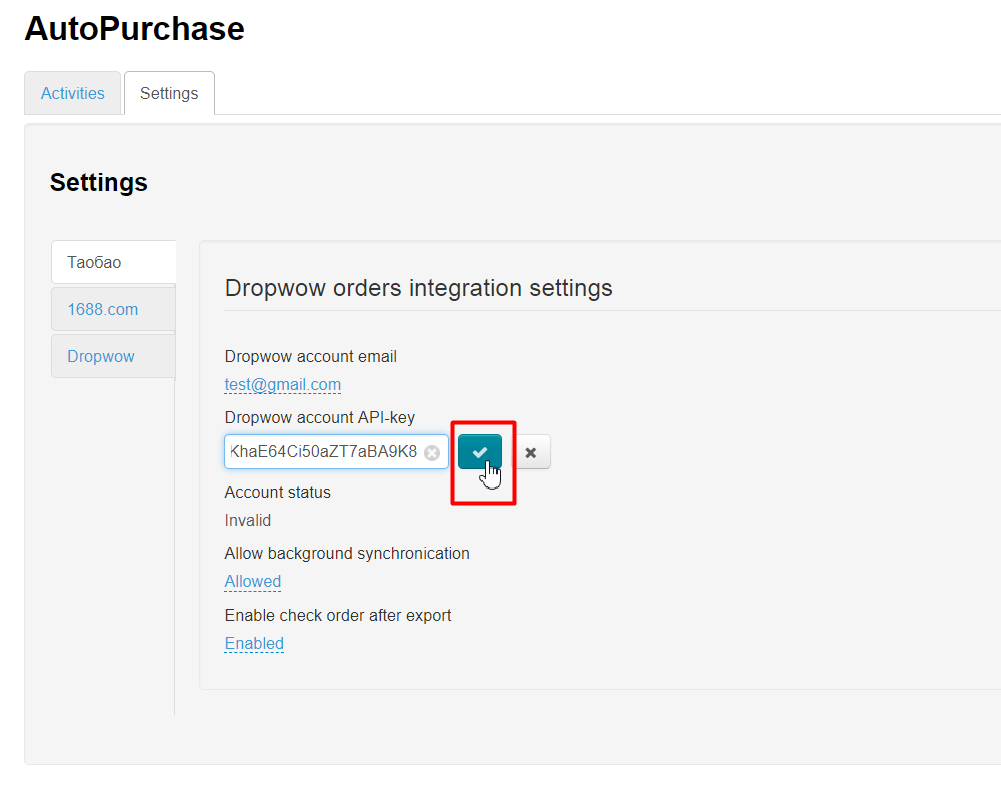
Save API Key clicking checkmarked button :
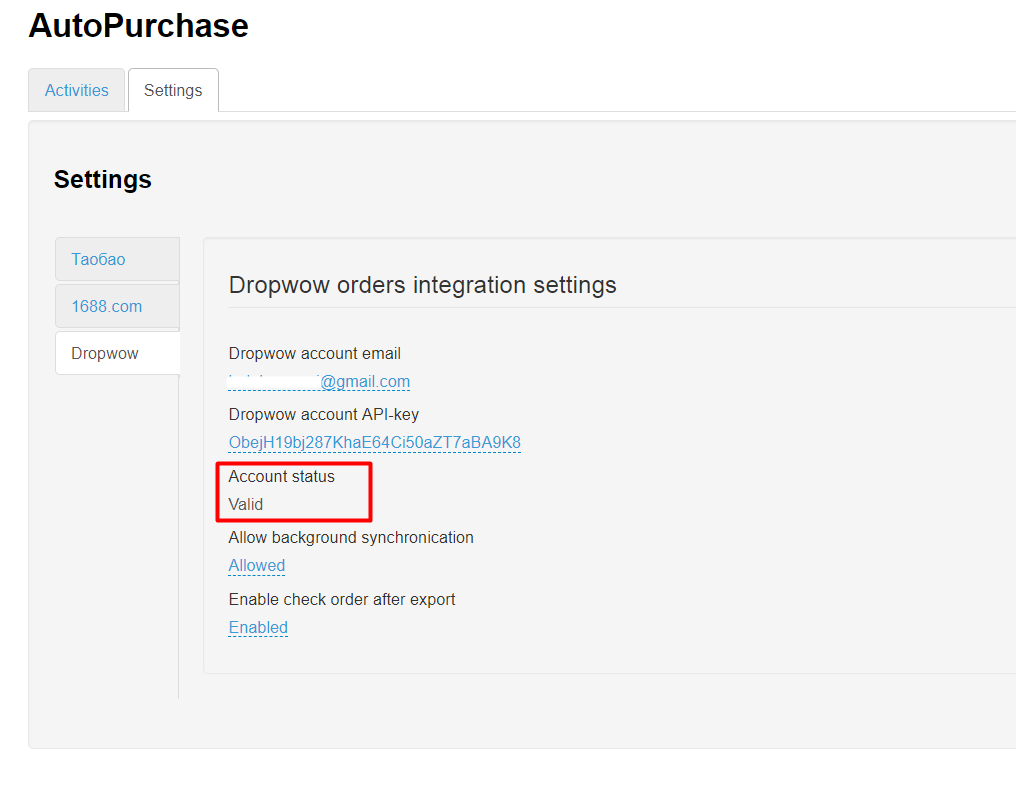
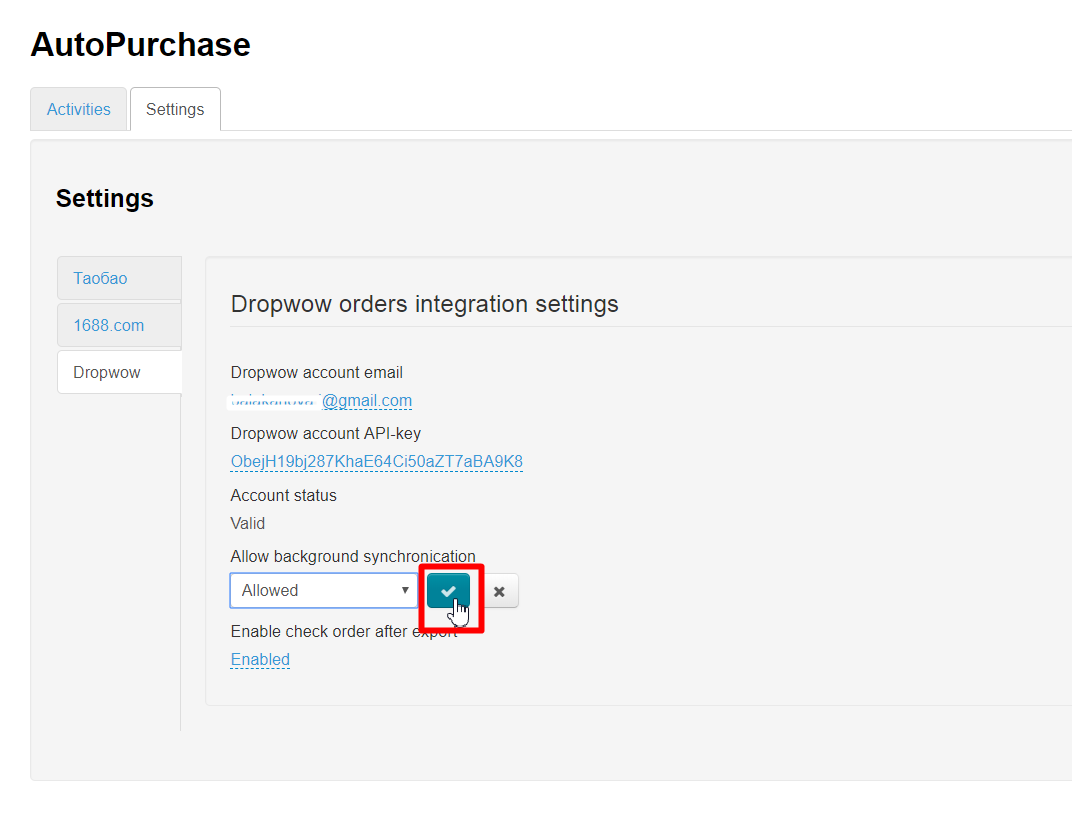
Dropwow account status becomes valid after saving:
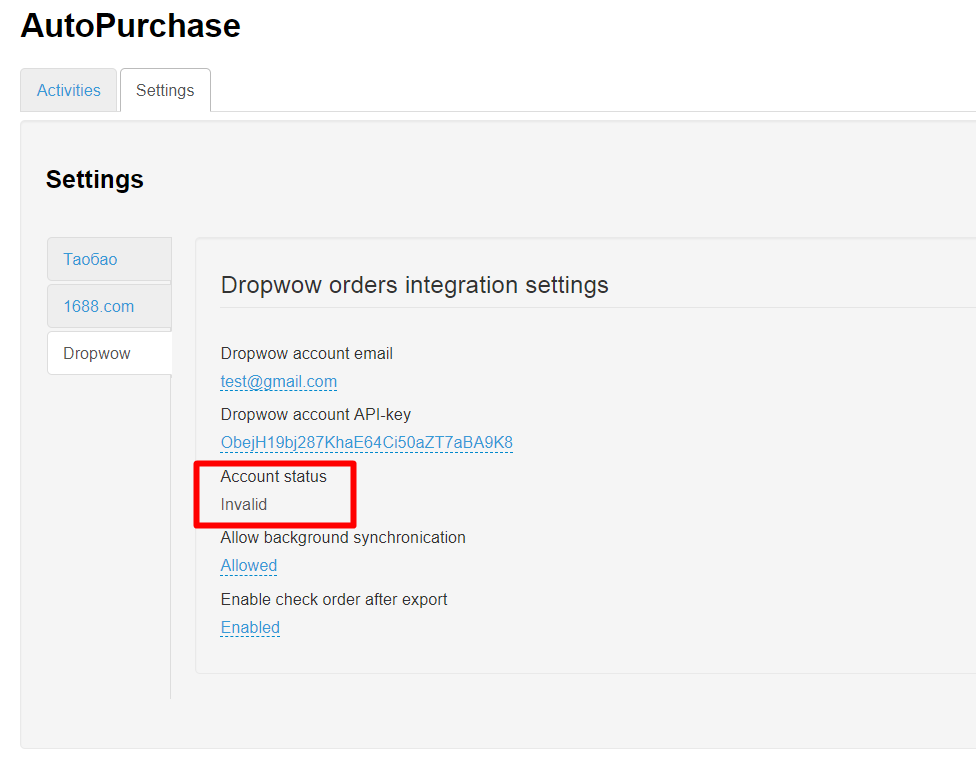
There is an error either in the Key or email if you don't have such inscription. Verify that the data is correct.
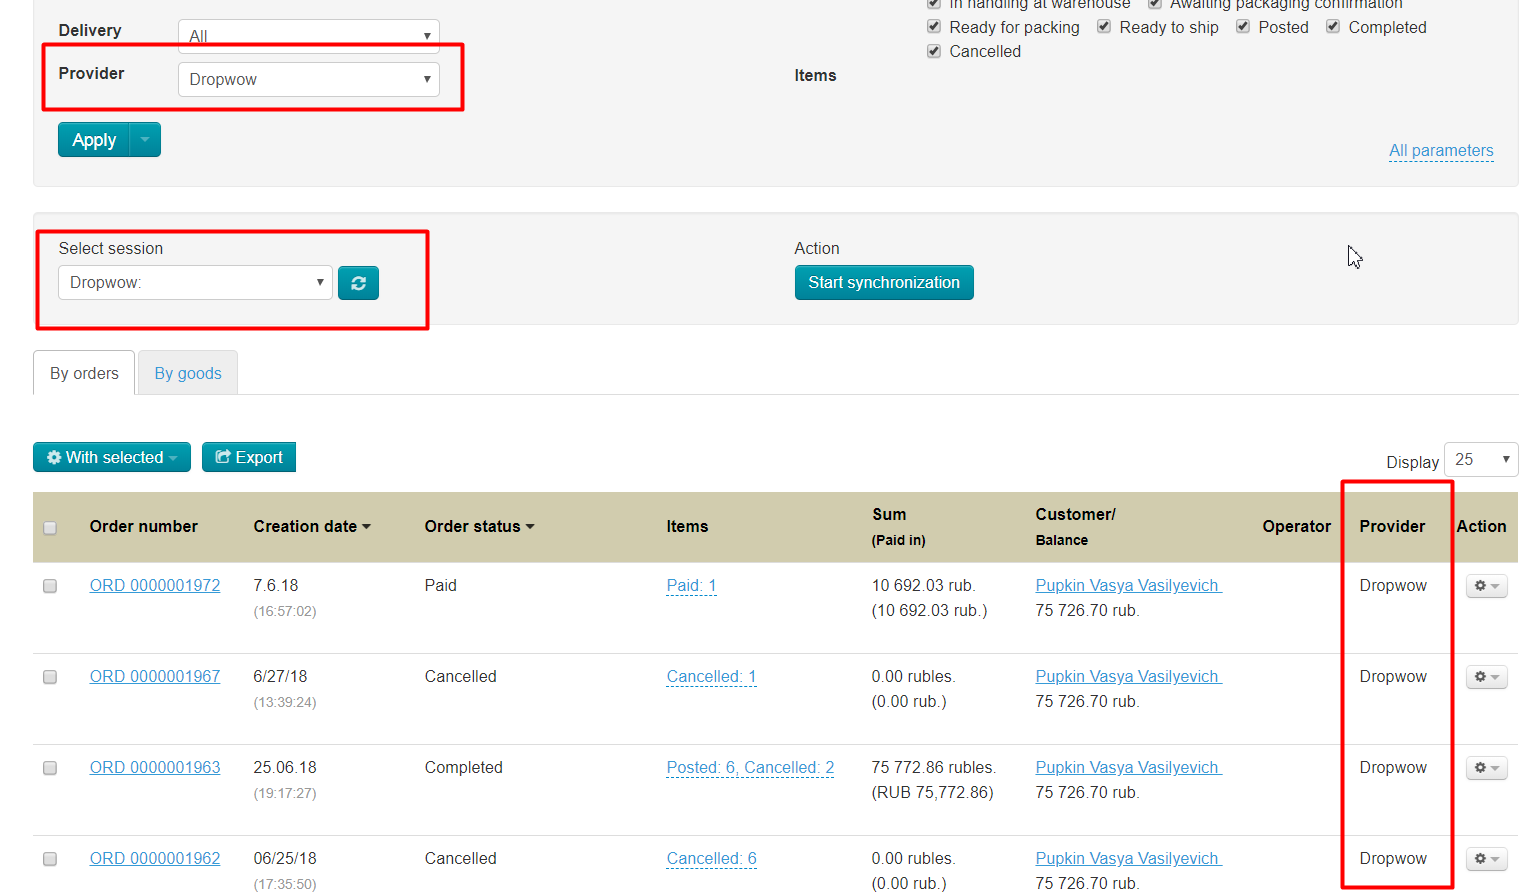
Then we decide if we need background synchronization (that is, comparing and updating account data without your participation). OT box will periodically check your Dropwow account for updates (order statuses) if it is enabled.
...
It's necessary to allow background synchronization to let OT Box interact with your Dropwow account without your reminder (if you disallowed it for some reason before). Click "Disallowed" button:

Choose "Allowed" by mouse click in opened dropdown list:
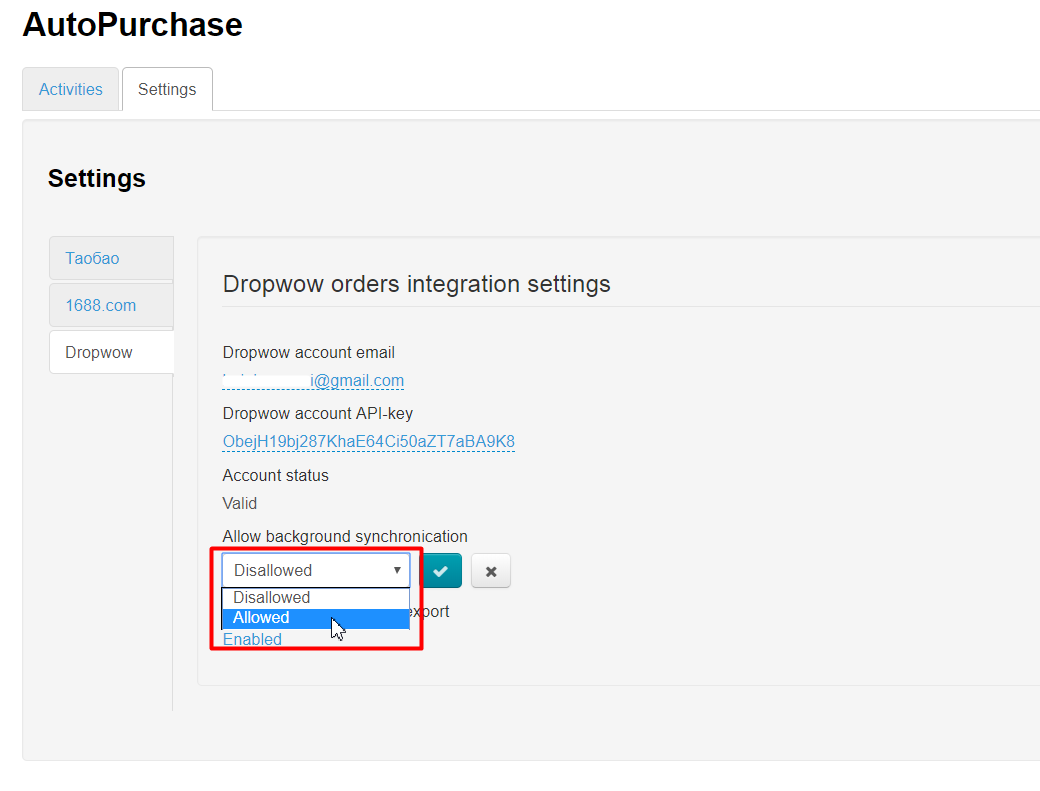
Save choice by clicking checkmarked button :
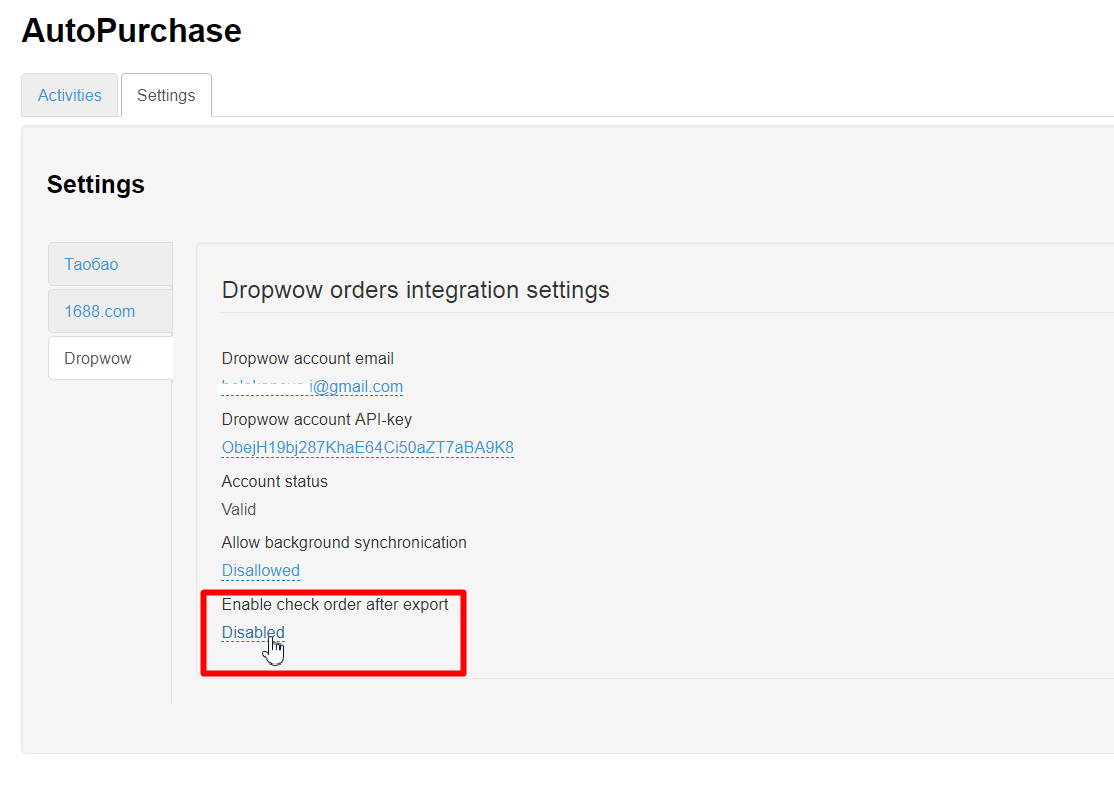
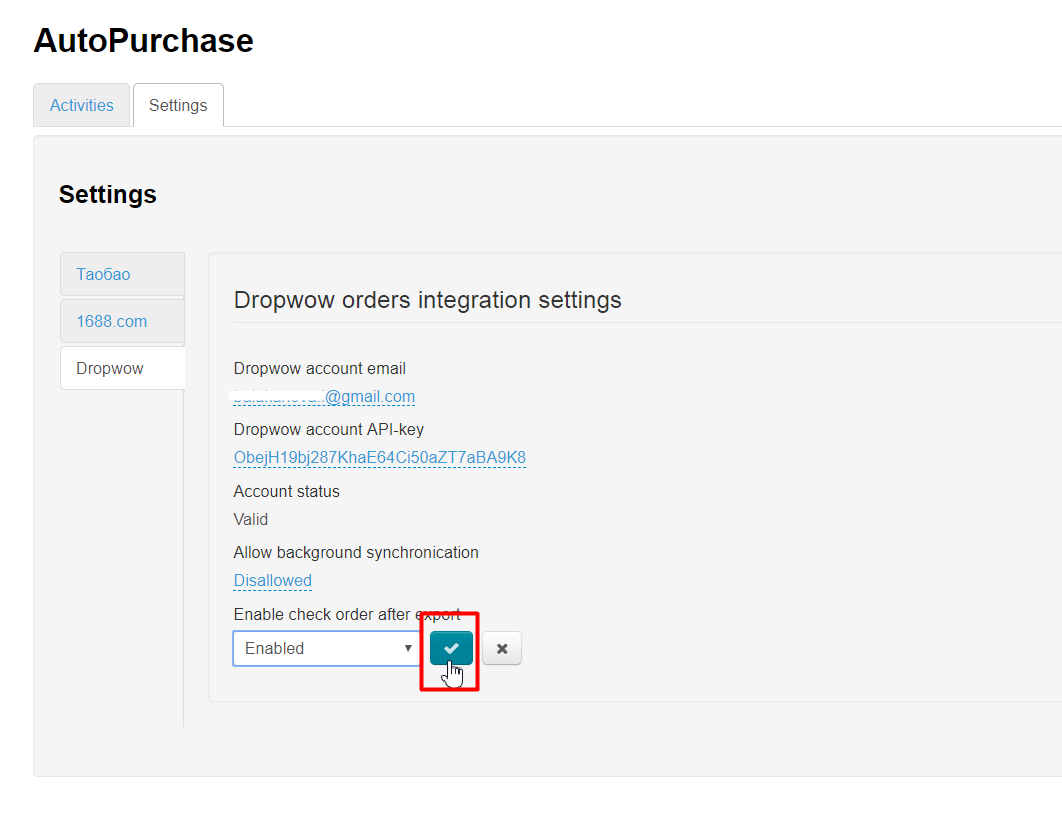
You must ensure that sent orders are available for booking when you begin to work with orders and send them to booking before purchase. We recommend not to turn off "Order Check after Export" in order to check order for availability and prices immediately after the order was sent to Dropwow.
...
Find "Order Check after Export" title to allow (if you disallowed it for some reason before). Click "Disallowed" button:
Choose "Allowed" by mouse click in opened dropdown list:
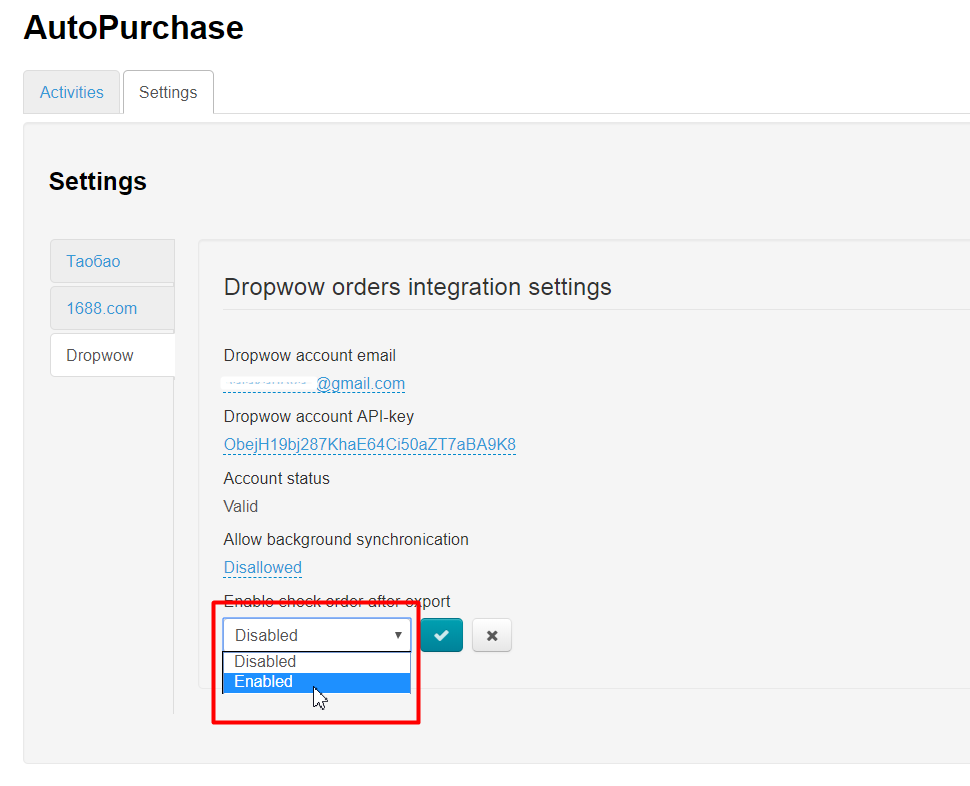
Save choice by clicking checkmarked button:
Ready. First step of settings is finished.
...
- Delivery from the seller to the final buyer is done by seller in China, who added his goods to Dropwow.
- Delivery cost is already included in price of goods. Delivery is carried out by ePacket within 10-20 days.
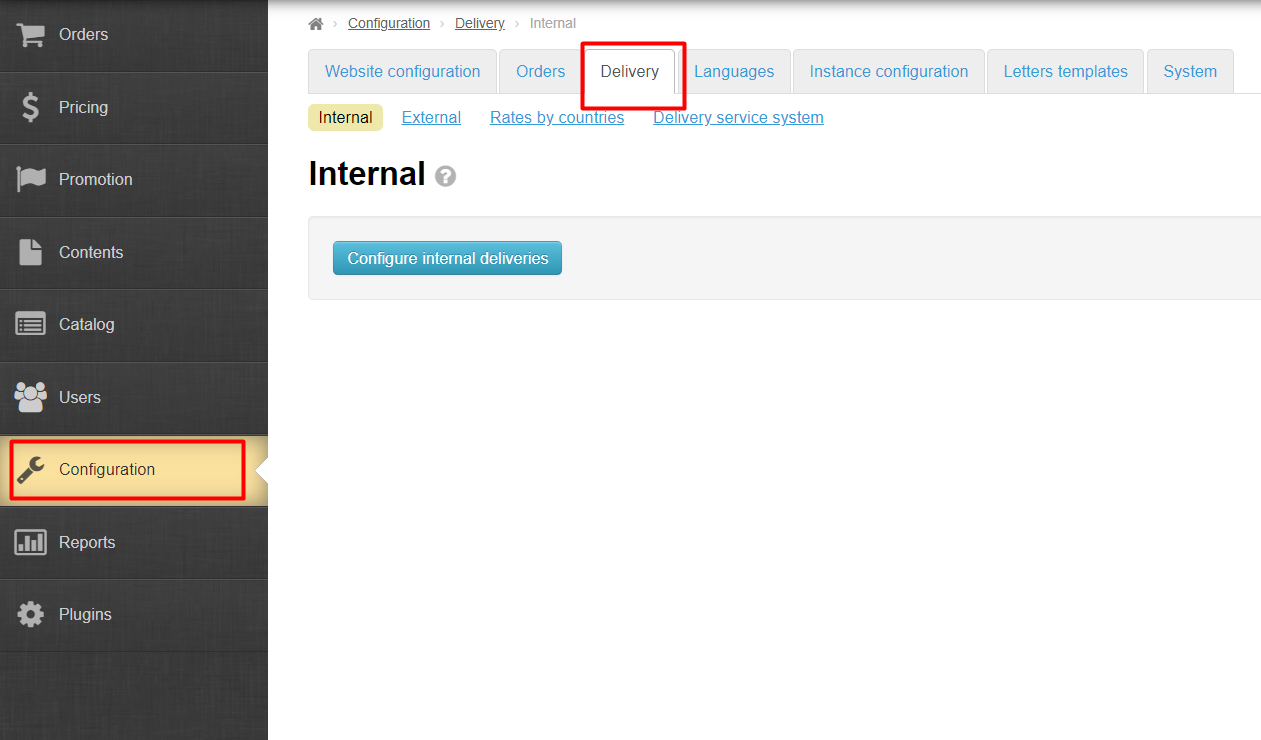
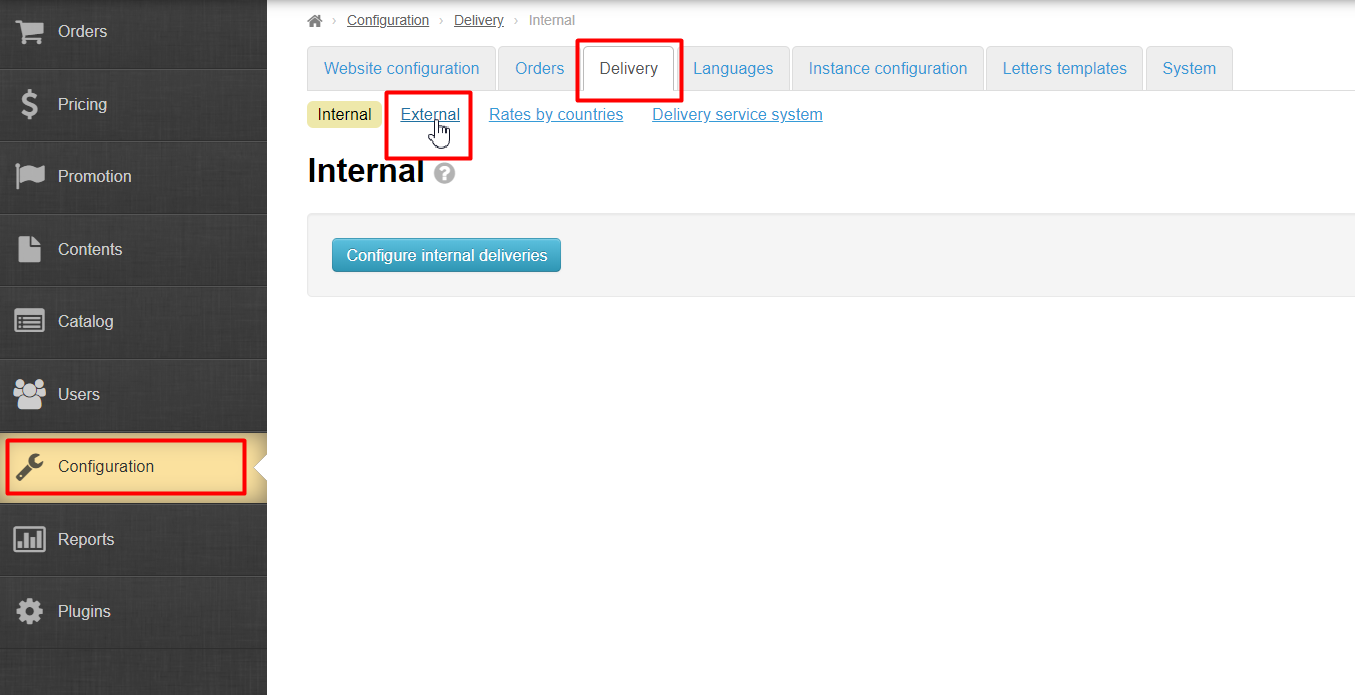
- Since delivery is done directly, there is no such thing as "Internal delivery" when working with Dropwow. This means that you do not need to configure it and only "External delivery" needs to be configured.
Therefore, you need to set up free external delivery in admin panel of OT Box.
...
Open "Configuration" section and "Delivery" tab to configure delivery:
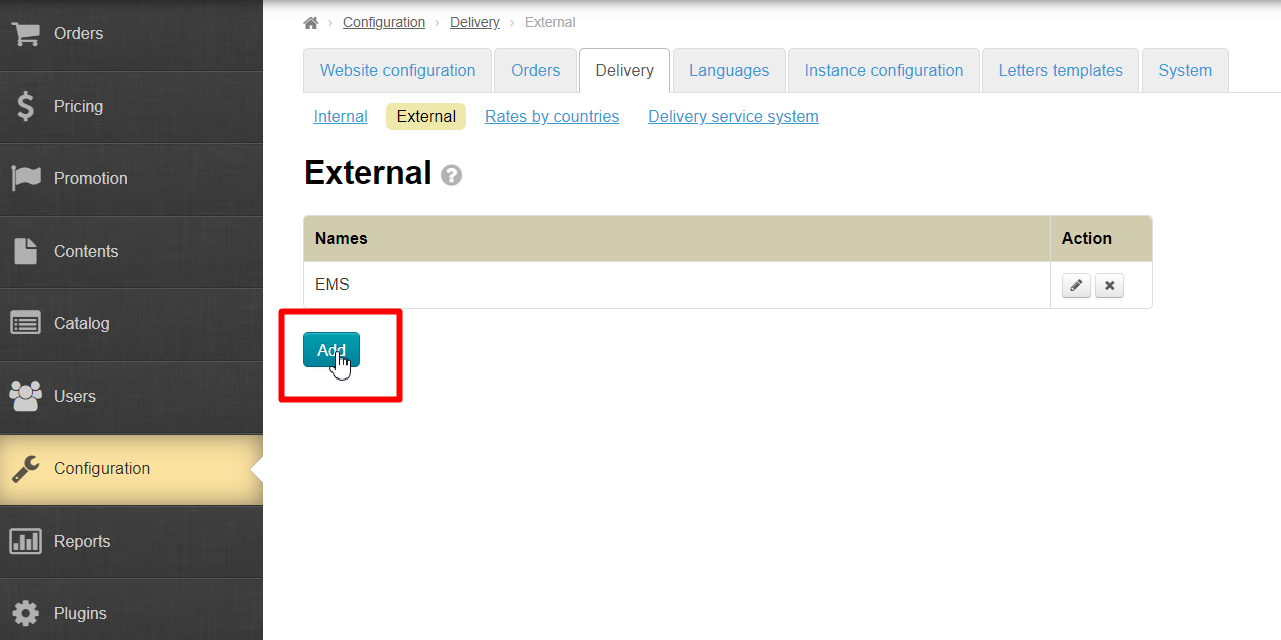
We need another tab: go to "External" tab:
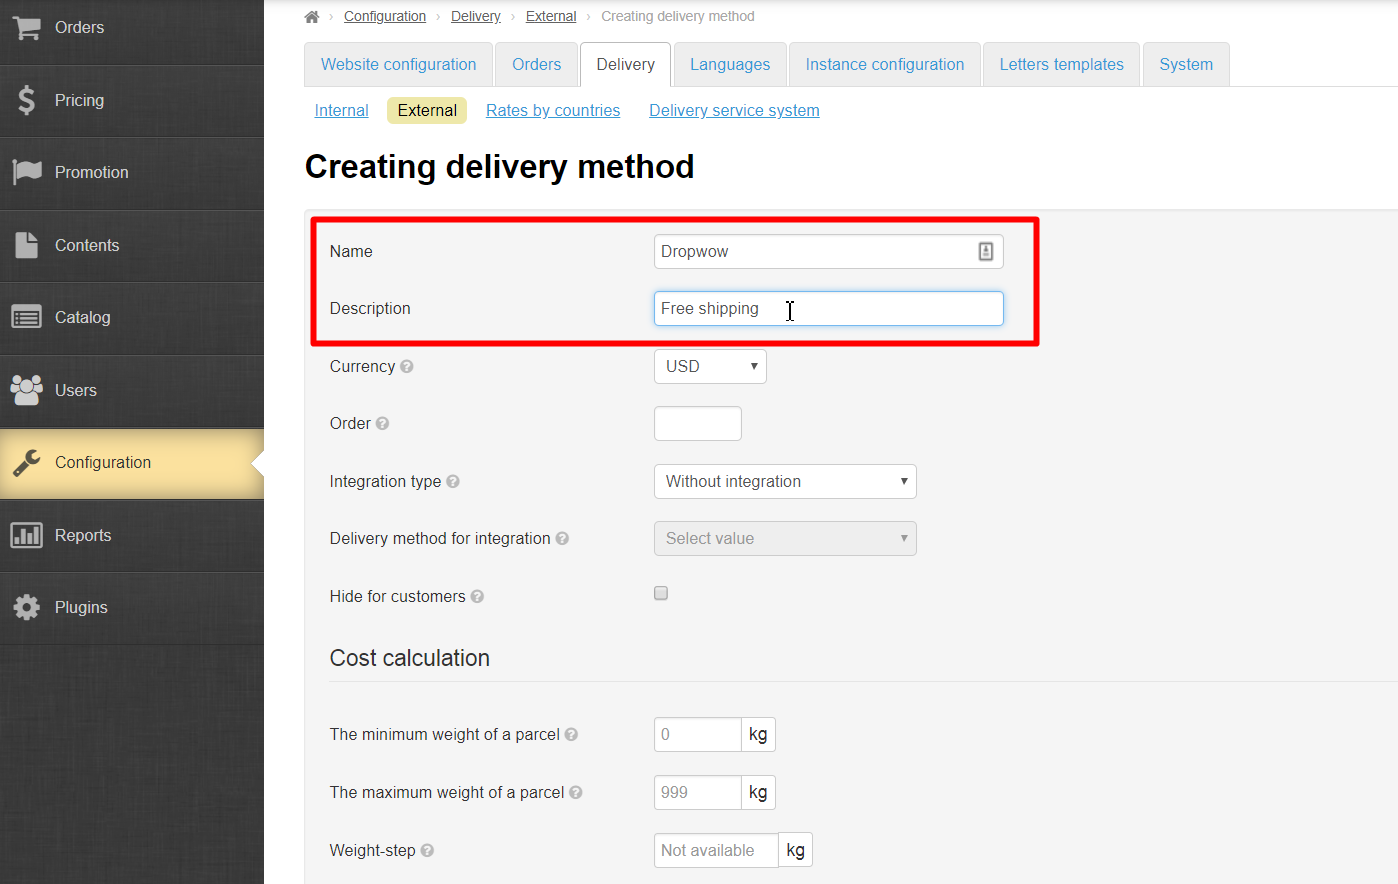
Click "Add" button:
Fill in the fields: name and description in the form that opens:
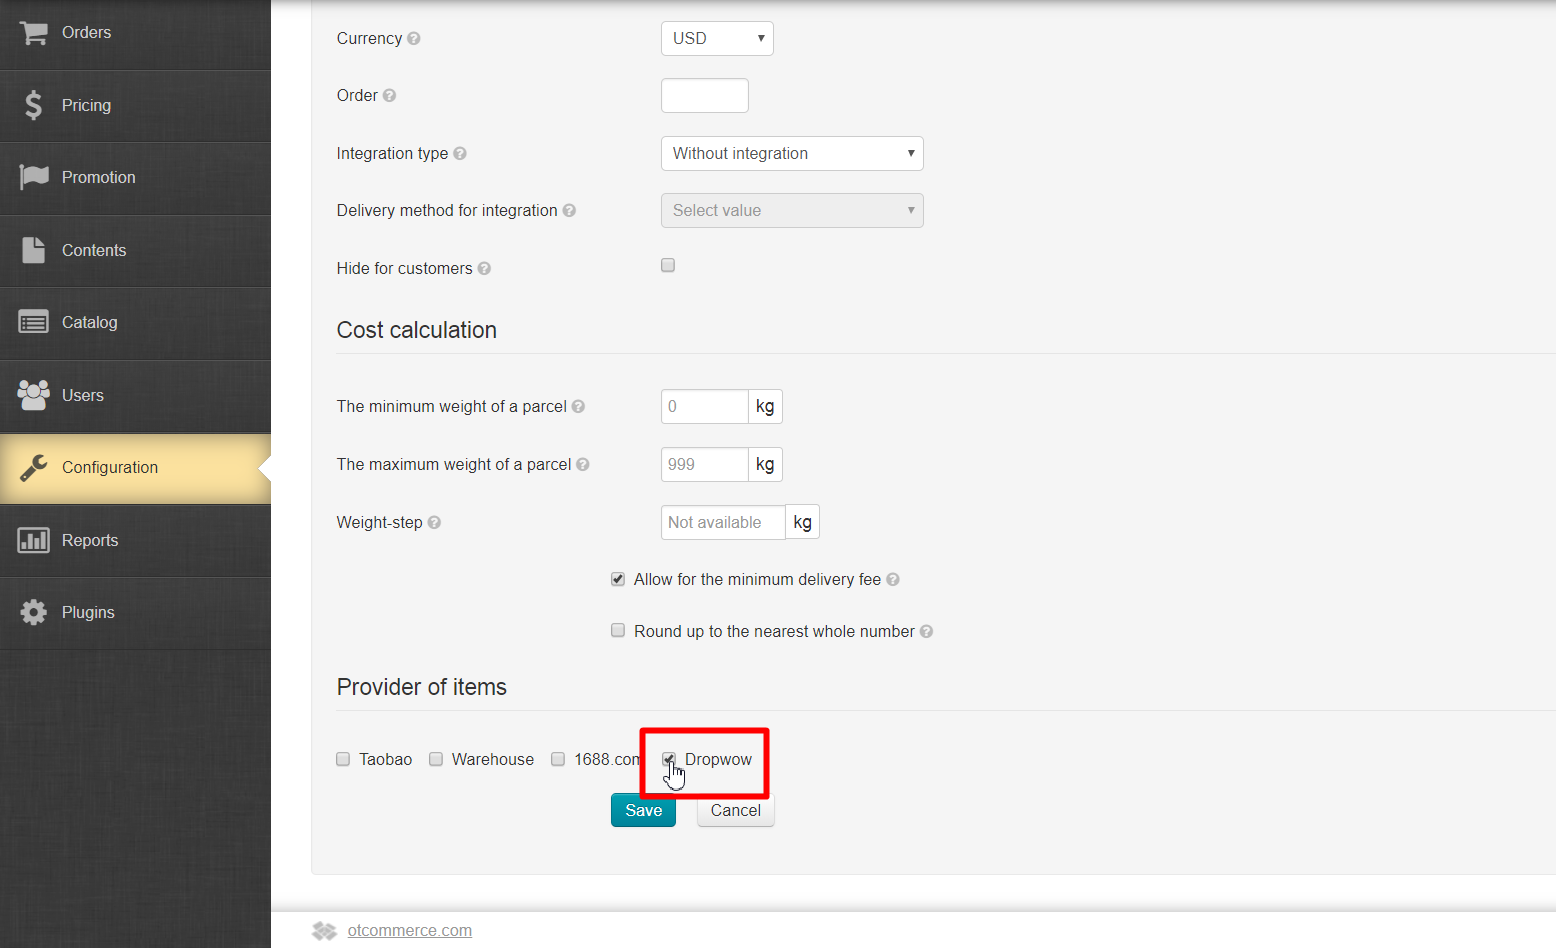
Put a tick next to "Allow for the minimum delivery fee" then:

Choose Dropwow Trade Provider, so that delivery applies only to this provider products and does not concern others:
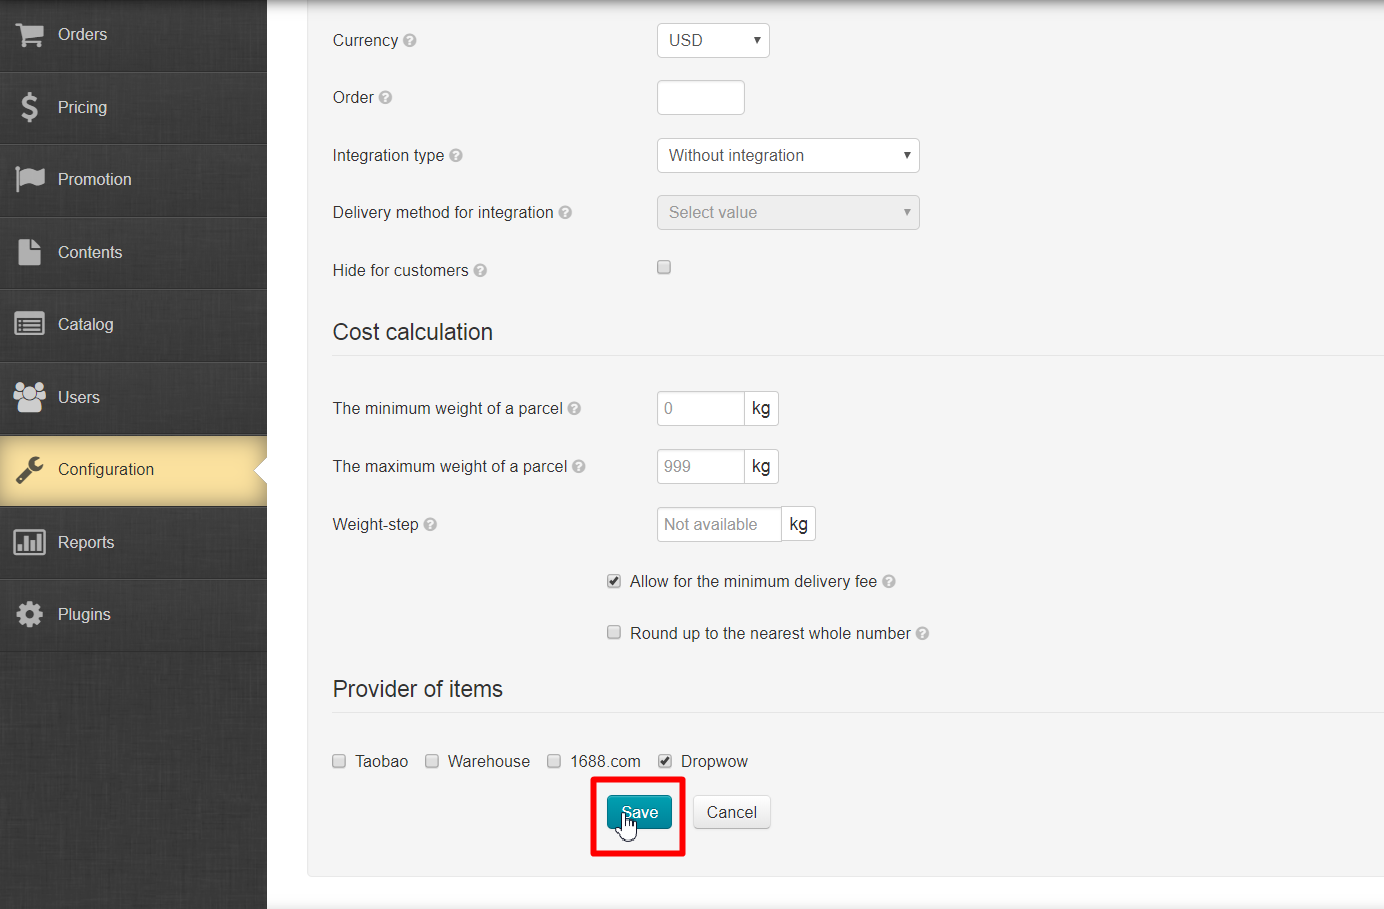
Save delivery:
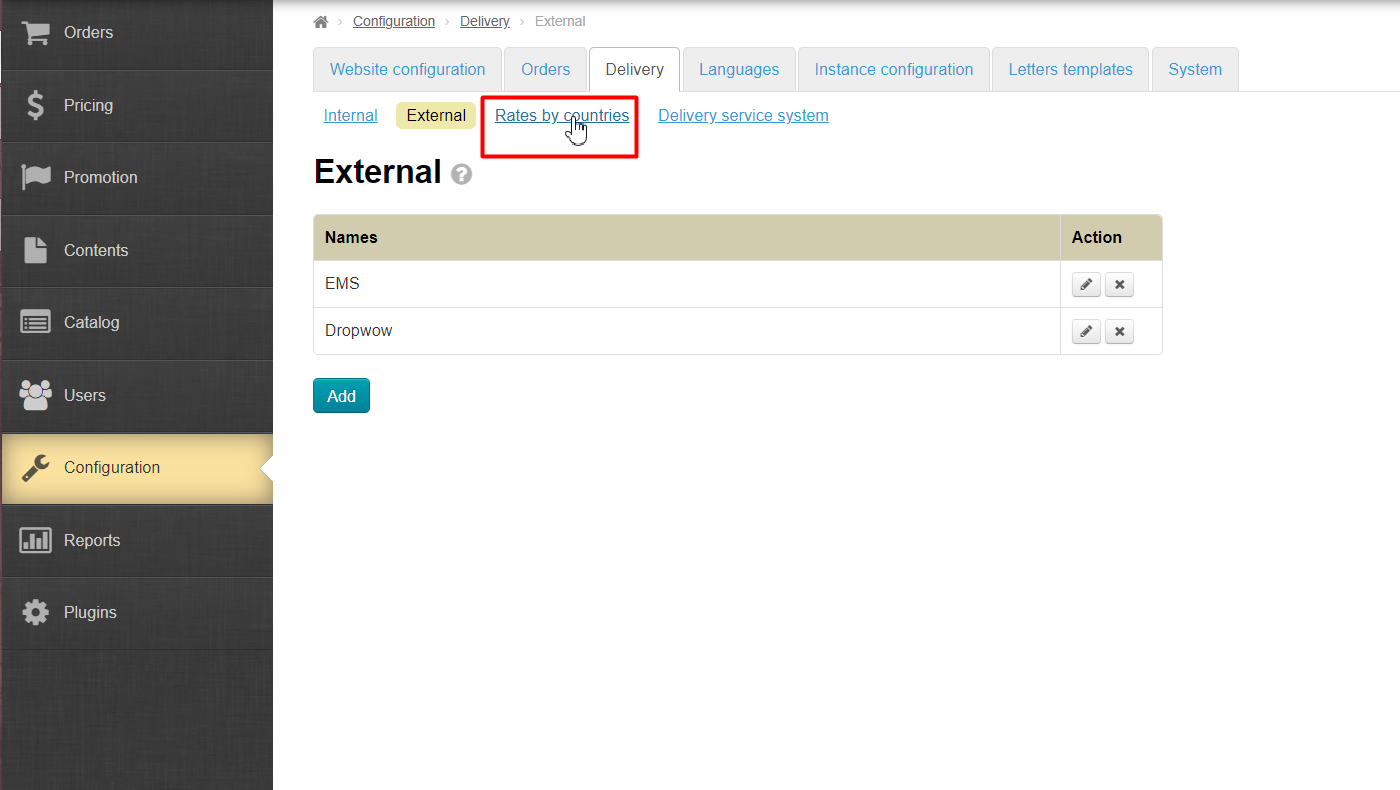
Next you need to add a list of countries to which delivery will be made. Dropwow delivers worldwide, so the choice of countries is limited only by your business strategy.
Open "Rates by countries" section:
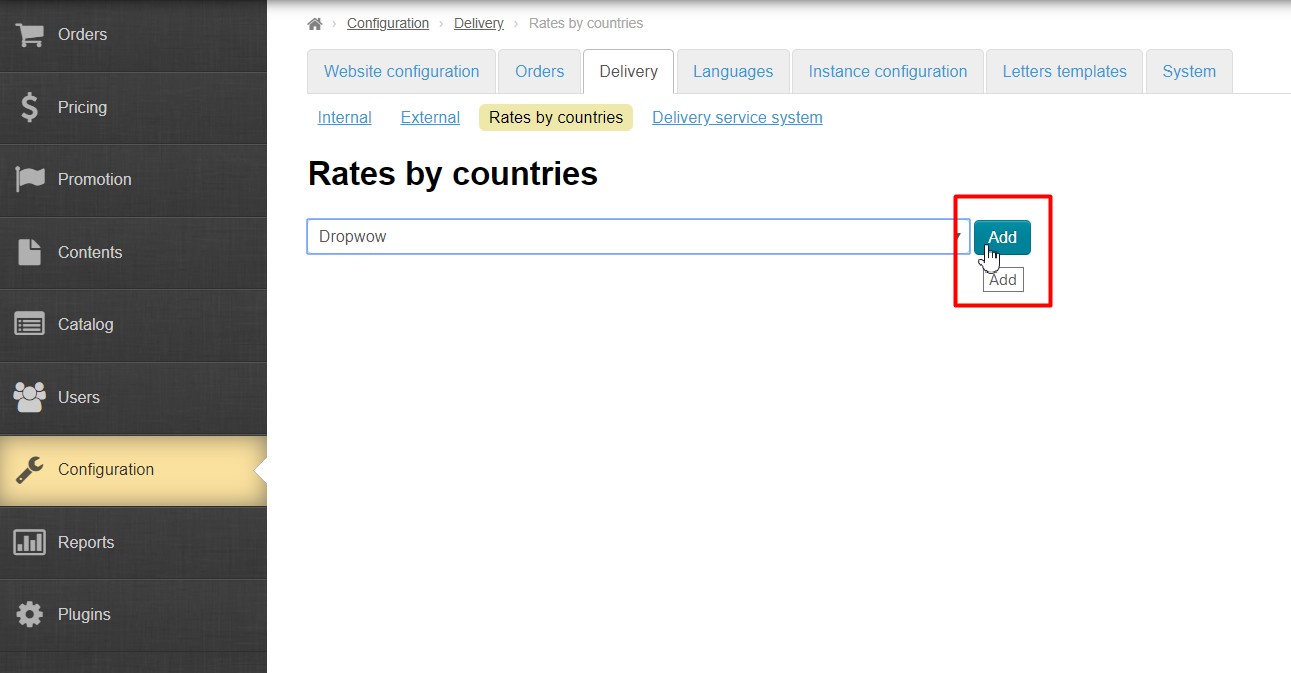
Choose Delivery we created before by mouse click from drop-down list:
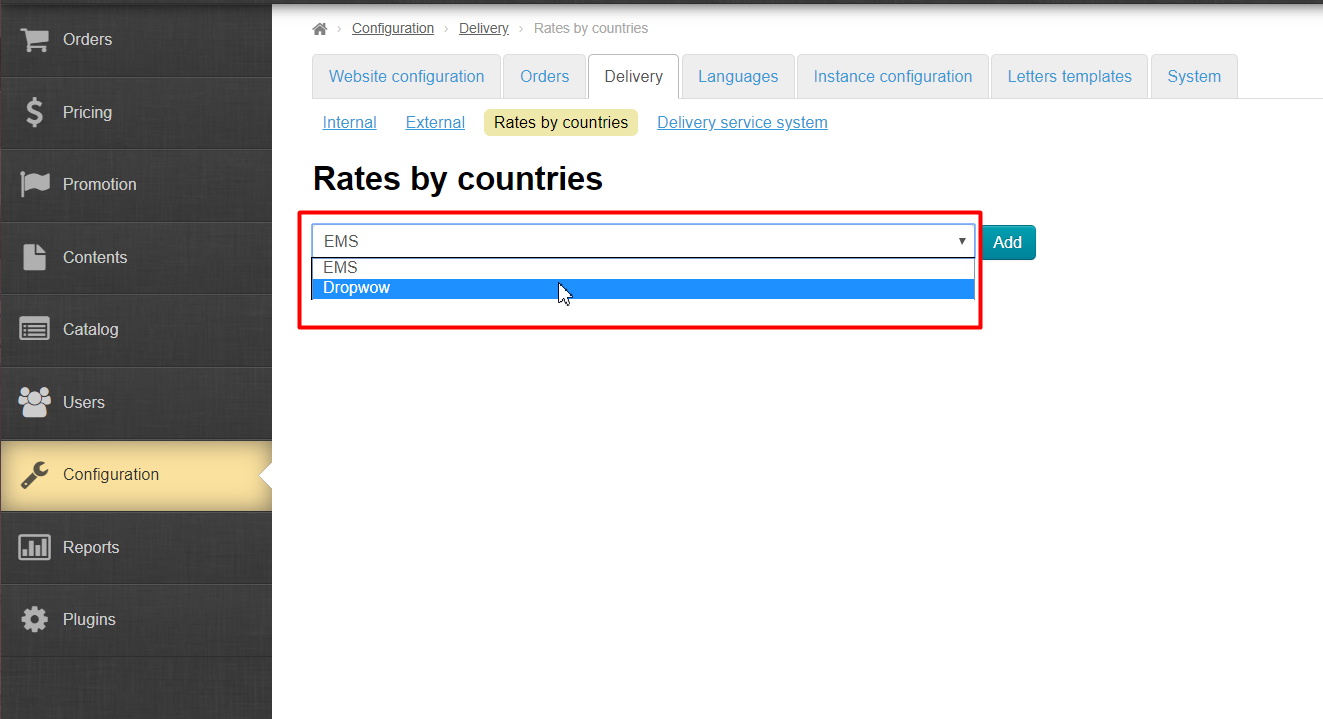
Click "Add" button:
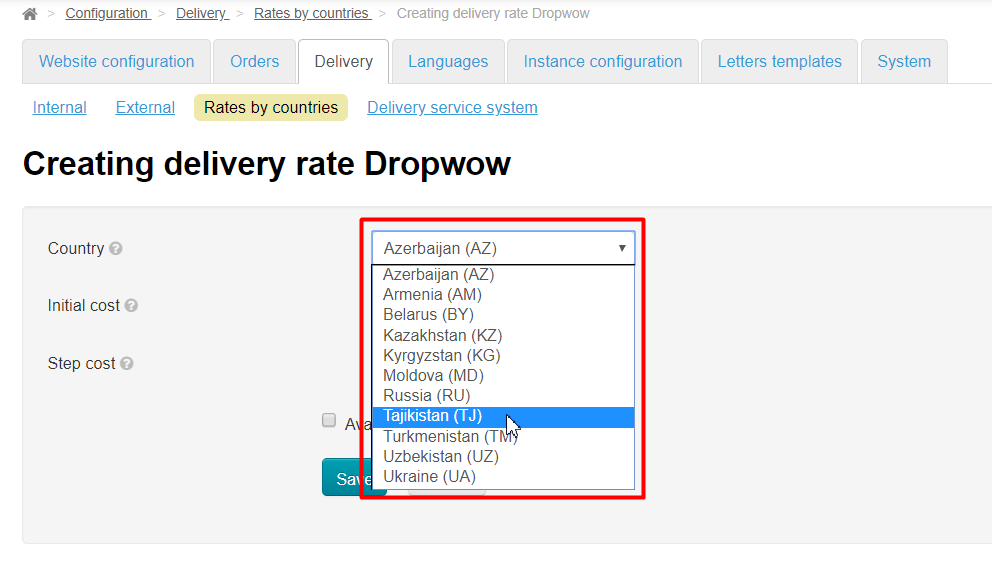
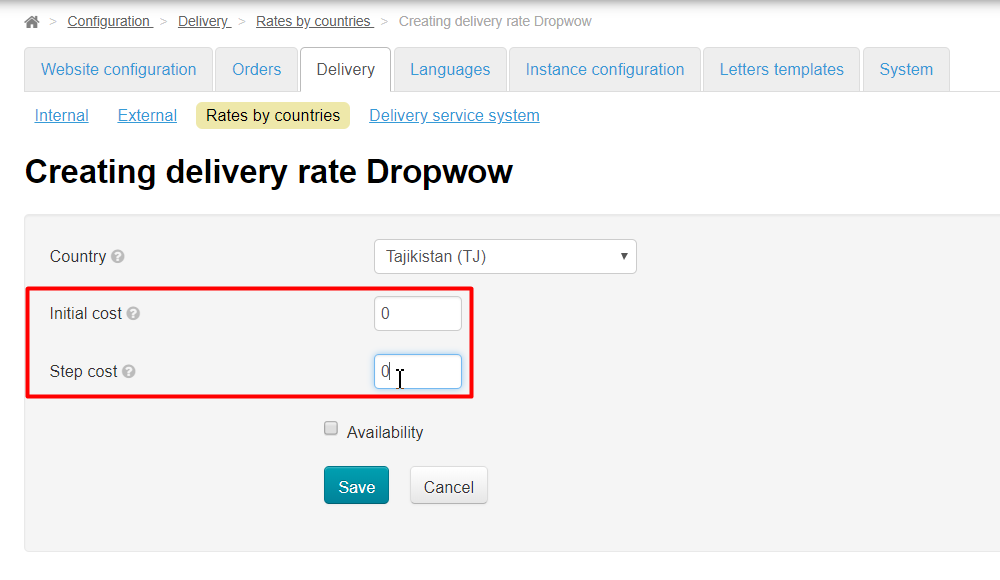
Choose country in opened form:
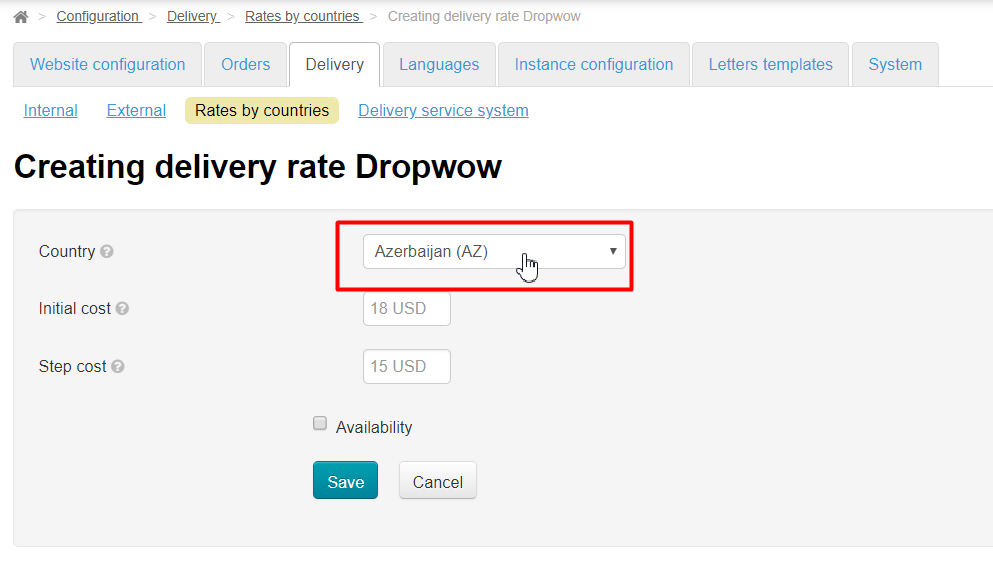
Put zero into other fields:
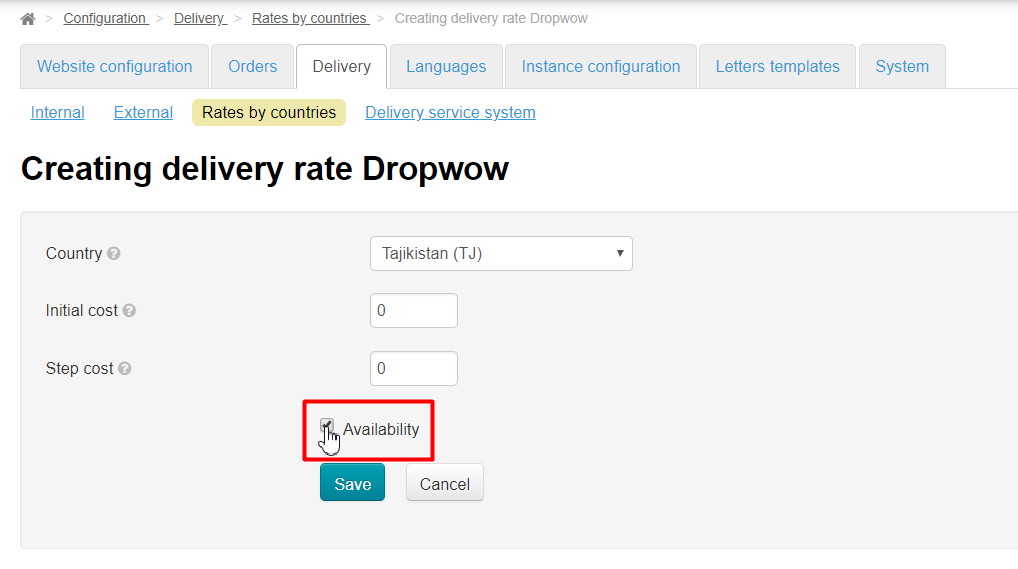
Put a tick next to "Availability" inscription, so that delivery is displayed when placing an order:
Save all changes:
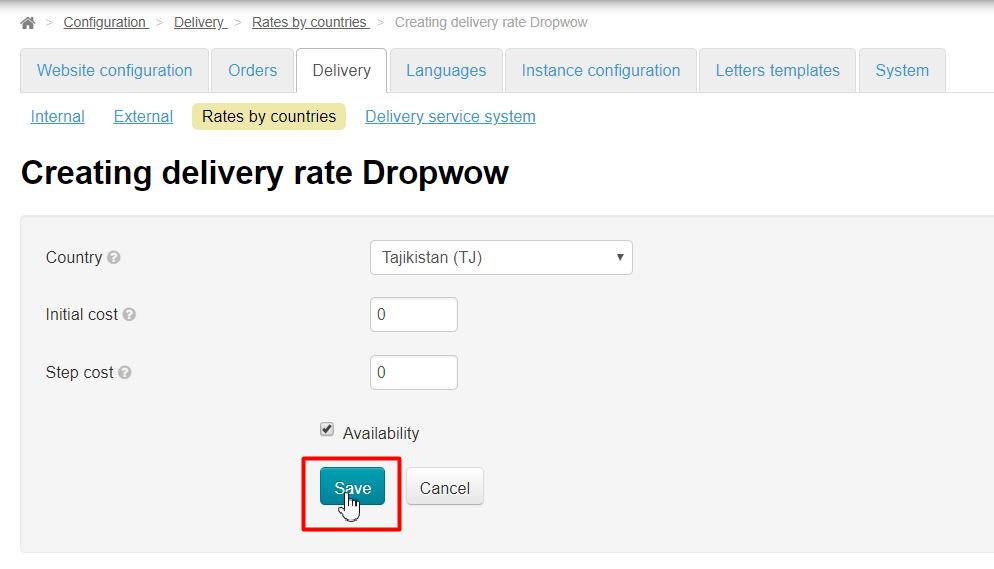
Set up all countries necessary for goods sale in the same way.
...
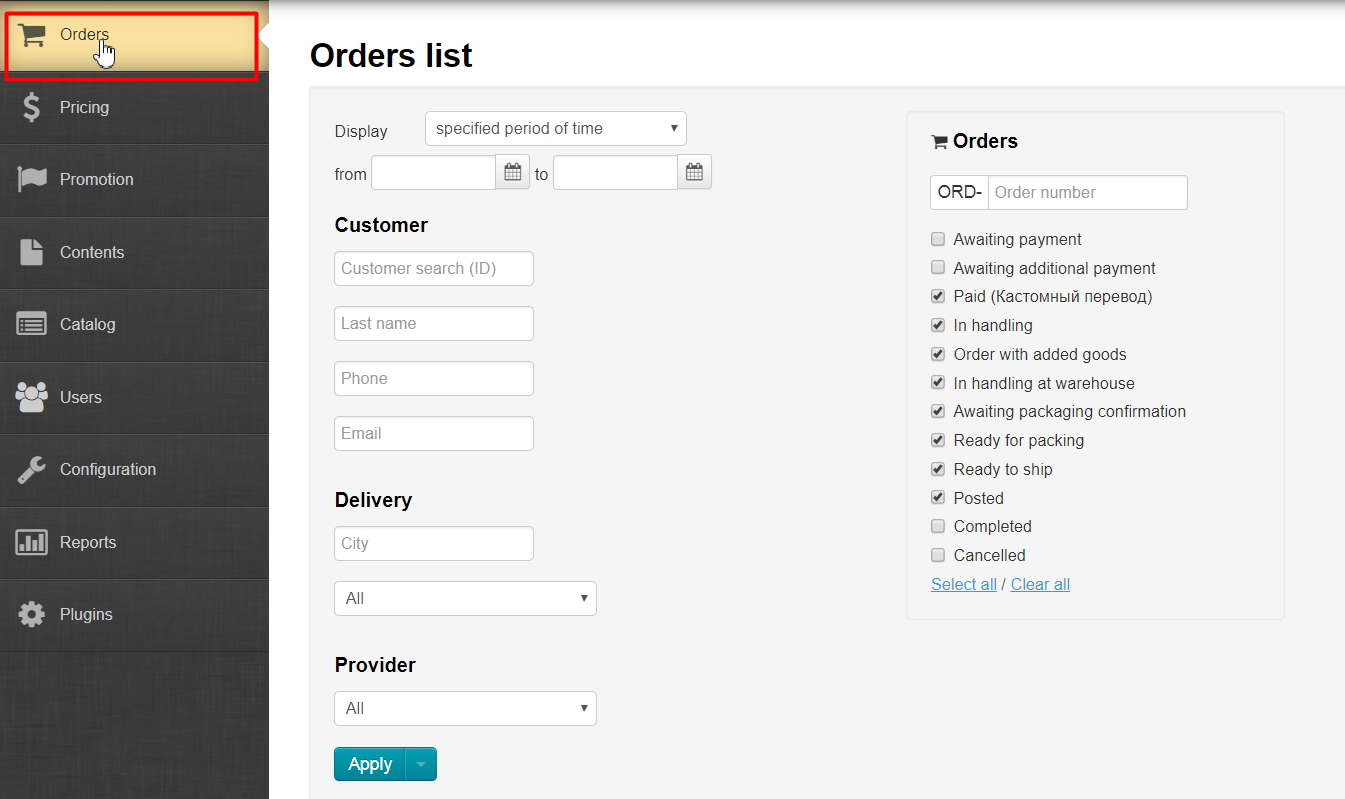
We go to "Orders" section:
Look for orders that were made in Dropwow Trade Provider. Look for Provider line to facilitate the task:
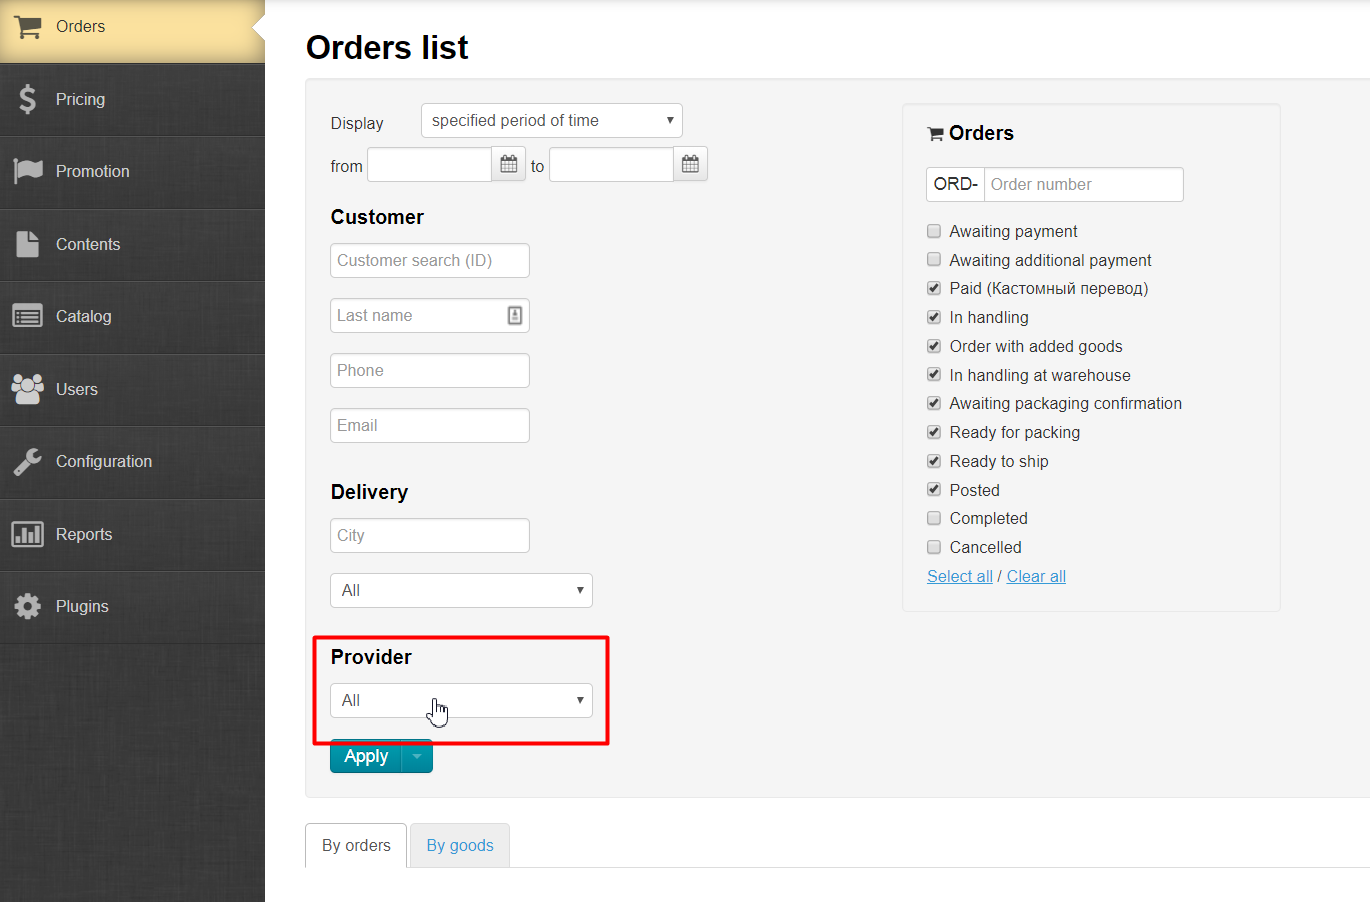
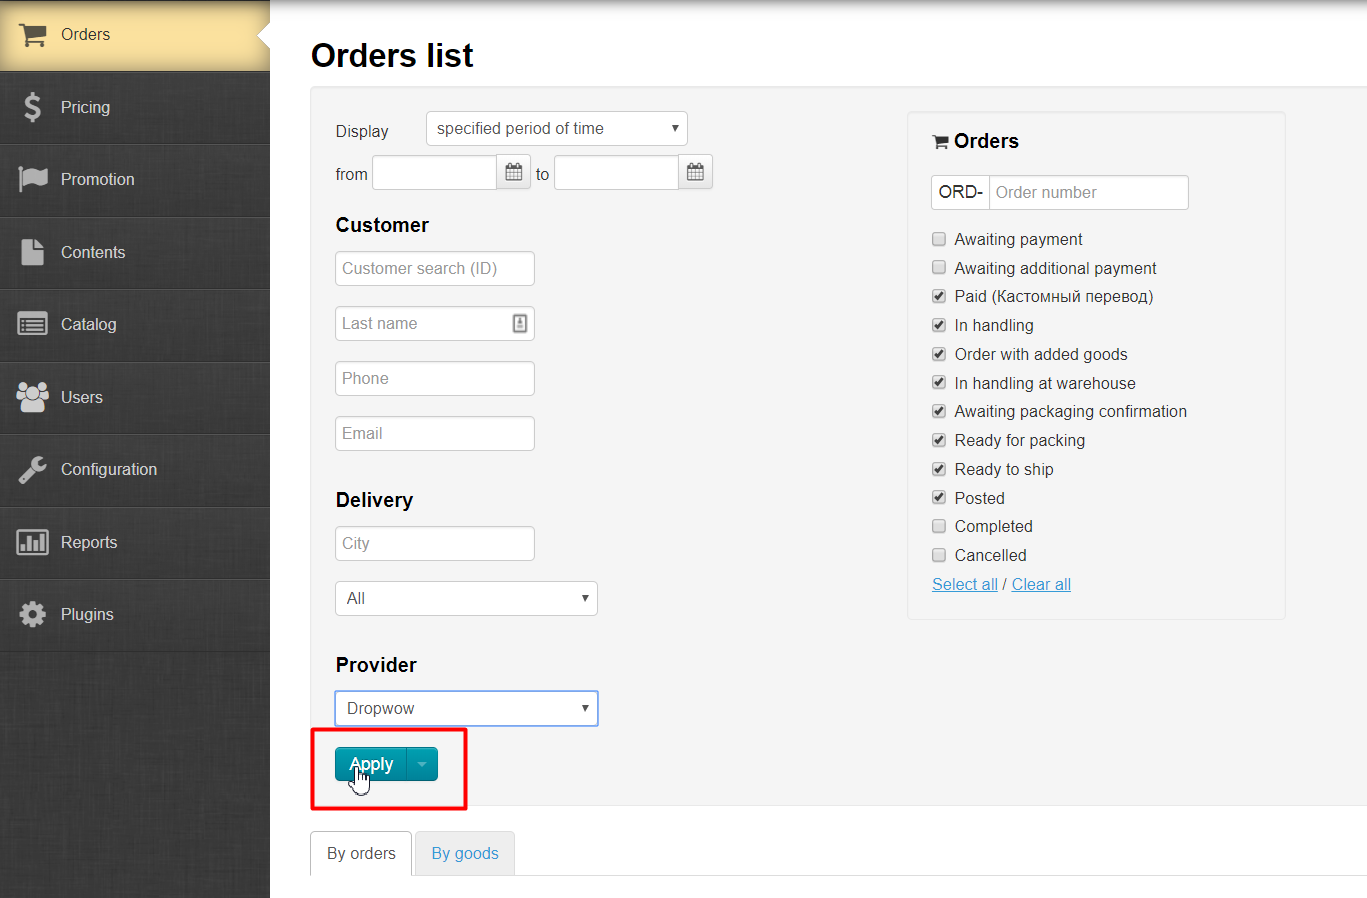
Click mouse and choose Dropwow Trade Provider in dropdown list:

Click "Apply" button to see orders:
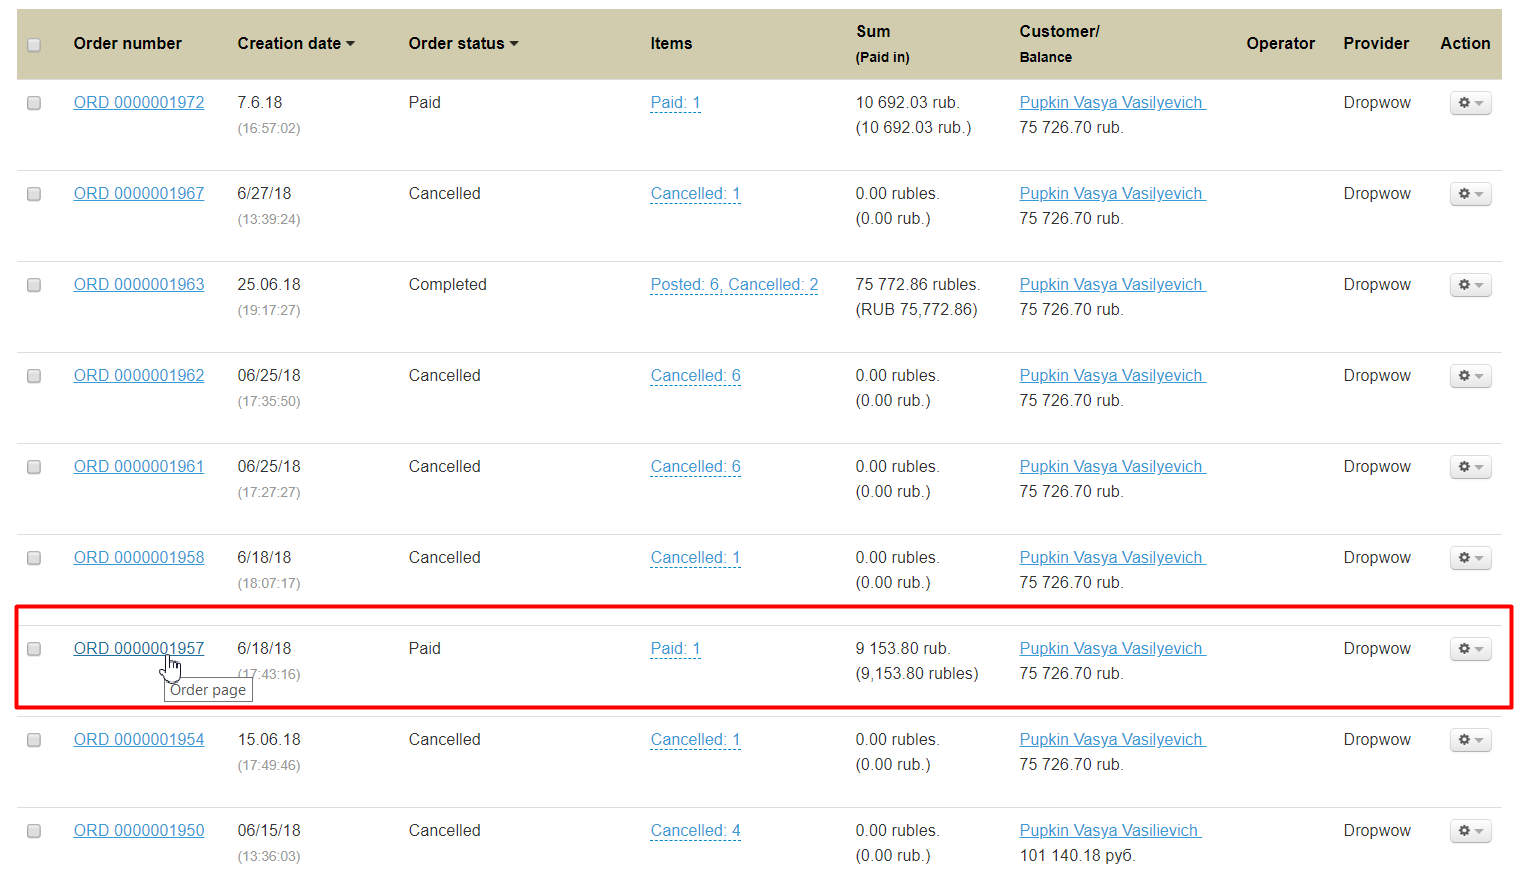
Ready. Orders according to filter are found. Choose order we want to send for purchase:
Click order by mouse:
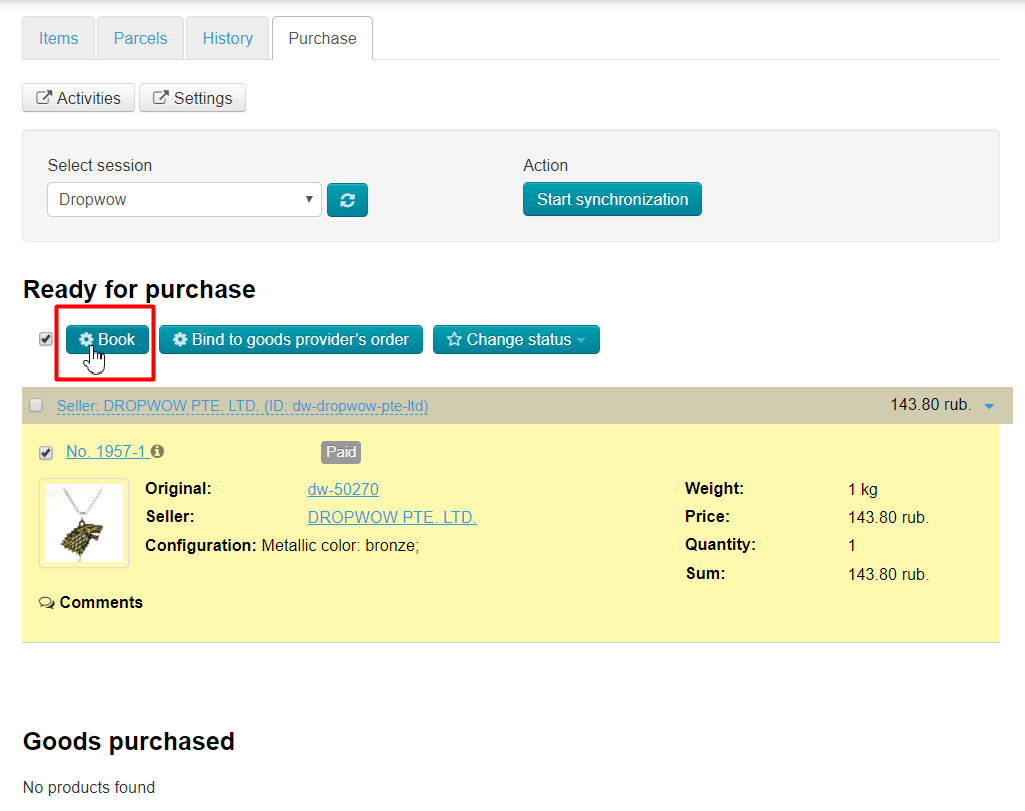
Open "Purchase" tab when order detalization opens:
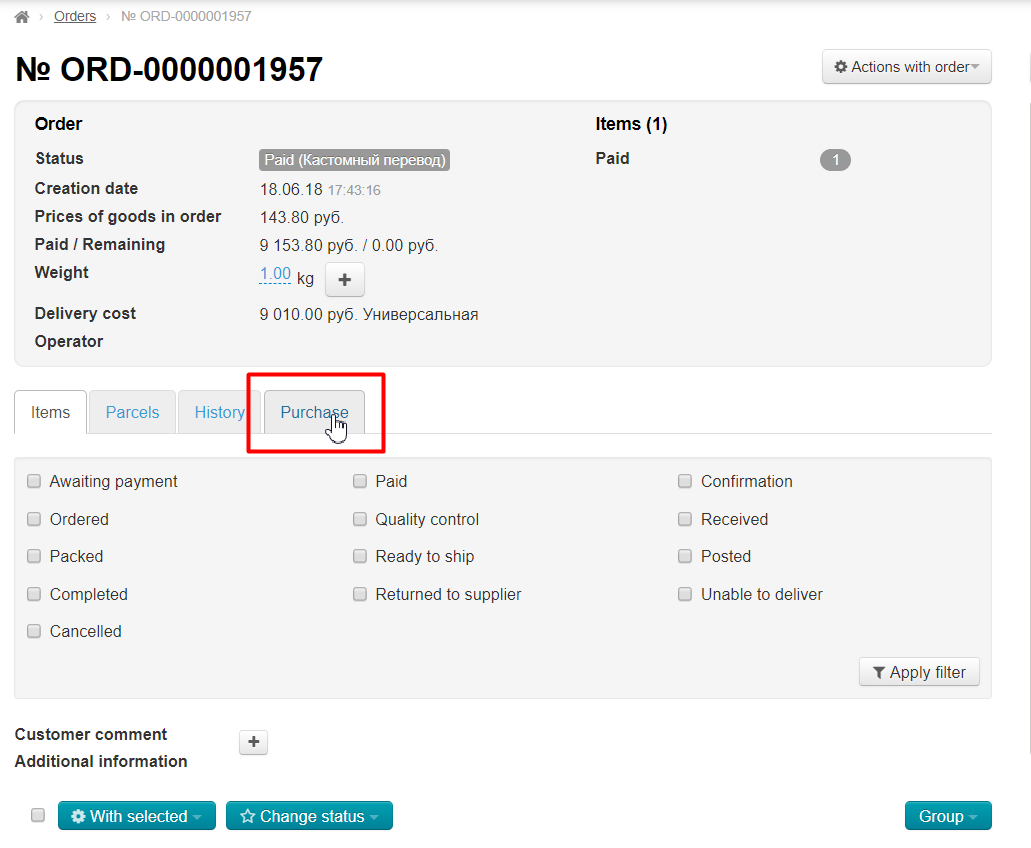
"Purchase" tab should contain goods in "Ready for purchase" section:
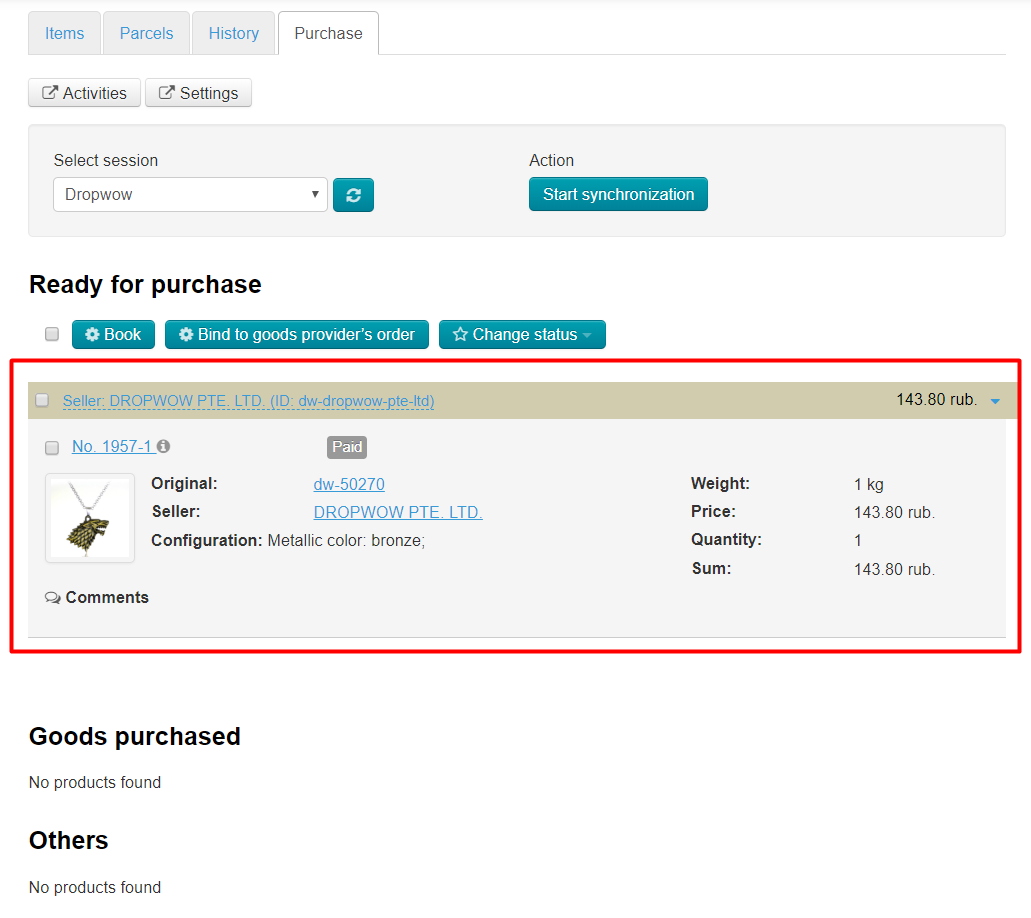
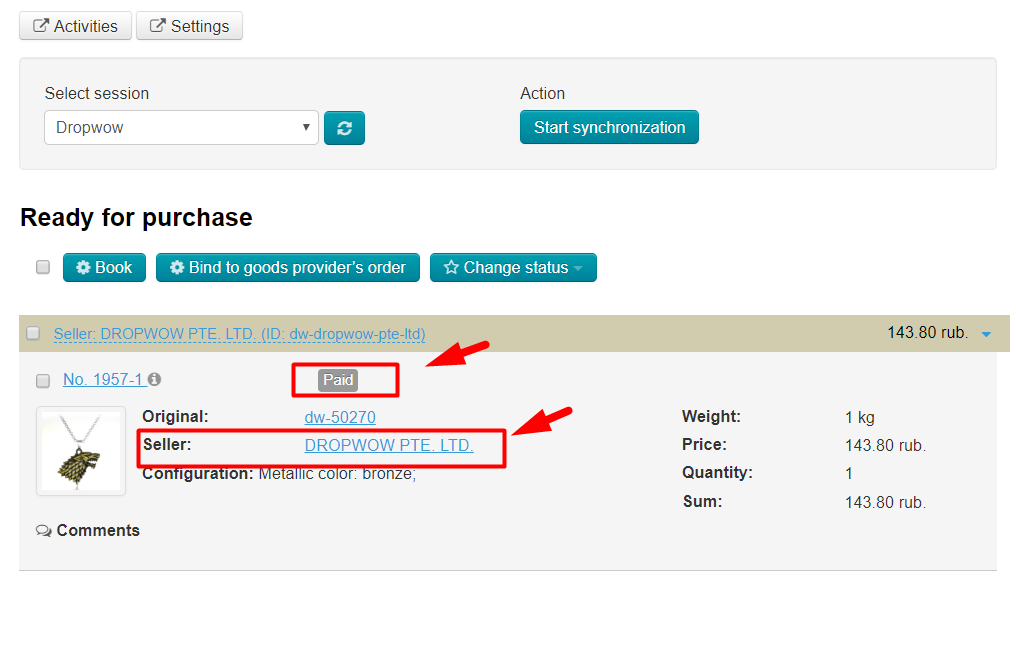
Check whether goods are paid and which vendor is specified if there are no goods there:
Ready-to-purchase items can be sent to Dropwow. Select goods that we want to purchase with the mouse:
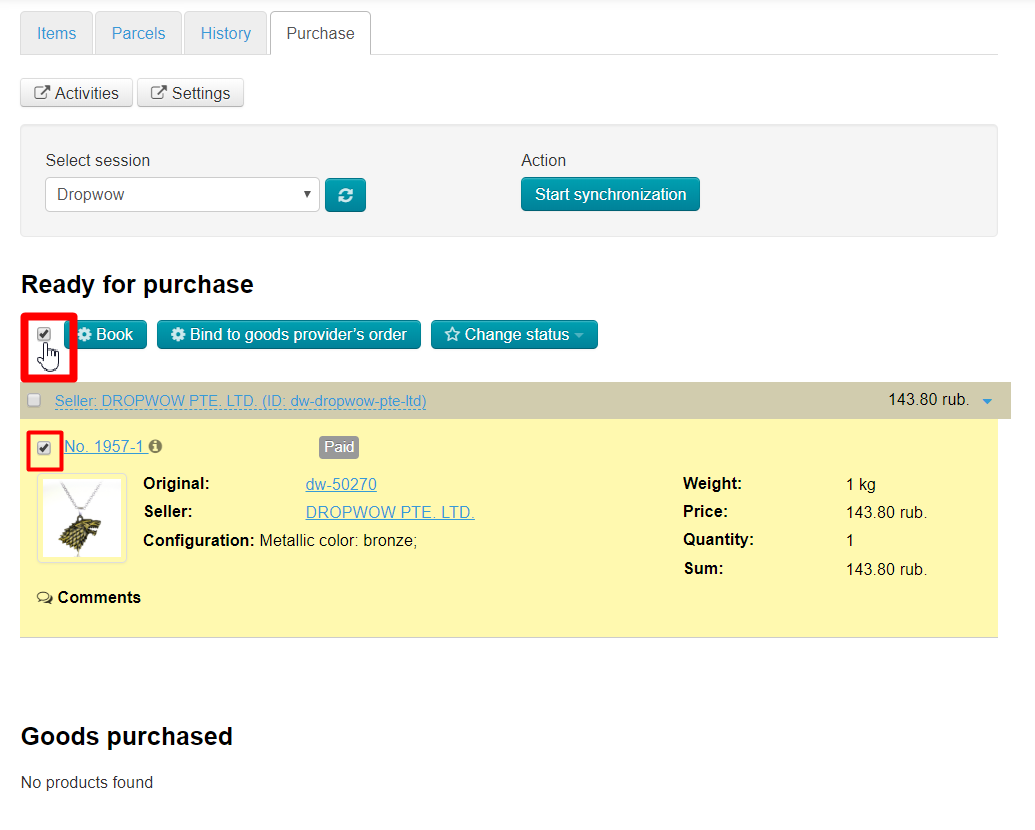
Click "Book" button when all goods are chosen:
Progress window will open after clicking "Book" button.
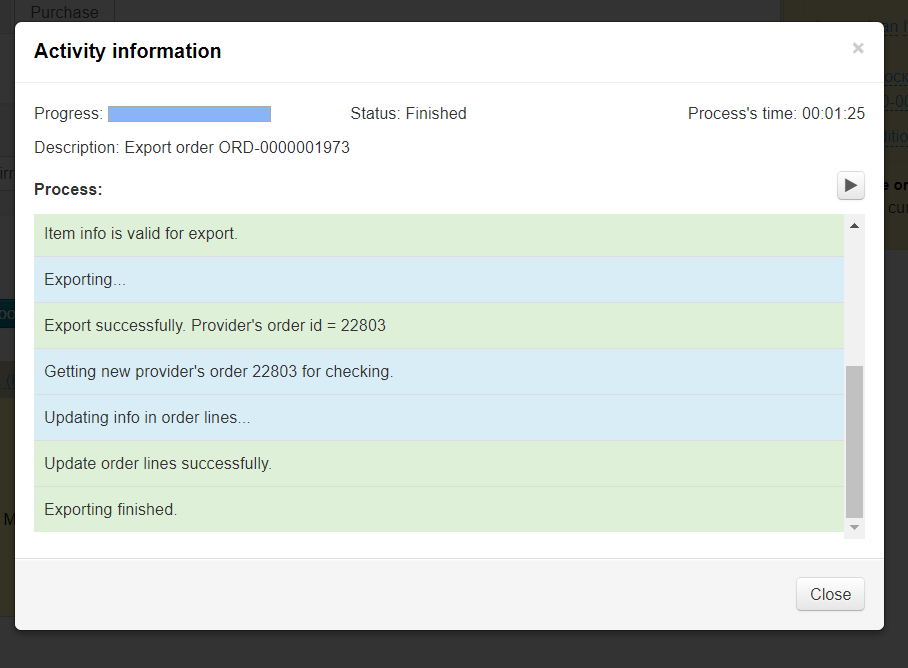
Closing the window does not affect booking process. Everything happens in background, so you can close it. The view is further available on "Activity" page:
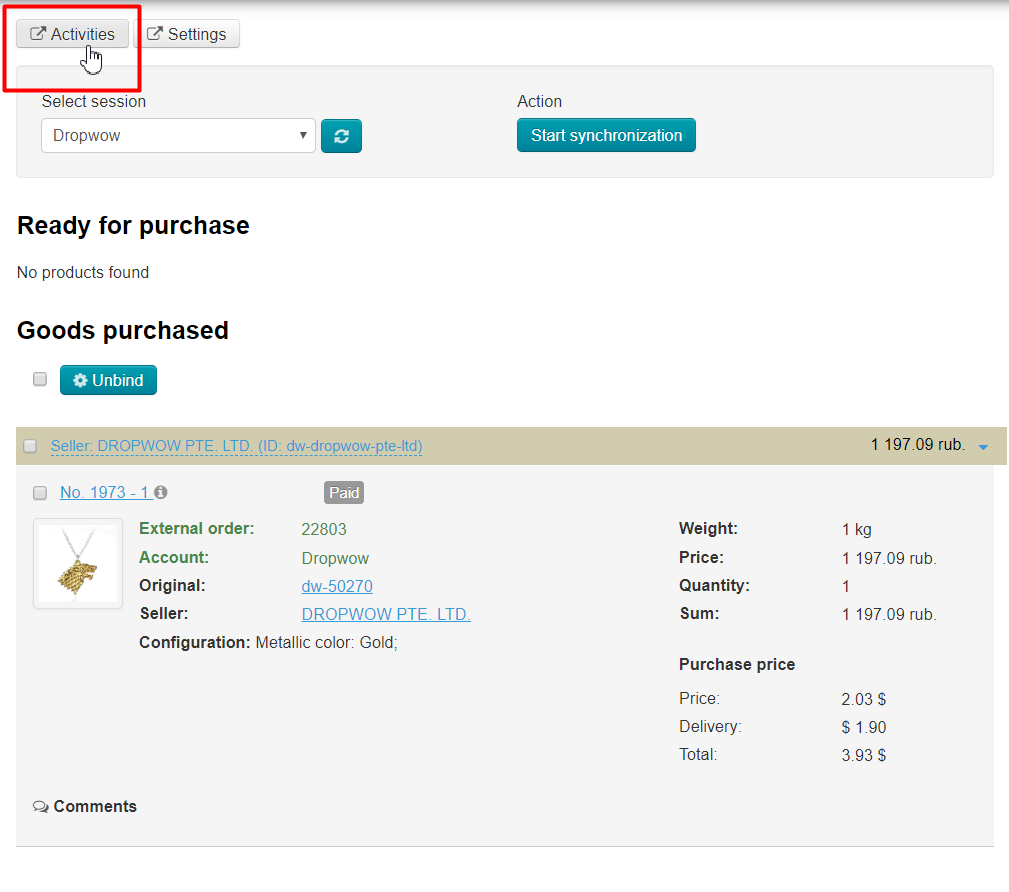
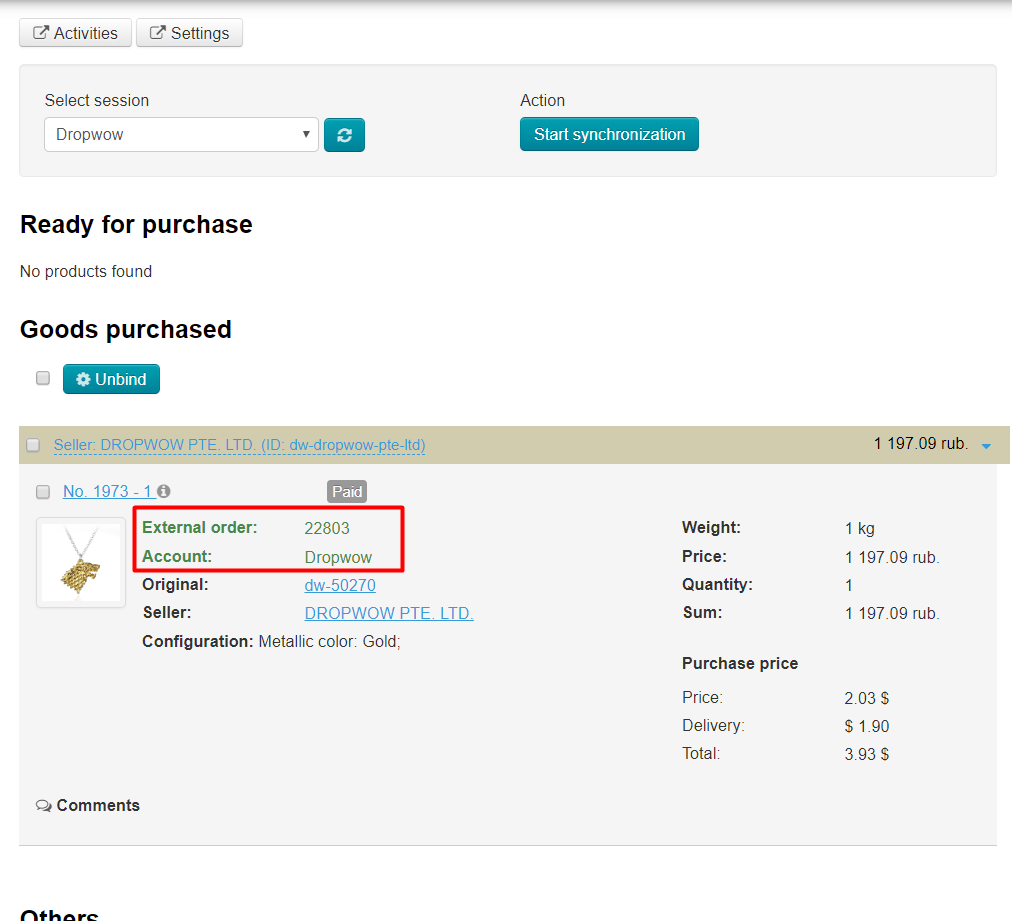
Product was successfully booked when "Account" and "External Order" fields appear, and they also moved to "Purchased" section:
You need to go to your personal account at Dropwow after booking where the order will be displayed:
...
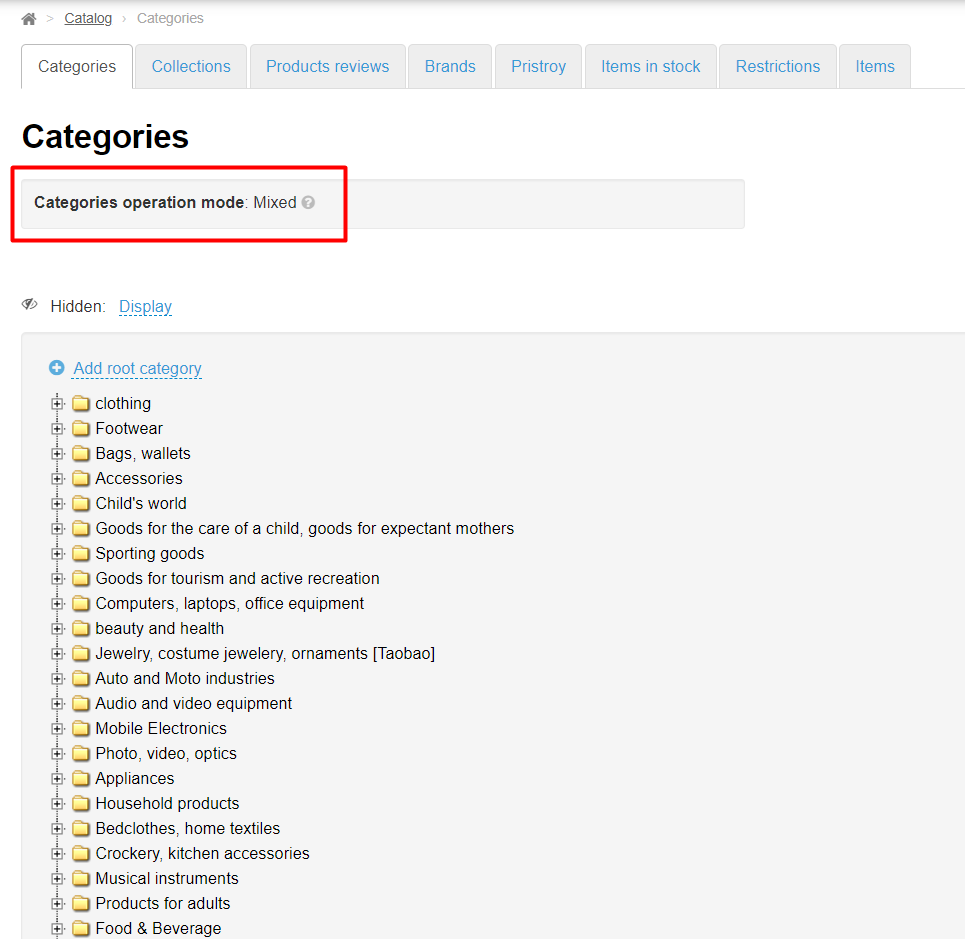
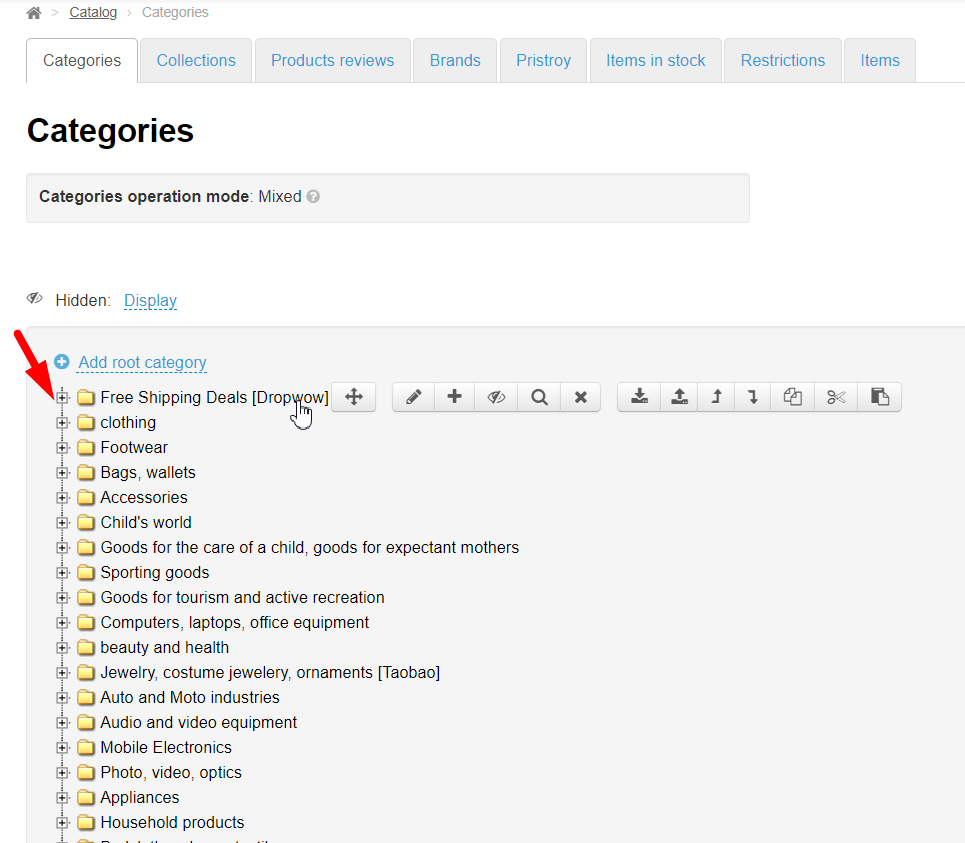
Open "Catalog → Categories" section:
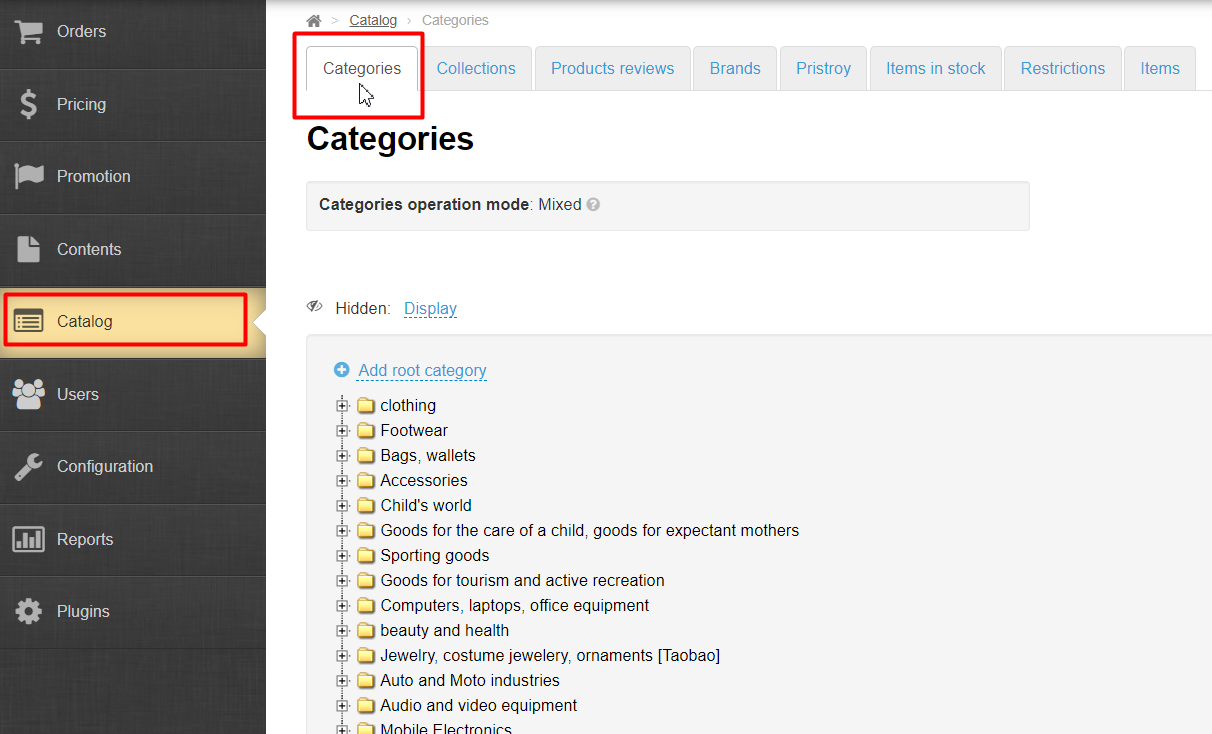
Check that catalog mode is mixed:
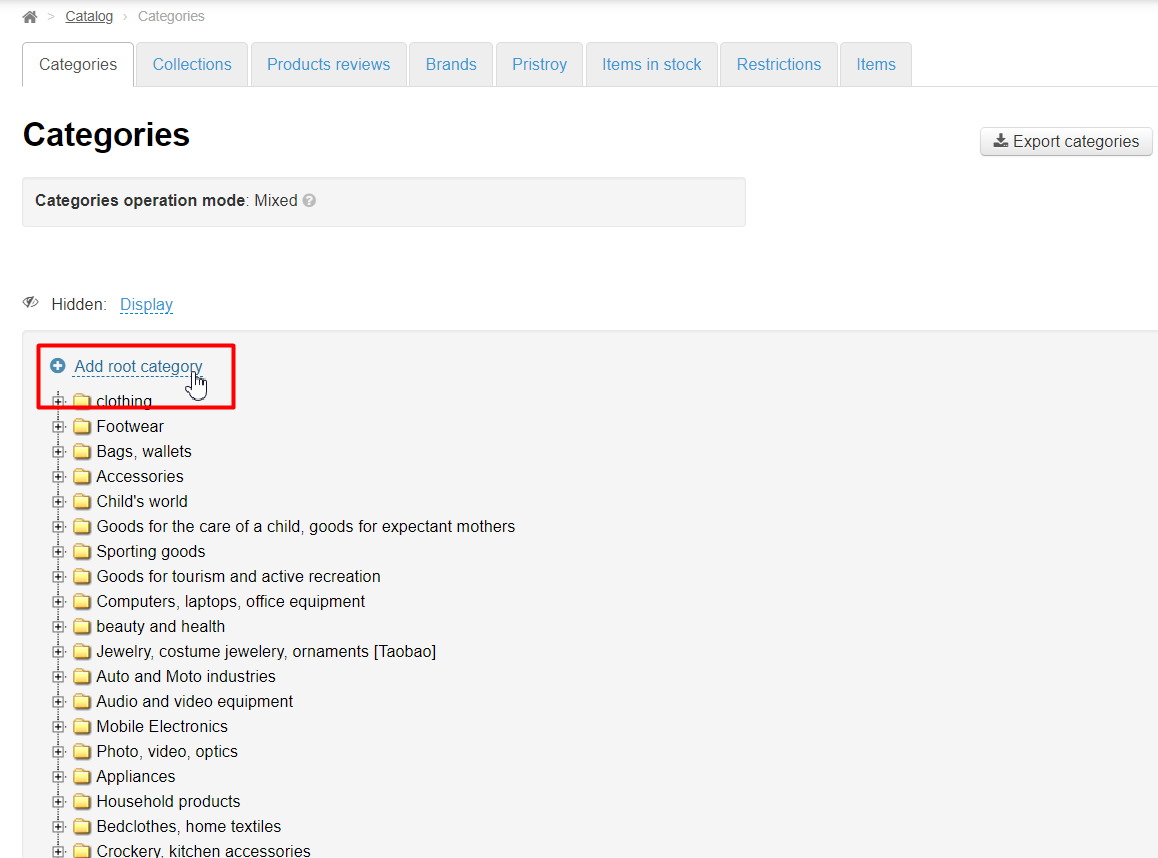
Mouse click "Add root category":
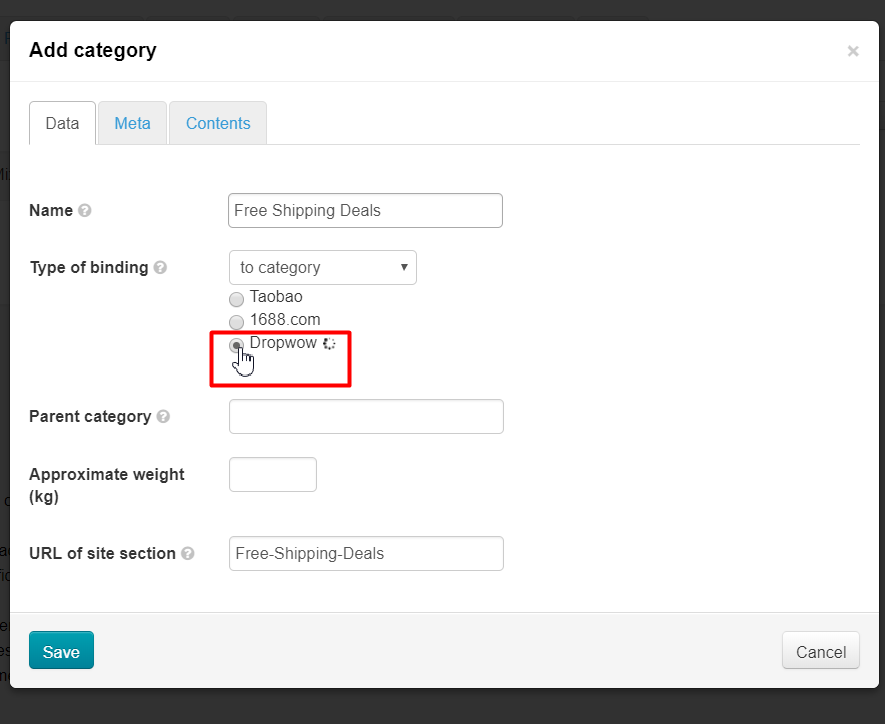
Write category title in opened window:
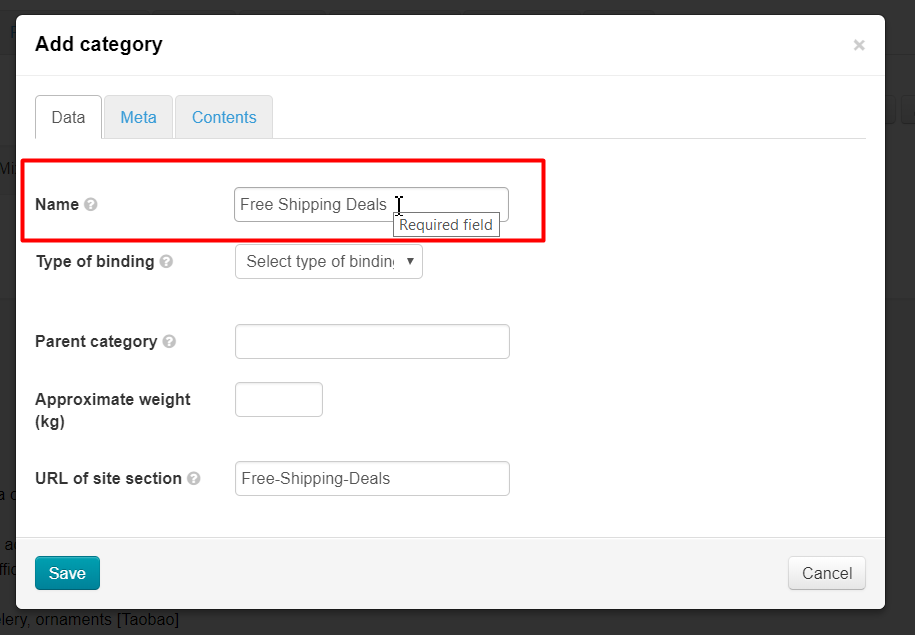
Choose "To category" binding from drop-down list:
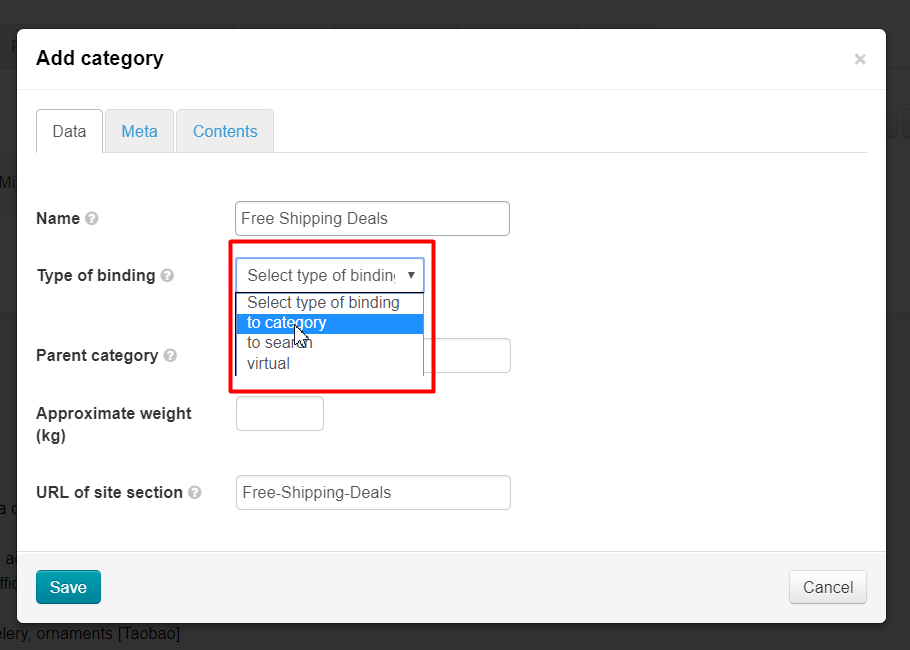
A list of available commodity providers will open. Choose Dropwow by mouse click:
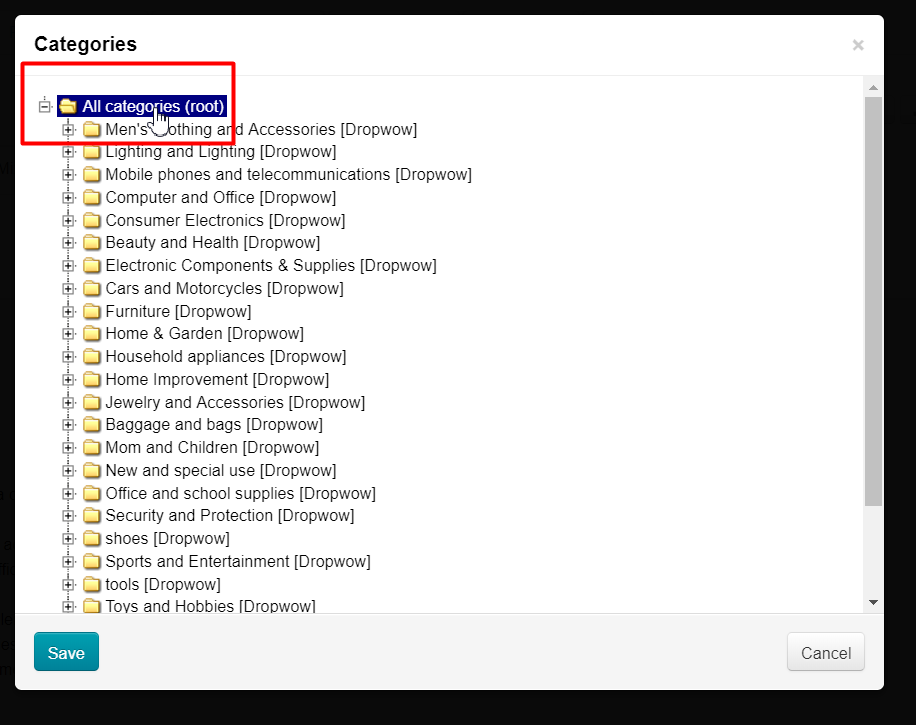
We will show the whole catalog after choosing commodity provider. Click topmost category:
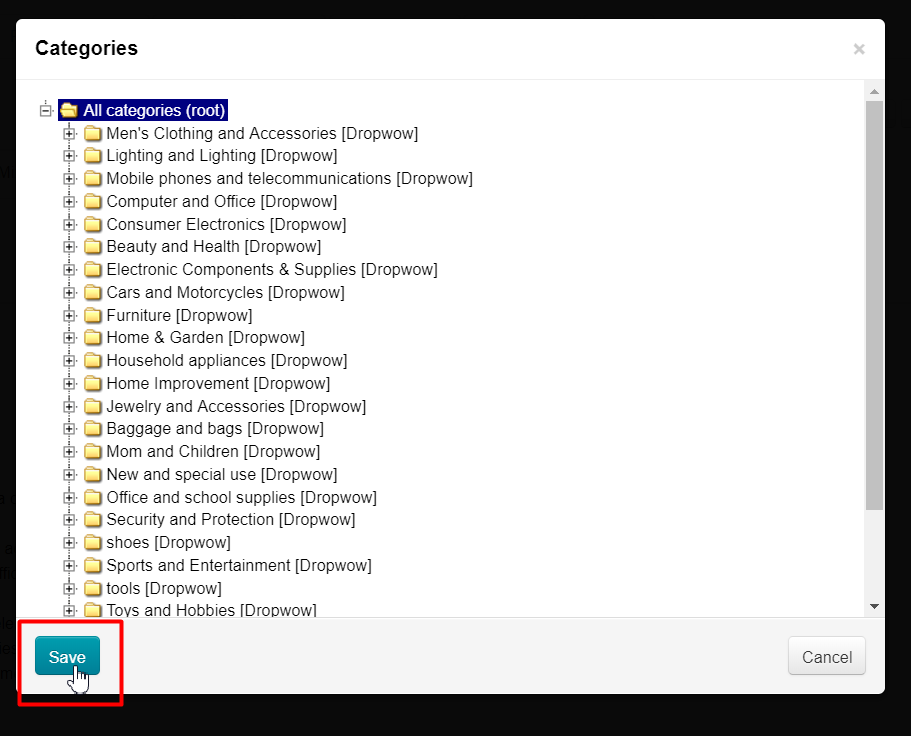
Click "Save" button:
This was saving of our category and catalog binding. Now we need to save again to show created category on the site:
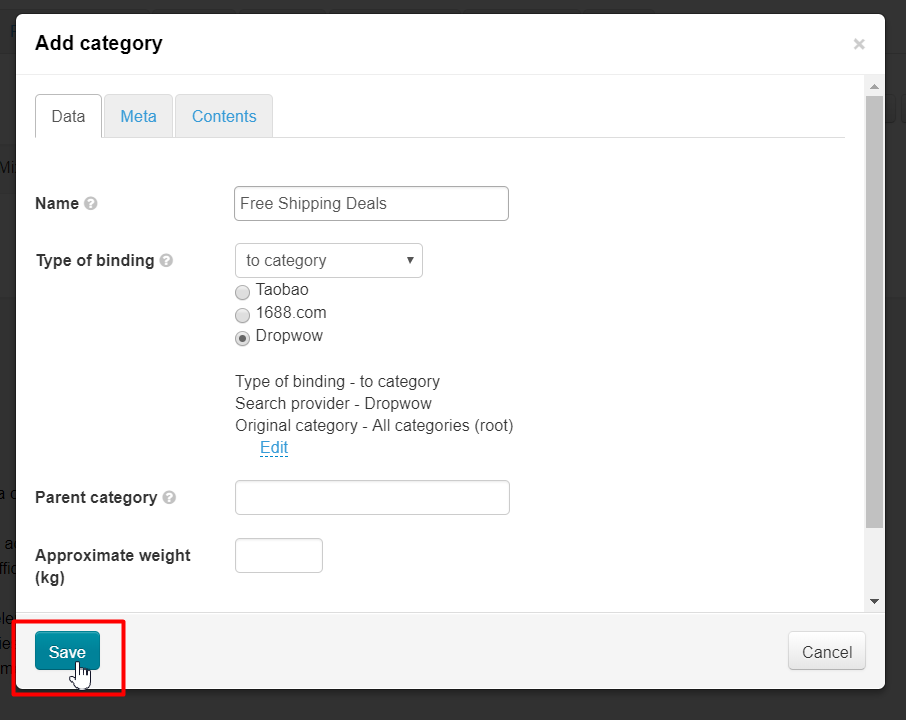
Ready! Category successfully appeared in catalog!
Thus, you can create both a whole section and also individual products categories. For example, "Women's handbags with free delivery." Or "Baby carriages directly from manufacturer", etc.
...