| Оглавление |
|---|
...
Description
Dropwow — is a Trade Provider with delivery to the end customer. It means that at first the service itself selects goods sellers that it trusts, then downloads their goods into its catalog, negotiates delivery and sends orders to your final customers with the ability to track the package.
...
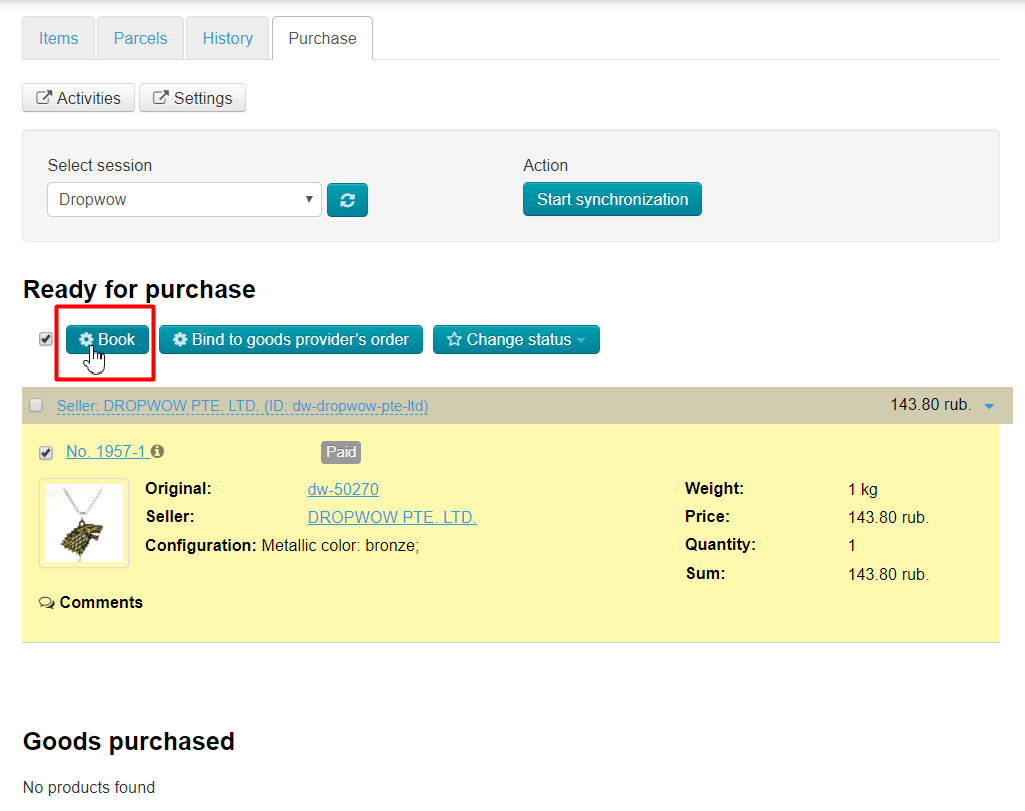
You buy goods clicking "Book" button in admin panel after buyers paid for orders:
All money transactions are made on Dropwow website in your personal account. Therefore, for purchase you need to login to Dropwow personal account and pay for the goods.
...
Log into admin panel and choose "Plugins" section:
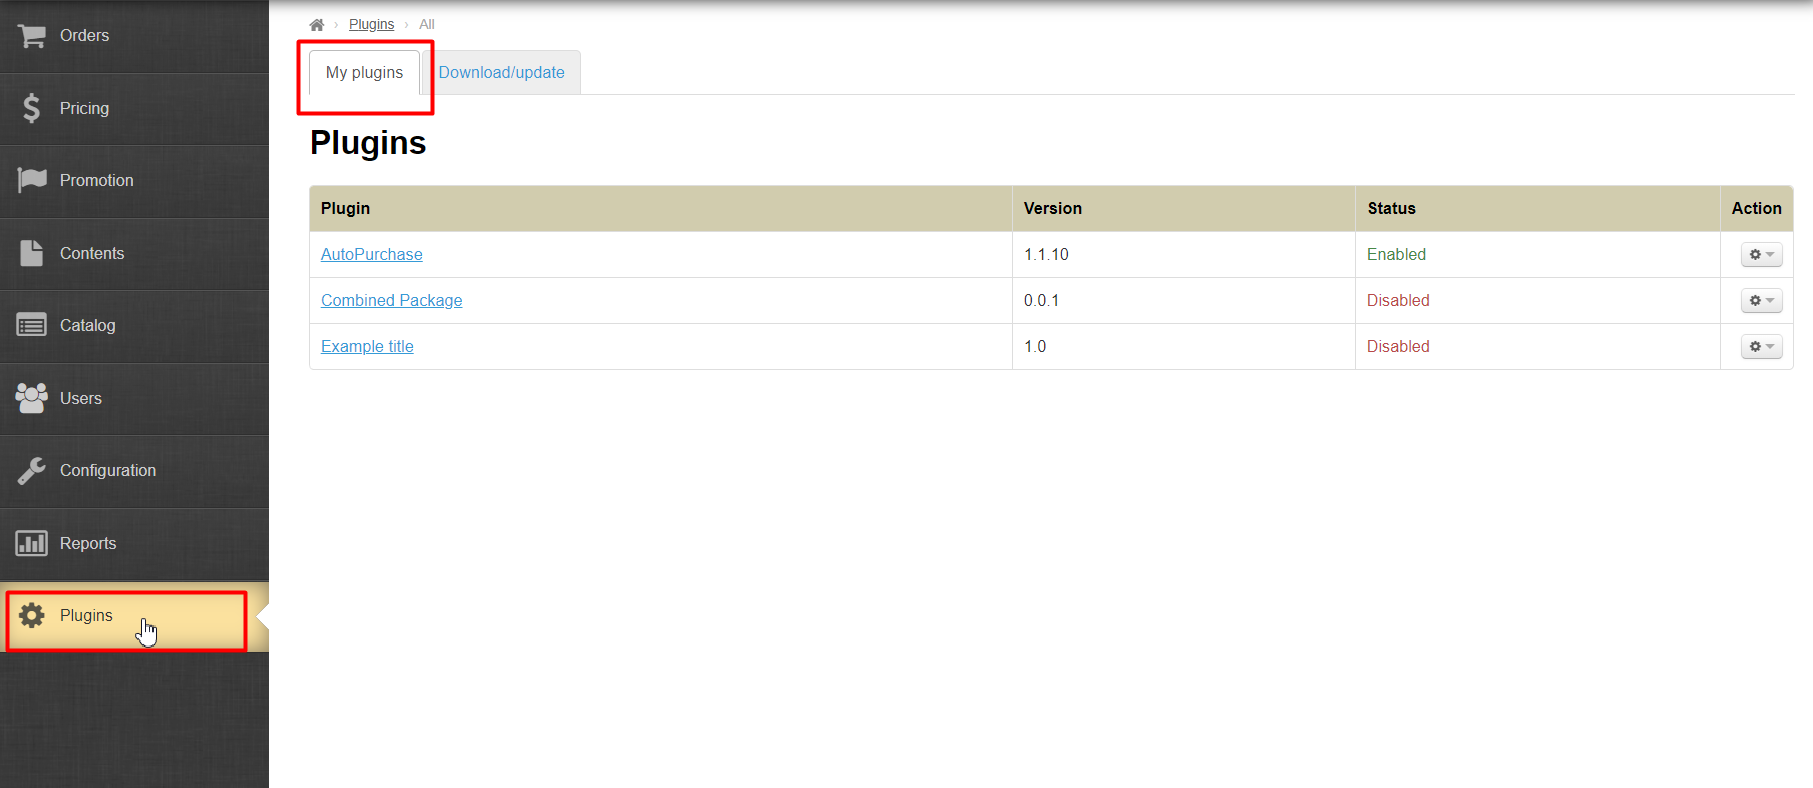
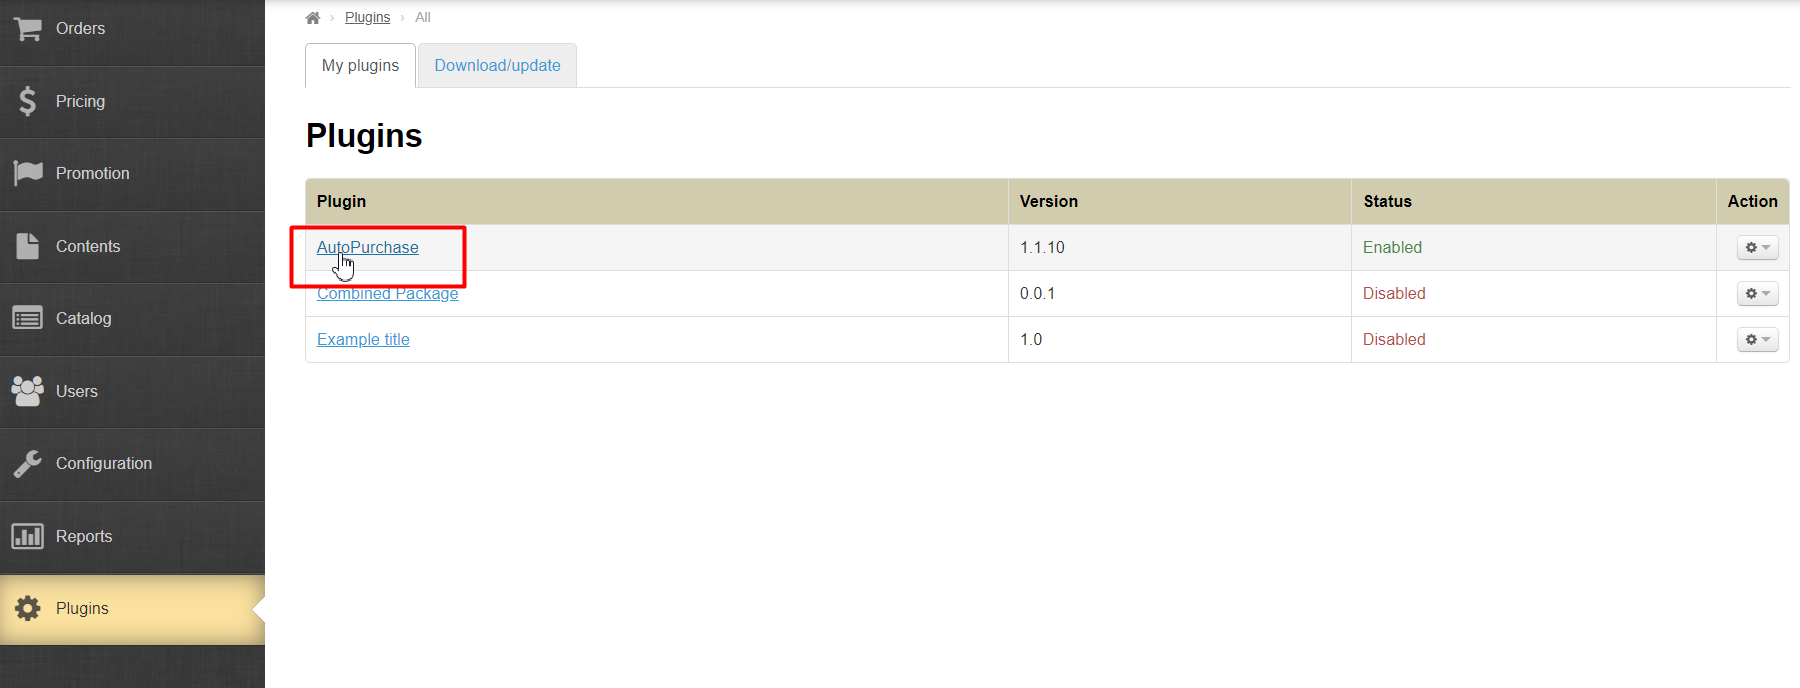
Choose "Autopurchase" plugin in the list and click it:
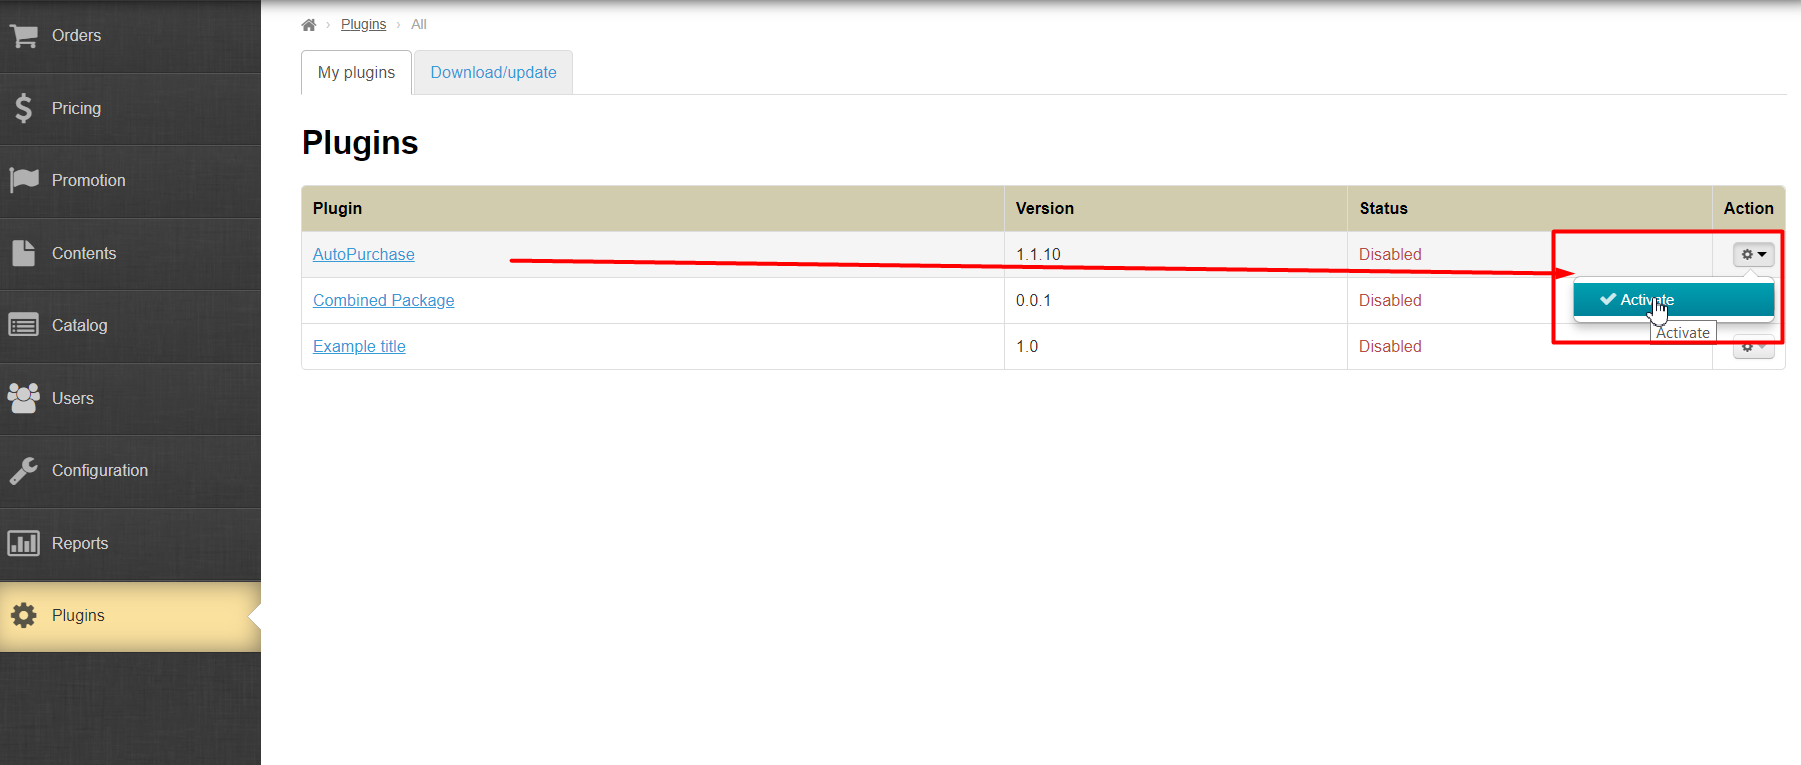
Click gear on the right and select "Activate" if plugin is inactive:
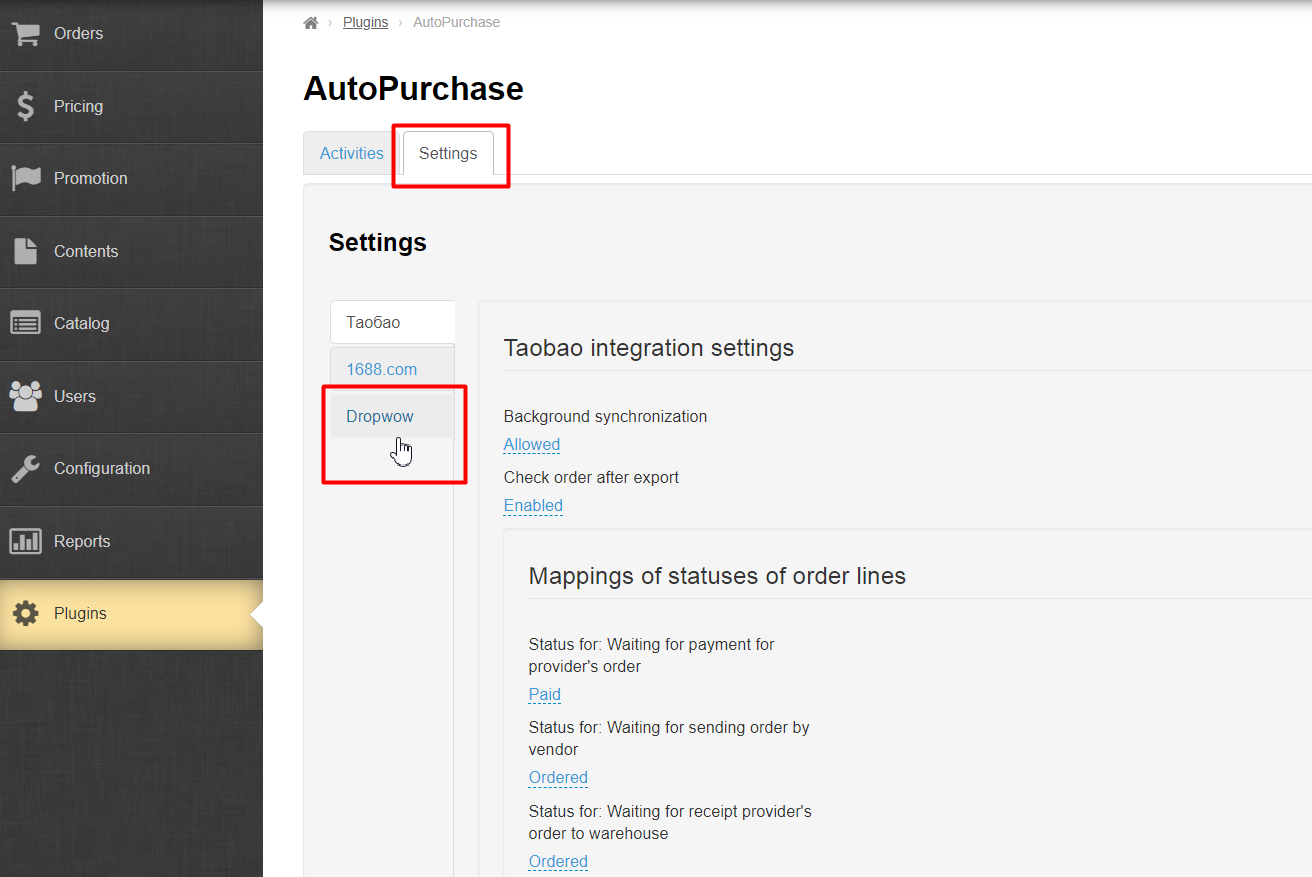
Choose "Settings" tab:
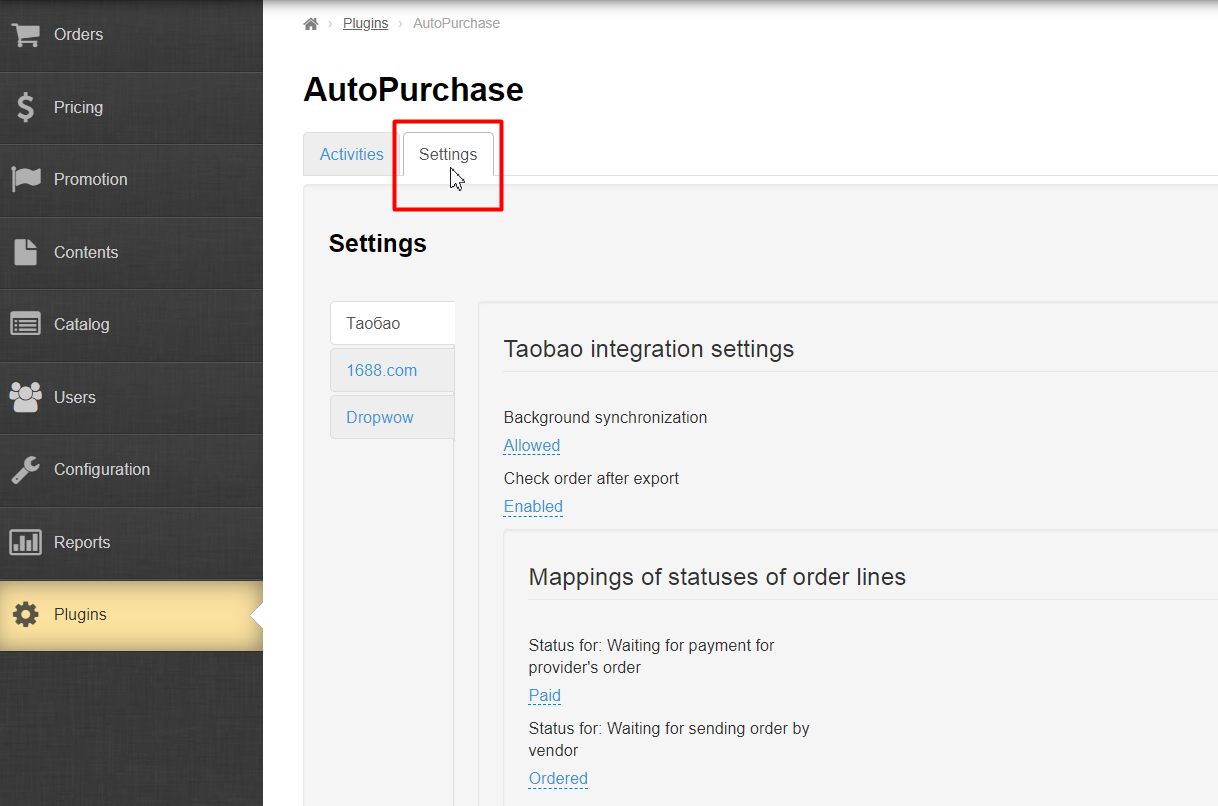
"Settings" tab lists all trade providers for which auto-purchase is enabled. Choose Dropwow:
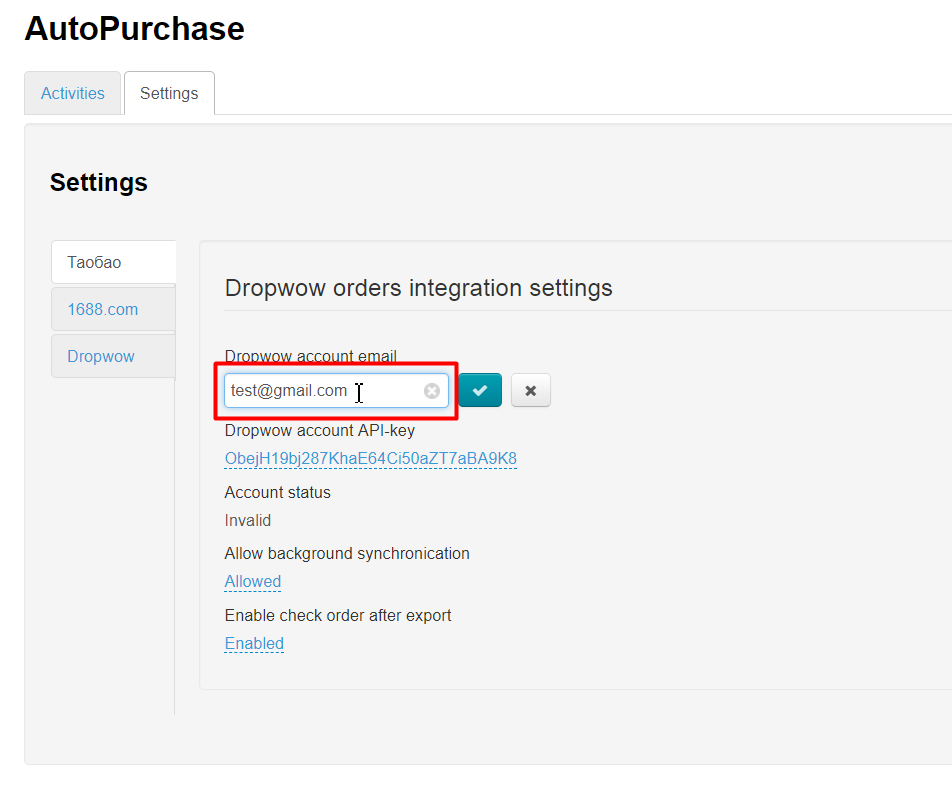
Check email you used for registration on Dropwow website:
...
Paste it in OT Box admin panel in "Integration with Dropwow settings" under Dropwow email account:
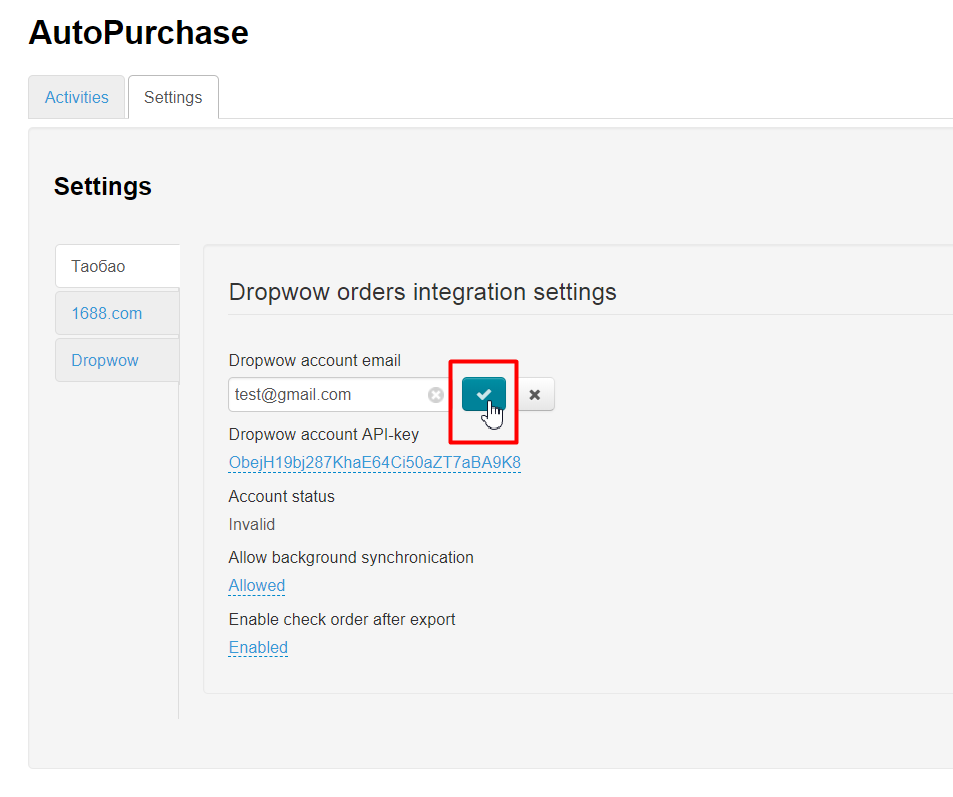
Save data clicking checkmarked button:
Copy API Key from profile details on Dropwow website:
...
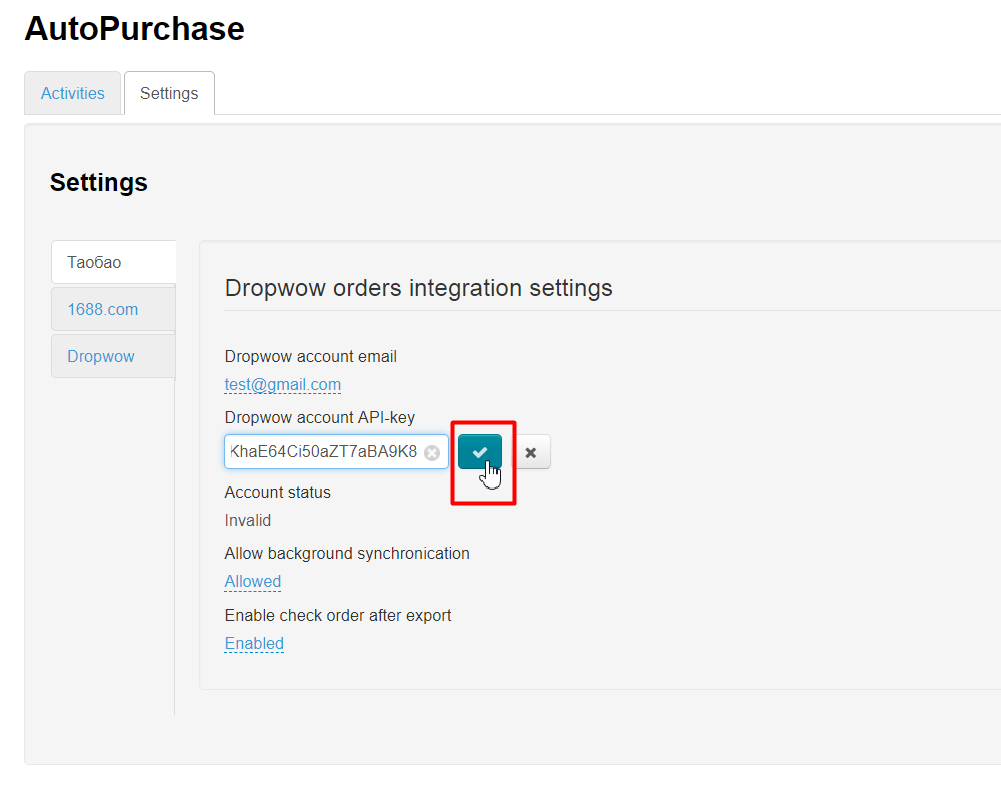
Paste API Key into special field in OT Box admin panel
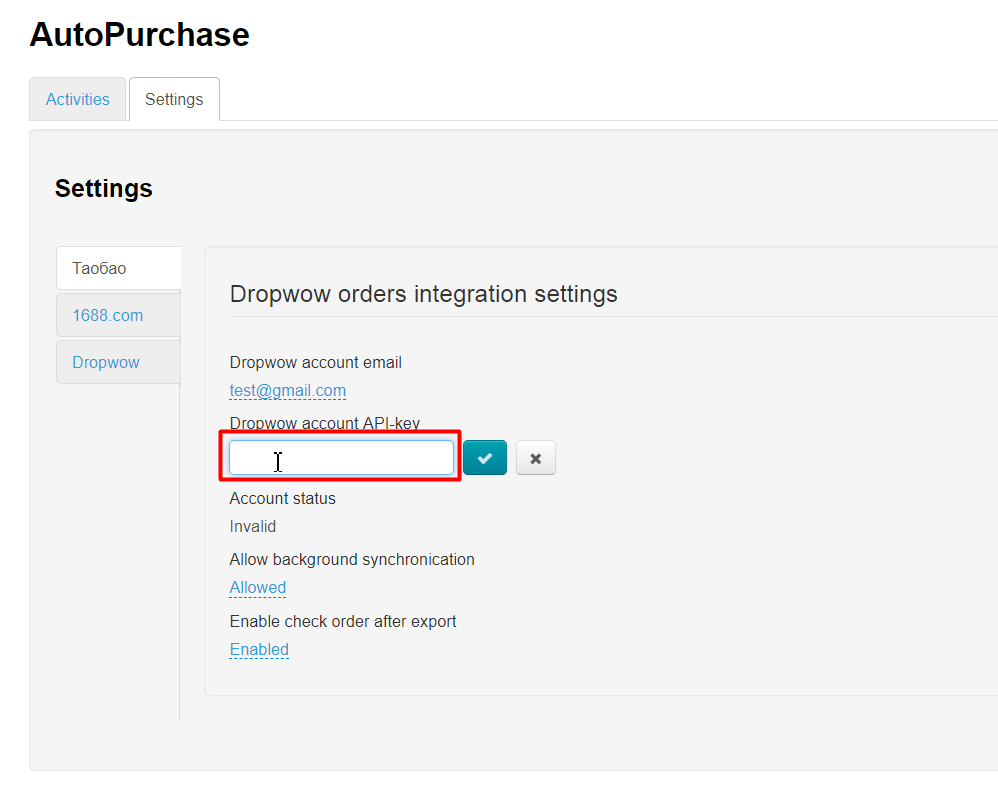
Save API Key clicing clicking checkmarked button :
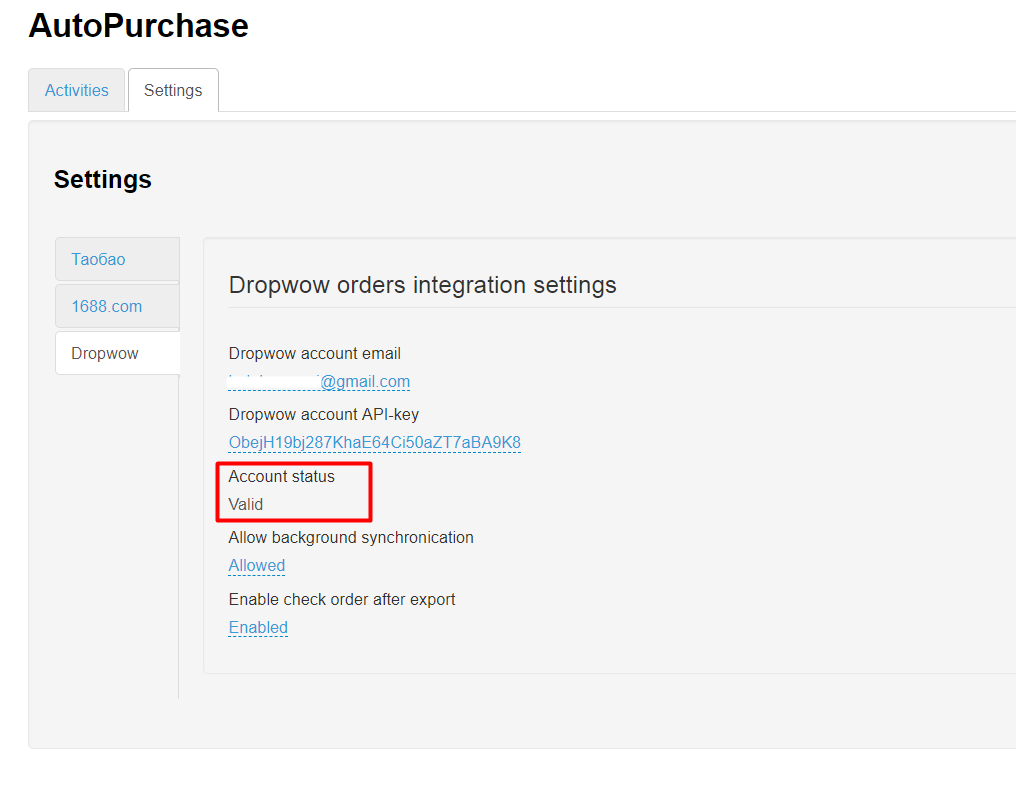
Dropwow account status becomes valid after saving:
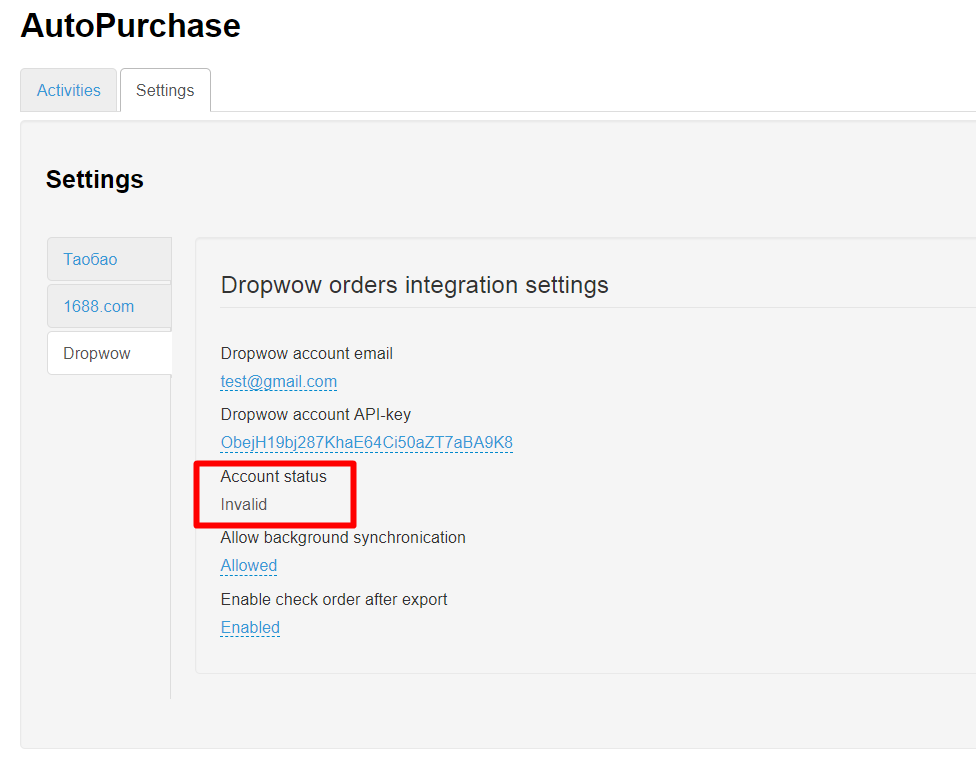
There is an error either in the Key or email if you don't have such inscription. Verify that the data is correct.
Then we decide if we need background synchronization (that is, comparing and updating account data without your participation). OT box will periodically check your Dropwow account for updates (order statuses) if it is enabled.
This synchronization is allowed by default.
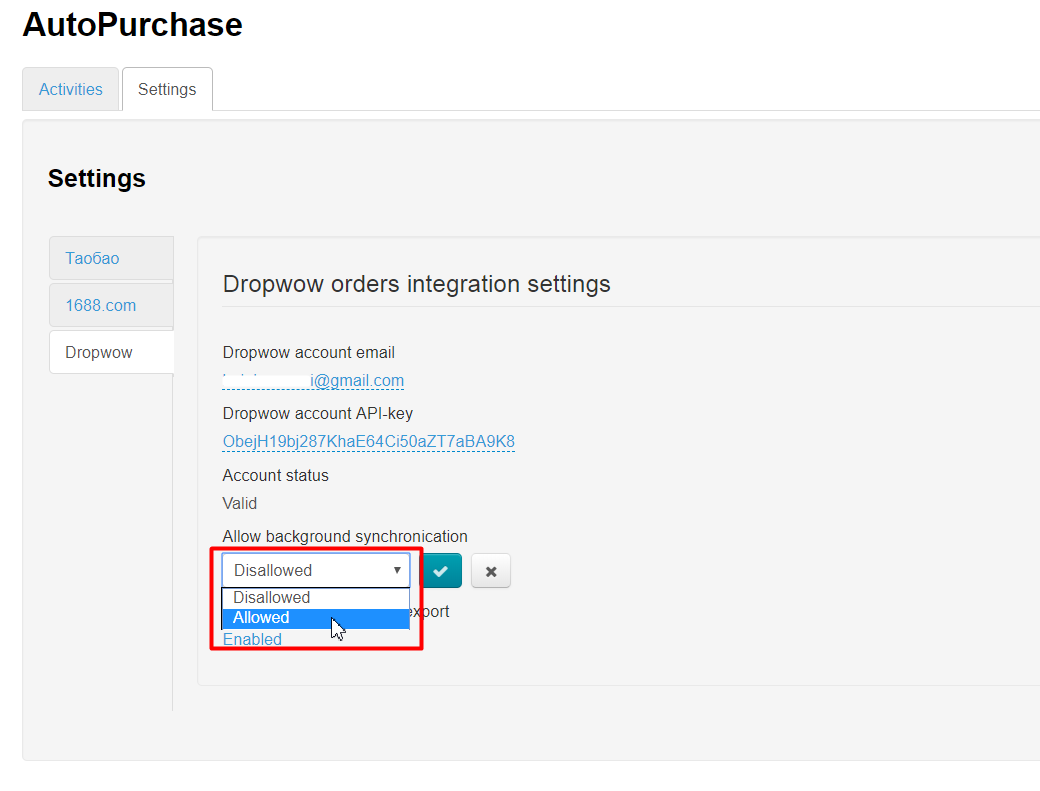
Чтобы разрешить Коробке ОТ без вашего напоминания взаимодействовать с вашим аккаунтом Dropwow, необходимо разрешить фоновую синхронизацию (если ранее вы запретили ее по какой-либо причине). Кликаем по надписи «Запрещена»:
В появившемся списке кликом мышки выбираем «Разрешена»:
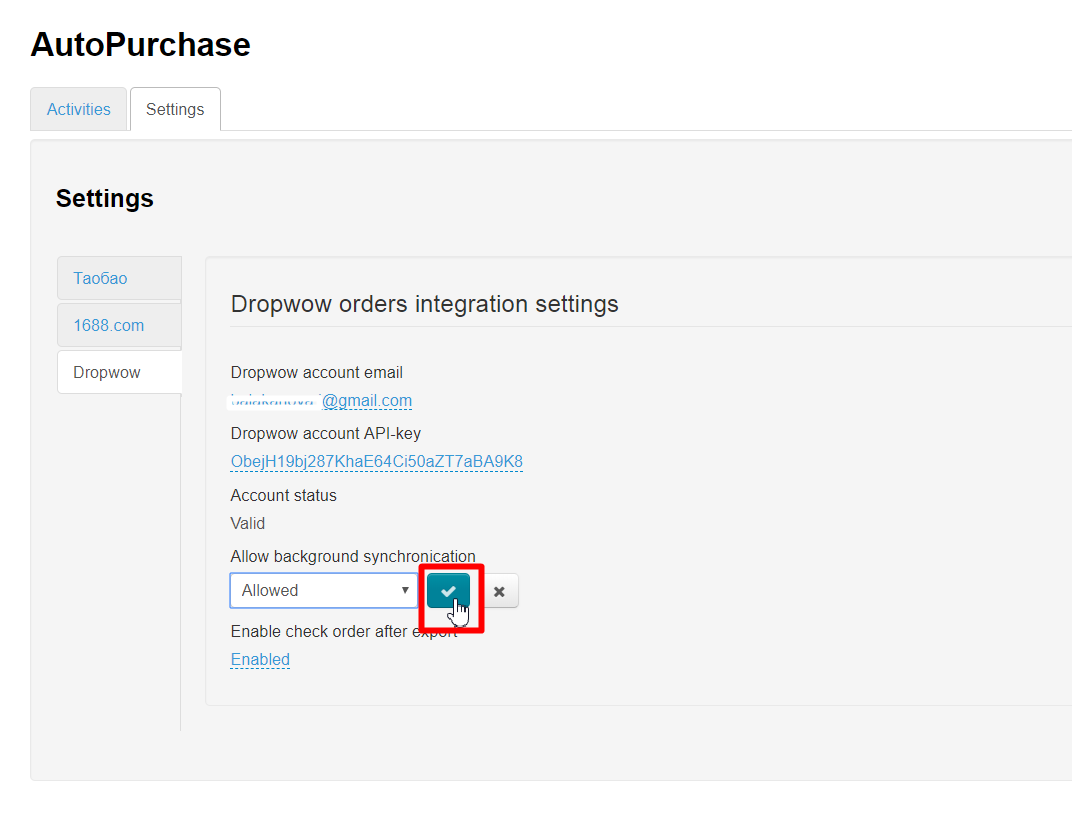
Сохраняем выбор, нажав на кнопку с галочкой:
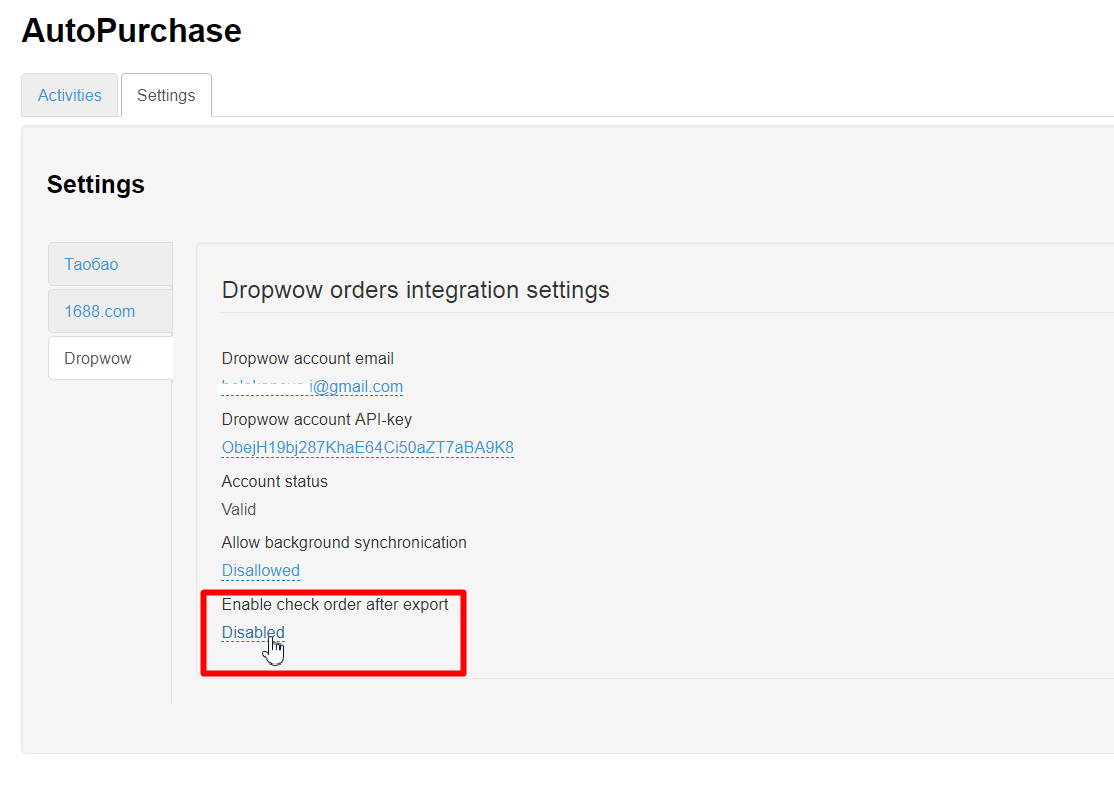
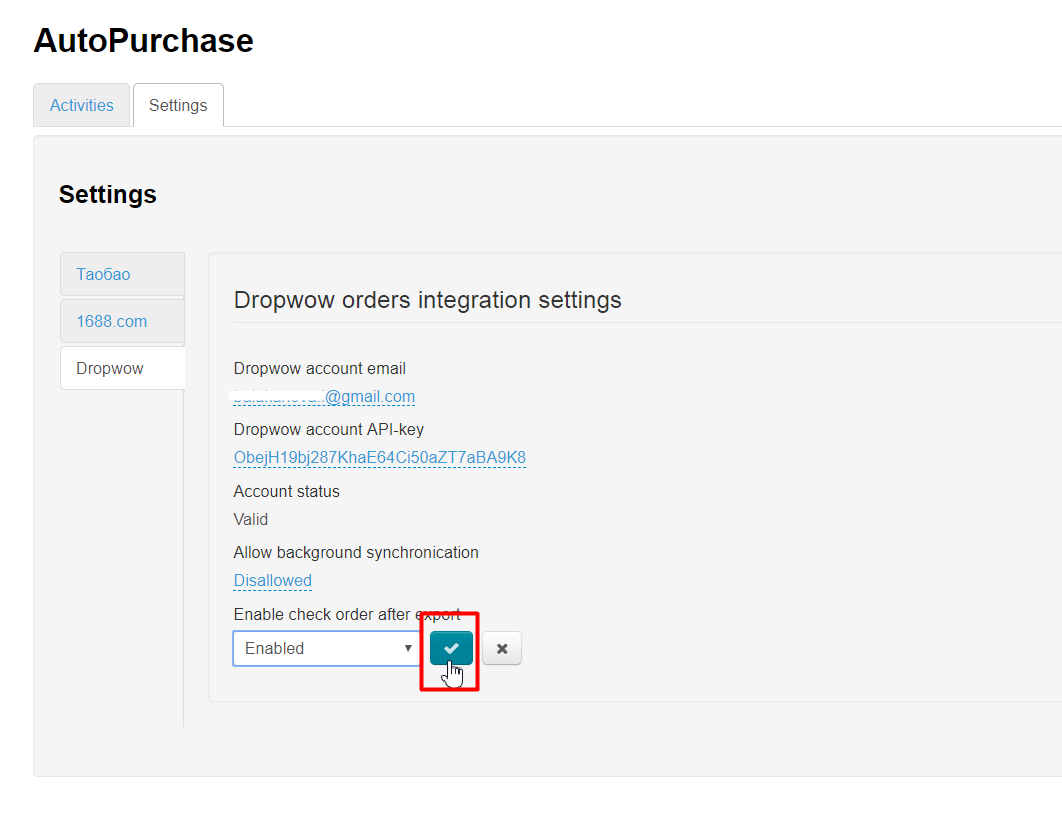
Когда вы начнете работать с заказами и отправлять их на бронирование перед выкуп, необходимо следить, чтобы отправленные заказы были доступны для бронирования. Для того, чтобы сразу после отправки заказа в Dropwow он проверился на наличие и уточнились цены, рекомендуем не выключать «Проверку заказа после экспорта».
По умолчанию проверка включена.
Для включения (если ранее вы выключили ее по какой-либо причине) находим в настройках фразу «Проверка заказа после экспорта» и под ней кликаем по надписи «Выключена»:
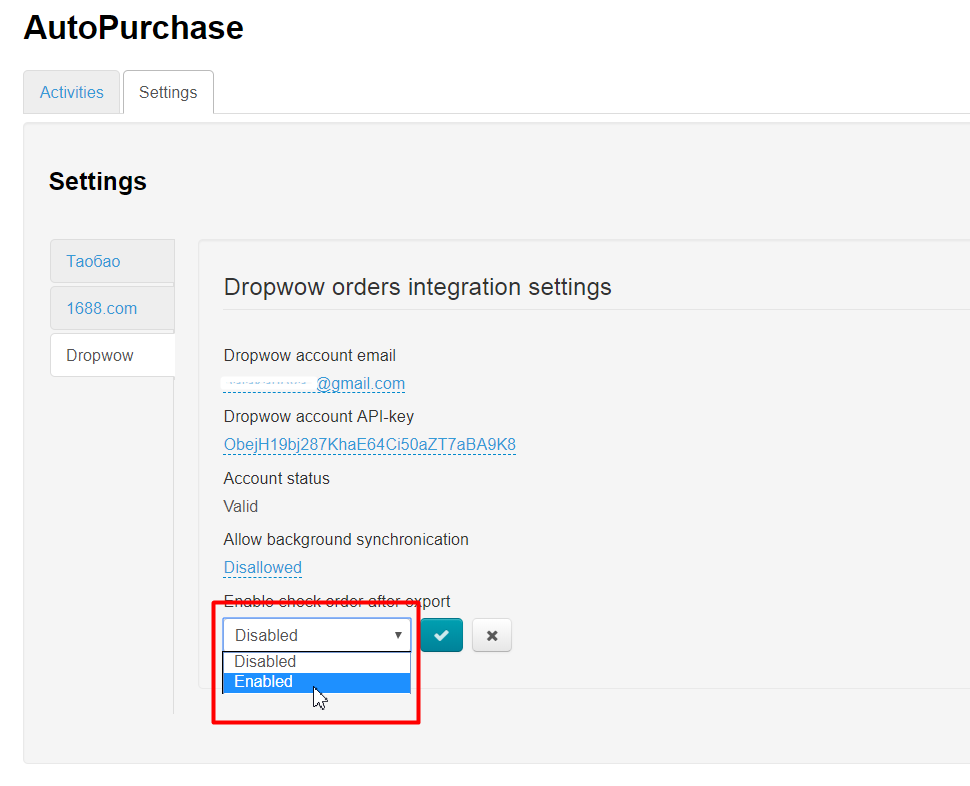
В появившемся списке кликом мышки выбираем «Включена»:
Сохраняем выбор, нажав на кнопку с галочкой:
Готово. Первый этап настройки завершен.
Настройка доставки
Есть три важных нюанса доставки товаров с Dropwow:
- Доставку от продавца до конечного покупателя берет на себя Продавец в Китае, который добавил свои товары на Dropwow.
Стоимость доставки уже включена в стоимость товара. Доставка осуществляется методом ePacket в течение 10-20 дней.
- Так как доставка осуществляется напрямую, такого понятия как «Внутренняя доставка» при работе с Dropwow нет. Это означает, что настраивать её не нужно и в настройке нуждается только «Внешняя доставка».
Поэтому, в админке вашей Коробки ОТ необходимо настроить бесплатную Внешнюю доставку.
Стоит отметить, что вам никто не запрещает поставить определенную цену на доставку, так что решение зависит исключительно от вашей бизнес-стратегии. Однако, принципы дропшиппинга предполагают, что доставка бесплатная, поэтому рекомендуем упор делать на наценку товаров и повышение объема продаж.
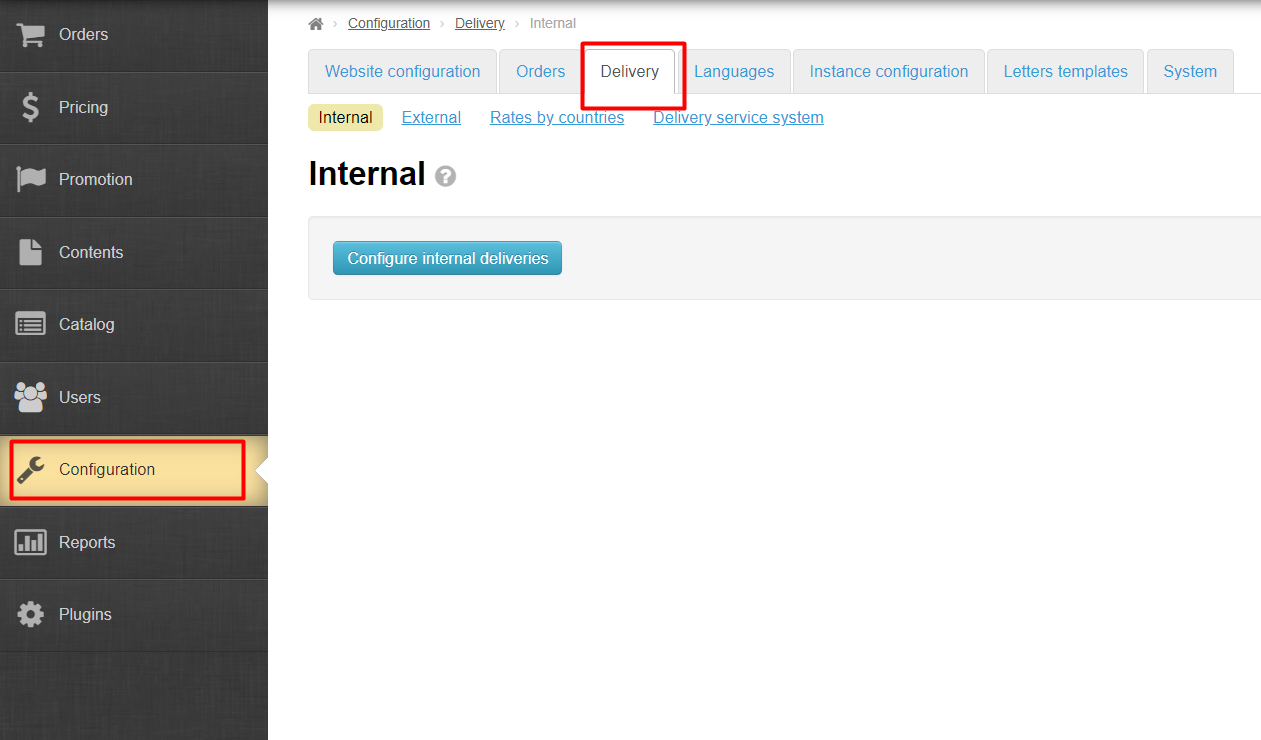
Для того, чтобы настроить доставку, открываем раздел «Конфигурация» и вкладку «Доставка»:
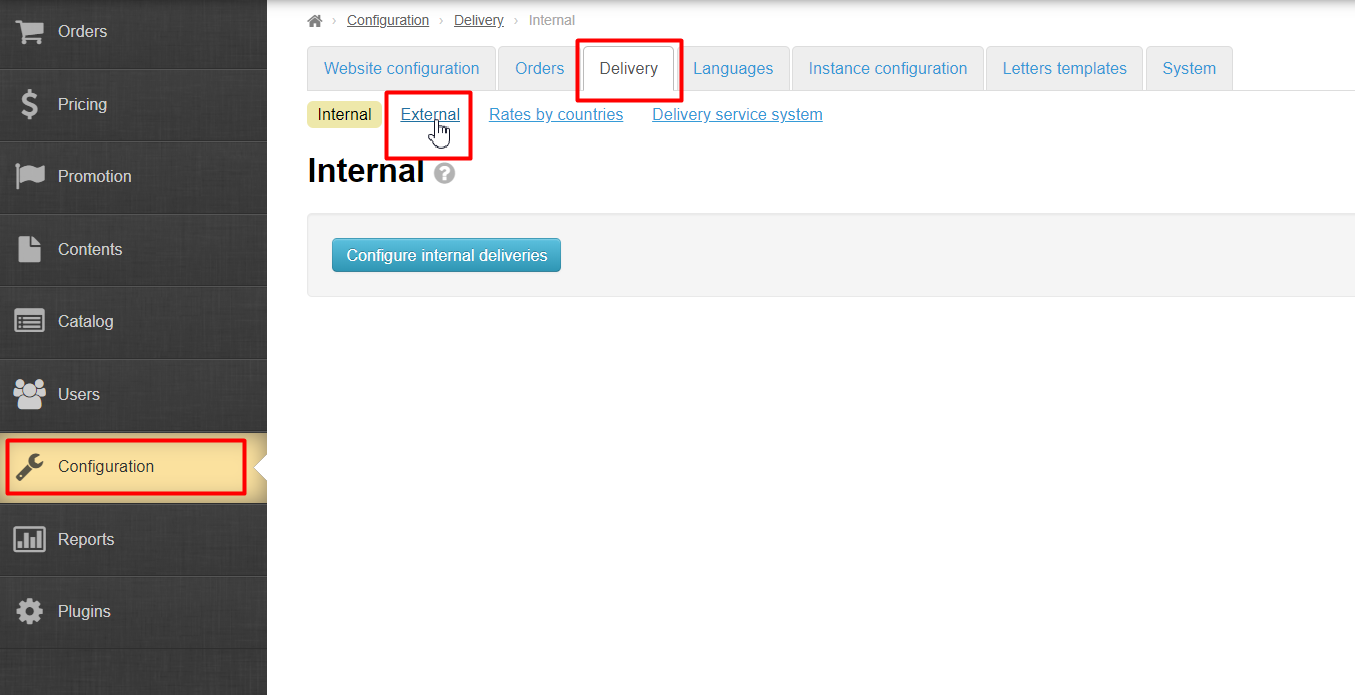
Нам необходима другая вкладка: переходим на вкладку «Внешняя»:
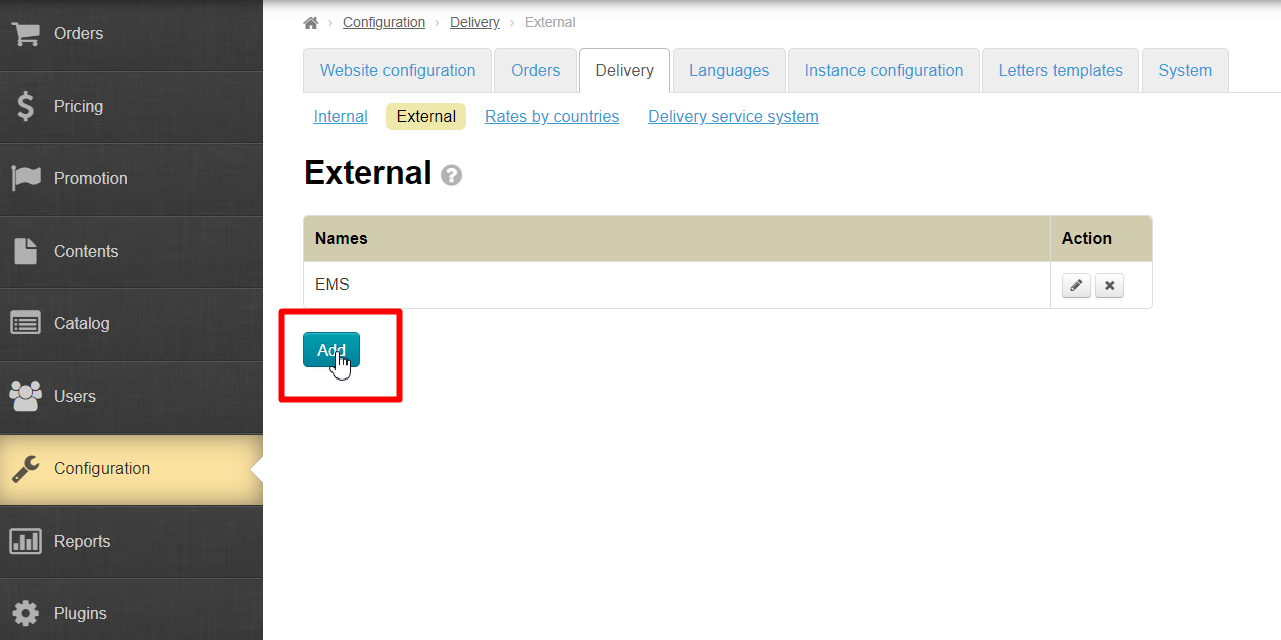
Нажимаем кнопку «Добавить»:
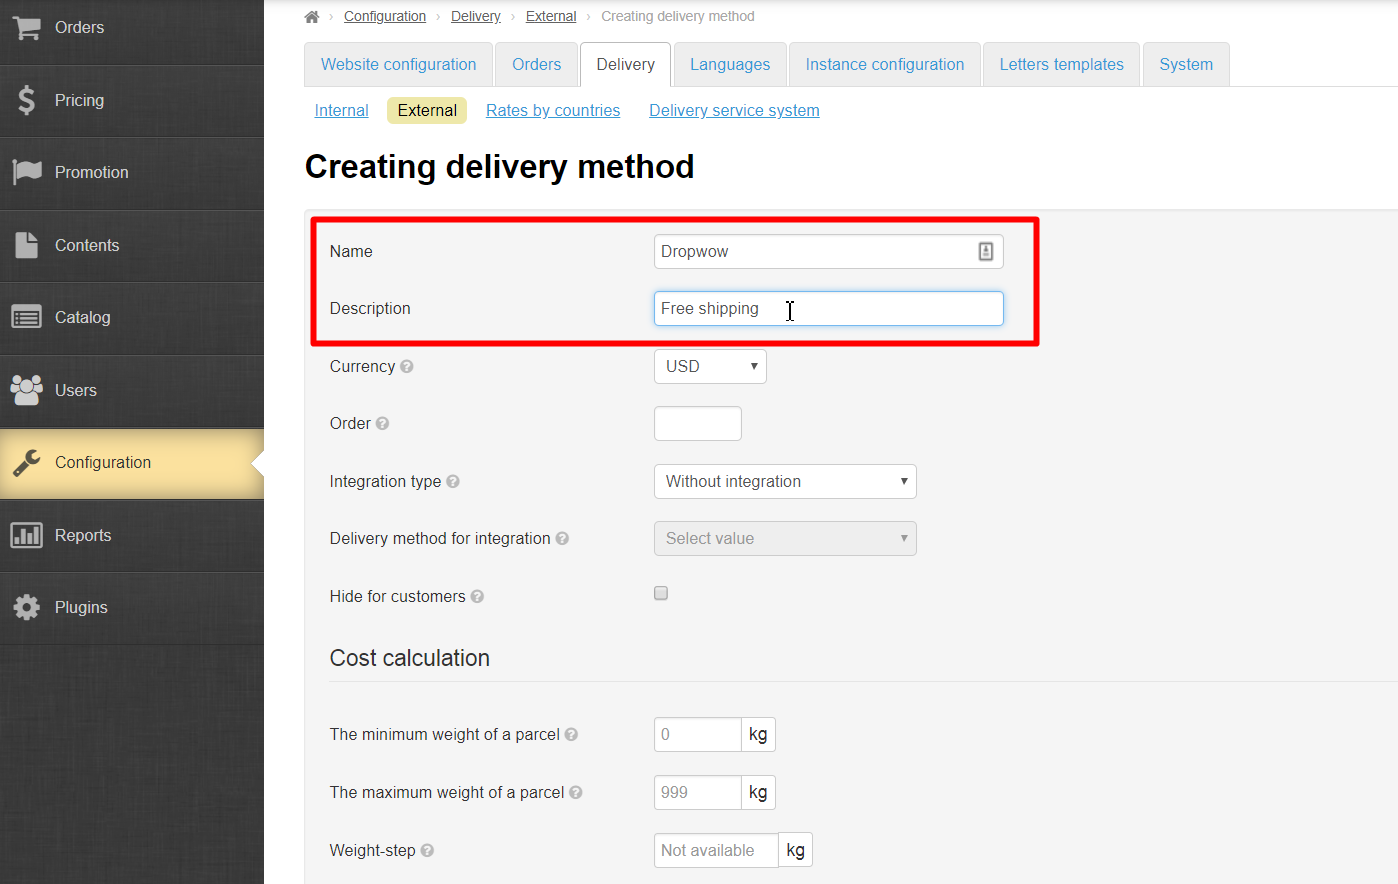
В открывшейся форме заполняем поля: название и описание:
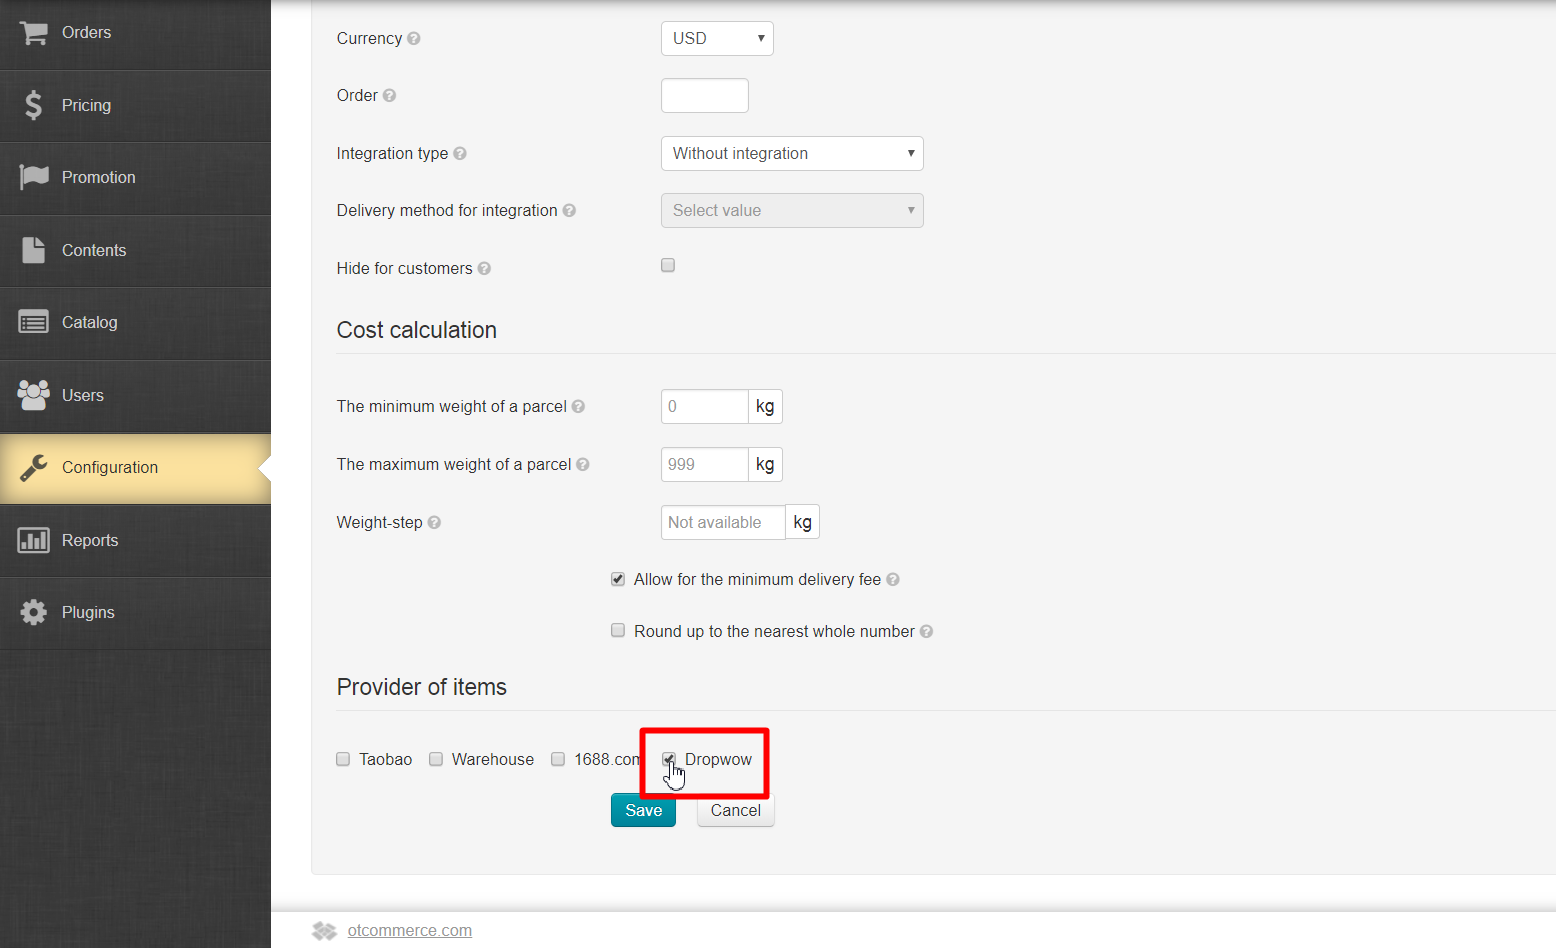
Затем ставим галочку рядом с пунктом «Учитывать минимальную стоимость доставки»:
Выбираем товарного провайдера Dropwow, чтобы доставка распространялась только на товары этого провайдера и не касалась других:
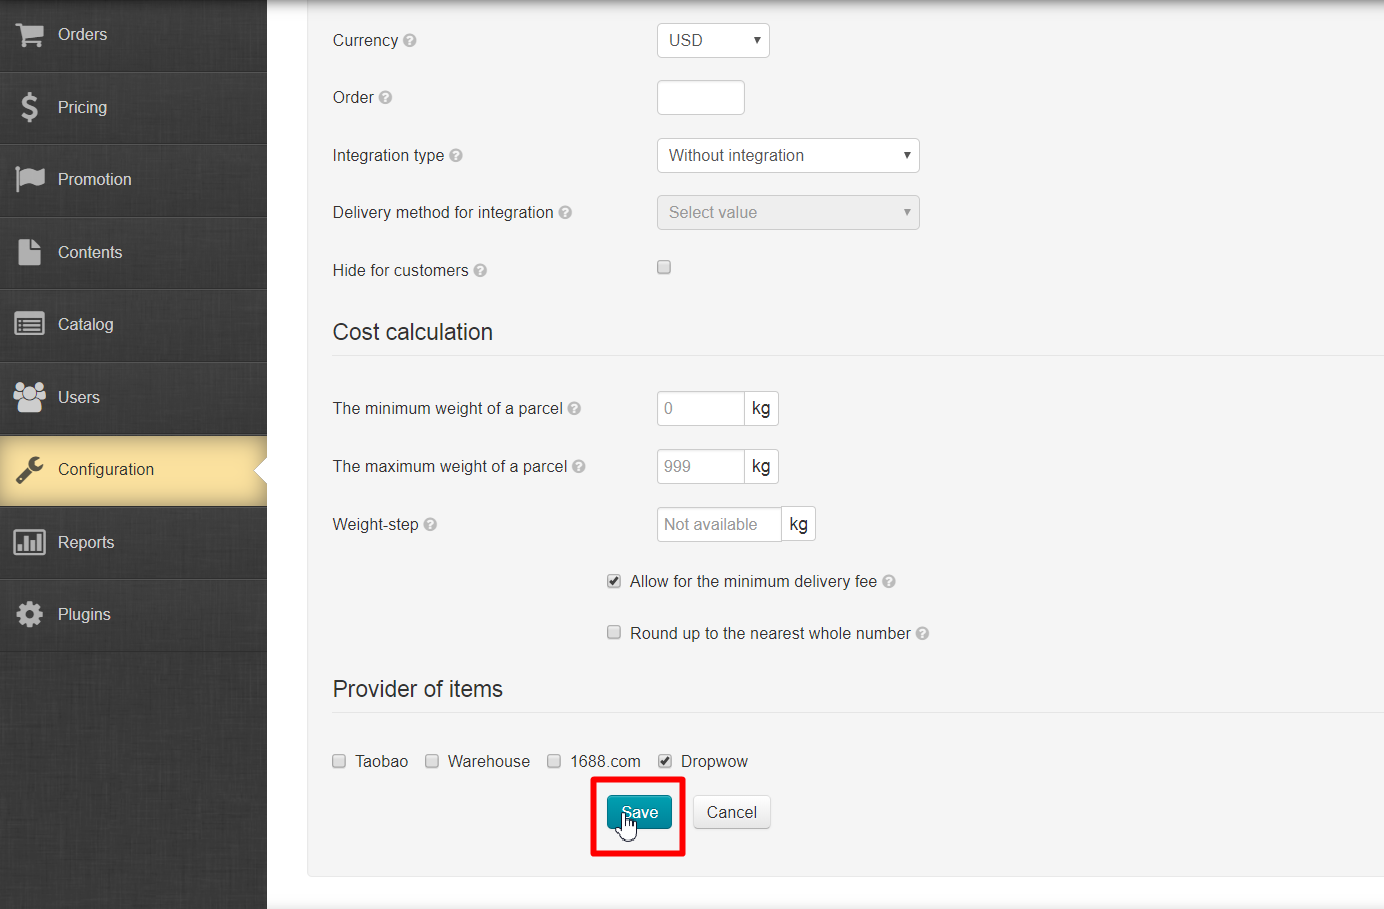
Сохраняем доставку:
Далее надо добавить список стран, в которые будет доставка. Dropwow осуществляет доставку по всему миру, так что выбор стран ограничивается лишь вашей бизнес стратегией.
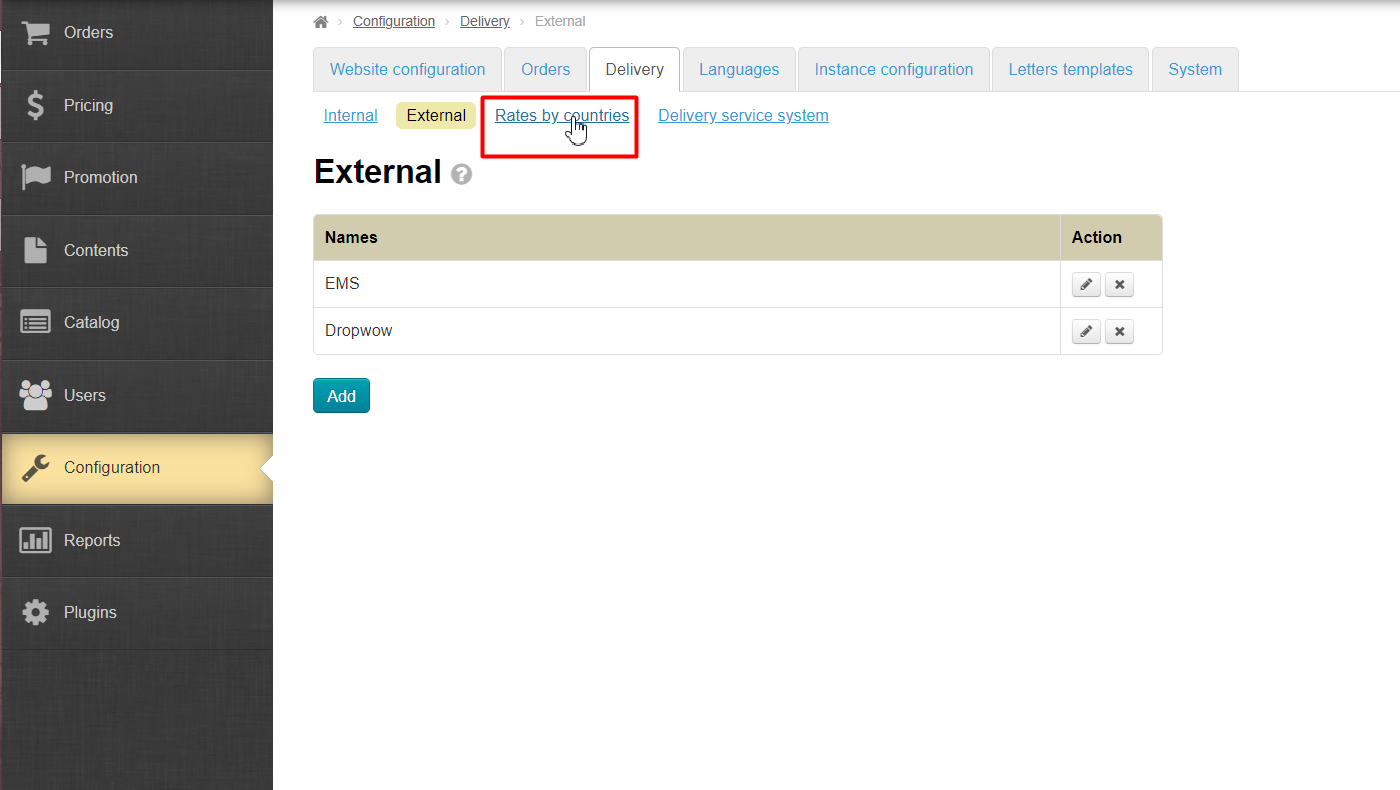
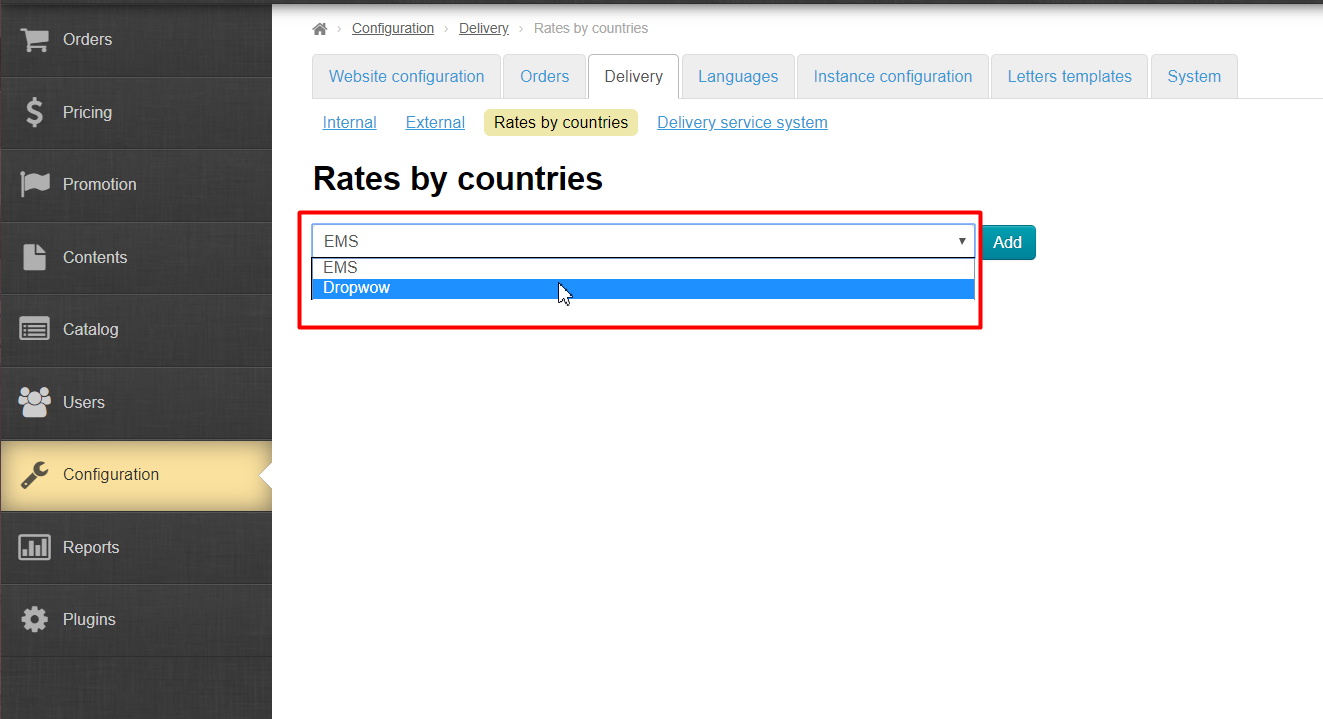
Открываем раздел «Тарифы по странам»:
Из выпадающего списка кликом мышки выбираем Доставку, которую только что создали:
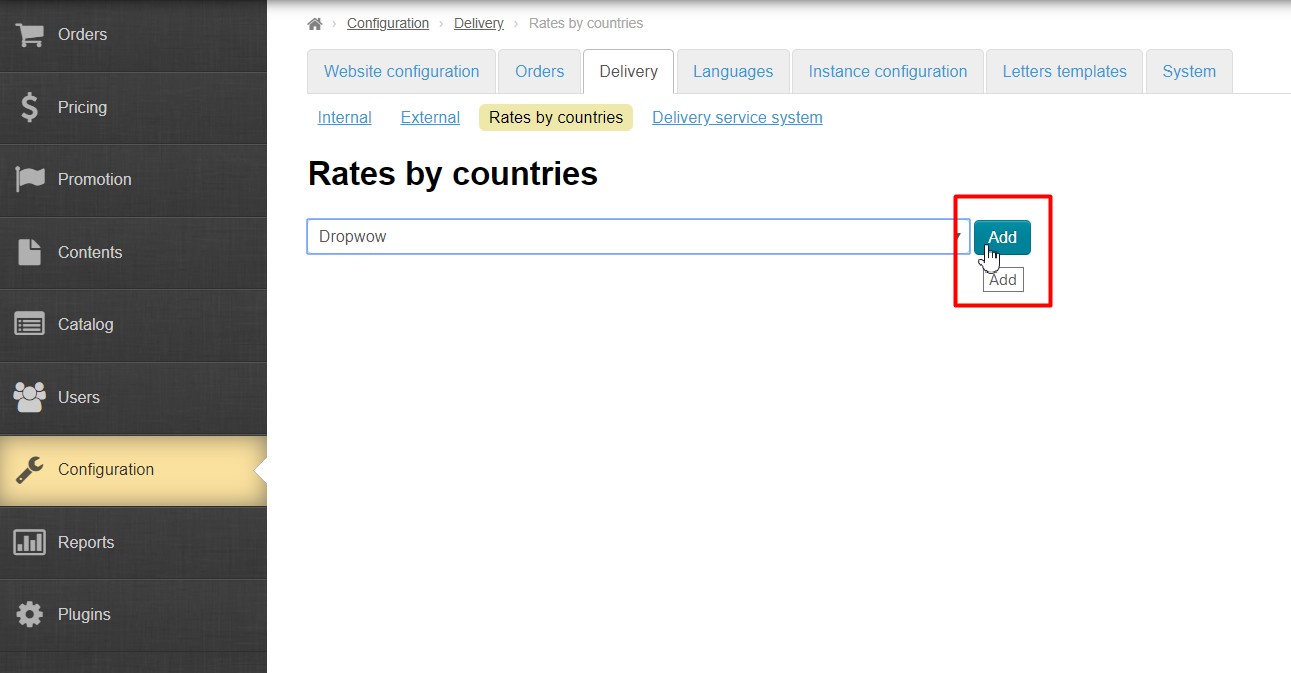
Нажимаем кнопку «Добавить»:
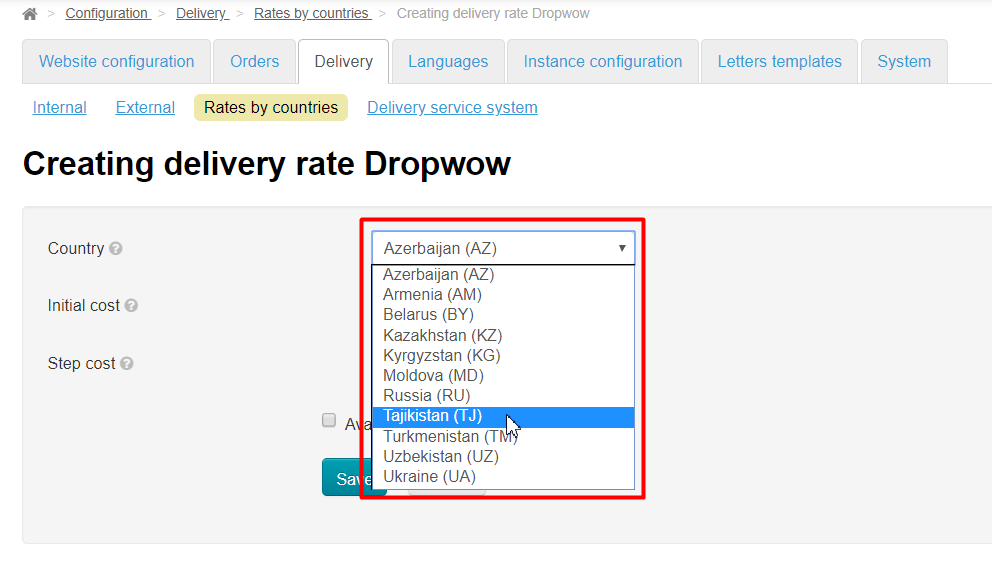
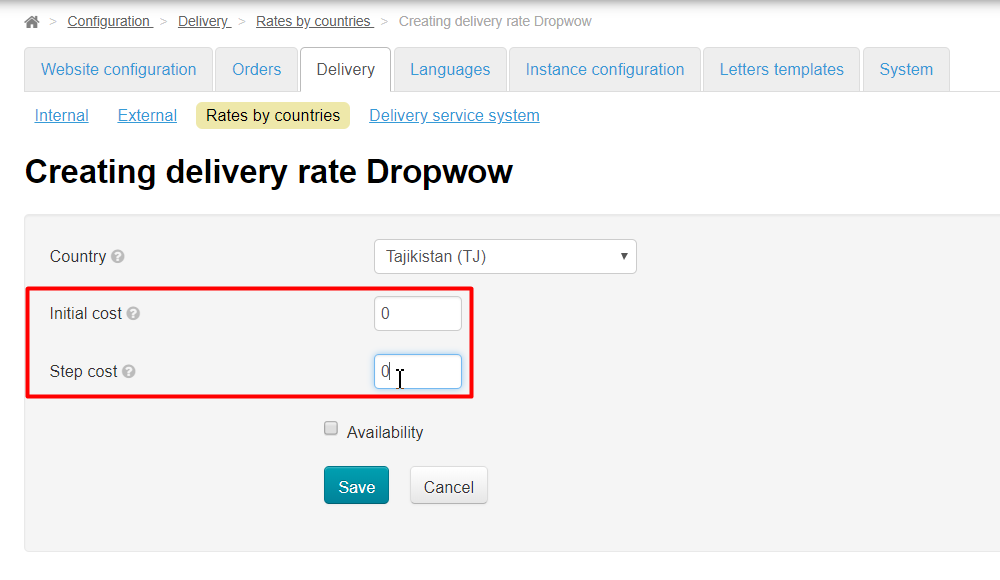
В открывшейся форме выбираем страну:
Затем ставим цифру ноль в остальные поля:
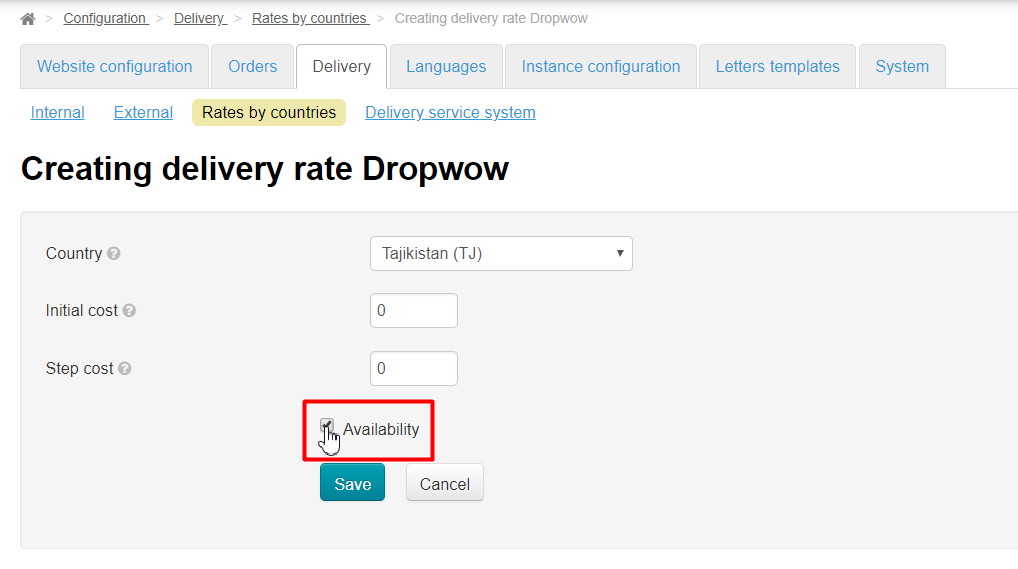
Ставим галочку рядом с надписью «Доступность», чтобы доставка отображалась при оформлении заказа:
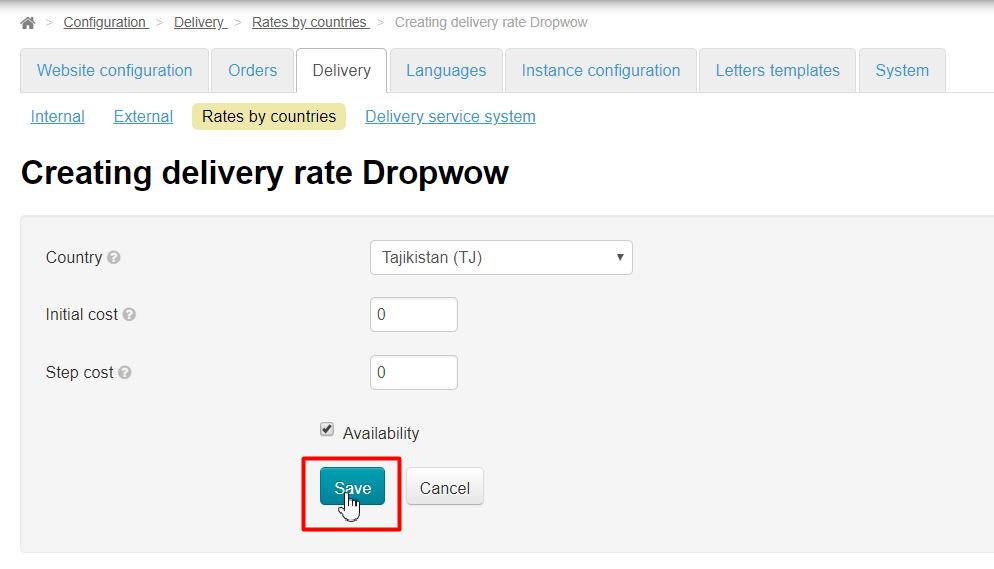
Сохраняем все изменения:
И так настраиваем все страны, которые будут нам нужны для продажи товаров.
Как работать с заказами: выкуп и посылки
Когда ваш покупатель сделал заказ и оплатил его, можно приступать к обработке заказа.
Заходим в раздел «Заказы»:
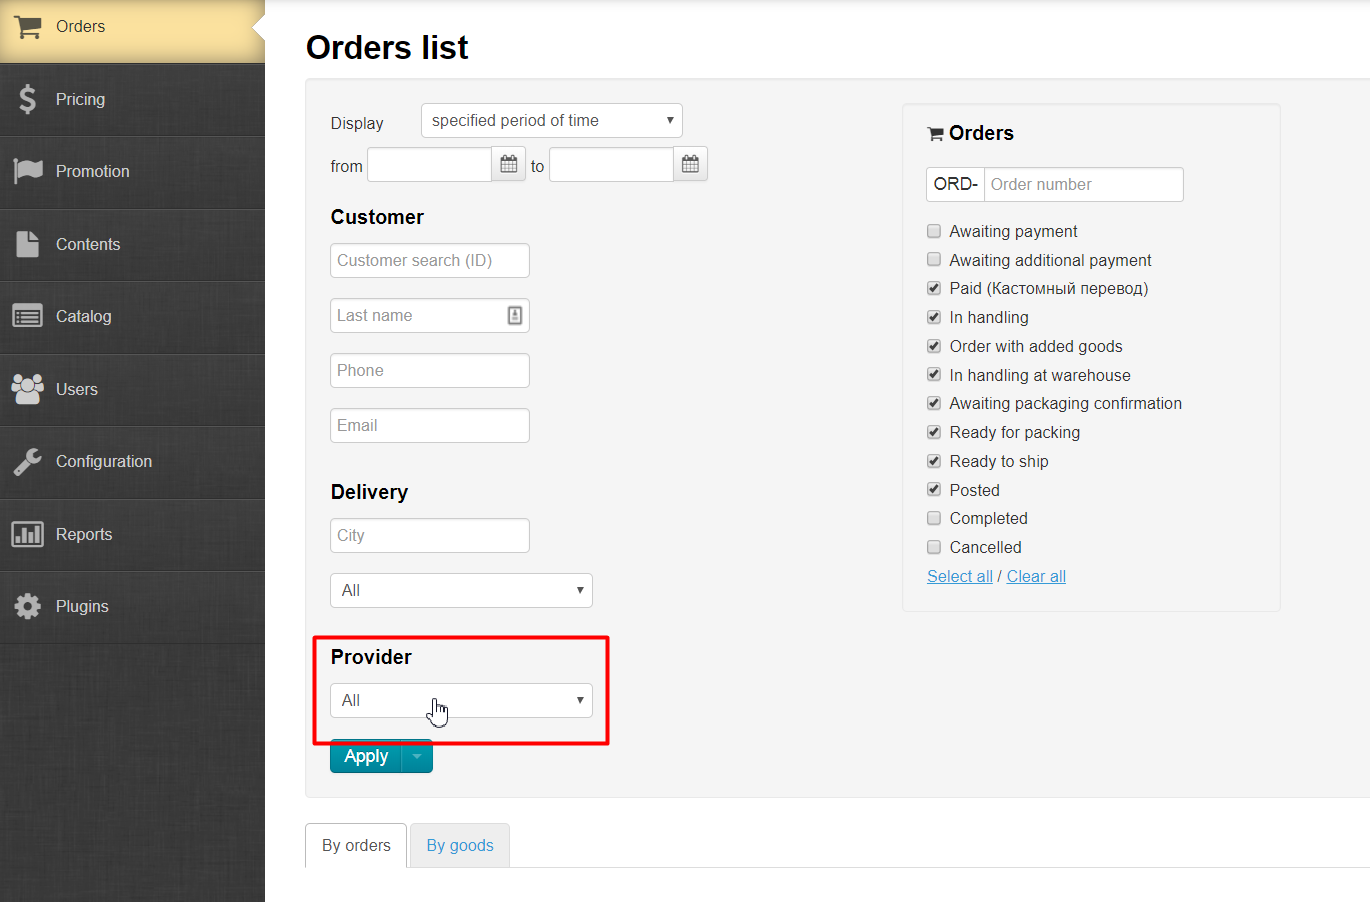
Ищем заказы, которые были сделаны у товарного провайдера Dropwow. Чтобы облегчить задачу, в поле фильтров ищем строку Провайдер:
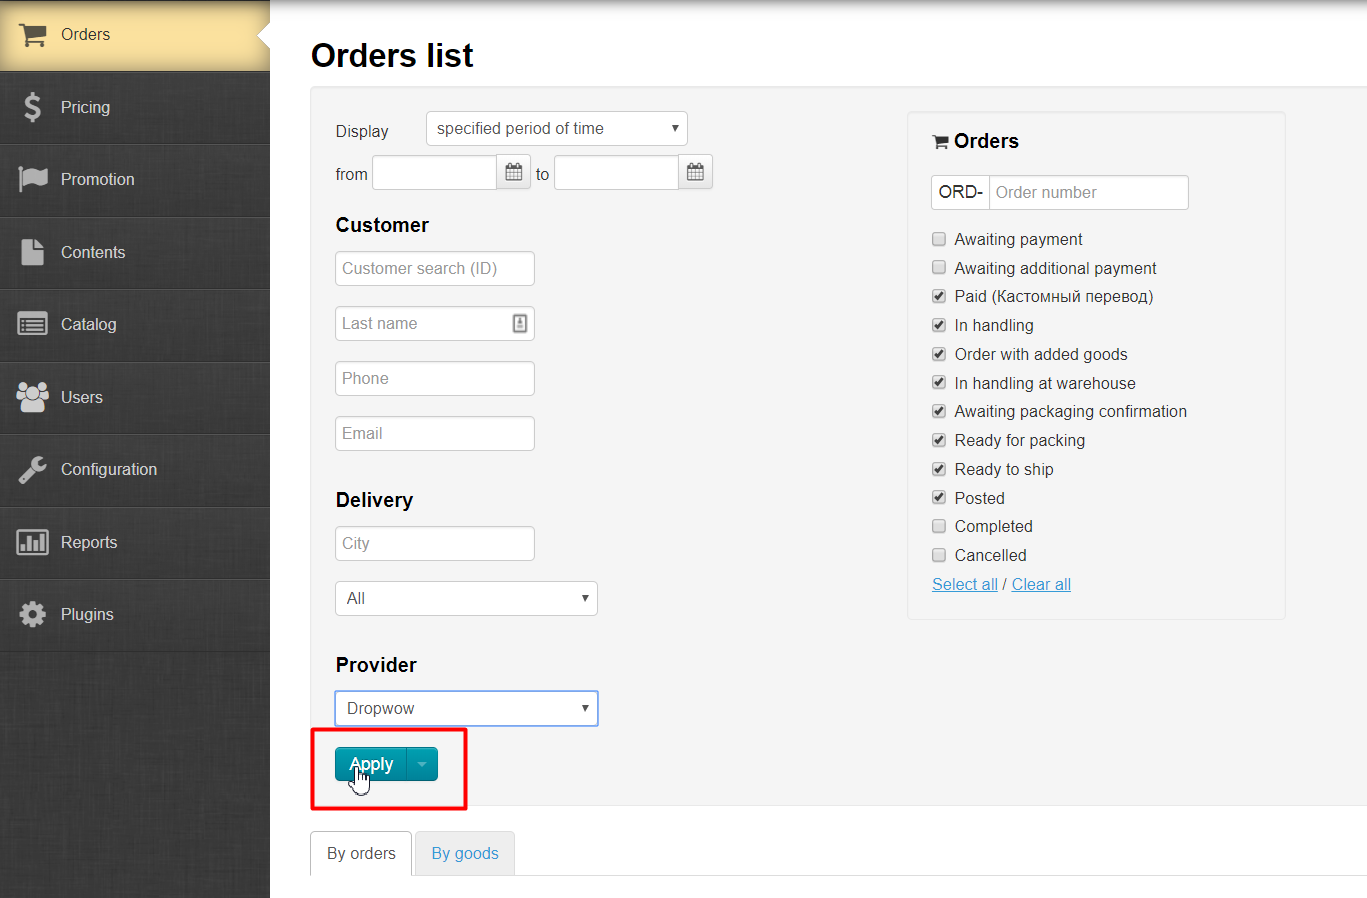
В выпадающем списке кликом мышки выбираем Dropwow:
Нажимаем кнопку «Применить», чтобы фильтр показал нам заказы:
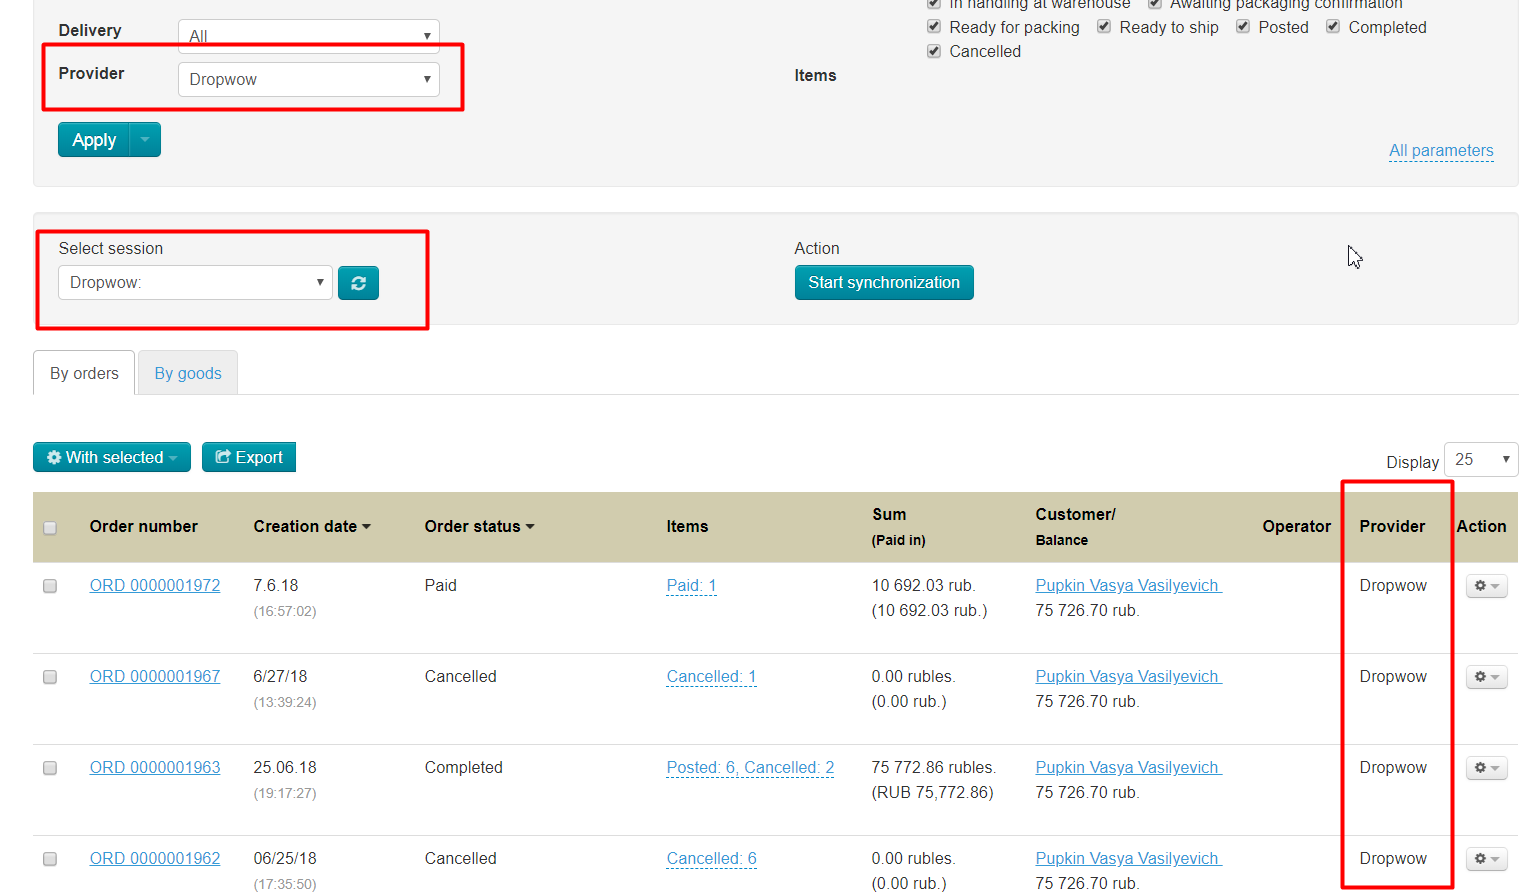
Готово, интересующие нас заказы найдены, теперь выбираем заказ, который хотим отправить на закупку:
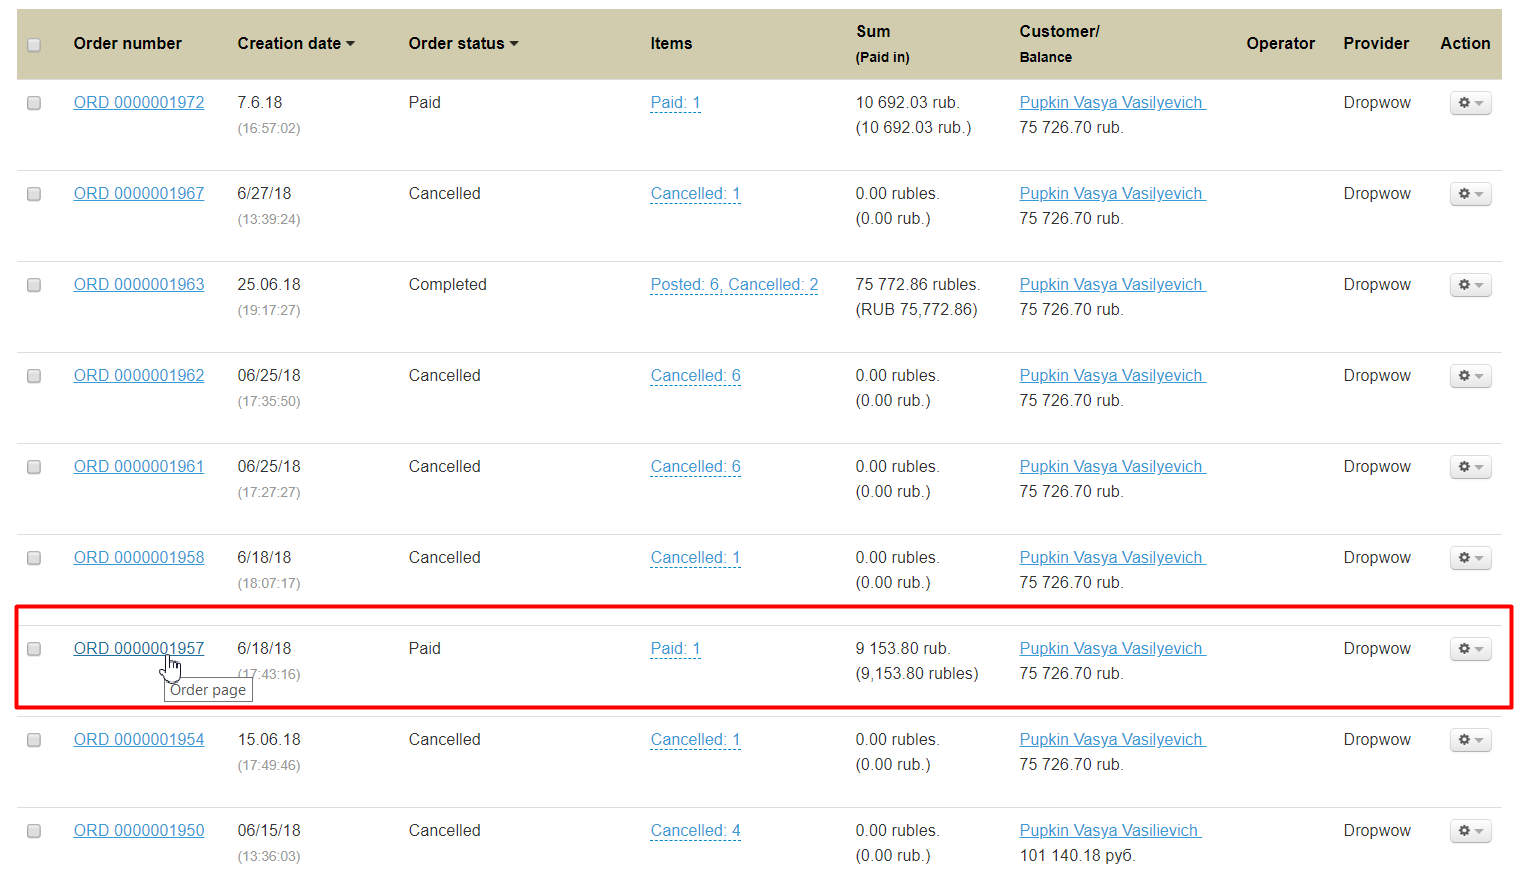
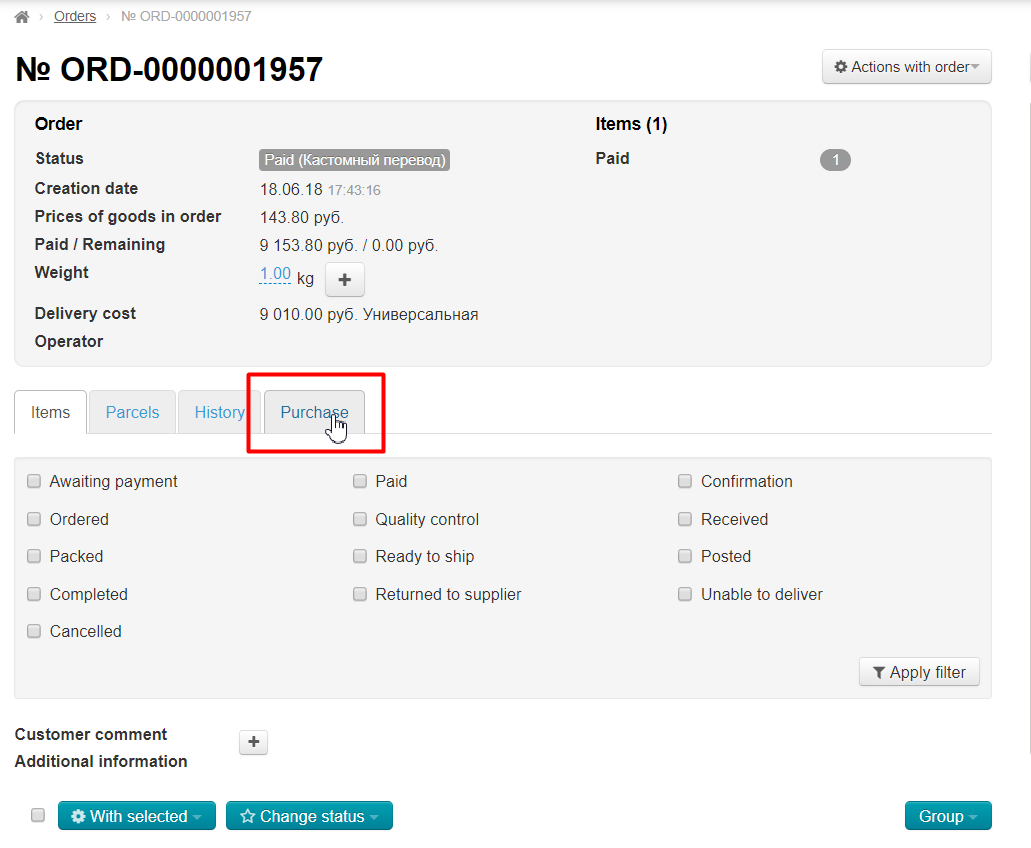
Кликаем по заказу мышкой:
Когда откроется детализация заказа, открываем вкладку «Закупка»:
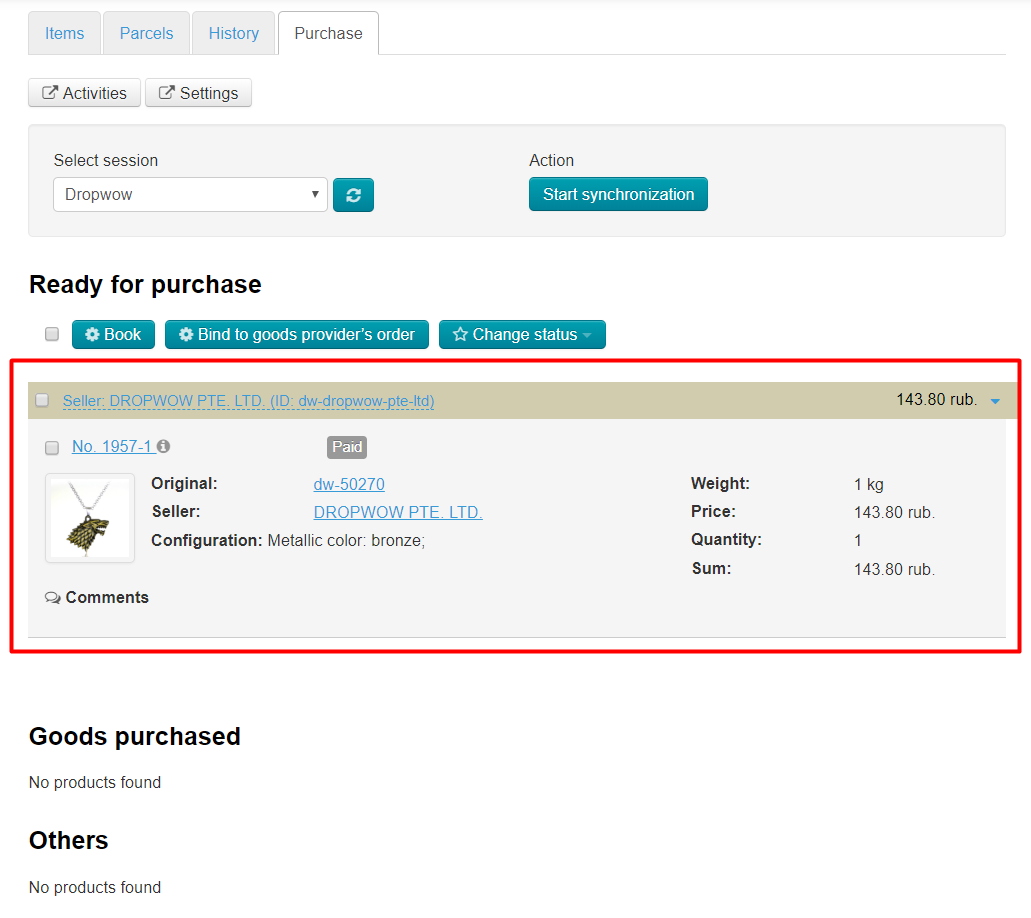
На вкладке «Закупка» должны присутствовать товары в разделе «Готовы к закупке»:
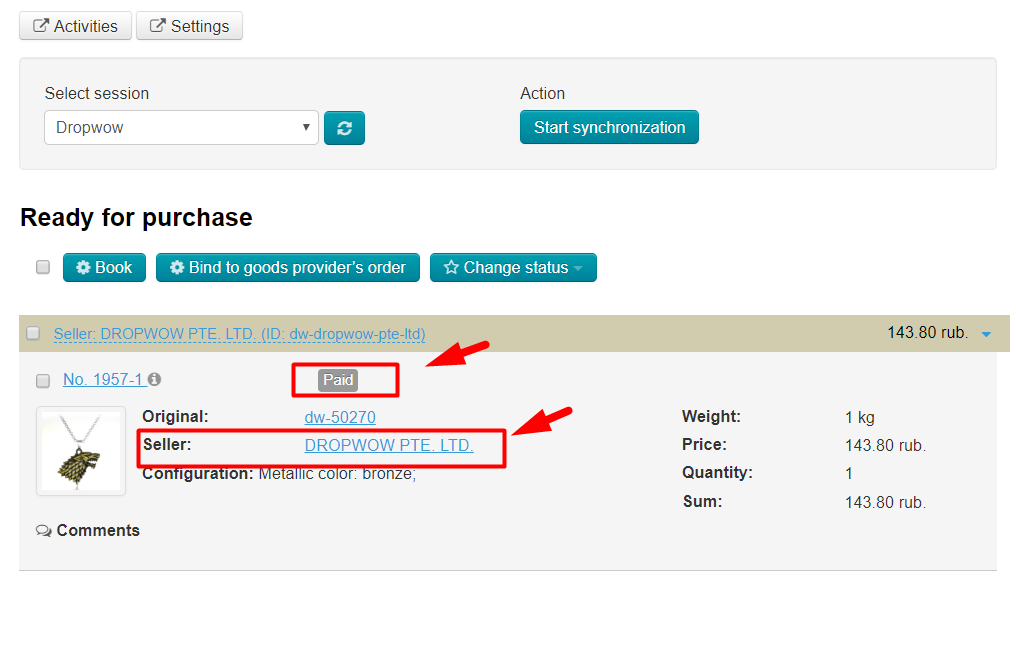
Если товаров там нет, проверьте оплачены ли они и какой товарный провайдер указан:
Готовые к закупке товары можно отправлять в Dropwow. Для этого выделяем мышкой товары, которые хотим выкупить:
Когда все товары выбраны, нажимаем кнопку «Забронировать»:
После нажатия кнопки «Забронировать» появится окошко прогресса:
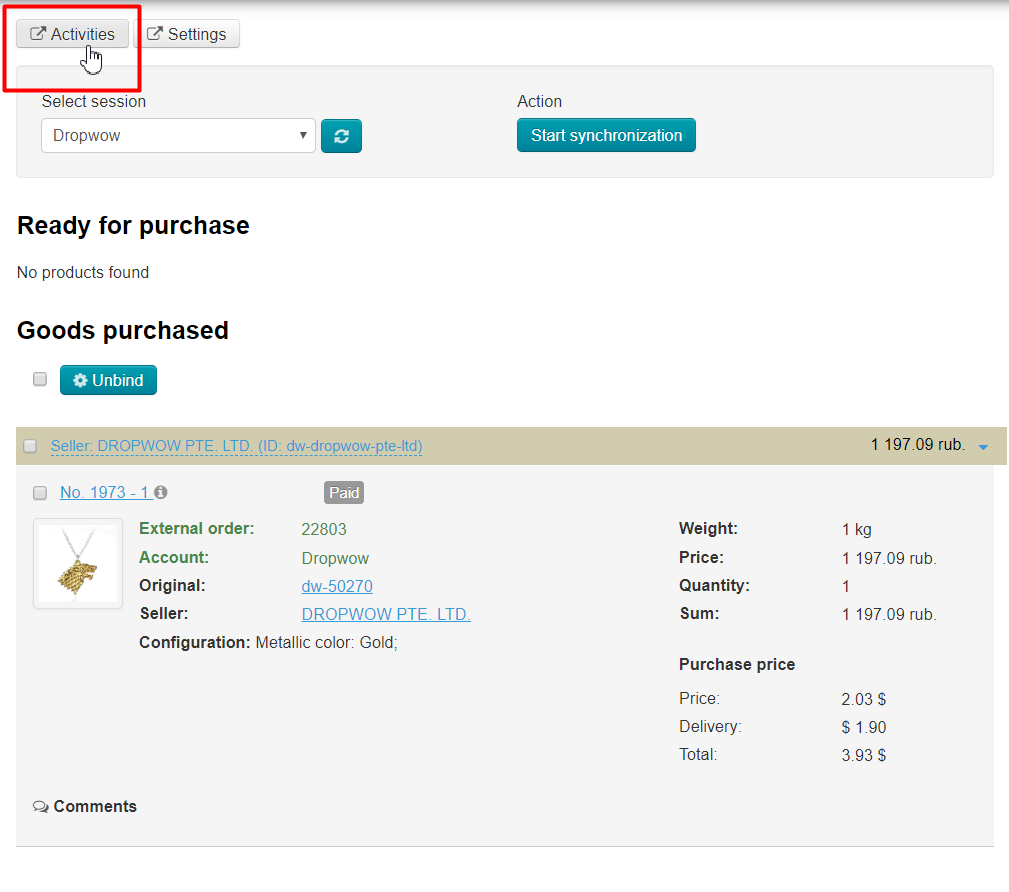
Закрытие окошка не влияет на процесс бронирования. Всё происходит в фоновом режиме, поэтому вы можете его закрыть. Просмотр в дальнейшем доступен на странице «Активность»:
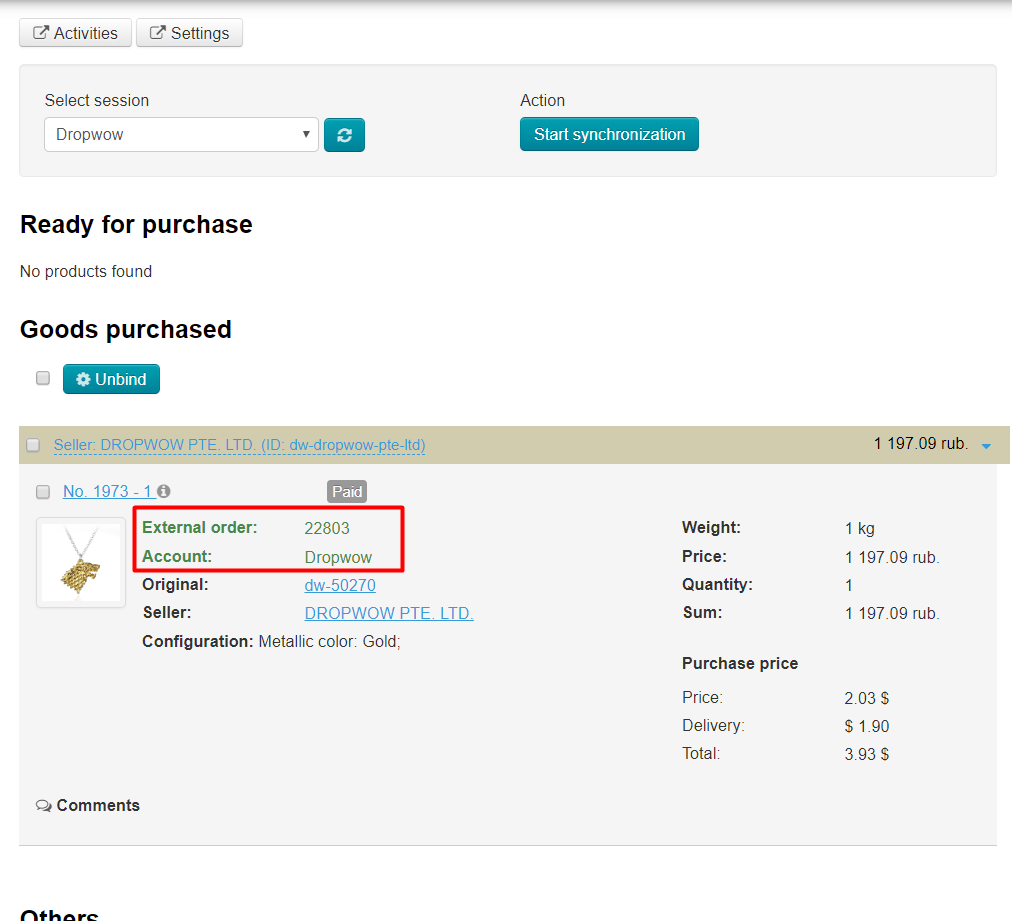
Товар успешно забронирован, когда появились поля «Аккаунт» и «Внешний заказ», а также они перешли в раздел «Закупленные»:
После бронирования необходимо зайти в личный кабинет Dropwow где будет отображен заказ:
Необходимо отправить его на закупку. После клика по надписи Orders откроется список товаров, которые были добавлены из Коробки ОТ:
Далее необходимо пополнить кошелек и выкупить товары, которые вы добавили. После того, как товары будут куплены, статусы заказов Dropwow будут передаваться в Коробку ОТ для информирования покупателя о состоянии его заказа (работает только при включенной фоновой синхронизации).
Как добавить каталог Dropwow на сайт?
Если провайдер Dropwow не является вашим основным провайдером, рекомендуем добавить отдельный раздел с каталогом Dropwow.
Для удобства ваших покупателей, раздел можно назвать, например, «Товары с бесплатной доставкой».
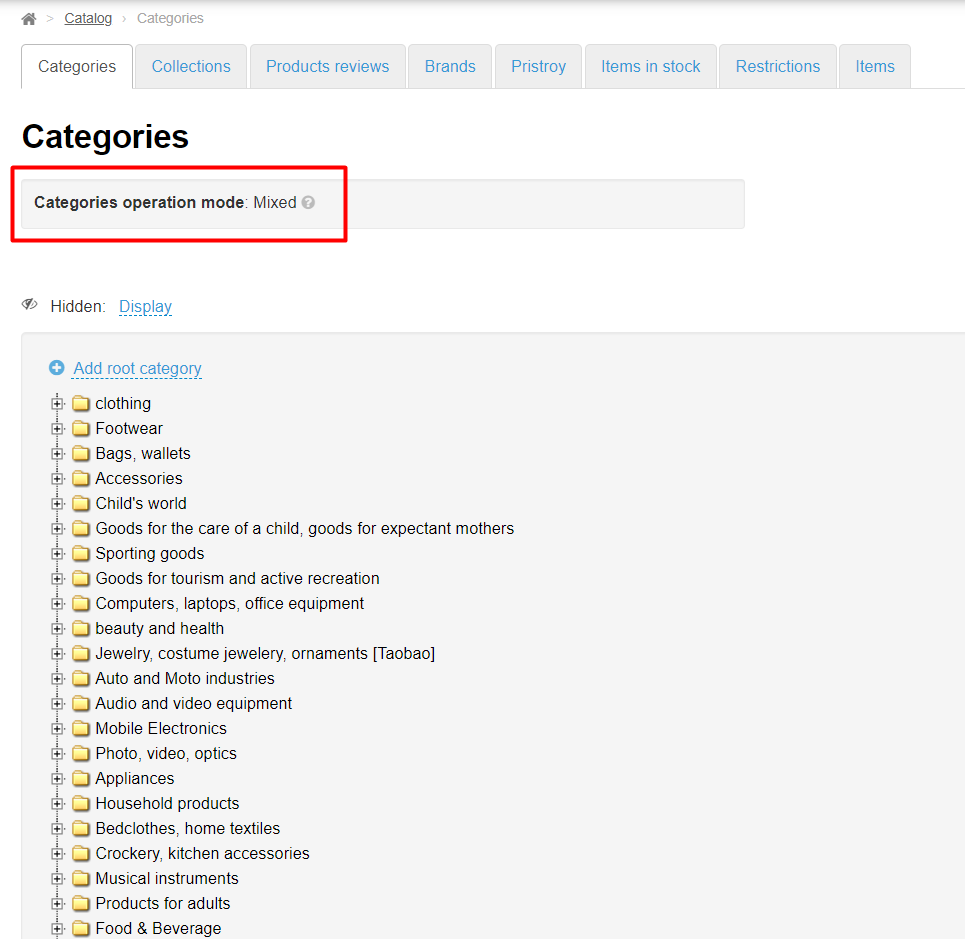
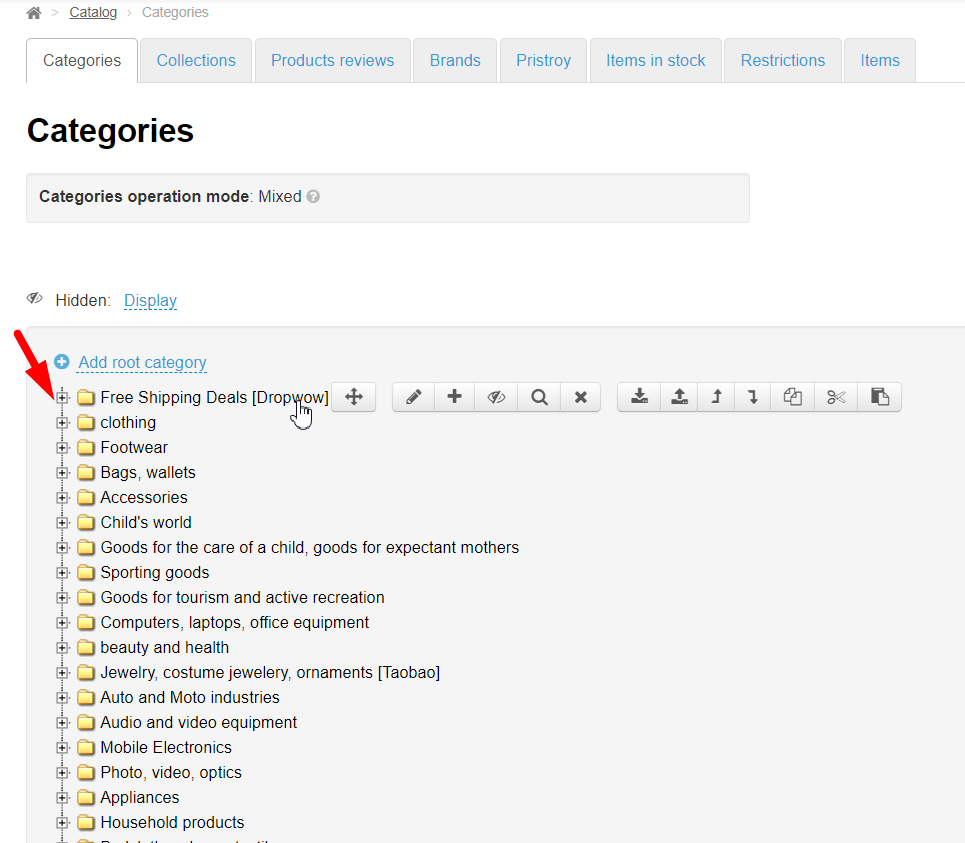
Открываем раздел «Каталог — Категории»:
Проверяем, чтобы режим каталога был смешанный:
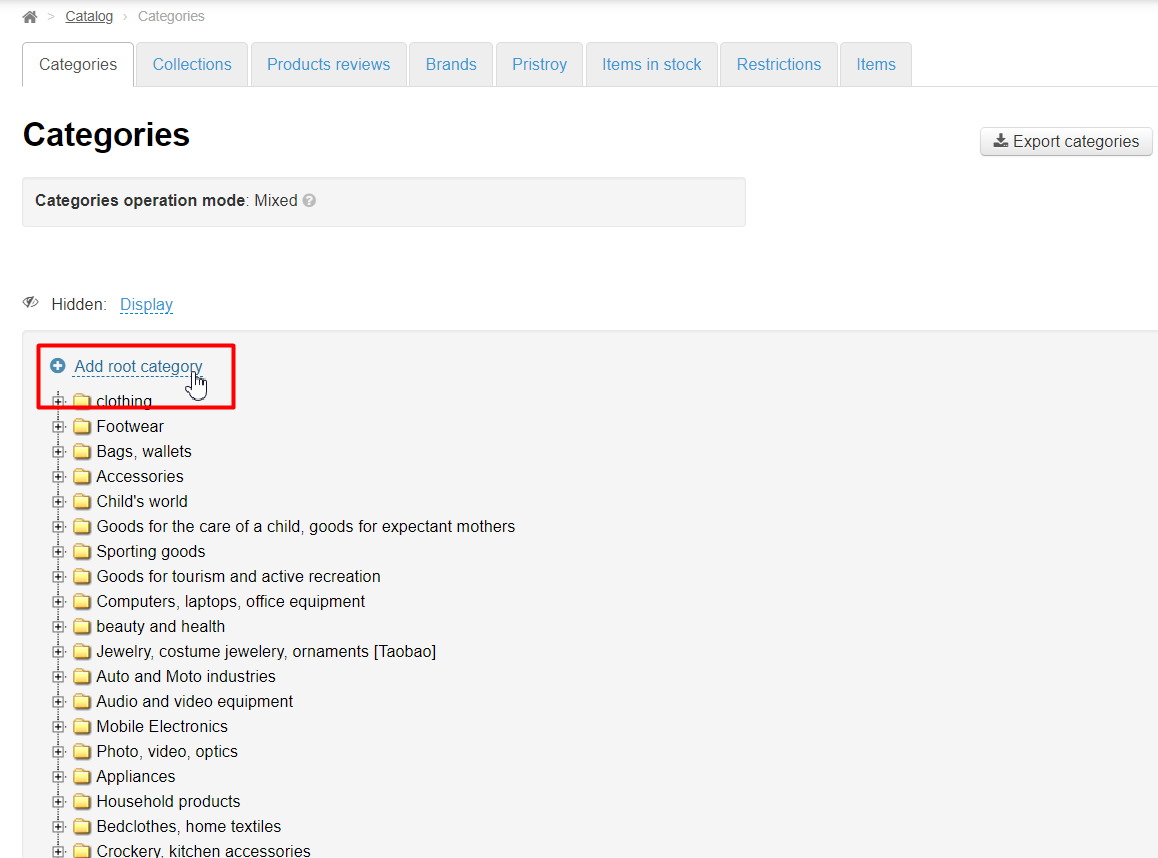
Кликаем мышкой по надписи «Добавить корневую категорию»:
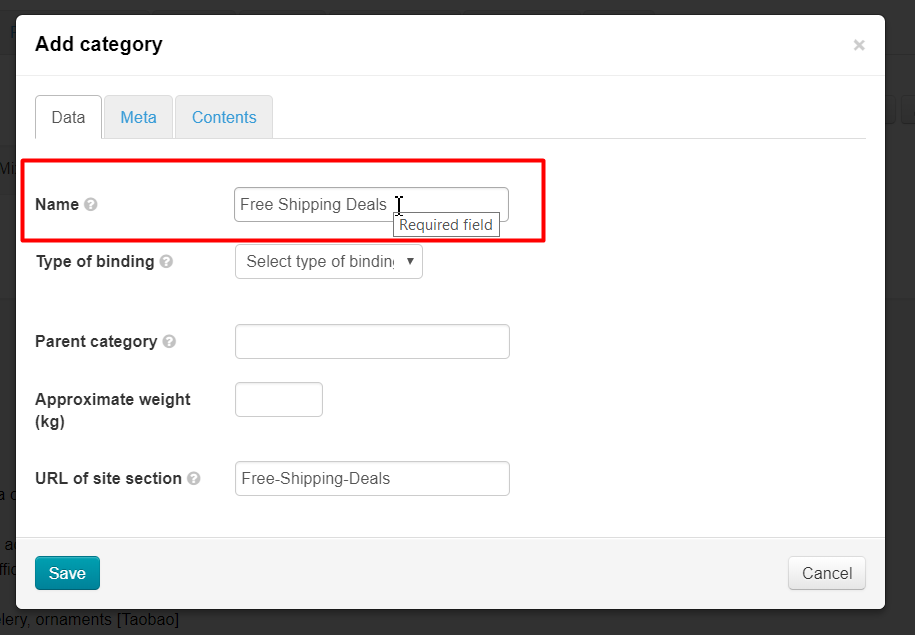
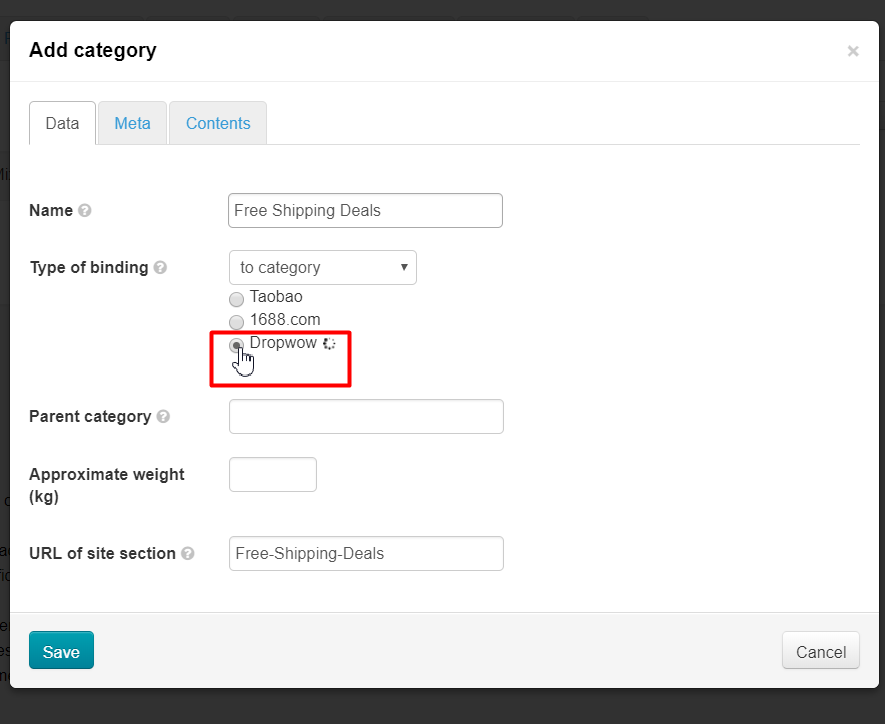
В открывшемся окошке пишем название категории:
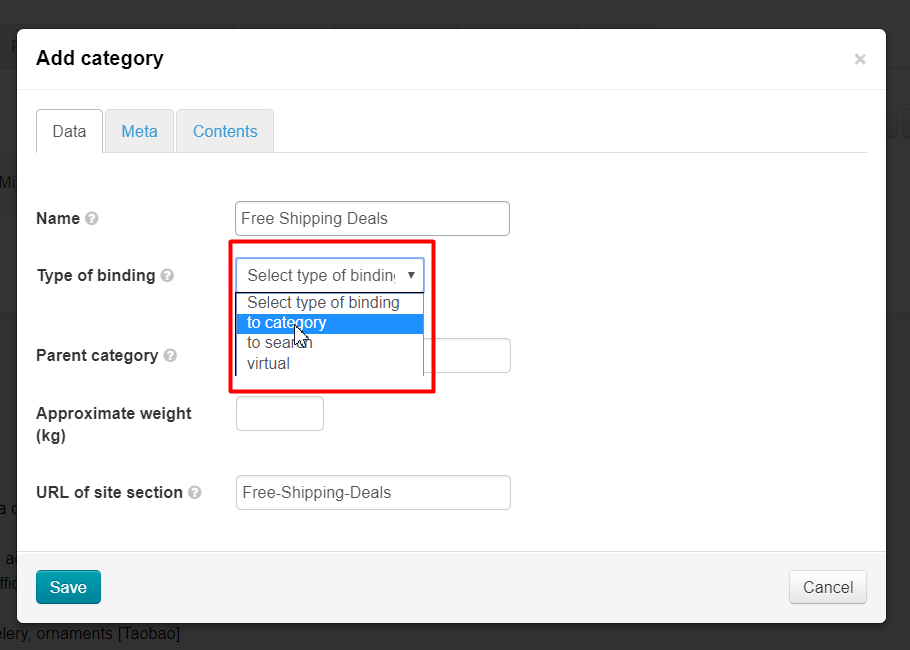
Затем из выпадающего списка выбираем привязку «К категории»:
Нам откроется список доступных товарных провайдеров. Выбираем кликом мышки Dropwow:
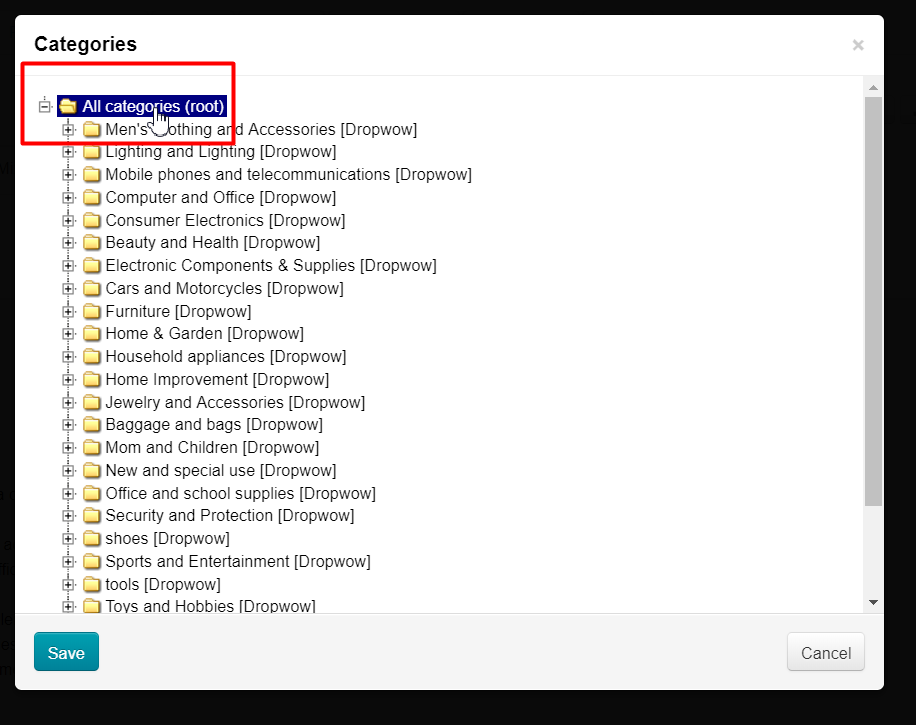
После выбора товарного провайдера нам будет показан весь каталог. Кликаем по самой верхней категории:
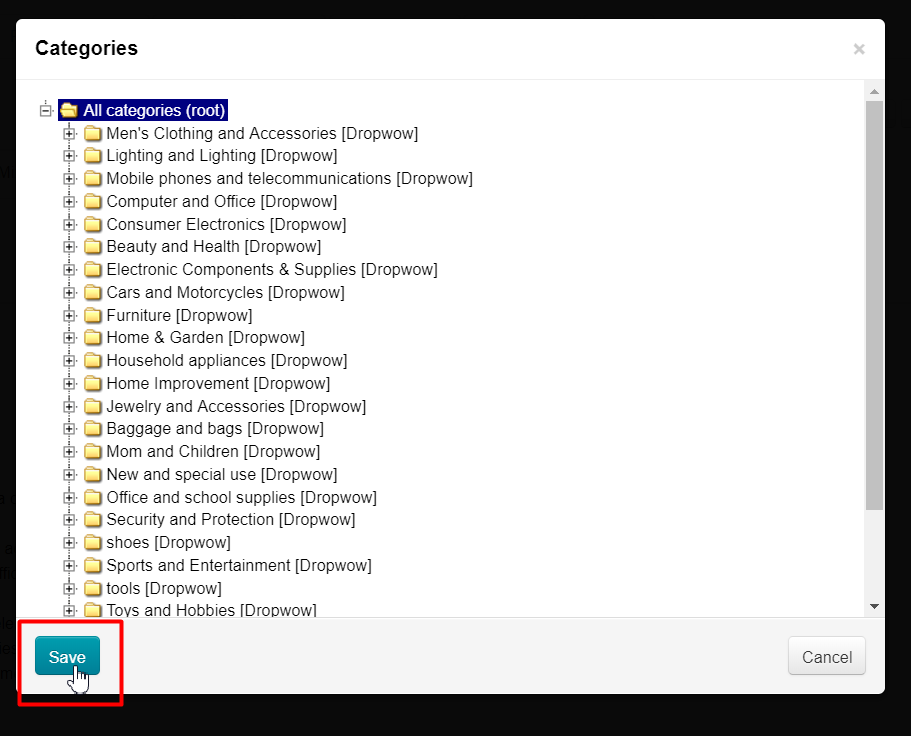
Нажимаем кнопку «Сохранить»:
Это было сохранение свазки нашей категории и каталога. Теперь надо сохраниться еще раз, чтобы создаваемая категория появилась на сайте:
Готово! Категория успешно появилась в каталоге!
It's necessary to allow background synchronization to let OT Box interact with your Dropwow account without your reminder (if you disallowed it for some reason before). Click "Disallowed" button:

Choose "Allowed" by mouse click in opened dropdown list:
Save choice by clicking checkmarked button :
You must ensure that sent orders are available for booking when you begin to work with orders and send them to booking before purchase. We recommend not to turn off "Order Check after Export" in order to check order for availability and prices immediately after the order was sent to Dropwow.
Checking is allowed by default.
Find "Order Check after Export" title to allow (if you disallowed it for some reason before). Click "Disallowed" button:
Choose "Allowed" by mouse click in opened dropdown list:
Save choice by clicking checkmarked button:
Ready. First step of settings is finished.
Delivery settings
There are three important nuances of delivering goods with Dropwow:
- Delivery from the seller to the final buyer is done by seller in China, who added his goods to Dropwow.
- Delivery cost is already included in price of goods. Delivery is carried out by ePacket within 10-20 days.
- Since delivery is done directly, there is no such thing as "Internal delivery" when working with Dropwow. This means that you do not need to configure it and only "External delivery" needs to be configured.
Therefore, you need to set up free external delivery in admin panel of OT Box.
It is worth noting that no one forbids you to put a certain price for delivery, so decision depends entirely on your business strategy. However, dropshiping principles assume that delivery is free, so we recommend an emphasis on goods mark-up and sales increase.
Open "Configuration" section and "Delivery" tab to configure delivery:
We need another tab: go to "External" tab:
Click "Add" button:
Fill in the fields: name and description in the form that opens:
Put a tick next to "Allow for the minimum delivery fee" then:

Choose Dropwow Trade Provider, so that delivery applies only to this provider products and does not concern others:
Save delivery:
Next you need to add a list of countries to which delivery will be made. Dropwow delivers worldwide, so the choice of countries is limited only by your business strategy.
Open "Rates by countries" section:
Choose Delivery we created before by mouse click from drop-down list:
Click "Add" button:
Choose country in opened form:
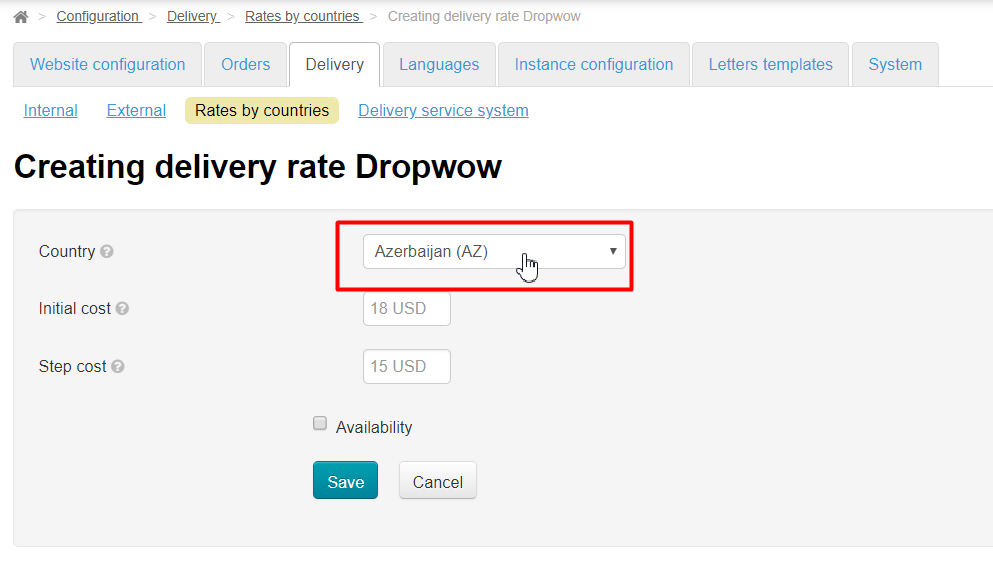
Put zero into other fields:
Put a tick next to "Availability" inscription, so that delivery is displayed when placing an order:
Save all changes:
Set up all countries necessary for goods sale in the same way.
How to work with orders: purchase and packages
You can start processing the order when your buyer made an order and paid for it.
We go to "Orders" section:
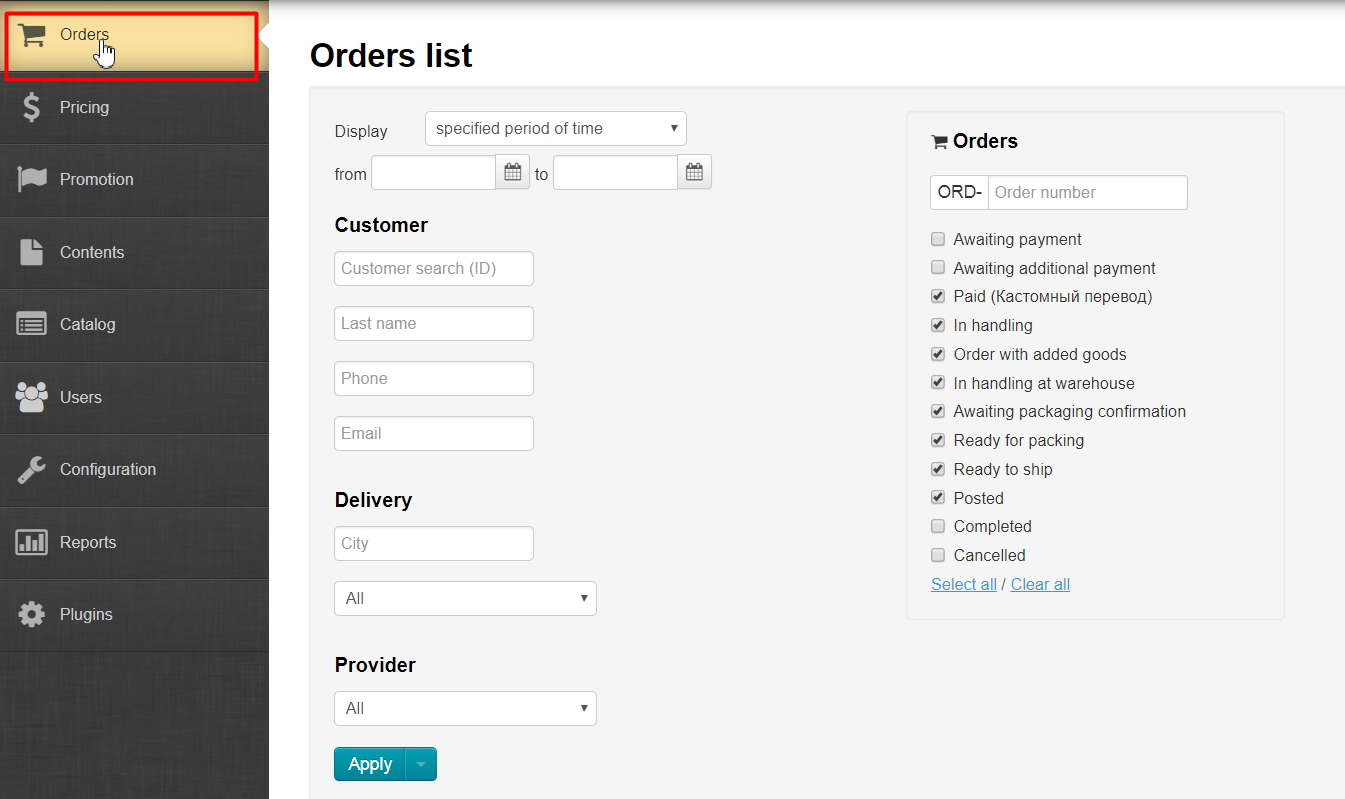
Look for orders that were made in Dropwow Trade Provider. Look for Provider line to facilitate the task:
Click mouse and choose Dropwow Trade Provider in dropdown list:

Click "Apply" button to see orders:
Ready. Orders according to filter are found. Choose order we want to send for purchase:
Click order by mouse:
Open "Purchase" tab when order detalization opens:
"Purchase" tab should contain goods in "Ready for purchase" section:
Check whether goods are paid and which vendor is specified if there are no goods there:
Ready-to-purchase items can be sent to Dropwow. Select goods that we want to purchase with the mouse:
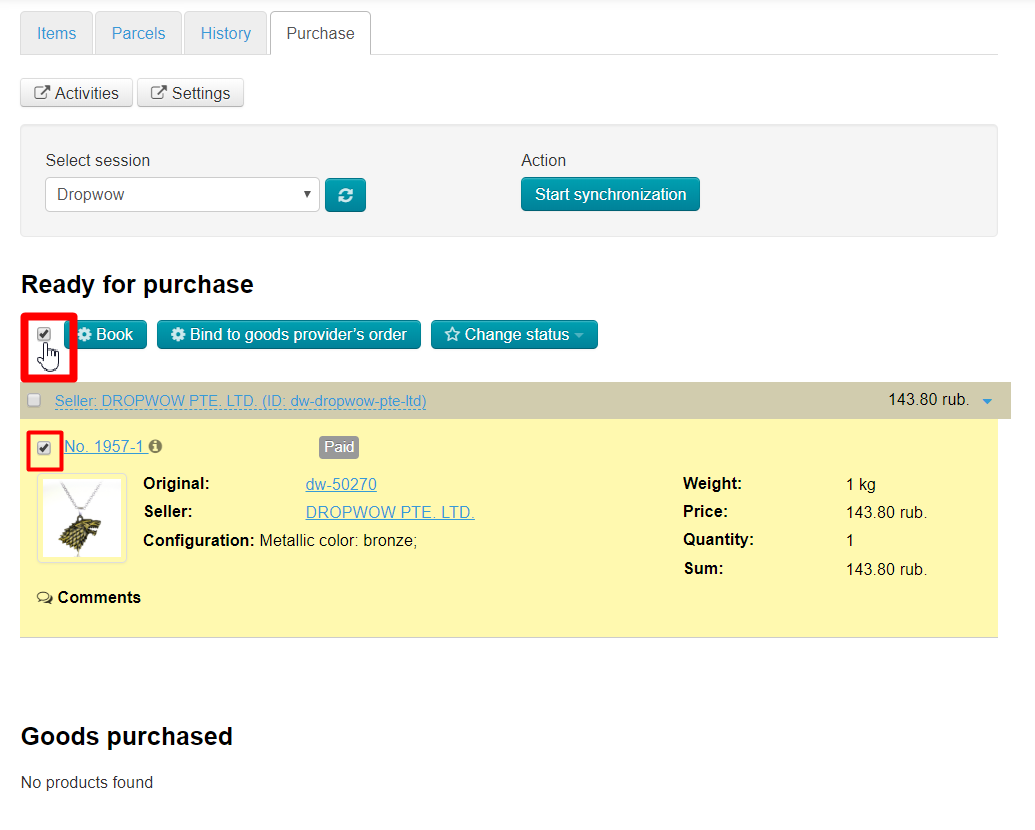
Click "Book" button when all goods are chosen:
Progress window will open after clicking "Book" button.
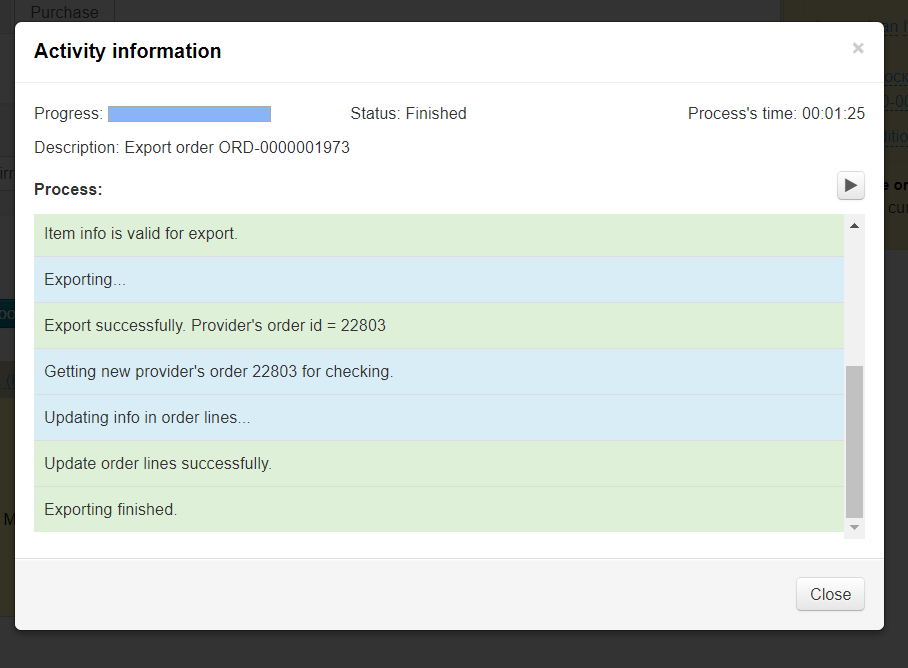
Closing the window does not affect booking process. Everything happens in background, so you can close it. The view is further available on "Activity" page:
Product was successfully booked when "Account" and "External Order" fields appear, and they also moved to "Purchased" section:
You need to go to your personal account at Dropwow after booking where the order will be displayed:
It is necessary to send it for purchase. You will see a list of products that have been added from OT Box after clicking "Orders":
Then you need to add funds to your wallet and purchase added goods. After goods were purchased, order statuses of Dropwow will be transmitted to OT Box to inform buyer of order status (only works when background synchronization is active).
How to add Dropwow catalog to website?
We recommend to add a separate section with Dropwow catalog if Dropwow provider is not your primary provider.
Section can be called "Goods with free delivery", for example, for customers convenience.
Open "Catalog → Categories" section:
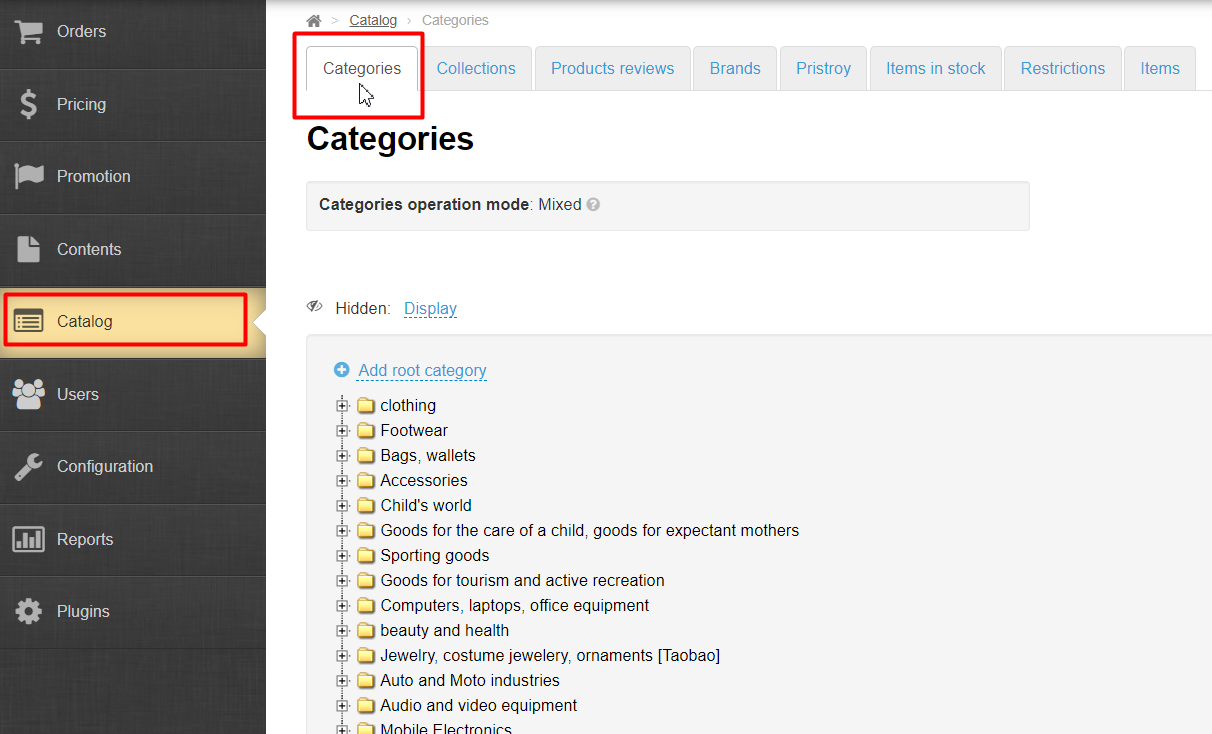
Check that catalog mode is mixed:
Mouse click "Add root category":
Write category title in opened window:
Choose "To category" binding from drop-down list:
A list of available commodity providers will open. Choose Dropwow by mouse click:
We will show the whole catalog after choosing commodity provider. Click topmost category:
Click "Save" button:
This was saving of our category and catalog binding. Now we need to save again to show created category on the site:
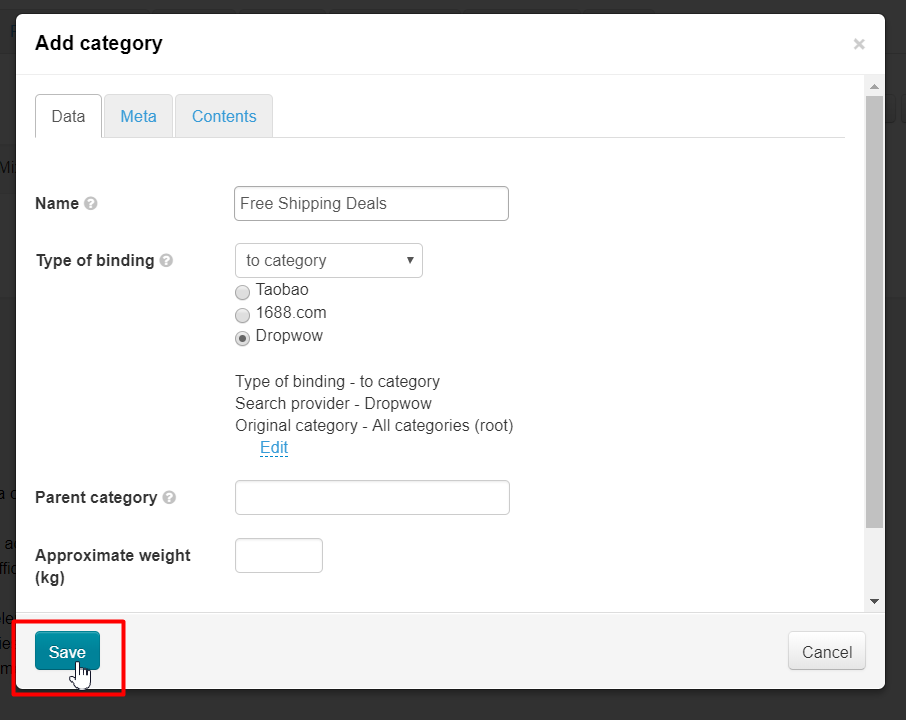
Ready! Category successfully appeared in catalog!
Thus, you can create both a whole section and also individual products categories. For example, "Women's handbags with free delivery." Or "Baby carriages directly from manufacturer", etc.
Таким образом можно создавать не только целый раздел, но и отдельные категории товаров. Например, «Женские сумочки с бесплатной доставкой». Или «Детские коляски напрямую от производителя» и тп.