| Оглавление |
|---|
СМС регистрация — удобный инструмент для взаимодействия с покупателями.
Чтобы включить смс регистрацию, необходимо:
- Выбрать и настроить смс сервис
- Настроить Коробку ОТ
- Включить СМС регистрацию
- По желанию включить смс-оповещения и рассылки
Регистрация и настройка смс сервиса Twilio
Сервис рассылки смс на английском языке. Поэтому все данные указываются на английском. Доступен полный список Стран. Сам сайт на трех языках: английский, немецкий и японский.
Регистрация
|
...
Connecting SMS service gives 2 convenient ways for customer to interact with your online store.
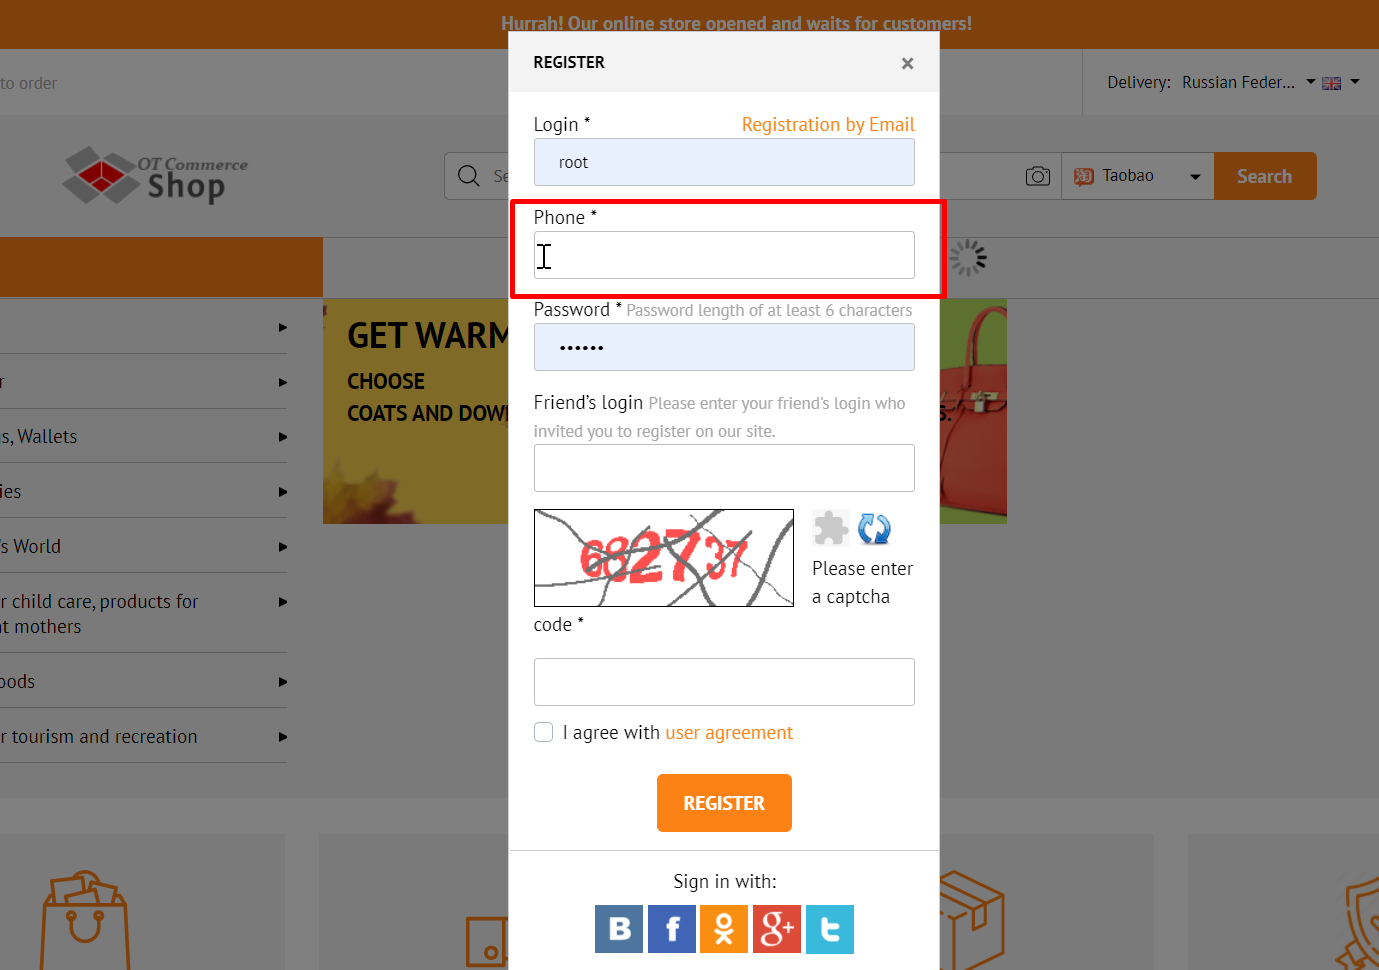
- SMS regitration — customer adds phone number instead of e-mail and receives confirmation code.
- SMS notification — customer receives notification when order status changes, for example about changing the order status.
Sending news, promotions and discounts by SMS is not provided by OT Box functionality. However, such a service is provided by third-party SMS services.
| Информация |
|---|
You can set up SMS registration for your customers, as well as the ability to send various SMS notifications about order or shopping cart status starting from admin version 1.12.2. |
It's necessary to follow the steps to set SMS registration:
Select and configure SMS service
Make settings in OT Box (You should update OT Box if admin panel version is lower than 1.12.2. Then make all the described site settings)
Set SMS registration
Optionally enable SMS notifications about order and shipping cart status
Registering and configuring Twilio SMS service
Service of sending SMS in English. Therefore, all data is indicated in English. A complete list of countries is available. Website is available in three languages: English, German and Japanese.
Registration
Go to Заходим по адресу https://www.twilio.com/sms и нажимаем на кнопку SMS and click “Sign up” button
Заполняем форму регистрацииFill in registration form.
Когда все поля заполнены, ставим галочку, соглашаясь с политикой конфиденциальности и нажимаем кнопку When all the fields are filled in, put a tick, agreeing to the privacy policy and click “Start your free trial” button.
Подтверждаем почтуConfirm email.
На указанный вами адрес электронной почты придет письмо со ссылкой. Переходим по ссылке
An email with a link will be sent to your email address. Follow the link.
Вводим
ваш номер телефона, код страны выбирается слеваEnter your phone number, country code is selected on the left.
На
указанный номер придет смс с кодом. Вводим код в специальное поле и нажимаем SMS with a code will be sent to specified number. Enter the code in a special field and click “Submit”.
После регистрации заполняем форму как показано на скриншоте
After registration, fill out the form as shown in the screenshot.
Когда все поля заполнены, нажимаем кнопку Click “Get Started with Twilio” button when all the fields are filled:
После регистрации и подтверждения аккаунта необходимо сделать номер телефона Twilio. Со страницы вашего аккаунта переходим в раздел Console.
И на этой странице будет кнопка для создания номера телефона.
Данные из сервиса Twilio для админки ОТ
Со страницы вашего аккаунта переходим в раздел Console.
Копируем ACCOUNT SID, нажав на иконку копирования.
Копируем AUTH TOKEN, нажав на иконку копирования.
Копируем TWILIO PHONE NUMBER, который был получен в настройках профиля или Alphanumeric Sender ID который был зарегистрирован ранее в личном кабинете
Настройка сервиса завершена. Переходим к настройке в админке ОТ.
Настройка сервисов в админке ОТ
В админке ОТ открываем раздел “Configuration → System → General”
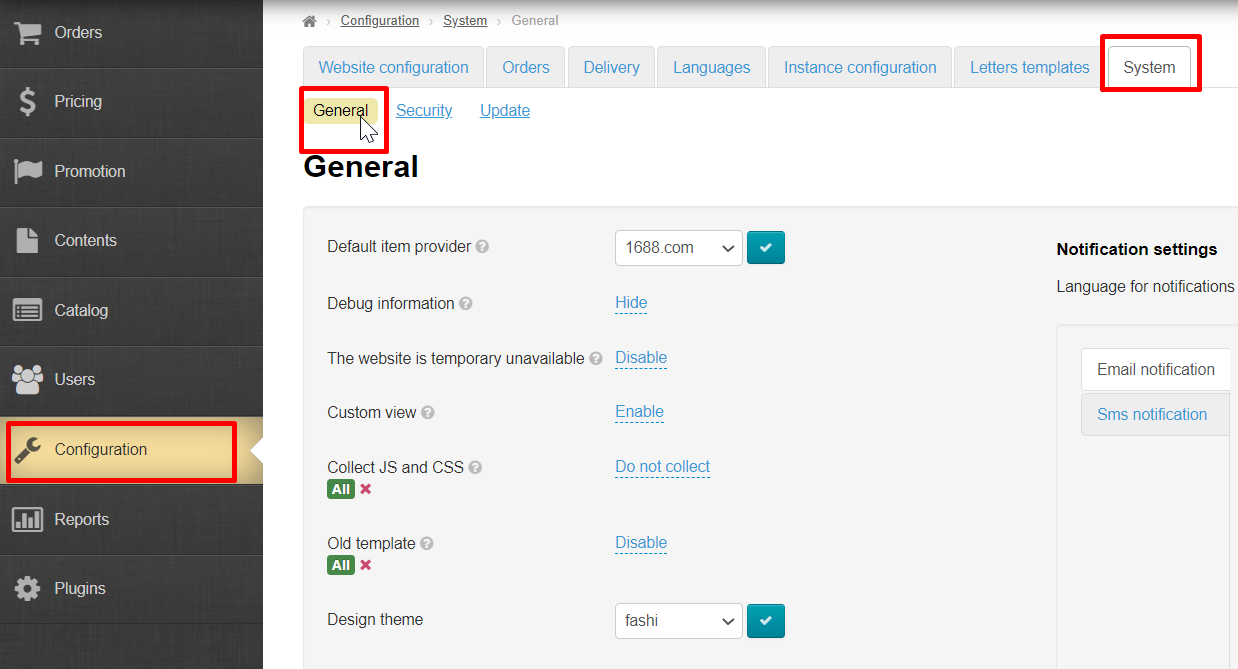
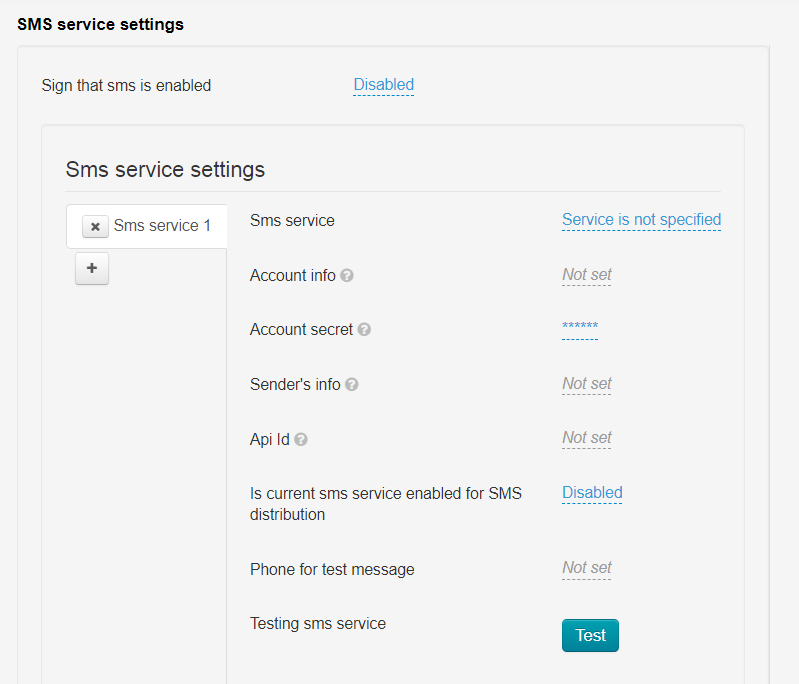
Прокручиваем страницу “General” в самый низ до заголовка “SMS service settings”. Именно сюда будем вводить данные, которые копировали в сервисах смс услуг.
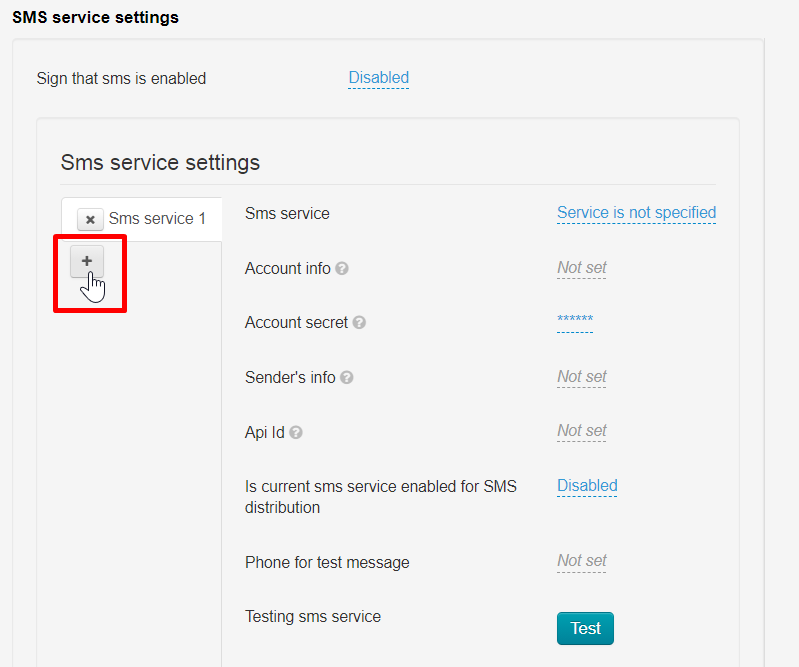
Для каждого сервиса смс услуг необходимо создать свою вкладку с настройками. Вкладка Sms service 1 стоит по умолчанию. Чтобы создать вторую вкладку, нажимаем кнопку со знаком +
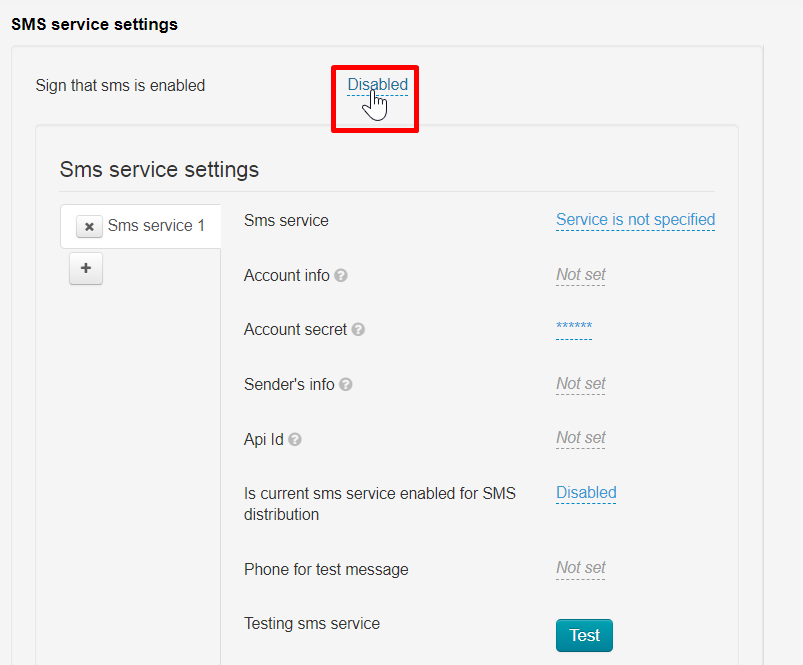
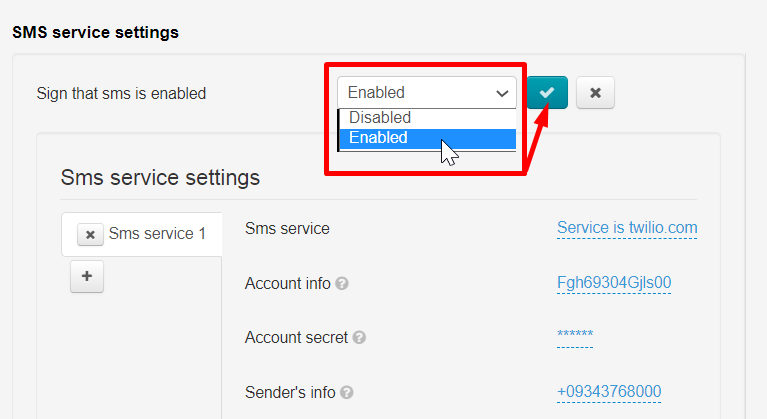
Включить смс сервис
Чтобы протестировать работу смс на вашем сайте, а также начать использовать смс для рассылок и регистрации покупателей, включаем сервис. Нажимаем на надпись “Disabled”.
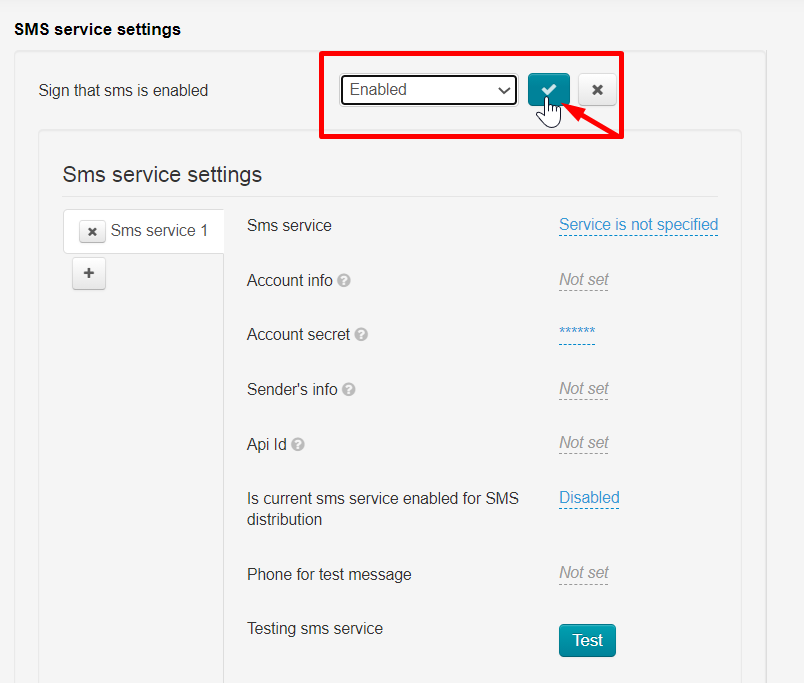
Выбираем в списке “Enabled” и сохраняем выбор.
Рекомендуем перед включением настроить сервисы для отправки смс.
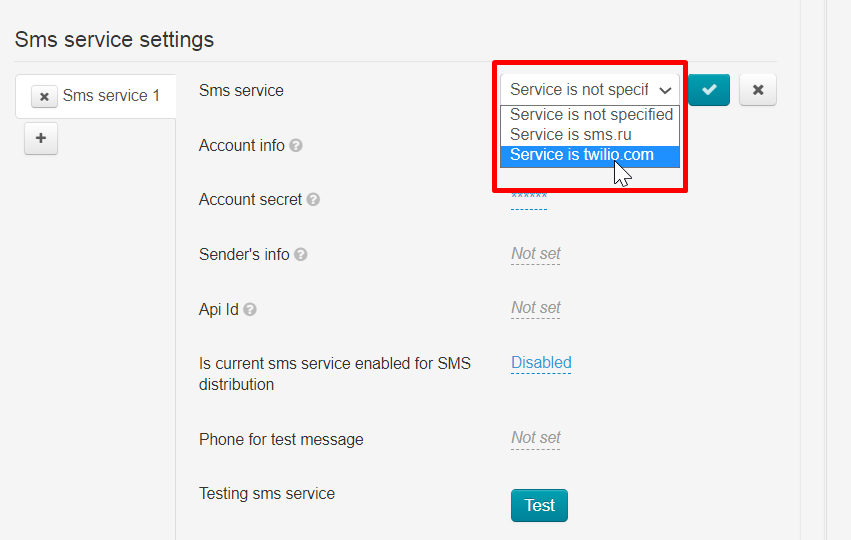
Настройка Sms service
В поле “Sms service” выбираем из выпадающего списка “Service is twilio.com”
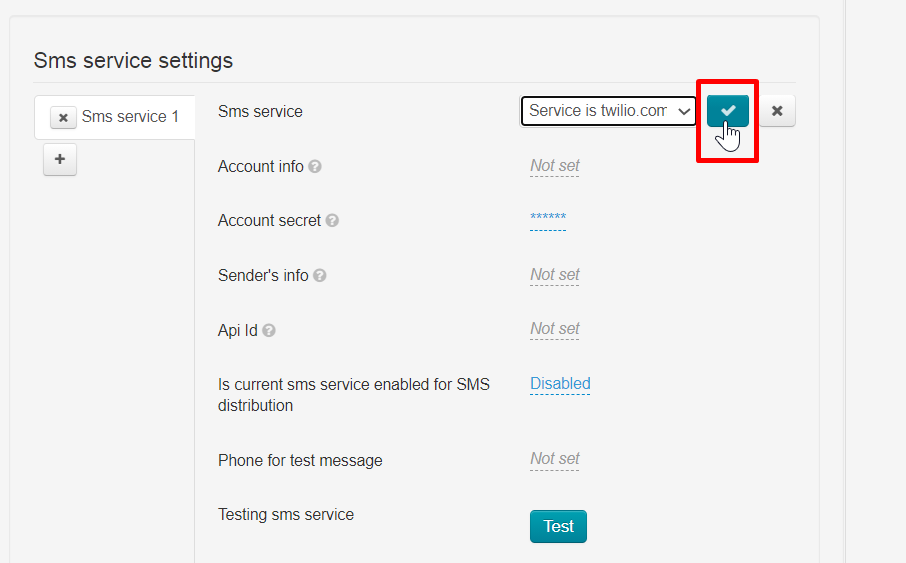
Нажимаем кнопку “Сохранить”
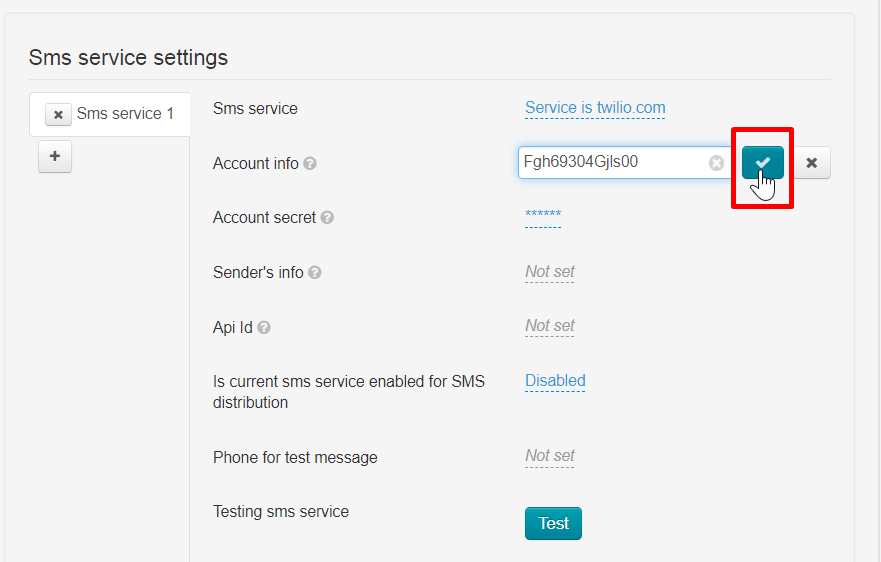
В поле “” пишем то, что вы скопировали в сервисе из поля ACCOUNT SID
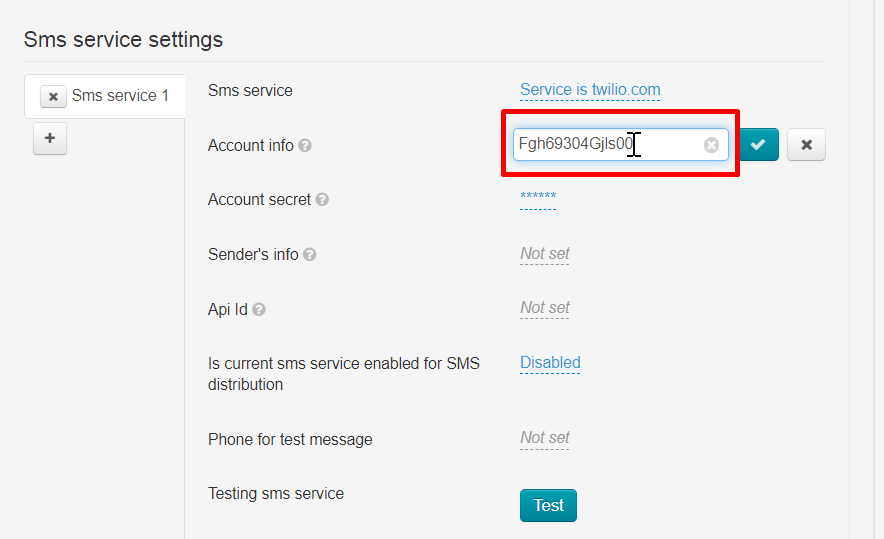
Нажимаем кнопку “Сохранить”
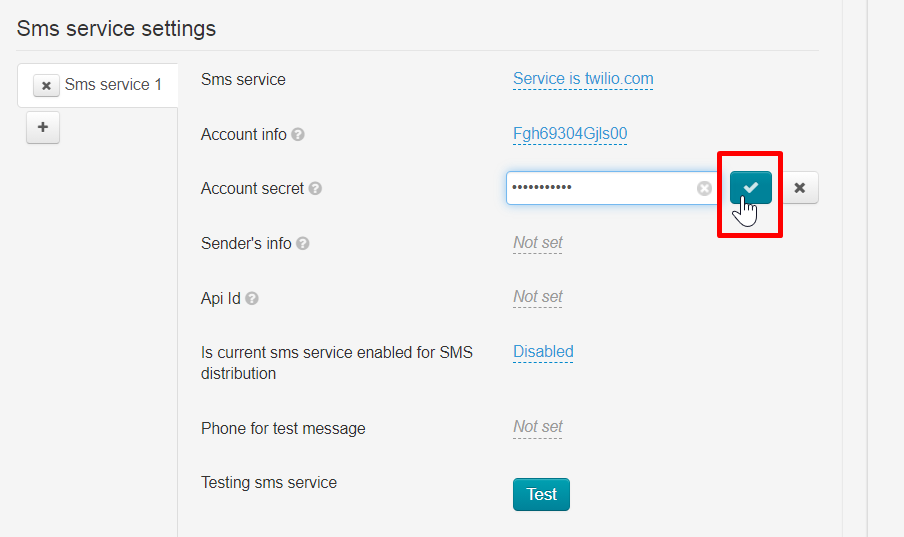
Следующее поле “Account secret”. Сюда пишем то, что вы скопировали в сервисе из поля AUTH TOKEN
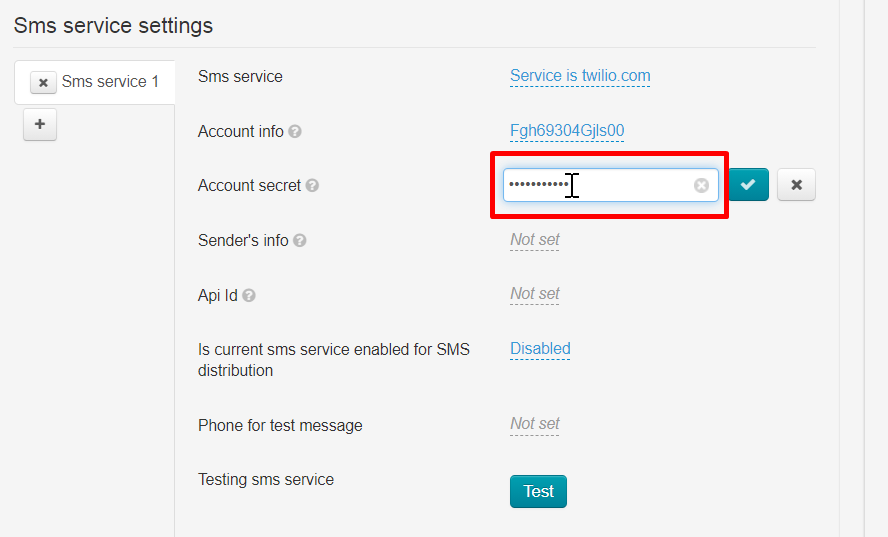
Нажимаем кнопку “Сохранить”
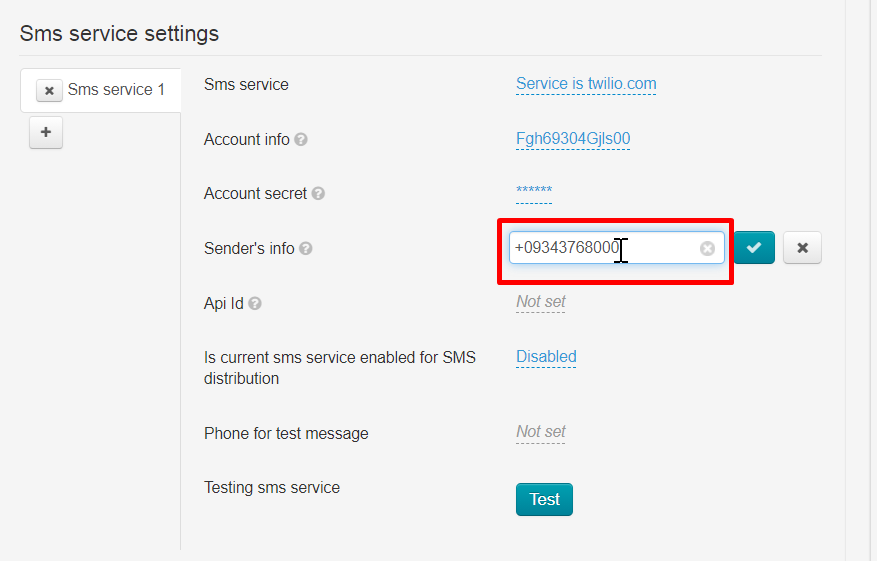
Следующее поле “Sender's info”. Сюда пишем то, что вы настраивали в сервисе TWILIO PHONE NUMBER (обязательное получение номера Twilio) или Alphanumeric Sender ID (который был зарегистрирован ранее в личном кабинете).
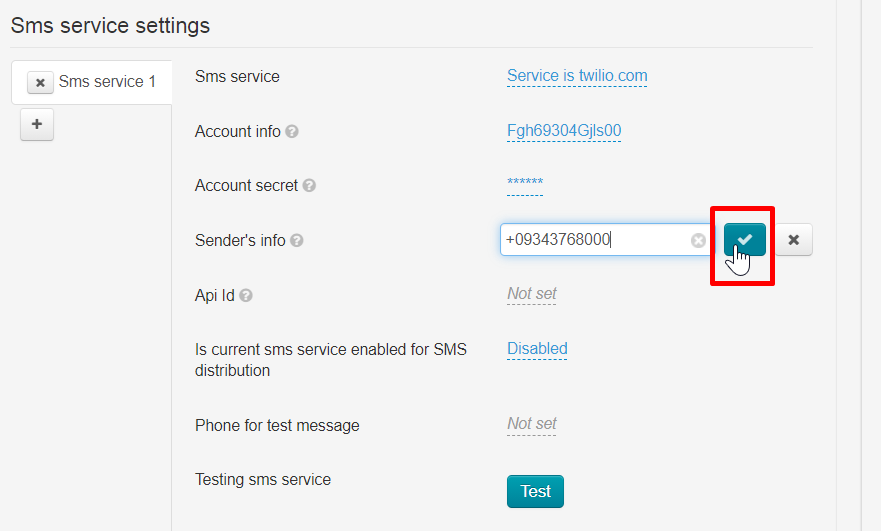
Нажимаем кнопку “Сохранить”
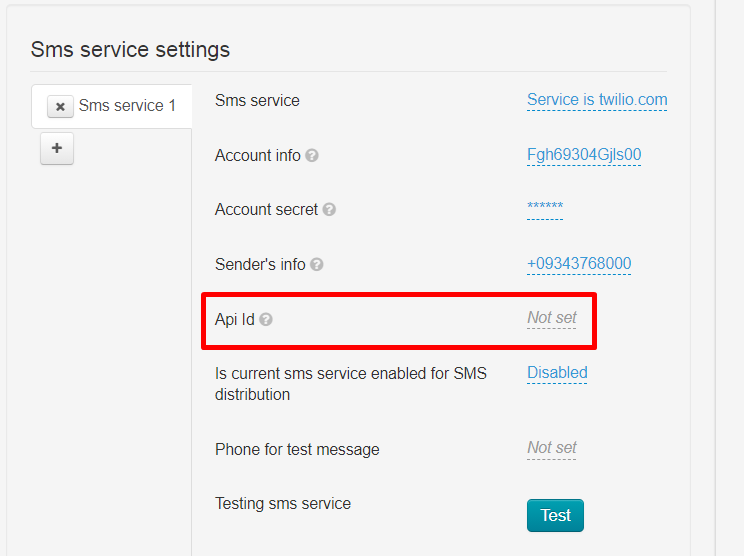
Поле “Api Id” оставляем без изменений.
Смс сервисы можно использовать для регистрации покупателей, а также для рассылки (Акции, скидки, напоминания и тп). Если сервис будет использоваться для рассылок, в поле “Is current sms service enabled for SMS distribution” выбираем “Enabled”. Если рассылки не требуются — оставляем без изменений.
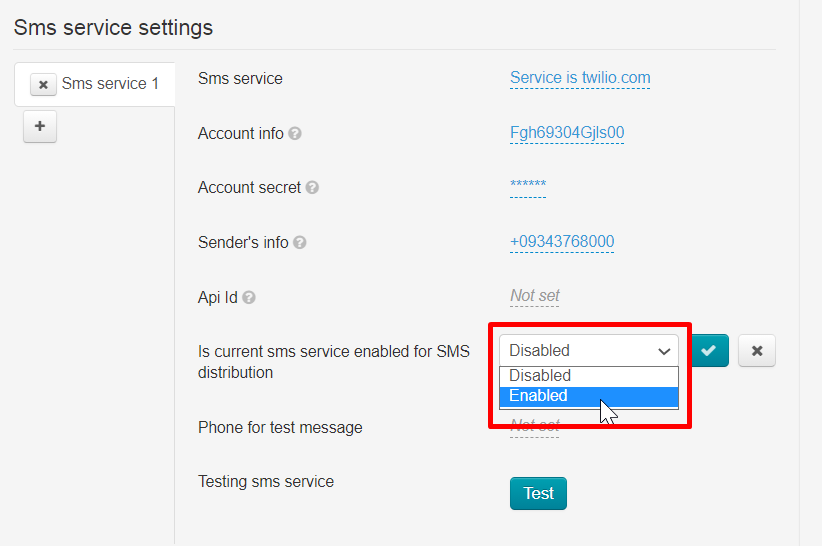
Сохраняем выбор, нажав кнопку “Сохранить”.
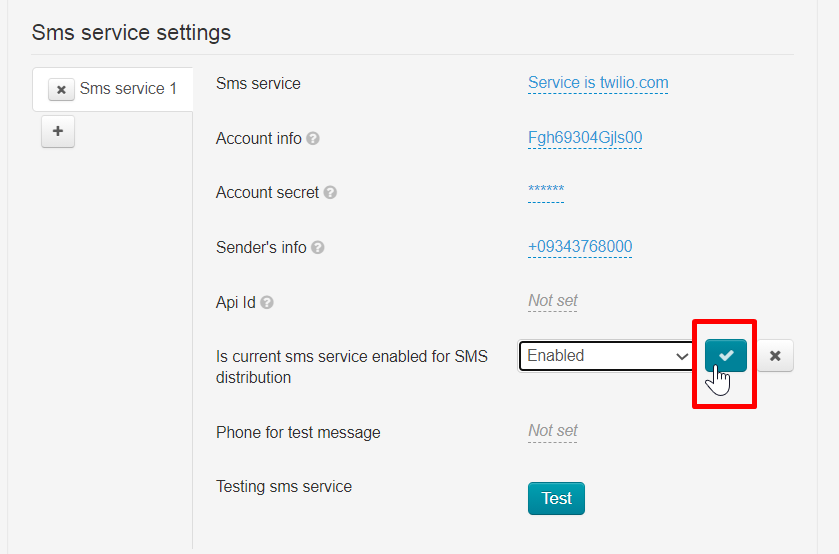
Использование сервиса в рассылках можно включить или отключить в любой момент.
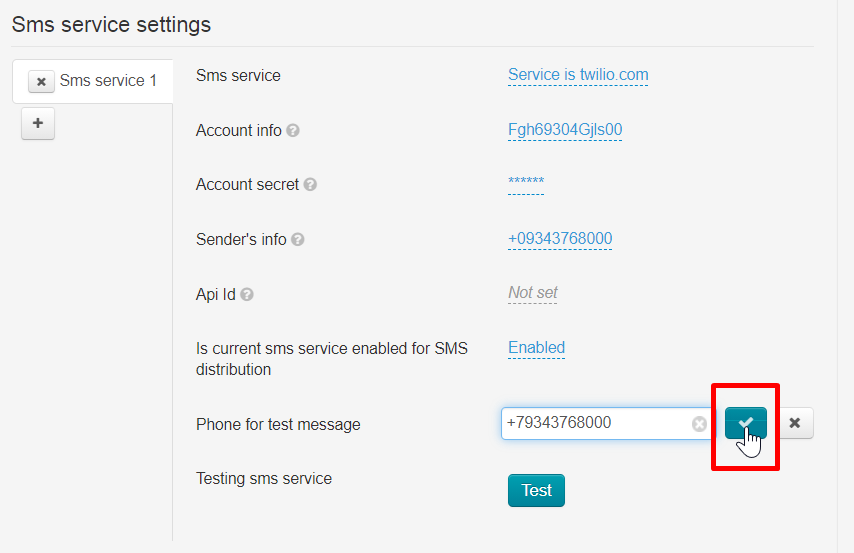
Для того, чтобы протестировать работу сервиса, указываем свой номер телефона.
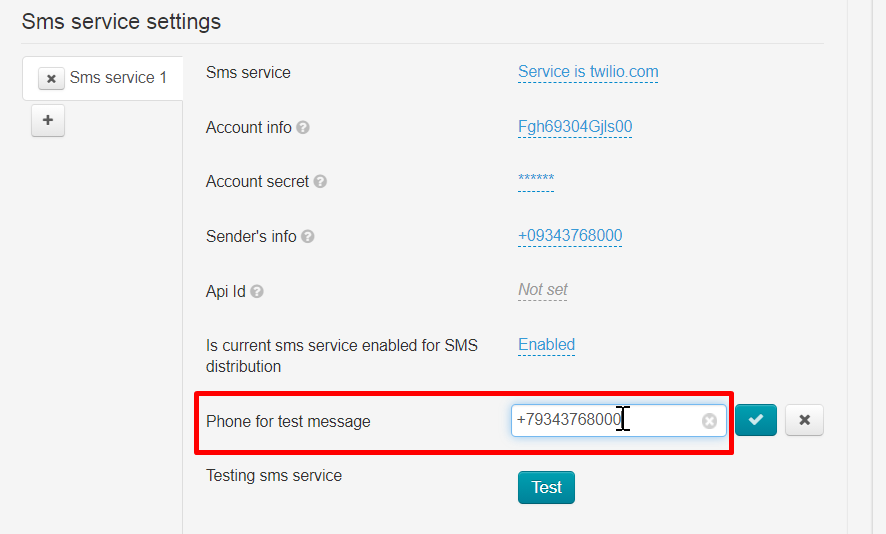
Нажимаем кнопку “Сохранить”.
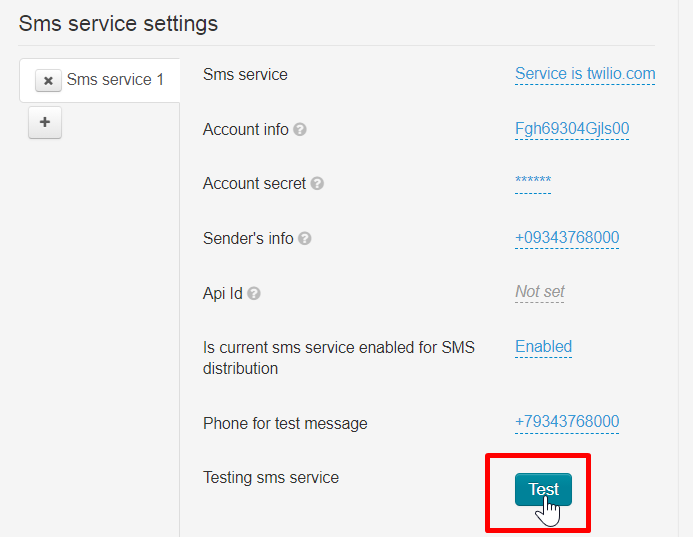
Затем нажимаем кнопку “Test” и ждем сообщение на указанный номер.
Включить Регистрацию по SMS
Ваши покупатели указывают свой номер телефона, на который придет код подтверждения. Телефон, как и другие данные о покупателе будет указан в его профиле.
Открываем раздел “Пользователи → Настройки”
Нам нужно поле “Возможность регистрации по смс”.
Кликаем мышкой по надписи “Запретить” и в выпадающем списке выбираем “Разрешить”.
Нажимаем кнопку “Сохранить”.
Теперь все, кто регистрируются у вас на сайте, будут использовать телефон для регистрации.
Включить SMS уведомления
Уведомления от админки, пользователей или сайта будут приходить на указанные вами номера телефонов.
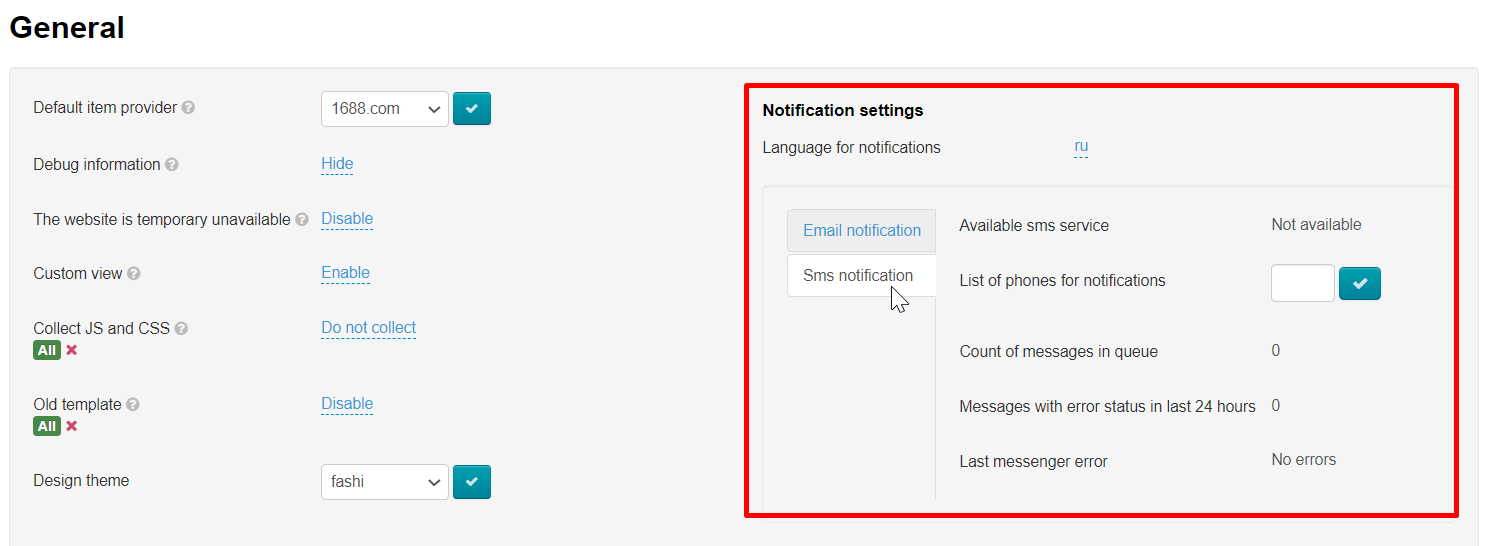
В админке ОТ открываем раздел “Configuration → System → General”
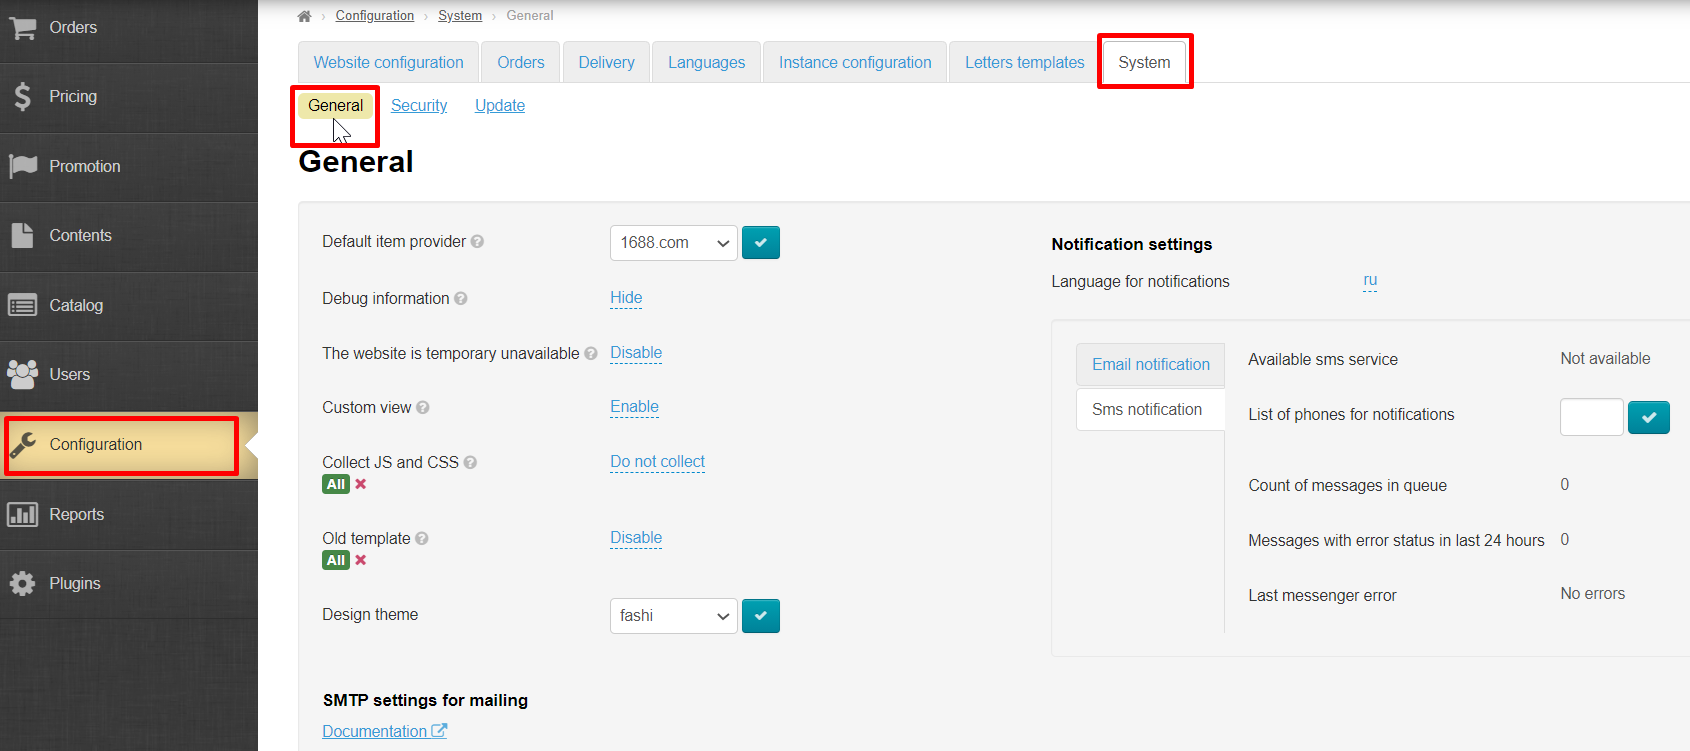
Смотрим правый блок “Настройка уведомлений” и кликаем мышкой по вкладке “Настройка sms уведомлений”
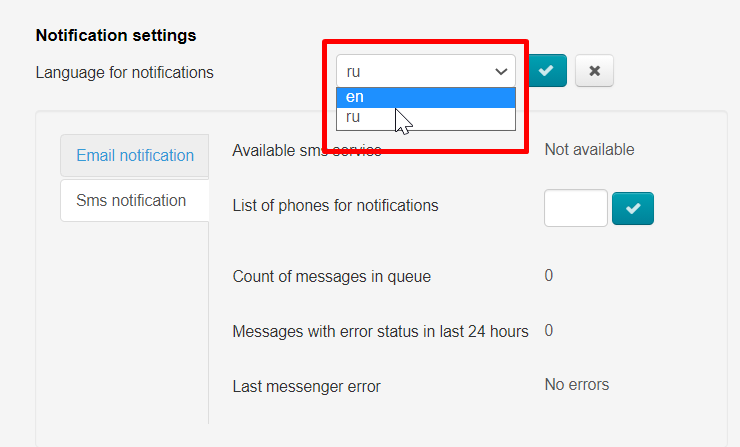
Можно выбрать язык оповещений русский или английский.
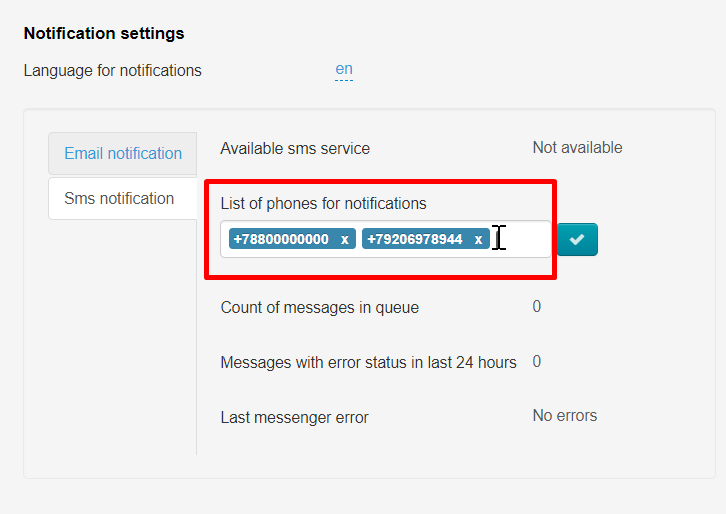
Здесь всего одна настройка: список телефонов. Кликаем по полю “Список телефонов для оповещений”.
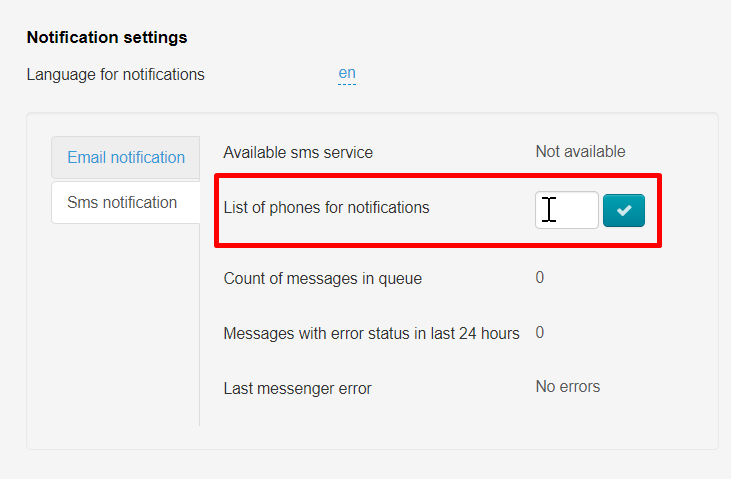
Указываем номера с кодом страны. Каждый номер с новой строки (кнопка ENTER).
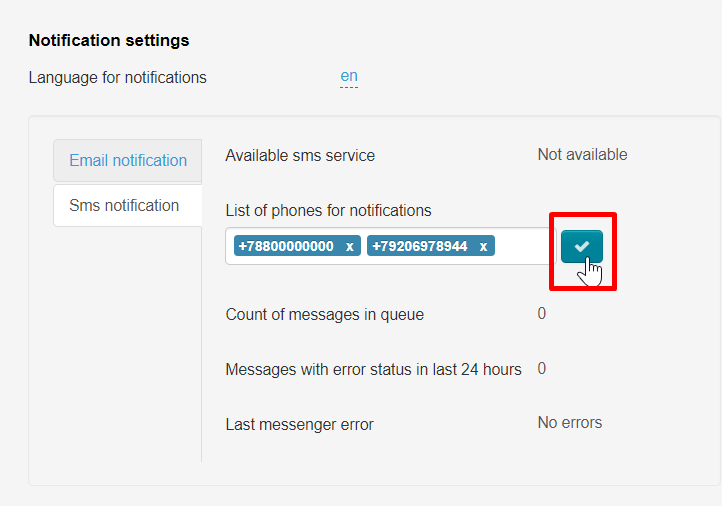
Нажимаем кнопку “Сохранить”
Отредактировать список номеров можно в любое время. Для того, чтобы удалить неактуальные телефоны, нажимаем крестик справа от номера и кнопку “Сохранить”.

Настройка шаблонов смс сервиса
| Информация | ||
|---|---|---|
| ||
1 SMS на латинице вмещает до 160 символов. |
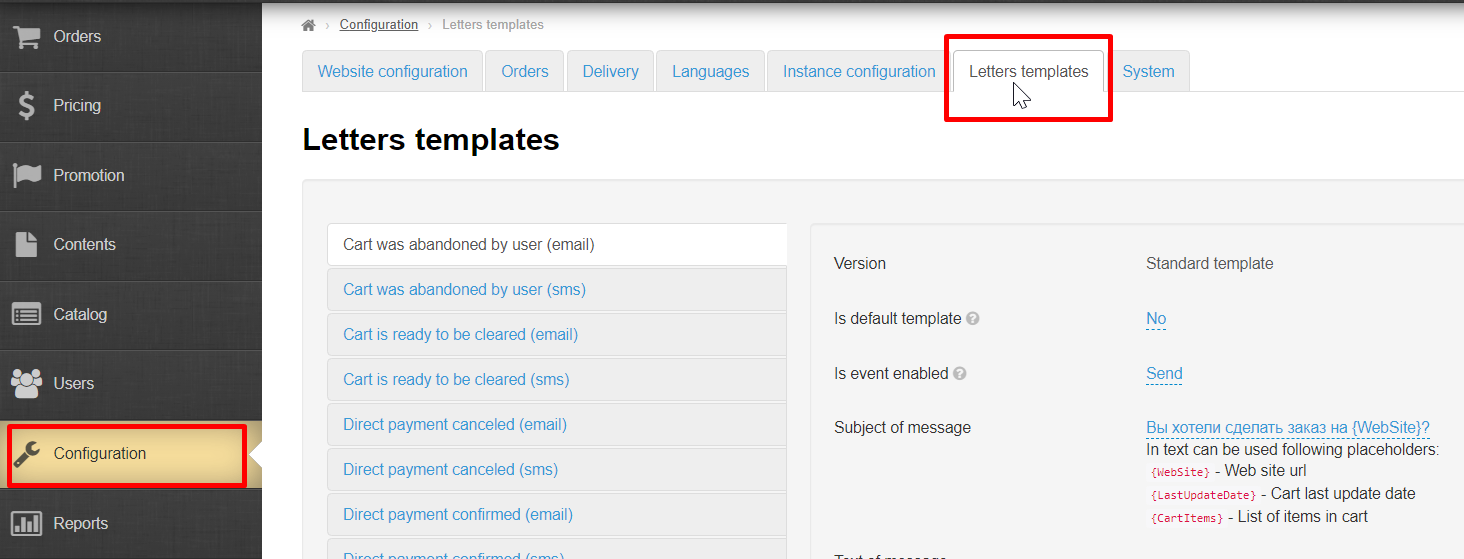
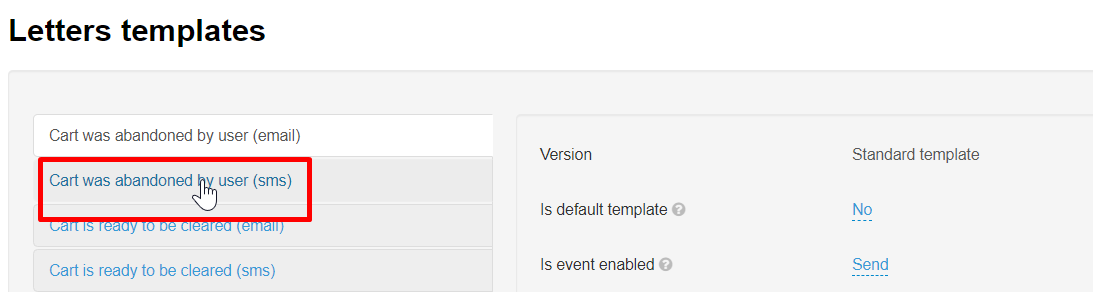
Открываем раздел редактирования шаблонов: Configuration → Letters templates
Нас интересуют шаблоны, у которых в конце написано (смс)
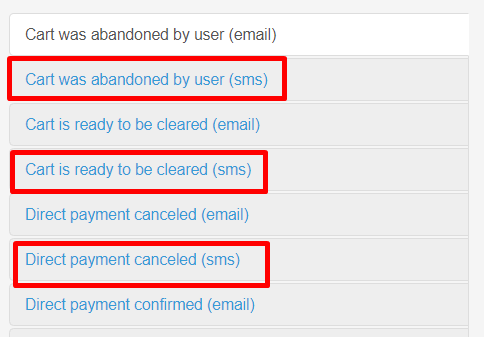
Если у вас нет таких шаблонов, необходимо включить использование смс сервисов (“Configuration → System → General” листаем вниз и выбираем “Включена”)
Чтобы отредактировать шаблон смс, кликаем мышкой по нужному нам шаблону.
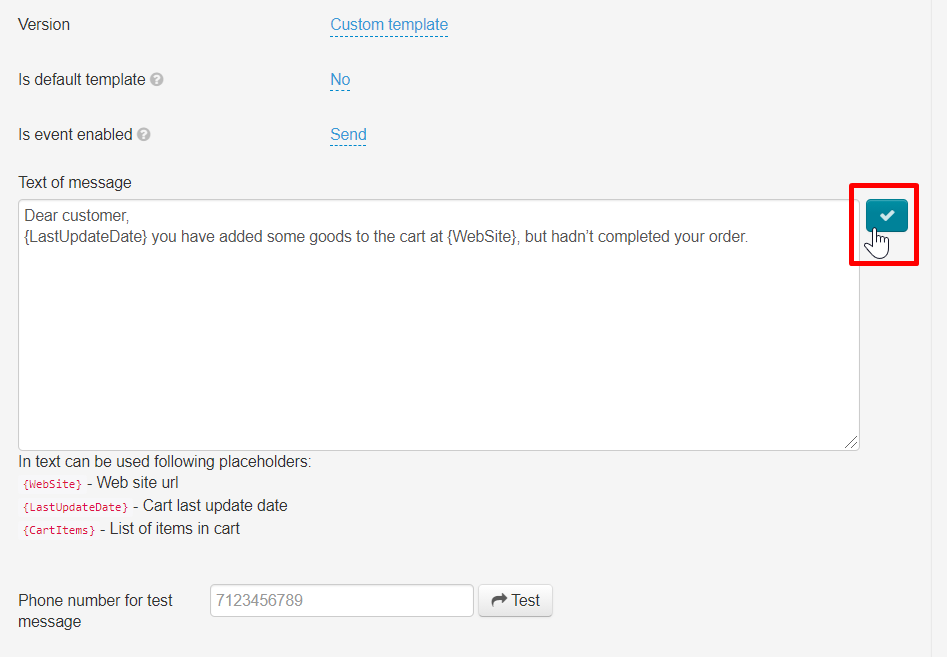
Откроется интерфейс редактирования шаблона
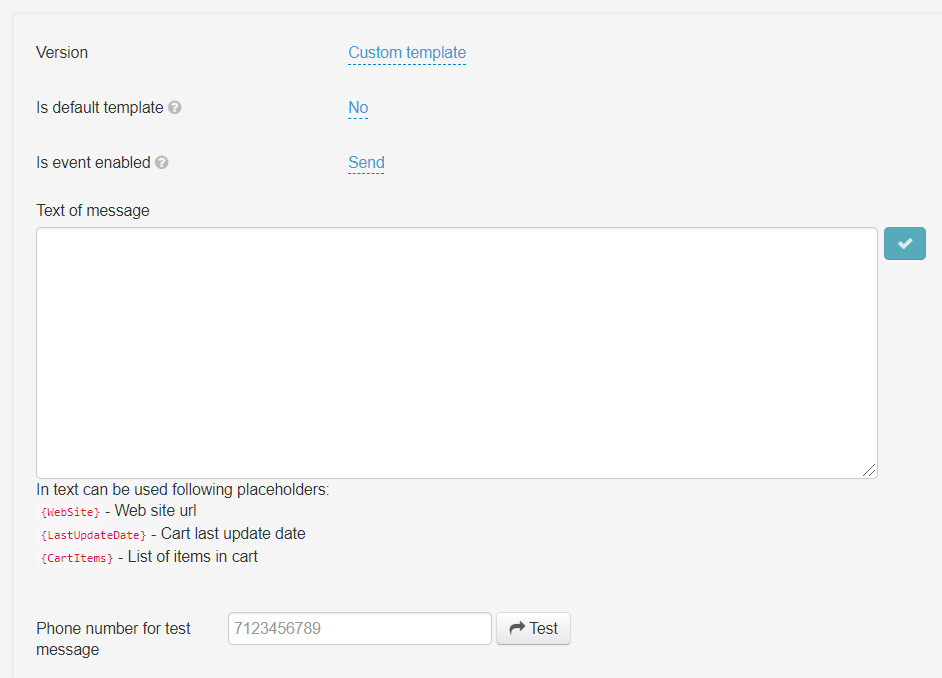
Важно помнить, что 1 SMS на латинице вмещает до 160 символов.
Есть также вспомогательные конструкции. Они помечены красным и при клике мышкой вставляются в текст смс.
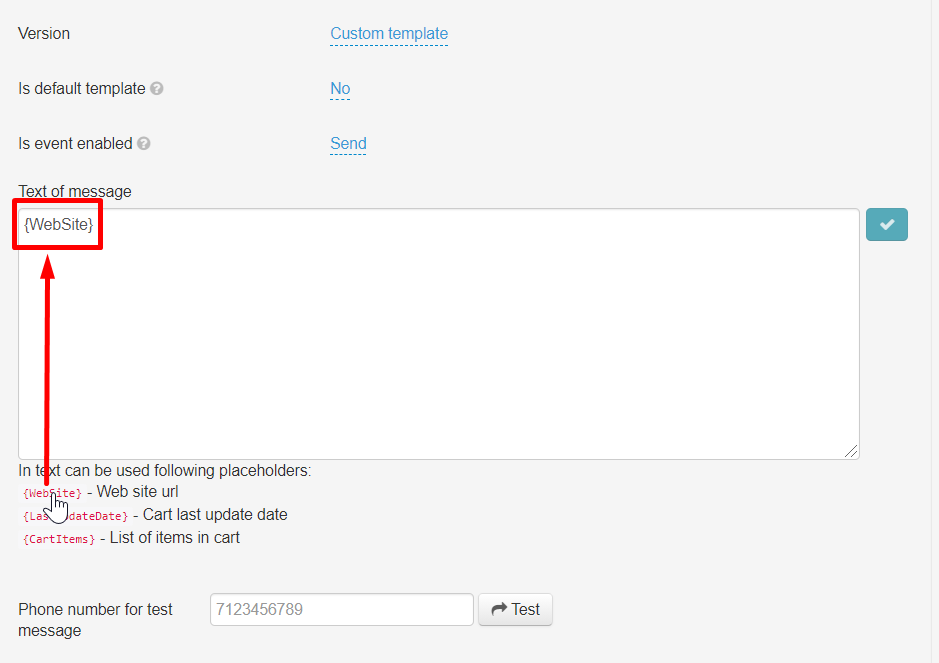
Это помогает сделать сообщения универсальными и сообщения подстраиваются под конкретного получателя.
Пишем текст сообщения и сохраняем его, нажав на кнопку “Сохранить”
И таким образом необходимо настроить все шаблоны сообщений.
Для удобства рекомендуем вам планировать текст смс в текстовых редакторах, где идет подсчет символов.
Добавить/редактировать номер телефона покупателя
Если необходимо, вы можете добавить или отредактировать номер телефона покупателя.
Кроме того, покупатель лично может добавить или изменить номер телефона через Личный Кабинет.
После изменения или добавления номера телефона, покупателю придет смс для подтверждения.
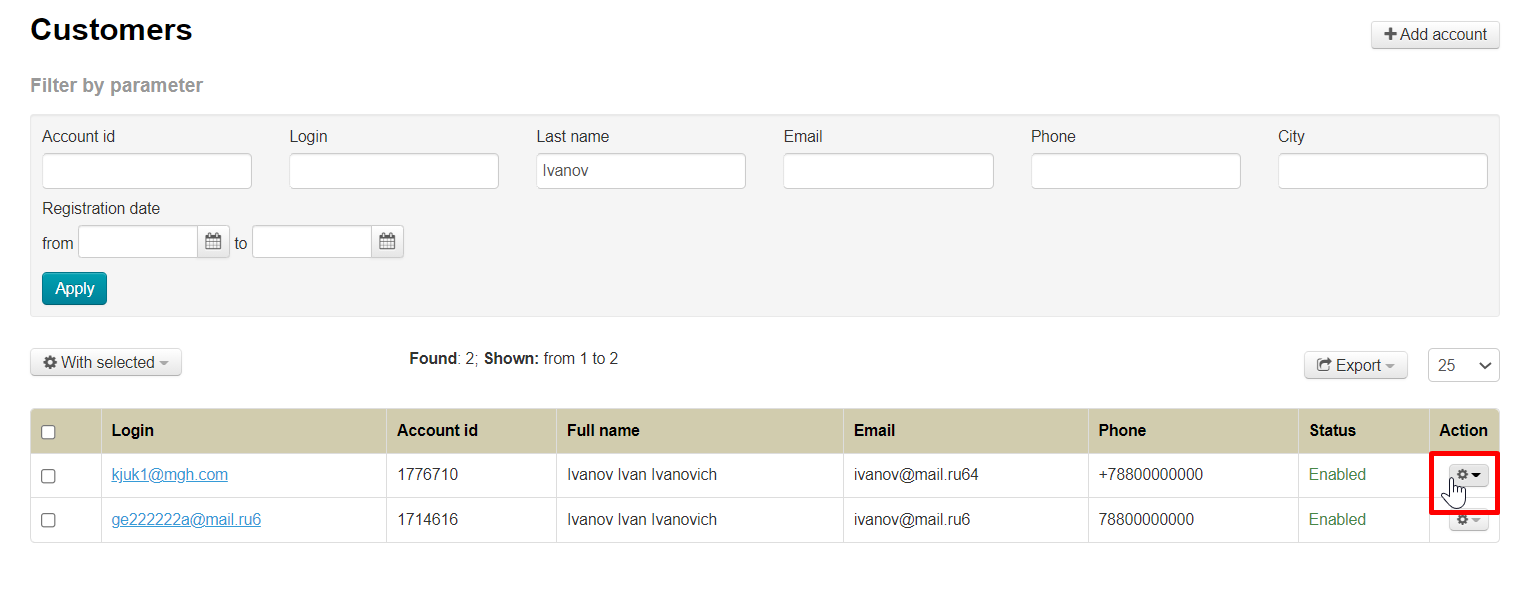
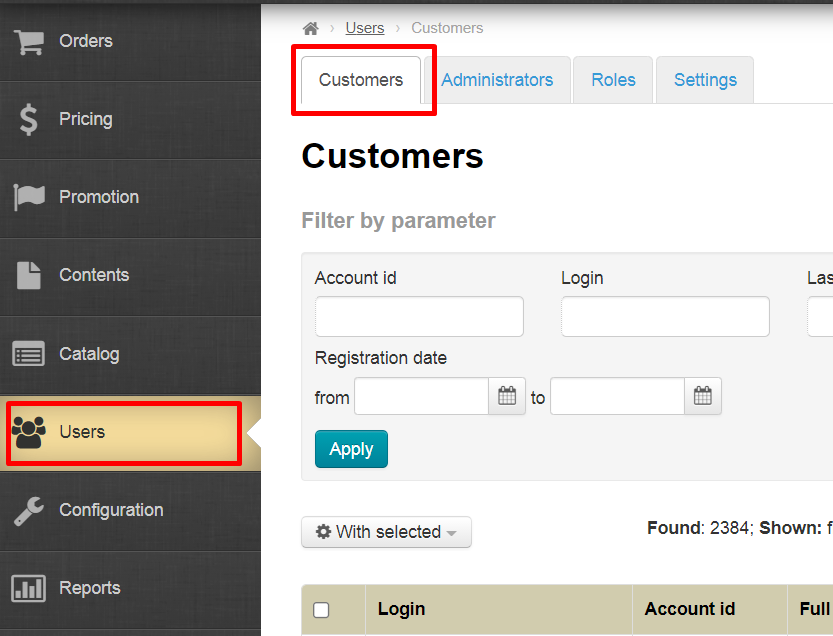
Чтобы через админку добавить номер телефона покупателя, заходим в раздел “Пользователи → Покупатели”
Выбираем пользователя, которому необходимо добавить или отредактировать номер телефона.
В колонке “Действия” нажимаем на кнопку с шестеренкой и выбираем из списка “Редактировать”.
В поле “Телефон” пишем номер телефона покупателя (или редактируем его).

Сохраняем изменения.

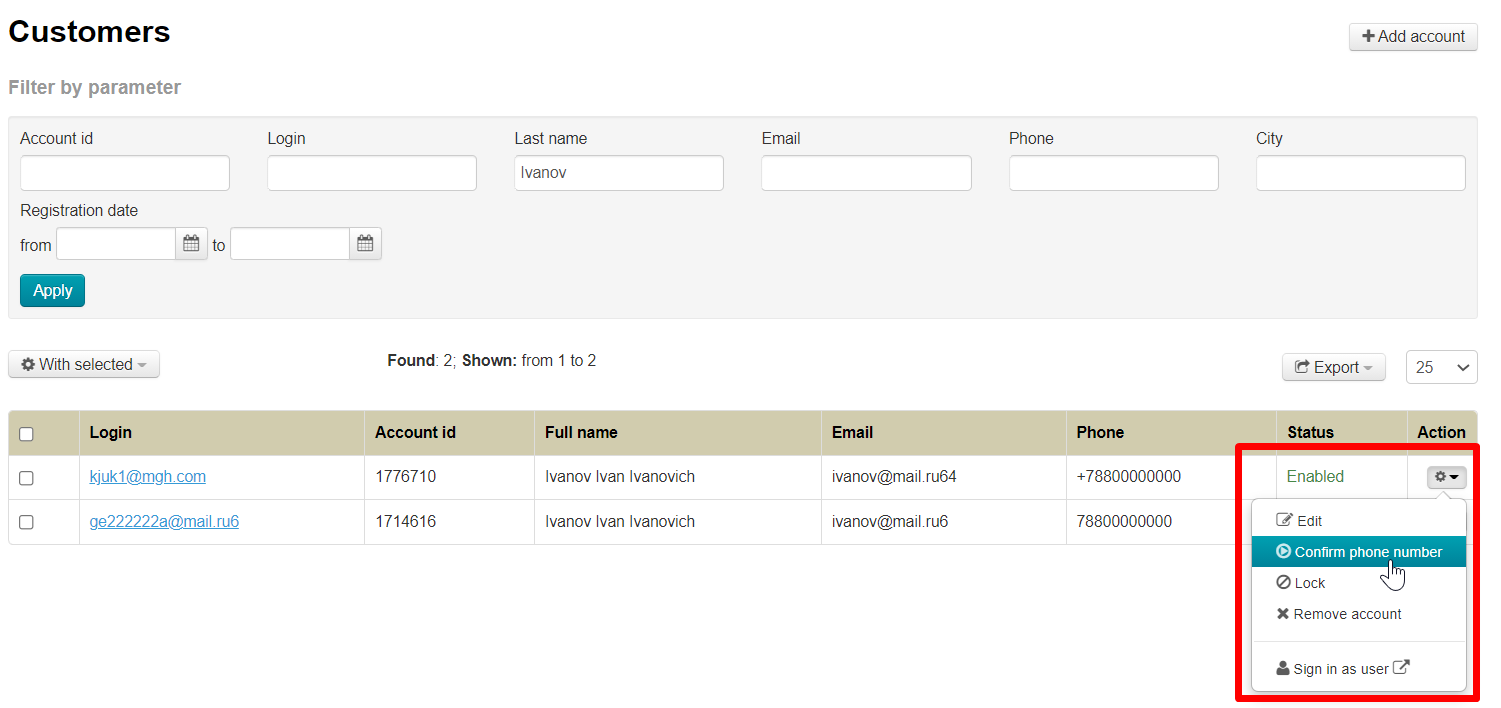
Снова ищем этого покупателя и в колонке “Действие” нажимаем на кнопку с шестеренкой
Выбираем пункт “Подтвердить номер телефона”
You need to create Twilio phone number after registering and confirming your account. Go to Console section from your account page.
You will see "Get a trial phone number" button on this page.
Data from Twilio service for OT admin panel
Go to Console section from your account page.
Copy ACCOUNT SID clicking "Copy" button.
Copy AUTH TOKEN clicking "Copy" button.
Copy TWILIO PHONE NUMBER that was received in profile settings or Alphanumeric Sender ID that was registered earlier in the personal account
Service configuration is complete. We proceed to settings in OT admin panel.
Setting up services in OT admin panel
Go to “Configuration → System → General” section in admin panel
Scroll down “General” page to the bottom of “SMS service settings” heading. This is the section where we will enter data from SMS services.
It's necessary to create own tab with settings for each SMS service. "SMS service 1" tab is a default one. Click + button to create a second tab
Enable SMS service
Enable service to test SMS service on your website, as well as start using SMS for notifications about customers' registration as well as order and shopping cart. Click “Disabled”.
Select “Enabled” in drop-down list and save choice.
We recommend to configure services for sending SMS before enabling.
SMS service setup
Select “Service is twilio.com” from drop-down menu in “SMS service” field
Click "Save" button
In "Account info" field write what you copied in the service from ACCOUNT SID field.
Click "Save" button
Next field is “Account secret”. Write here what you copied in the service from AUTH TOKEN field
Click "Save" button
Next field is “Sender's info”. Write here what you set up in TWILIO PHONE NUMBER service (mandatory receipt of Twilio number) or Alphanumeric Sender ID (which was previously registered in your personal account).
Click "Save" button
Leave “Api Id” field without changes.
SMS services can be used for customers registration, as well as for notifications about order and shopping cart status. Select "Use" in the field "Use this service for sending SMS" if the service will be used for notifications. Don't make any changes if SMS notifications are not required.
Save choice clicking "Save" button.
The use of service in mailing lists can be enabled or disabled at any time.
Add your own phone number to test service work.
Click "Save" button.
Then click “Test” button and wait for a message to specified number.
Enable registration by SMS
Your customers indicate their phone number where confirmation code will be sent. The phone number, like other data about the buyer, will be indicated in his profile.
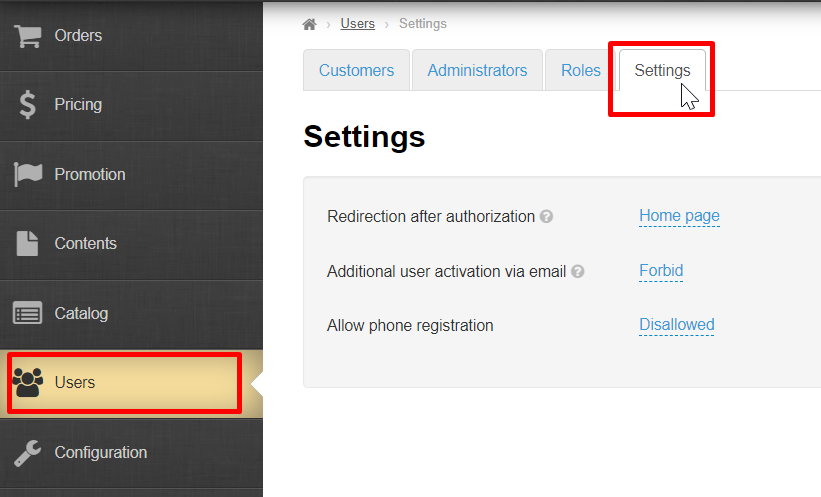
Open "Users → Settings” section
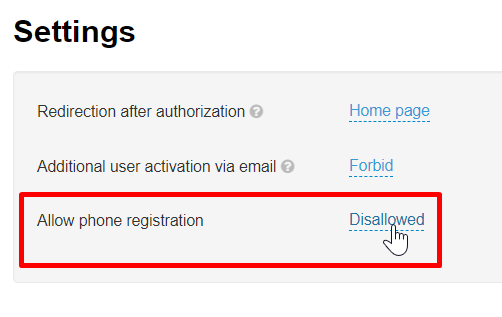
Find "Allow phone registration" field.
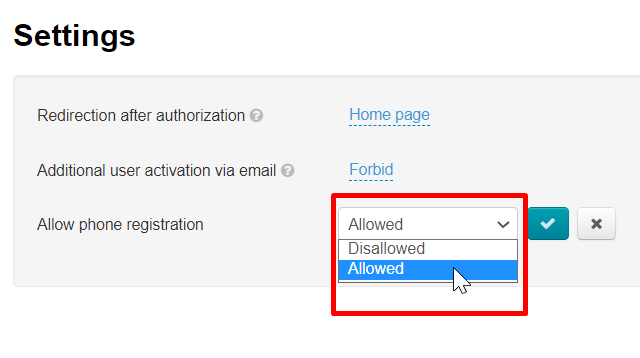
Click "Disallowed" and select "Allowed" in drop-down menu.
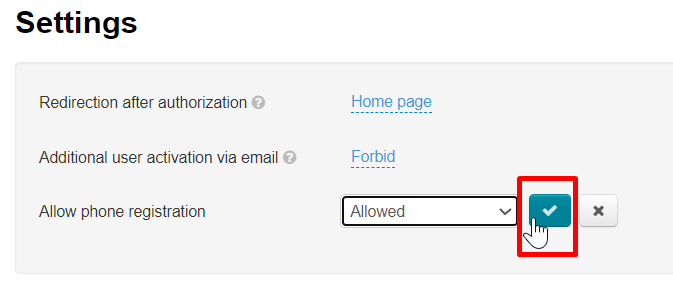
Click "Save" button.
Now everyone who registers on your site will use the phone to register.
Enable SMS notifications
Notifications from admin panel, users or website will be sent to specified phone numbers.
Open “Configuration → System → General” section in admin panel
Find "Notification settings" block on the right and click "SMS notifications" tab
It's possible to select Russian or English languages for notifications.
There is only one setting here: phone list. Click “List of phones for notifications” field.
Indicate phone numbers with the country code. Each number should be entered on a new line (ENTER button).
Click "Save" button
It's possible to edit the list of phone numbers at any time. Click cross to the right of the number and "Save" button to delete irrelevant phone numbers.
Setting up SMS service templates
| Информация | ||
|---|---|---|
| ||
1 SMS in Latin can hold up to 160 characters. |
Open Configuration → Letters templates section
We are interested in those templates that have (SMS) at the end
You must enable the use of SMS services if you do not have such templates (scroll down “Configuration → System → General” and select “Enabled”)
Click necessary template to edit SMS template.
Interface for editing template will open
It's important to remember that 1 SMS in Latin can hold up to 160 characters.
There are also auxiliary constructs. They are marked red and inserted into the text of SMS when clicked.
This helps to make messages versatile and they are configured to specific recipient.
Write message text and save it clicking "Save" button
It's necessary to customize all message templates in the same way.
We recommend to plan SMS text in text editors for convenience where characters are counted.
Add / edit customer's phone number
You can add or edit customer's phone number if necessary.
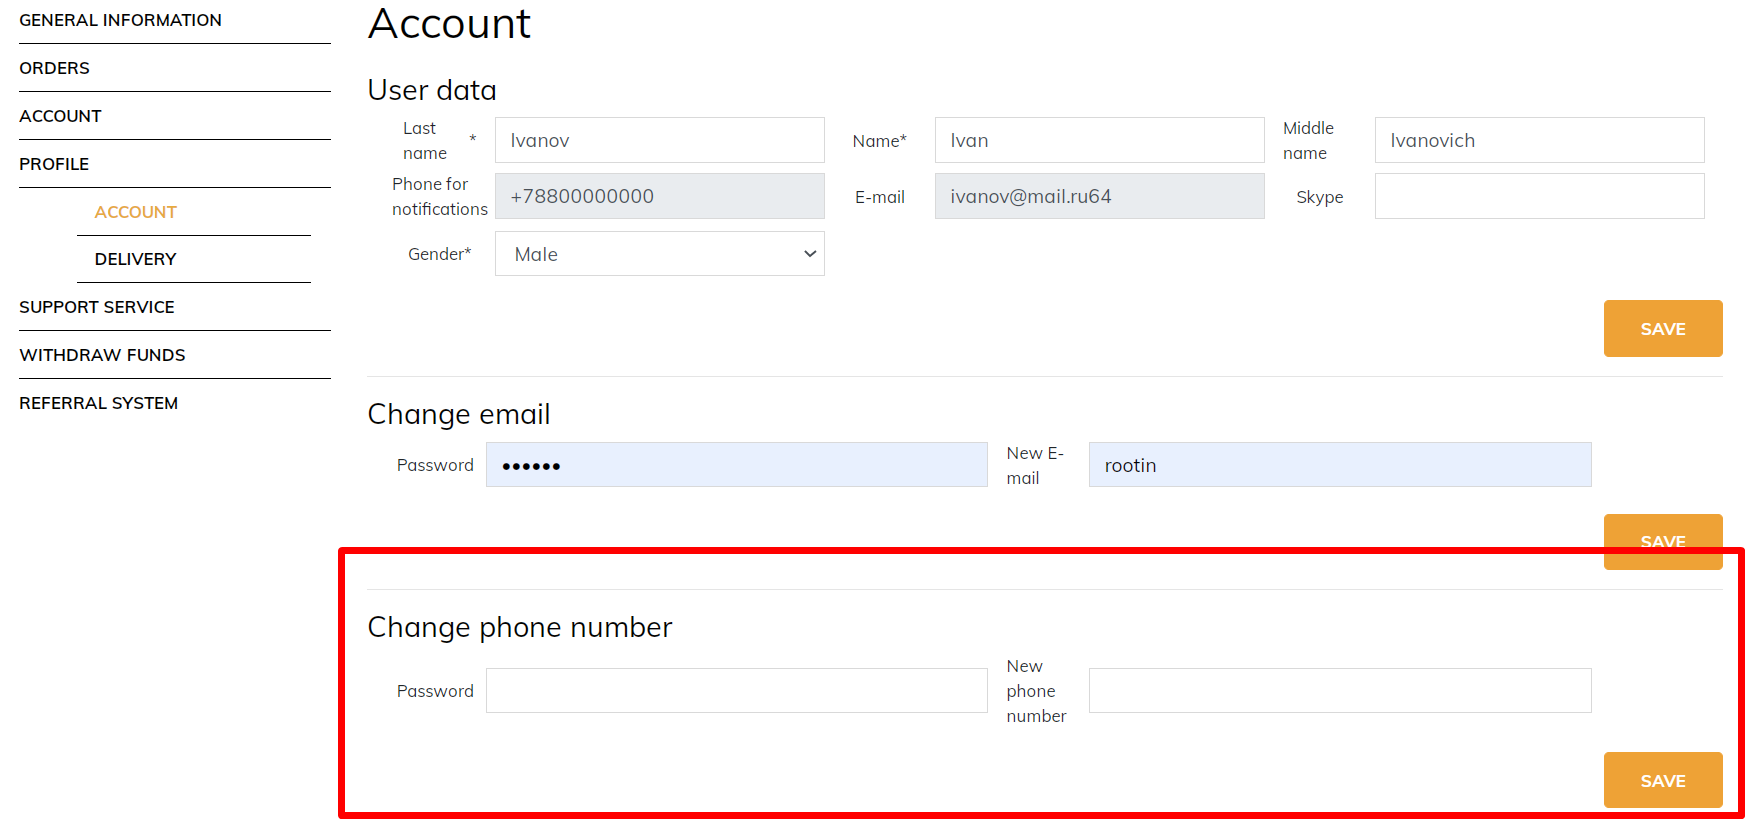
In addition, customer can personally add or change phone number through Personal Account.
Customer will receive SMS for confirmation after changing or adding the phone number.
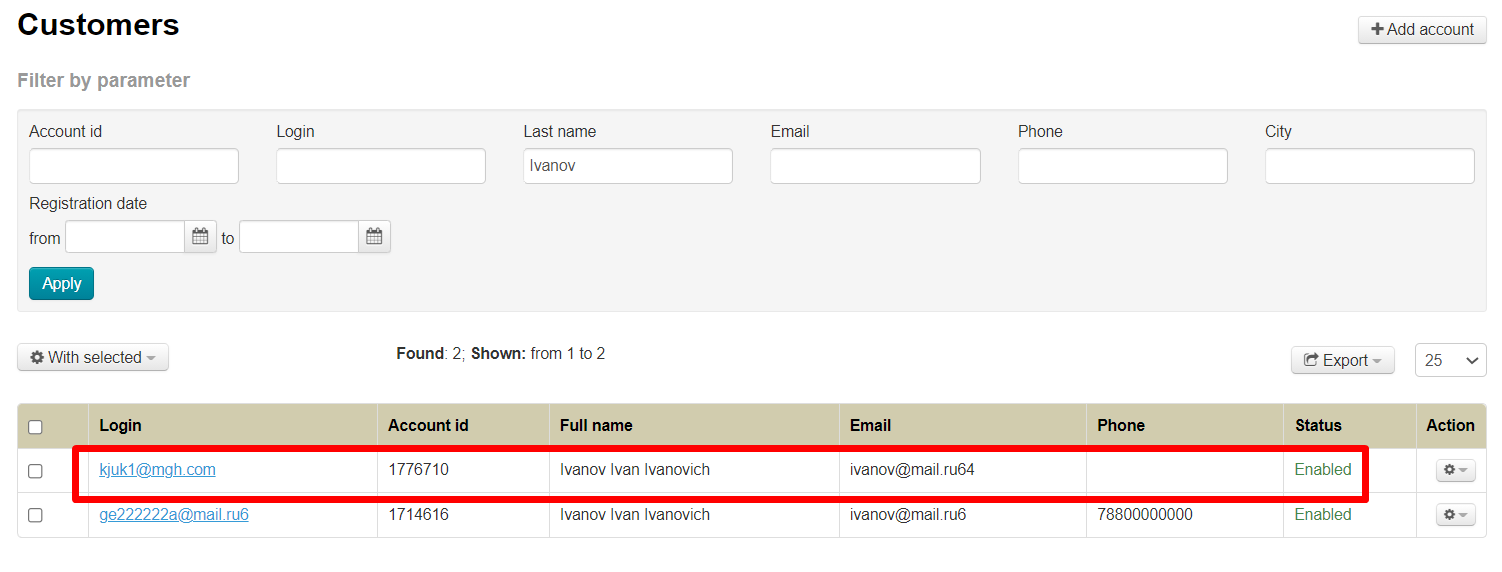
Go to "Users → Customers" to add customer's phone number through the admin panel
Select user who needs to add or edit the phone number.
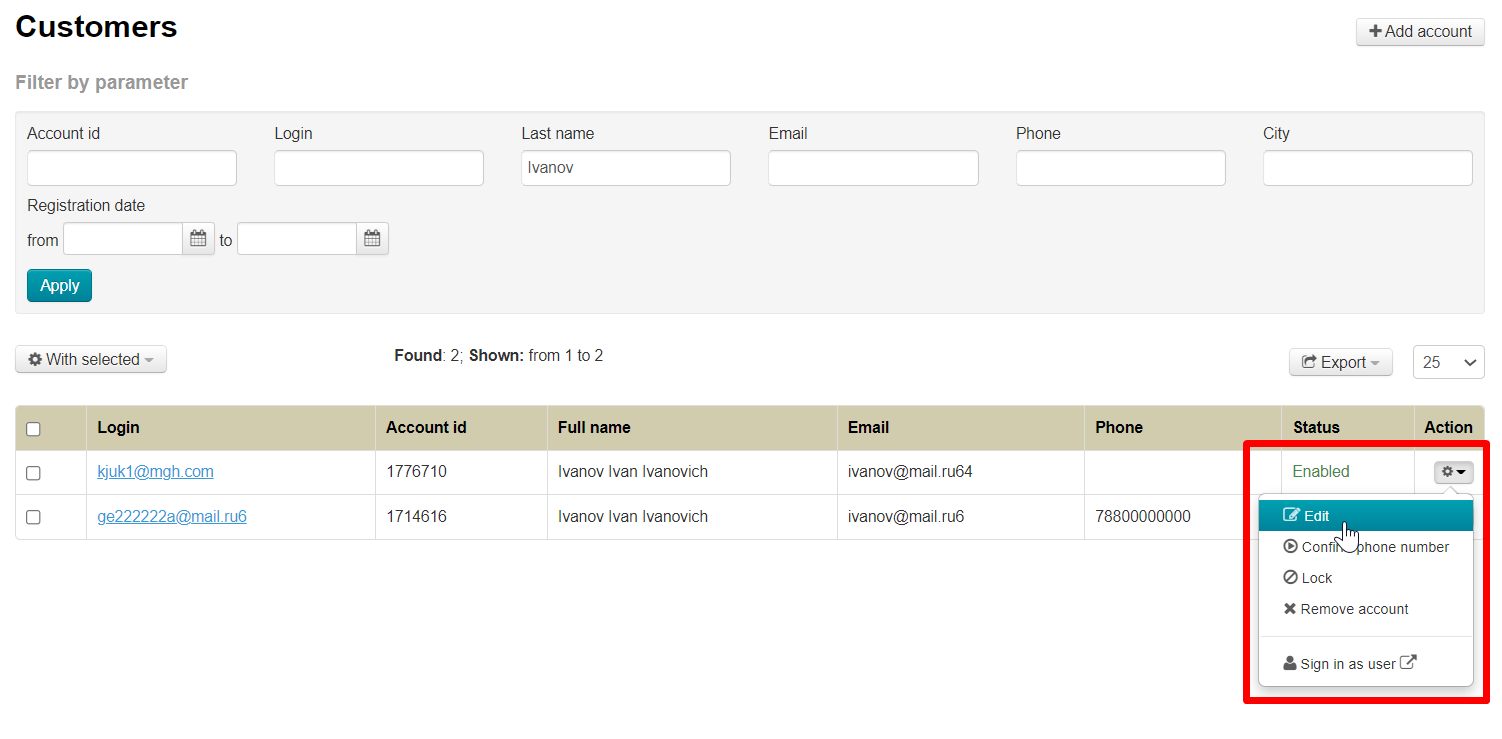
Click gear button in “Actions” column and select “Edit” button from the list.
Add customer's phone number (or edit) in the "Phone" field.
Save changes.
Find this customer again and click gear button in "Actions" column
Select "Confirm phone number"
Customer will receive SMS notifications after confirming the number. No action from customer is required from the buyer himself in this case.
Confirm customer's phone number
Go to "Users → Customers" section to confirm customer's phone number in admin panel
Select user whose phone number needs to be confirmed.
Click gear button in "Actions" column
Select "Confirm phone number"
Customer will receive SMS notifications after confirming the number. No action from customer is required from the buyer himself in this case.
Custom sms service
For custom sms service implementation you need:
1. Account info - "For custom, you need to specify send message url."
2. Account secret - "For custom, you need to specify secret for send message."После подтверждения номера, ваш покупатель будет получать смс уведомления. От самого покупателя, в этом случае, никаких действий не требуется.