| Оглавление |
|---|
...
Расположение в админкеLocation in admin panel: Configuration → Website configuration

Языковая версия шапки сайта
Все настройки внешнего вида сайта можно сделать для разных языковых версий отдельно. Количество языковых версий будет зависеть от охвата стран вашего бизнеса.
Когда вы определитесь со списком стран, рекомендуем по возможности сделать для каждой страны версию на её родном языке. Показывая покупателю сайт на его родном языке, вы повышаете его лояльность и доверия к вашему бизнесу больше.
Language version of site header
All settings for website template can be made for different language versions separately. Number of language versions will depend on countries coverage of your business .
When decide upon the list of countries, we recommend, if possible, to make a version for each country in its native language. By showing the customer a website in their native language, you increase their loyalty and trust in your business.
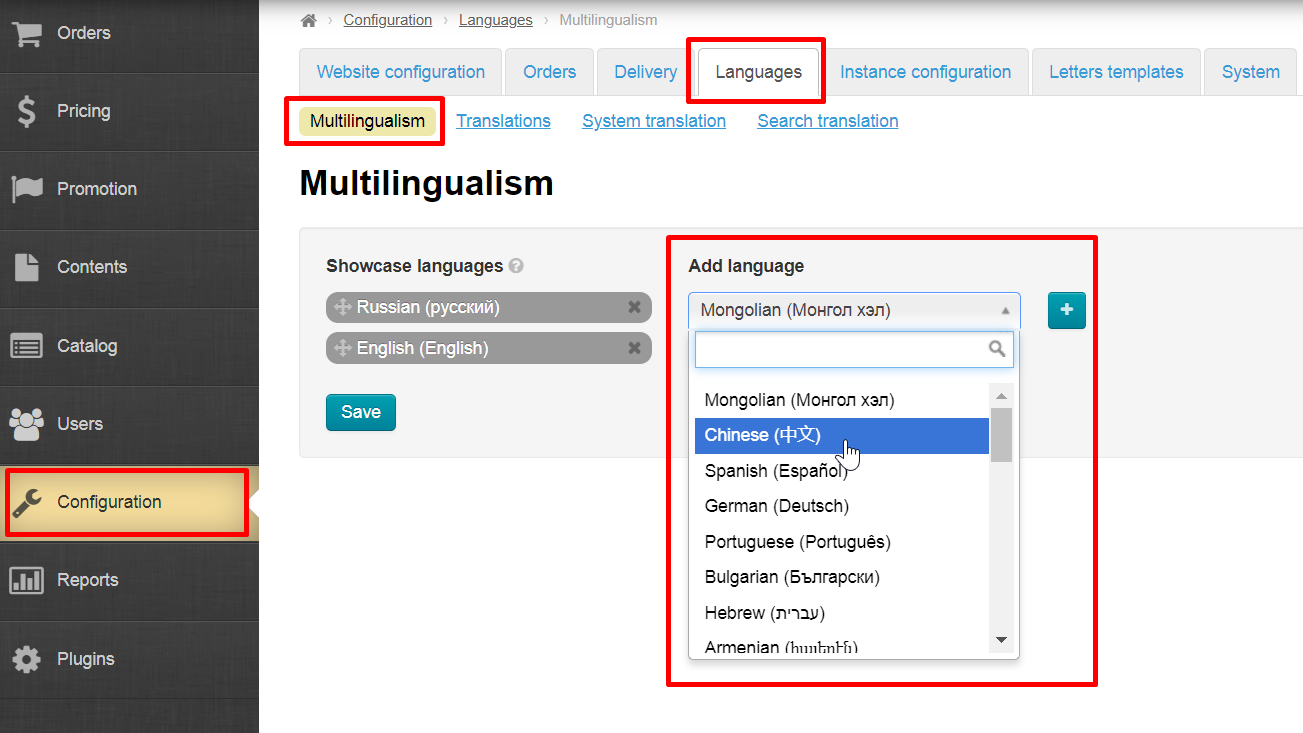
You can add languages to the list at any time in “Пополнить список языков можно в любое время в разделе “Configuration → Languages → Multilingualism” section
Чтобы выбрать языковую версию для настройки шапки сайта, открываем в админке раздел “Конфигурация” и смотрим “Конструкция сайта”
Выбираем язык из списка справа, кликнув по нему мышкой
Кроме того, можно делать настройку для всех версий сайта: не выбирайте язык и оставьте по умолчанию “Все языковые версии”.
Если есть настройки для языковой версии, вы увидите значок рядом с каждым полем, где настройки есть. В примере зеленым указана текущая языковая версия (Все языковые версии), а серый ярлык показывает что есть настройки для Русского языка.
Настройка Шапки сайта: лого, контакты, служба поддержки
Шапка — визитная карточка сайта.
Именно из шапки сайта ваши покупатели узнают всю необходимую информацию: время работы, телефоны, по лого смотрят точно ли этот сайт рекомендовала подруга и тп.
Загружаем логотип магазина
Загрузить логотип можно в любом виде и формате. Однако, стоит взять в расчет следующие рекомендации:
- Размер 300px по ширине и 100px по высоте — это рекомендуемые максимальные размеры.
- Формат изображения: png с прозрачным фоном, допустимые форматы: gif, jpg.
- Старайтесь не занимать логотипом большое пространство на экране.
В статье “Тема дизайна” подробно описано как изменить цвета в дизайне сайта, чтобы он максимально сочетался с вашим логотипом и фирменным стилем.
Открываем в админке раздел “Configuration” и смотрим “Configuration → Global website template”
Смотрим логотип. По умолчанию загружен логотип OT Commerce. Нажимаем кнопку “Изменить”. Если логотипа по умолчанию нет, значит будет одна кнопка “Загрузить”
Вам откроется папка на вашем ПК для выбора изображения логотипа. Выбираем его и нажимаем “Открыть”.
Логотип будет загружен и сохранен автоматически и появится сообщение “Данные успешно обновлены”.
Заголовок сайта
Здесь пишем текст, который будет отображаться в шапке сайта.
| Информация |
|---|
В зависимости от дизайна, этот заголовок может располагаться, как в середине шапки сайта, так и справа от логотипа. |
Открываем в админке раздел “Configuration” и смотрим “Configuration → Global website template”
Выбираем поле “Заголовок сайта” кликом мышки.
Откроется поле, в которое пишем заголовок вашего сайта.
Сохраняем заголовок нажатием кнопки с “галочкой”.
Заголовок появится на сайте сразу после сохранения.
Телефон для покупателей
Желательно указать телефон, по которому ваши покупатели смогут узнать интересующую их информацию или получить консультацию по заказу.
Открываем в админке раздел “Configuration” и смотрим “Configuration → Global website template”
Выбираем поле “Телефон” кликом мышки.
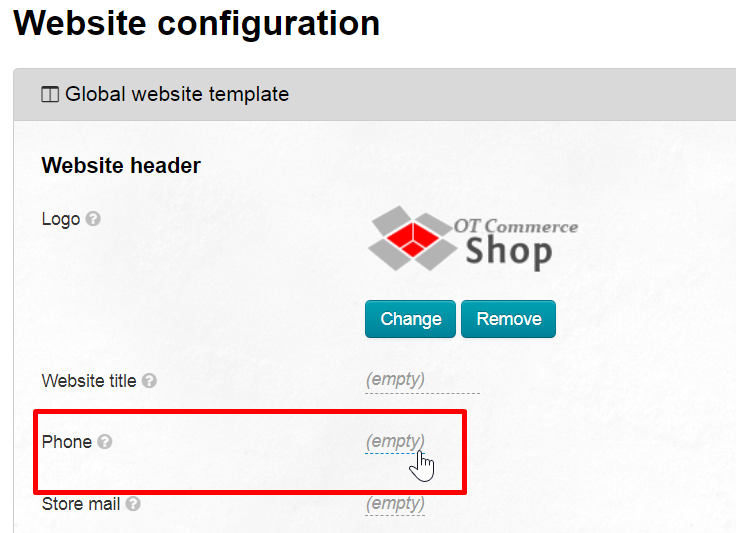
В окошке пишем номер телефона, по которому ваши покупатели смогут позвонить вам и задать возникшие вопросы.
Нажимаем кнопку “Сохранить”, чтобы на сайте появился номер телефона
Телефон появится сразу после сохранения. Его расположение и внешний вид будут зависеть от дизайна сайта.
Можно добавить в шапку сайта адрес электронной почты для обратной связи.
Открываем в админке раздел “Configuration” и смотрим “Configuration → Global website template”
Находим поле “Почта магазина”
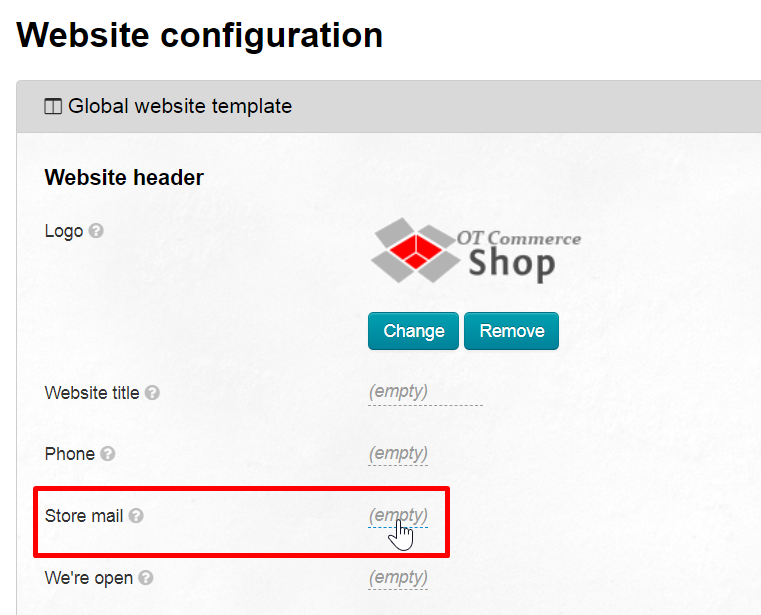
Пишем сюда электронную почту, которую вы будете периодически проверять на наличие новых писем.
Нажимаем кнопку “Сохранить”, чтобы адрес почты появился в шапке сайта.
В зависимости от дизайна сайта, положение и внешний вид блока может меняться.
График работы операторов в вашем магазине
В этом поле можно указать время работы оператора, обработки заказов и приёма звонков.
Открываем в админке раздел “Configuration” и смотрим “Configuration → Global website template”
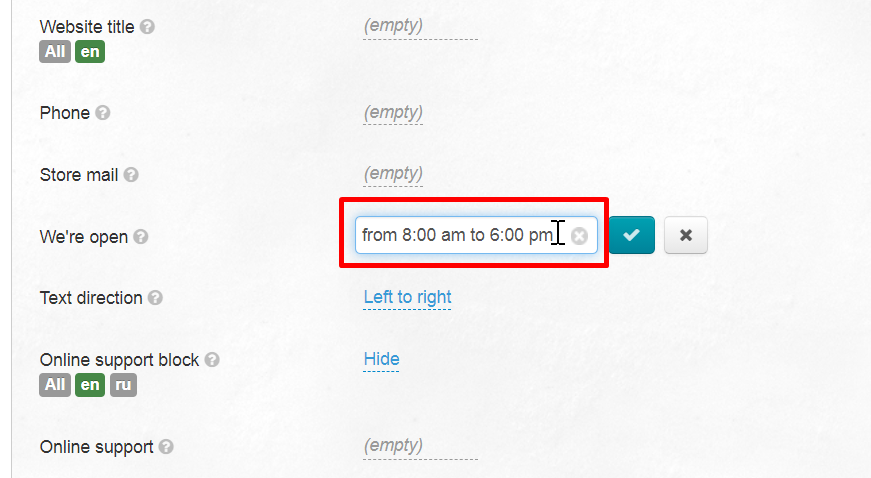
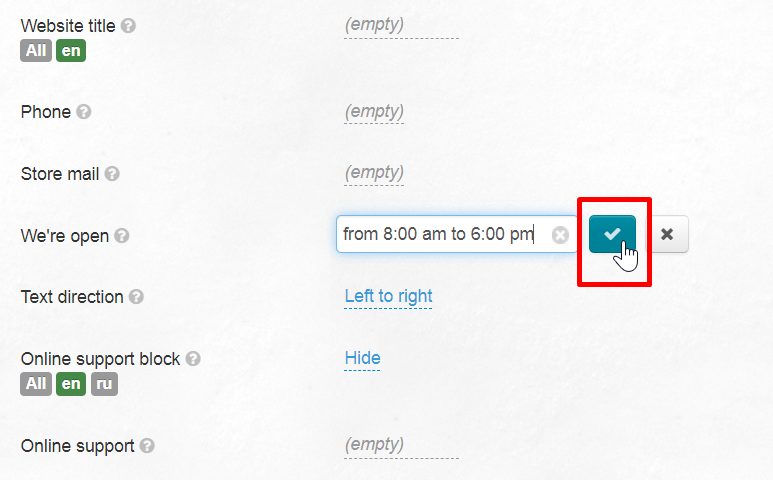
Выбираем поле “График работы” кликом мышки.

Пишем время работы: в какие дни и время доступны операторы (или когда идет обработка заказов и тп).
Сохраняем график работы, нажав на кнопку “Сохранить”.
Время работы появится на сайте сразу после сохранения.
Направление текста
По умолчанию направление текста слева направо. Справа налево рекомендуется устанавливать для арабского, иврита, персидского, урду и синдхи.
Коробка ОТ дает возможность использовать несколько языков на сайте, а также индивидуальную настройку под каждый язык. (см. выше “Языковая версия шапки сайта”).
Если языки сайта предполагают использование только языков с направлением слева направо, можно пропустить этот пункт.
Для языков справа налево открываем в админке раздел “Configuration” и смотрим “Configuration → Global website template”
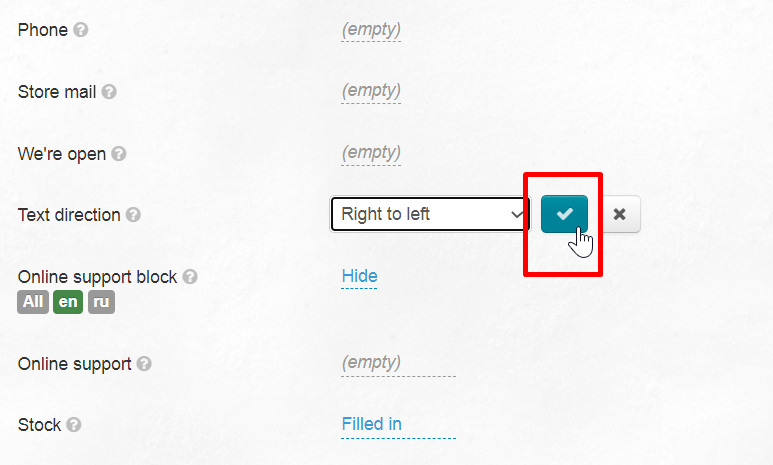
Ищем строчку “Направление текста” и кликаем по ней.
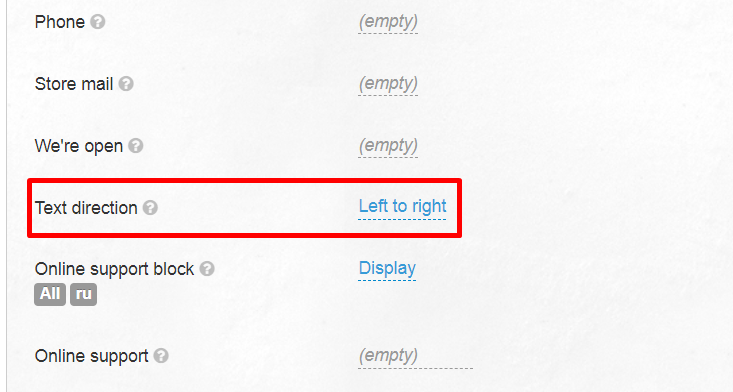
Выбираем “Справа налево” и нажимаем кнопку “Сохранить”.
Блок онлайн поддержки
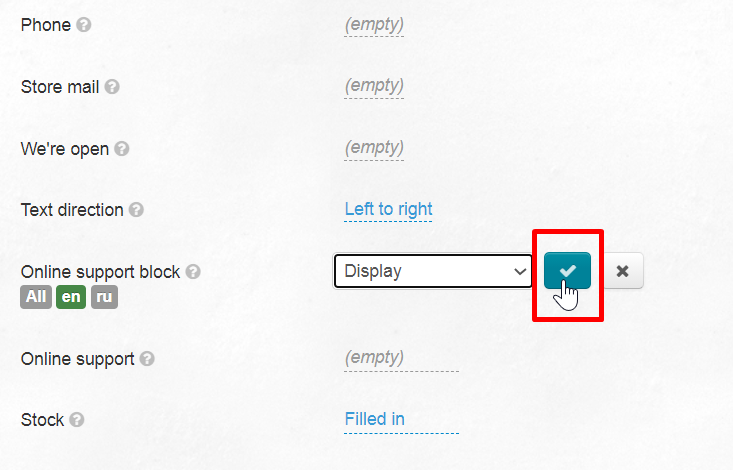
Если у Вас есть сервис онлайн поддержки покупателей, то рекомендуем включить “Блок онлайн поддержки” в шапке сайта.
Сразу после этого пункта идет “Онлайн поддержка” — блок, в который вставляется код, чтобы чат онлайн поддержки появился на сайте.
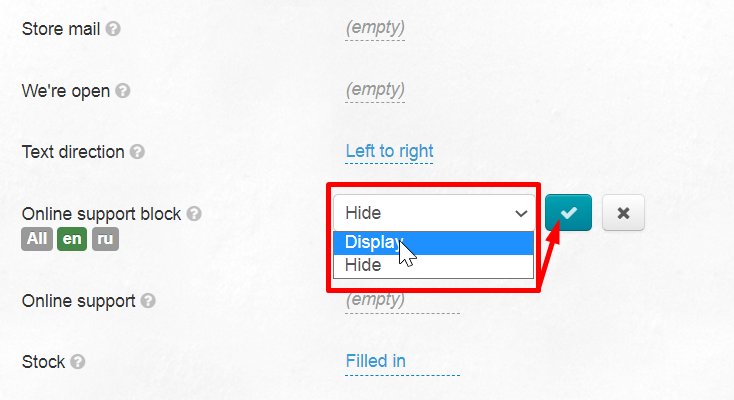
Открываем в админке раздел “Configuration” и смотрим “Configuration → Global website template”
Находим строку “
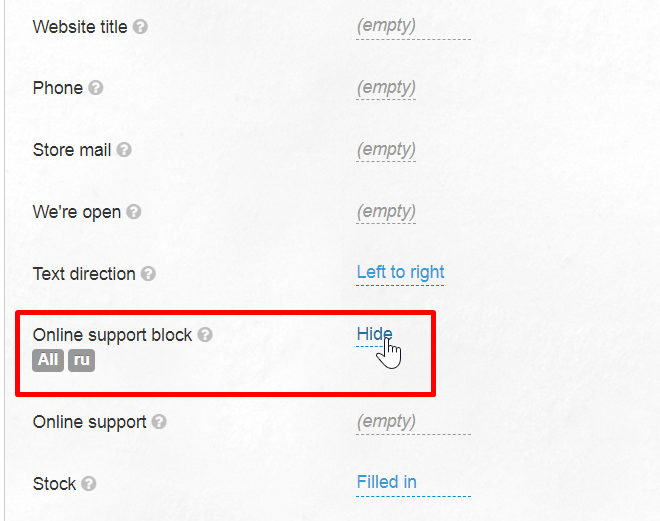
Кликаем по списку и выбираем “Отображать”
Нажимаем кнопку “Сохранить”
Если код сервиса онлайн поддержки добавлен, ваши покупатели смогут писать вам о своих проблемах и задавать вопросы.
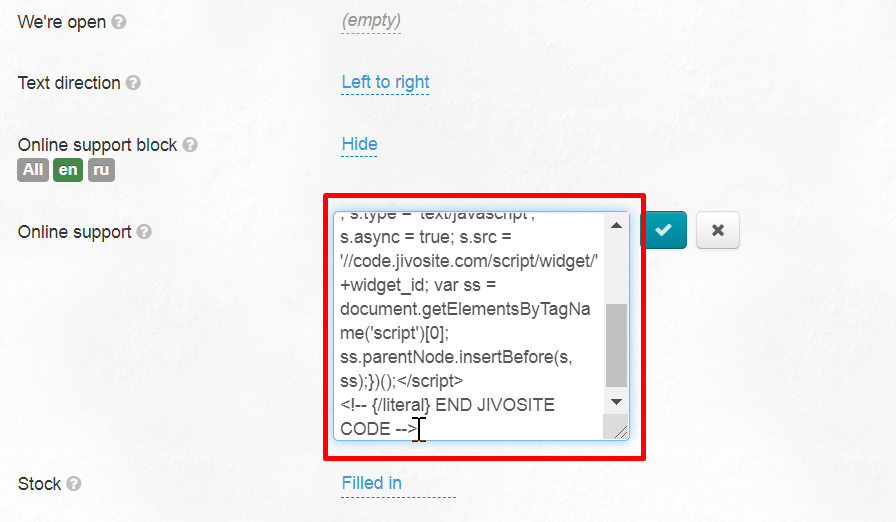
Онлайн поддержка
На данный момент существует множество сервисов, которые позволяют установить онлайн-чат прямо на вашем сайте. Для его работы дают специальный код, который необходимо разместить на сайте. Для такого случая в правом углу шапки зарезервировано место (см. выше).
Когда у вас уже есть этот специальный код, можно начать настройку.
Открываем в админке раздел “Configuration” и смотрим “Configuration → Global website template”
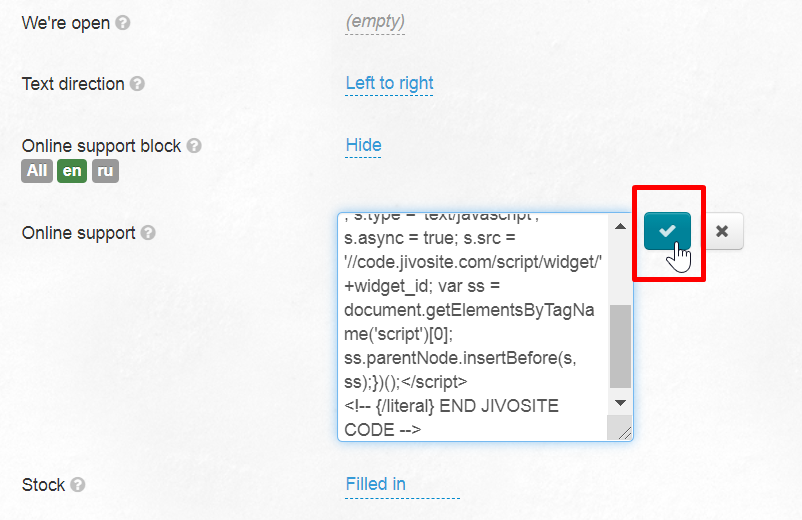
Находим строку “Онлайн поддержка”
Откроется поле, в которое копируем код сервиса Онлайн поддержки (в примере это jivosite)
Нажимаем кнопку “Сохранить”
Онлайн поддержка будет показана на сайте тогда, когда вы строкой выше в “Блоке онлайн поддержки” разрешите показ.
Строка с акцией вверху страницы
Над шапкой сайта можно разместить текст какой-нибудь акции. Например информацию о распродаже или о доставке или бонусах на День Рождения.
Эта строка с акцией видна не только на главной странице, но и на всех остальных страницах вашего магазина.
Чтобы сделать такую акцию, открываем в админке раздел “Configuration” и смотрим “Configuration → Global website template”
Находим строку “Акция”
Кликом мышки открываем окно редактирования и пишем текст акции
Нажимаем кнопку “Сохранить” и акция сразу появится на сайте.
Настройка текстовых страниц
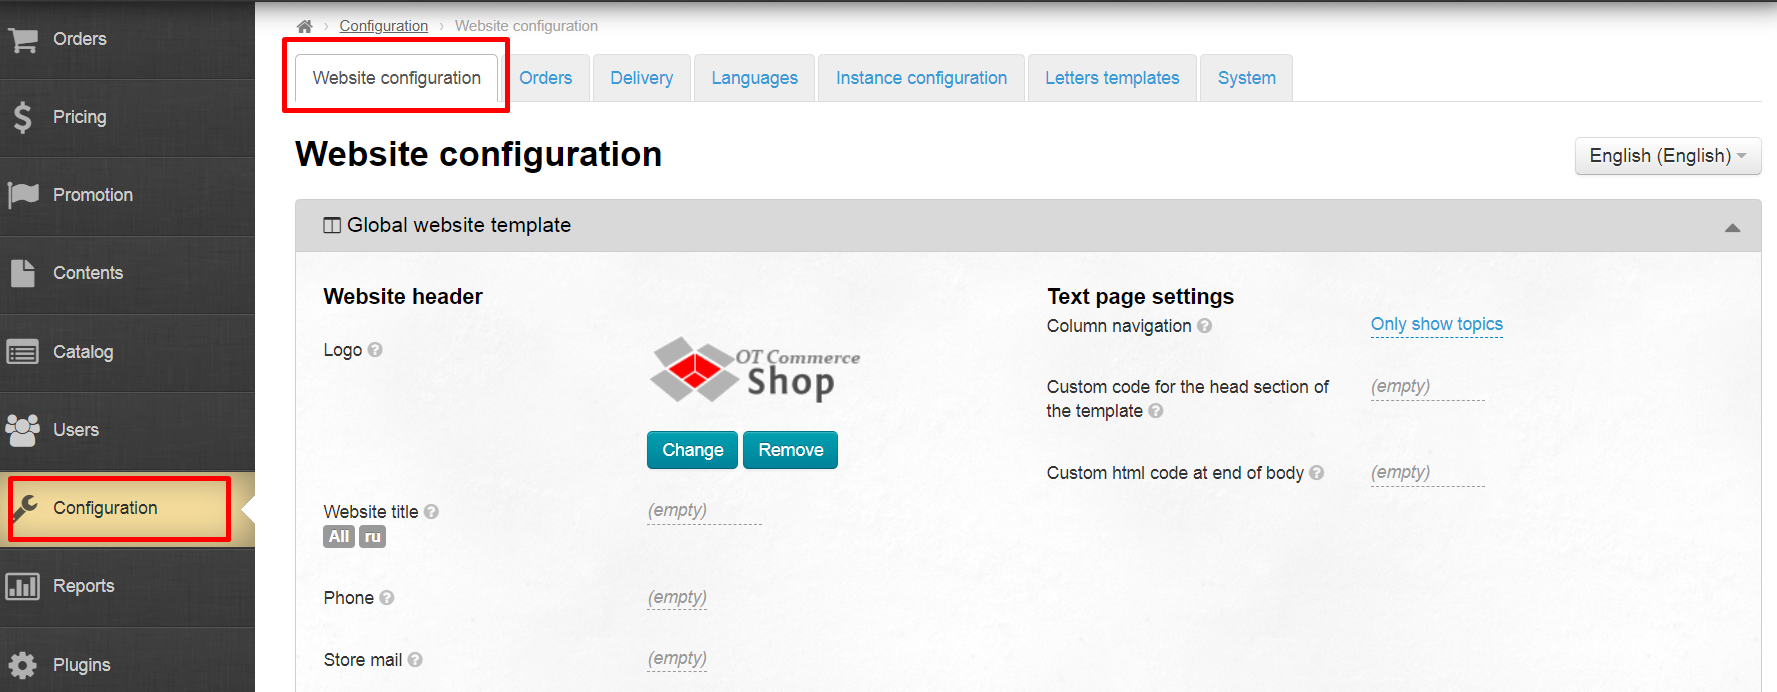
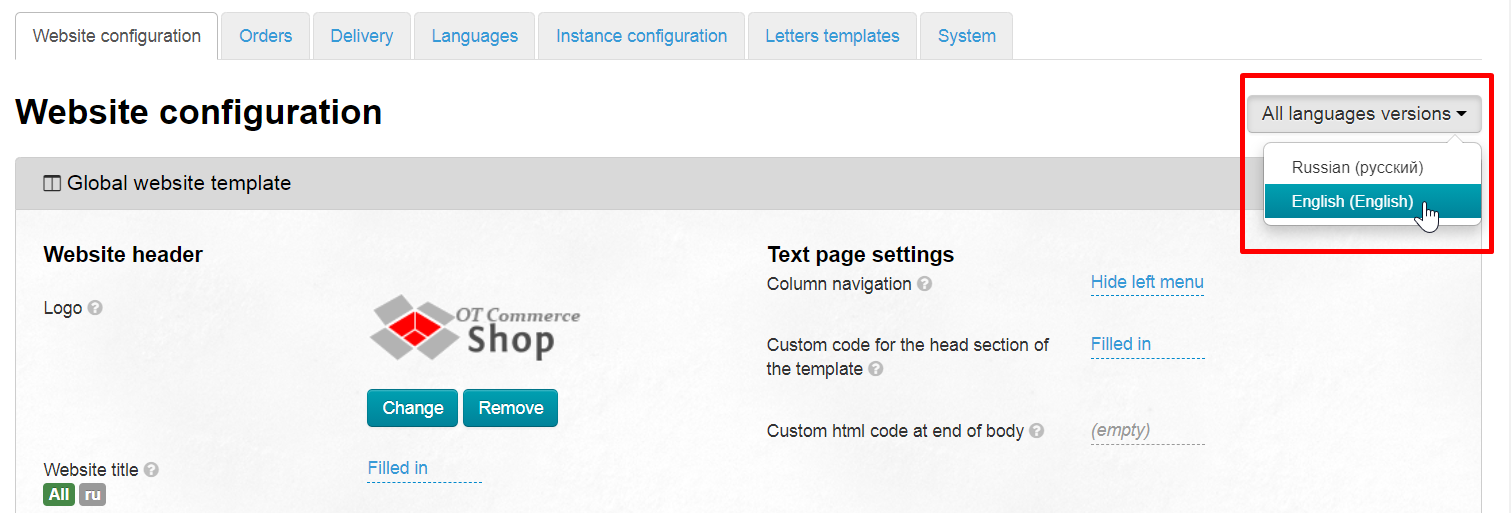
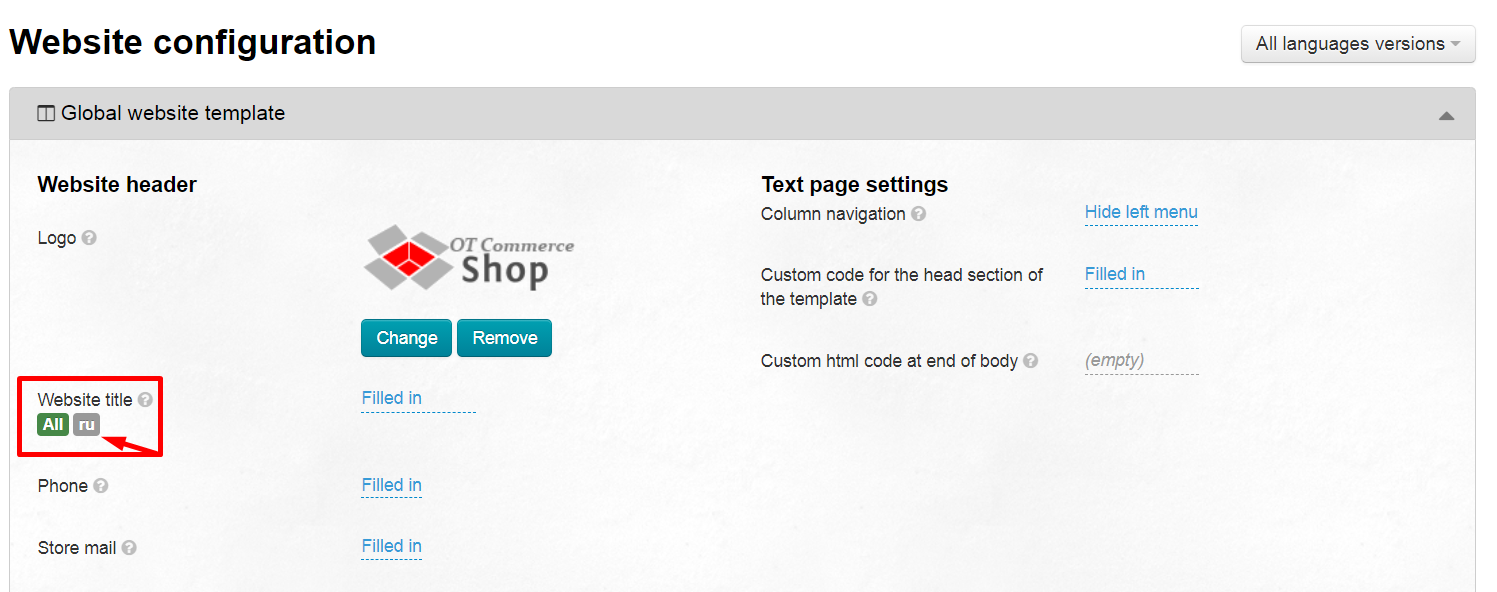
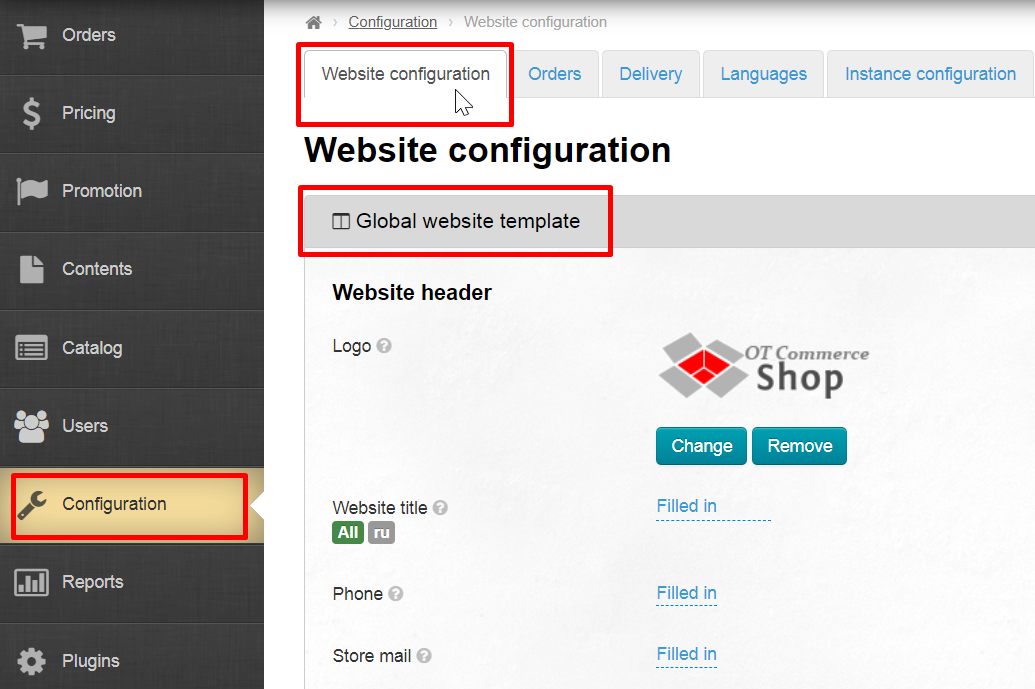
Open "Configuration -> Website configuration" in admin panel to select language version for website header
Click language in the list on the right to select it
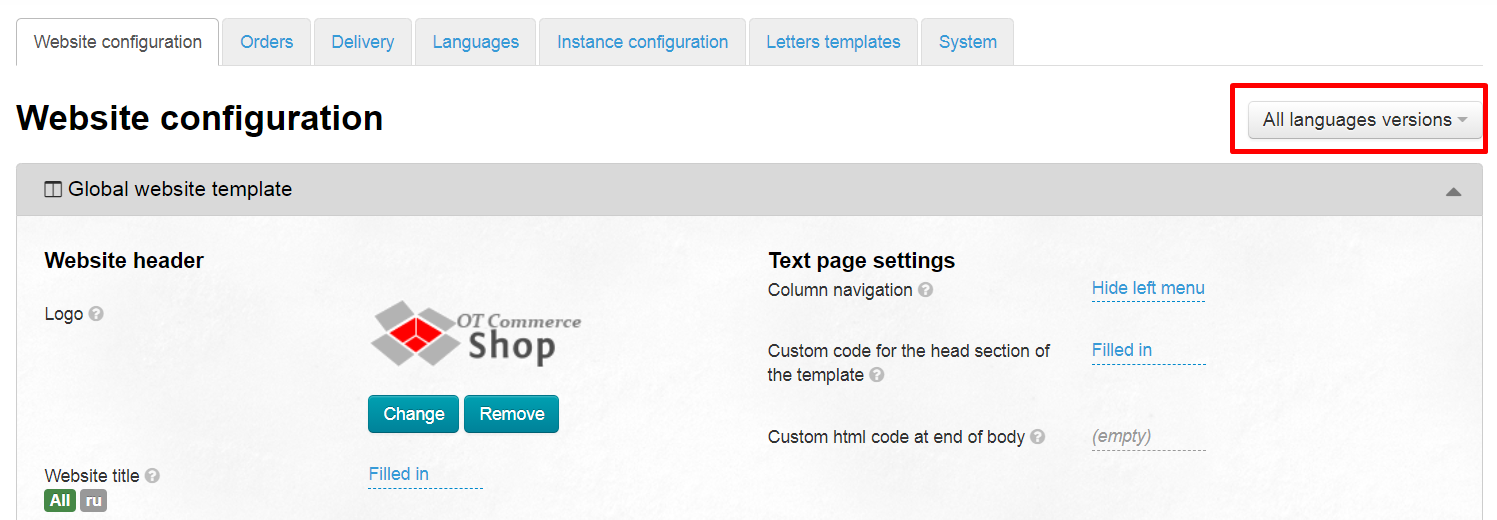
In addition, you can make settings for all versions of the site: do not select language and leave “All language versions” by default.
If there are settings for the language version, you will see an icon next to each field where the settings are. In the example, current language version is marked green (All language versions), and gray label indicates that there are settings for the Russian language.
Website header set up: logo, contacts, support service
Header is website business card.
Website header gives all necessary information to your customers: opening hours, phones, by the logo they see whether this site was recommended by a friend or not, etc.
Upload website logo
It's possible to upload website logo in any form and format. However, the following recommendations should be taken into account:
- 300px width and 100px height are recommended maximum sizes.
- Image format: png with transparent background, acceptable formats: gif, jpg.
- Try not to take up a lot of screen space with the logo.
"Design Theme" article give information how to change website colors to match your logo and corporate identity as much as possible.
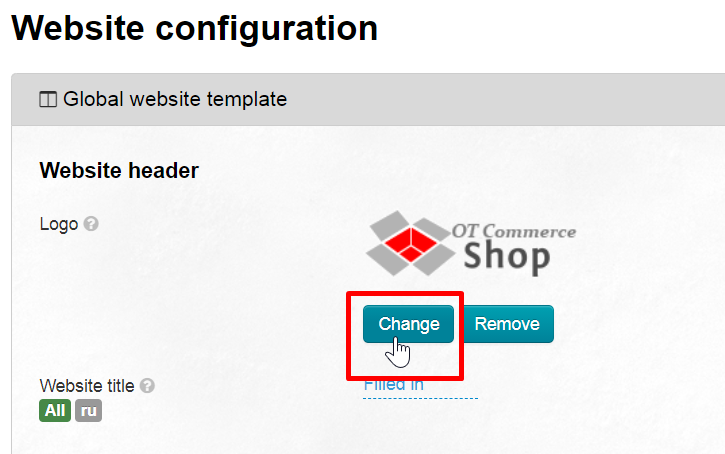
Open “Configuration -> Website configuration → Global website template” section in admin panel
Check the logo. OT Commerce logo is uploaded by default. Click "Change" button. There is only "Upload" button if there is no default logo.
A folder on your PC to select a logo image will open. Select logo and click "Open".
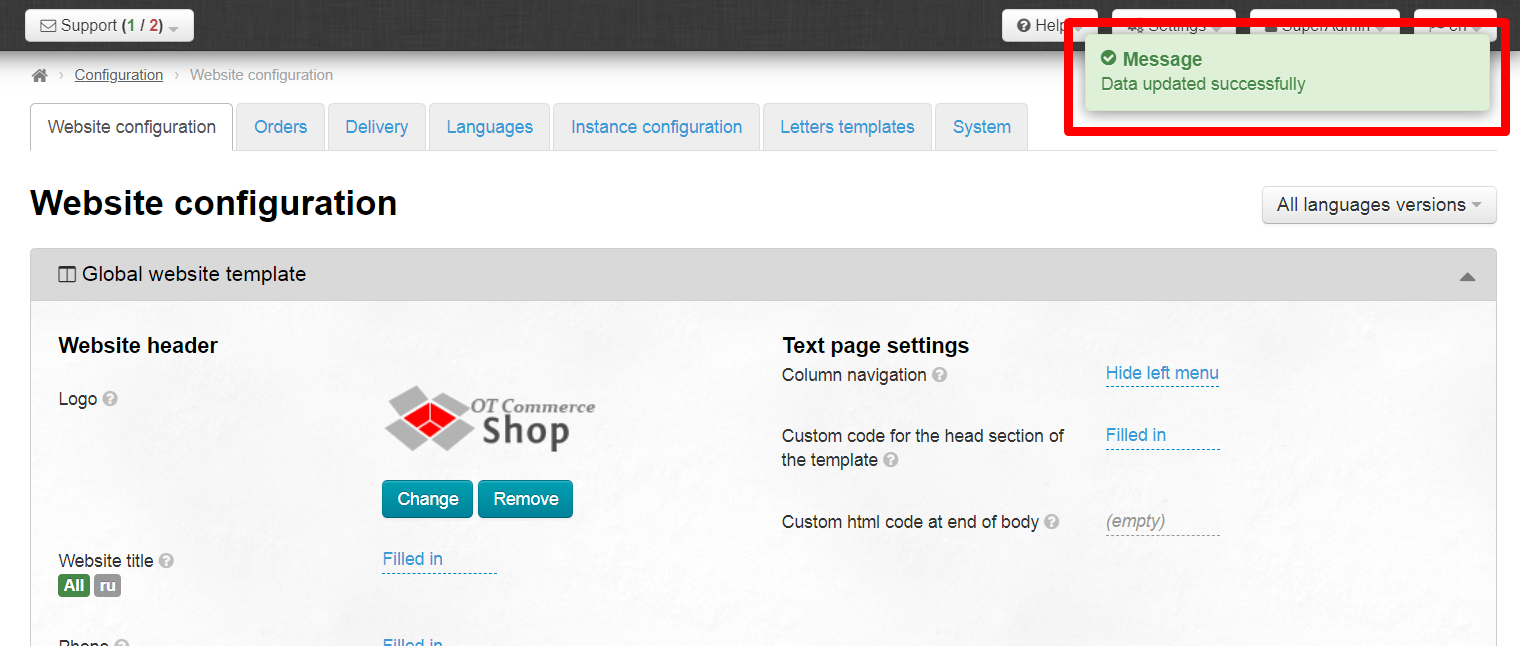
Logo will be uploaded and save automatically and you will get a message "Data updated successfully".
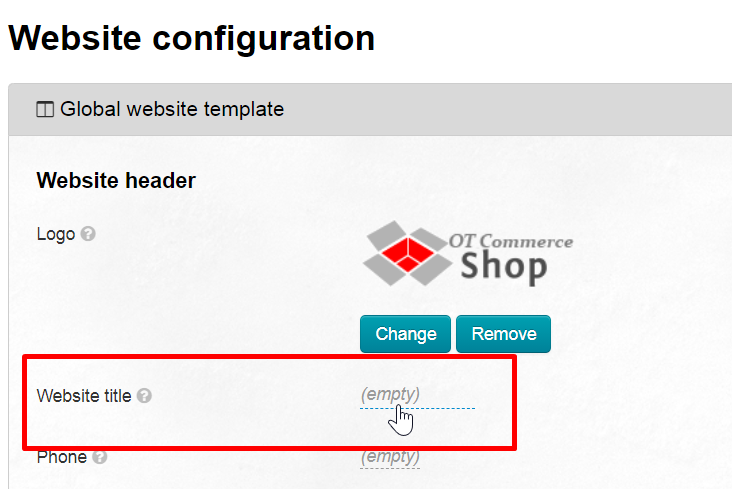
Website title
Here we write the text that will be displayed in website header.
| Информация |
|---|
This title can be located either in the middle of the site header or to the right of the logo depending on website design. |
Open “Configuration -> Configuration → Global website template” section in admin panel
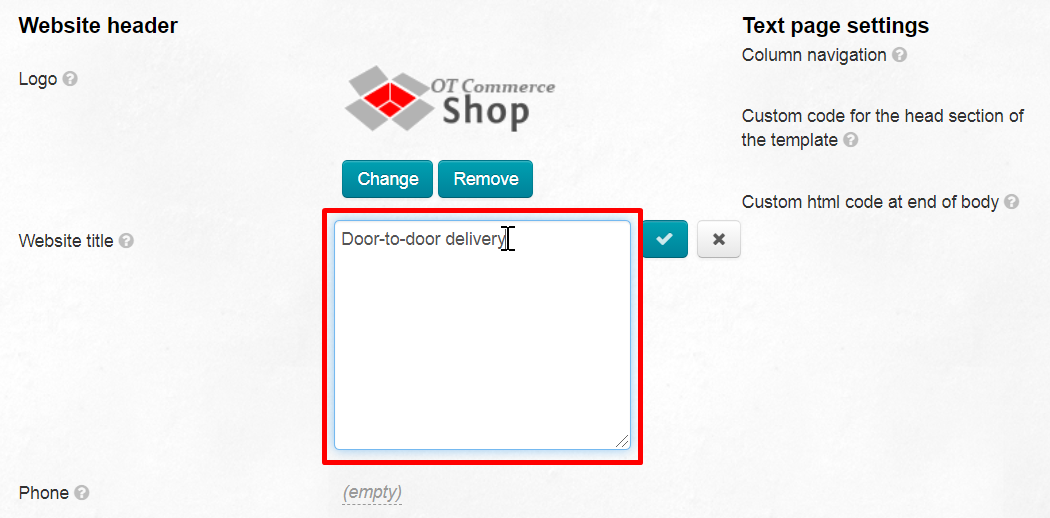
Click "Website title".
A field to write website title will open.
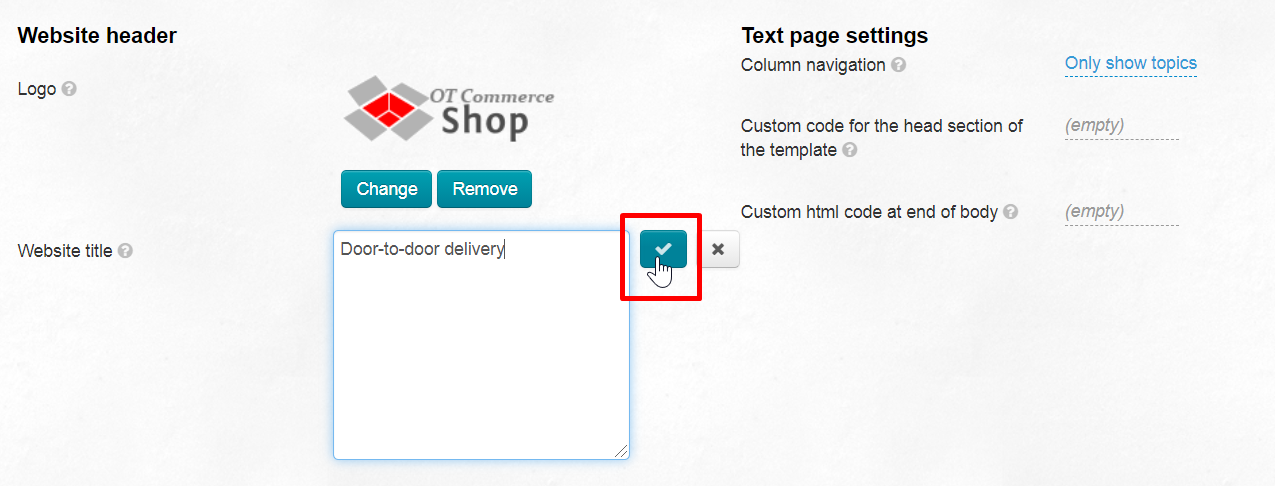
Save title and click tick button.
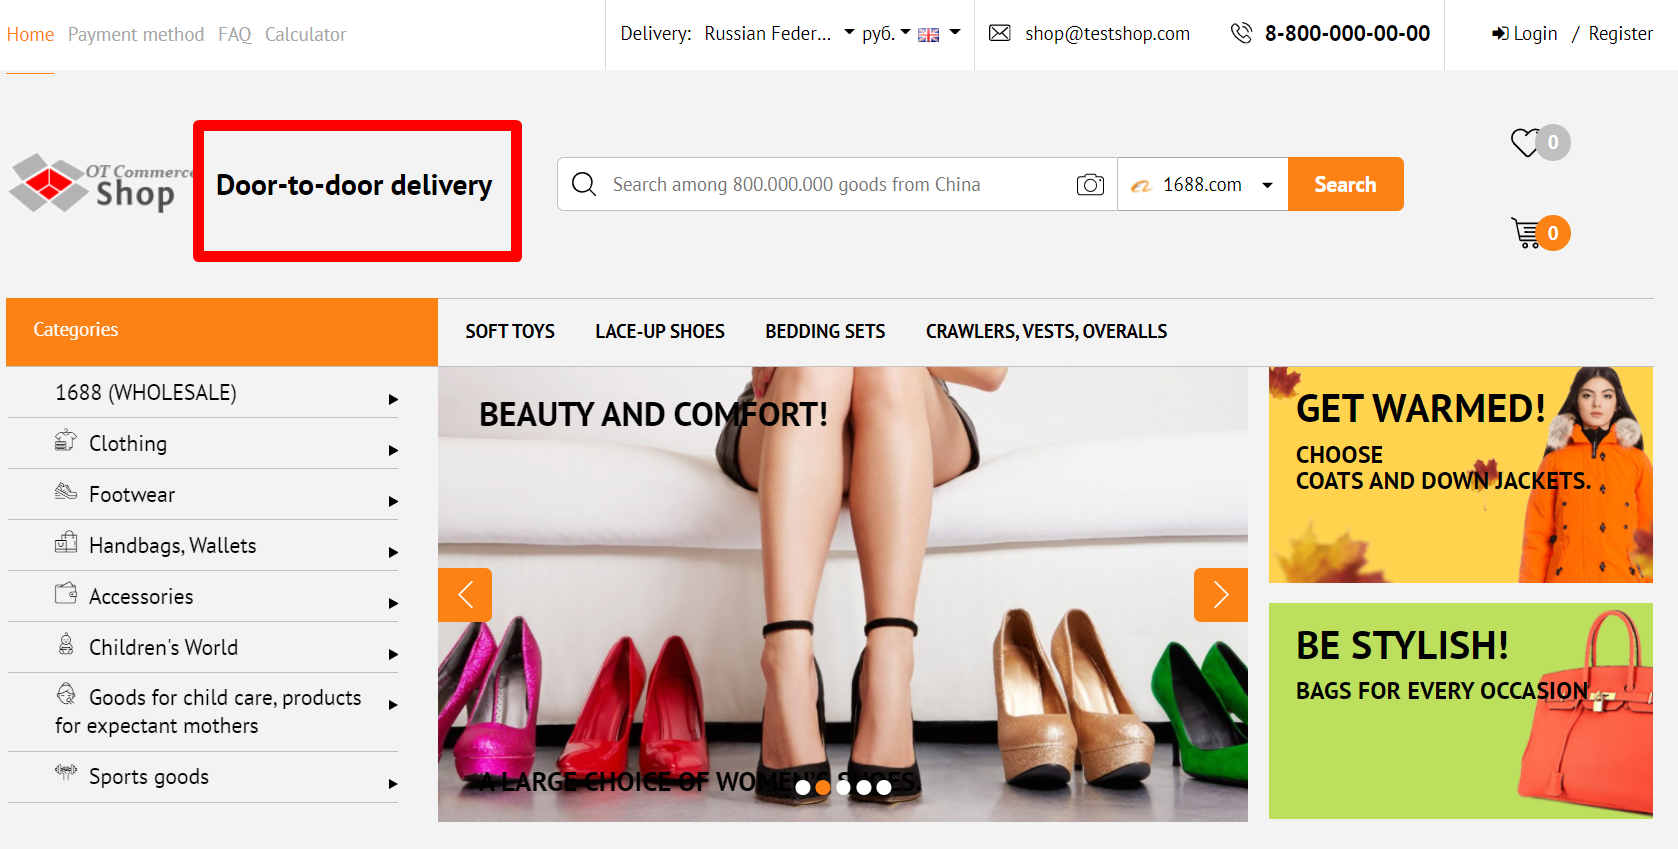
Title will appear on website immediately after saving.
Phone number for customers
It is advisable to add phone number for customers' information, questions or advice on the order.
Open “Configuration -> Configuration → Global website template” section in admin panel
Click "Phone" field.
Write phone number for your customers' questions in the window.
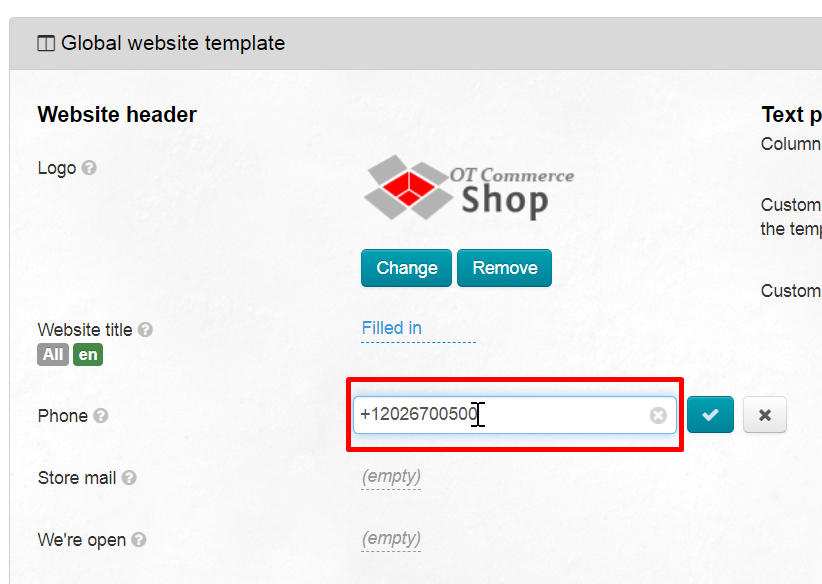
Click "Save" button to add phone number to website
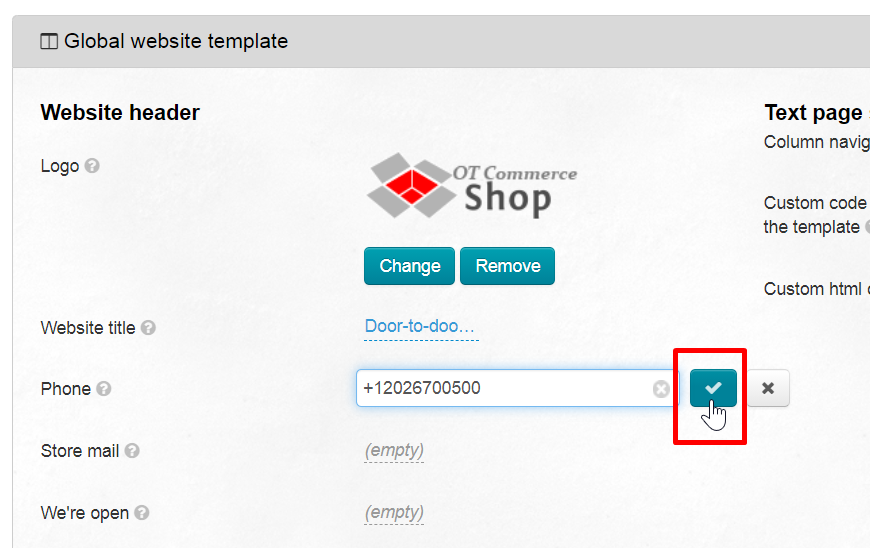
Phone number will appear immediately after saving. Its location and appearance will depend on website design.
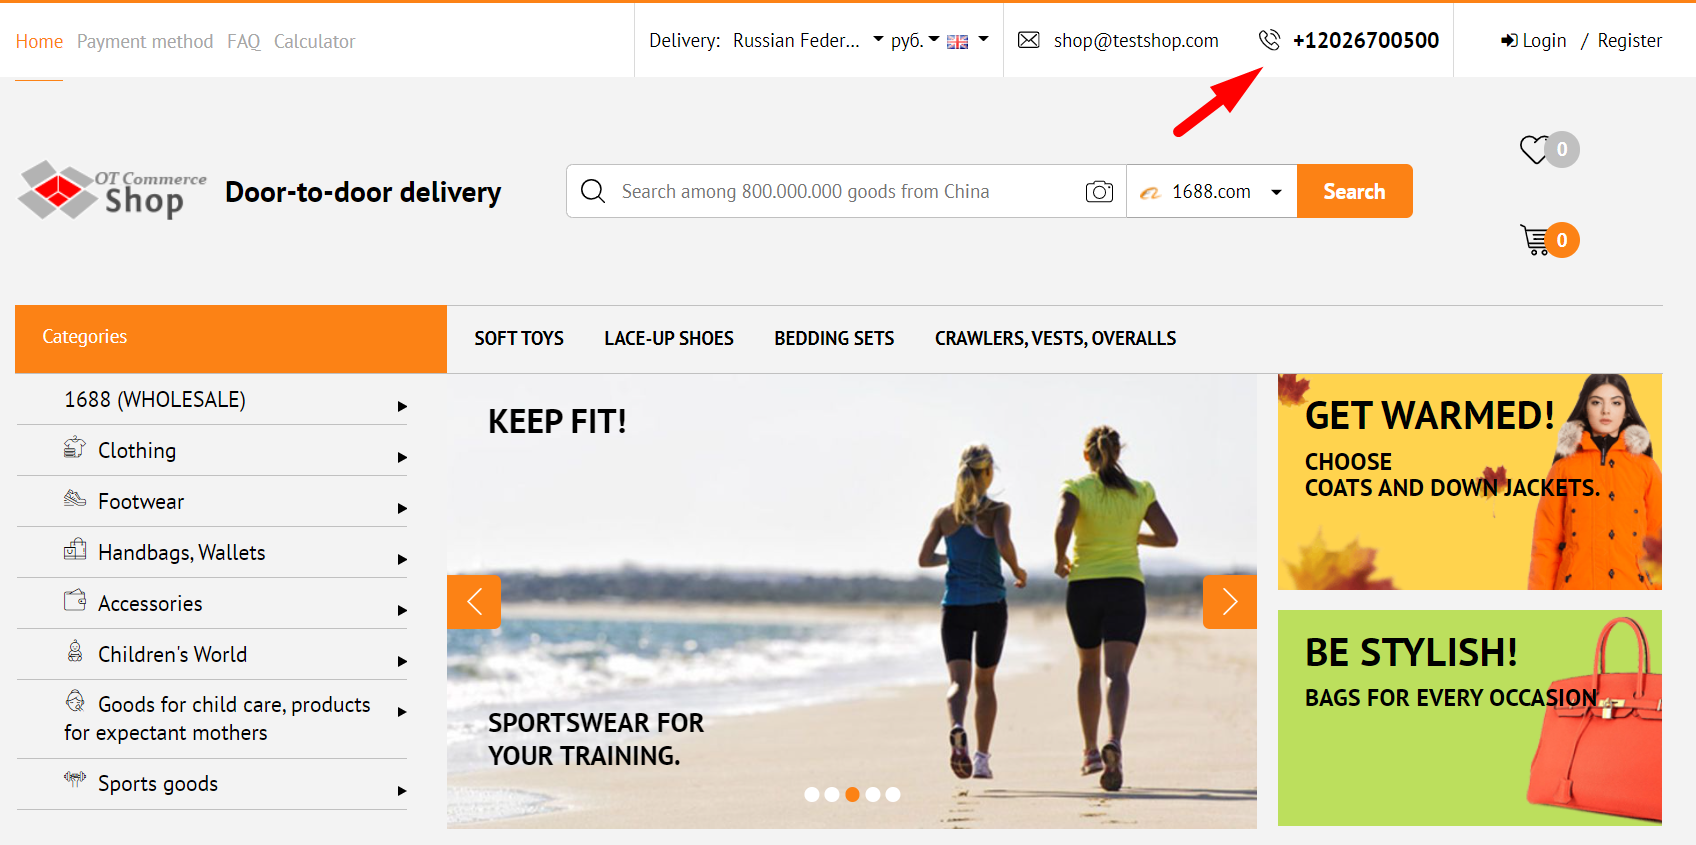
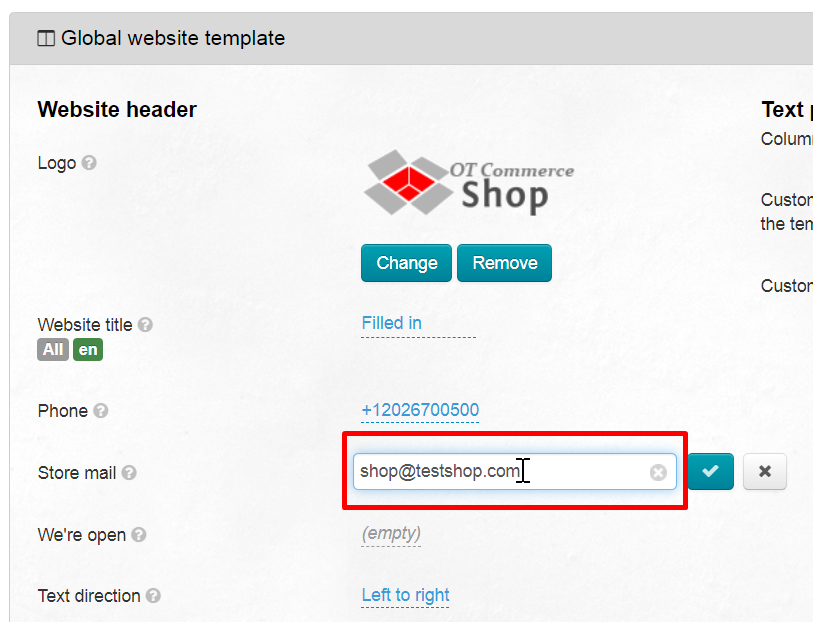
It's possible to add email for feedback to website header.
Open “Configuration -> Configuration → Global website template” section in admin panel
Find "Store mail" field
Write email here which you will periodically check for new messages.
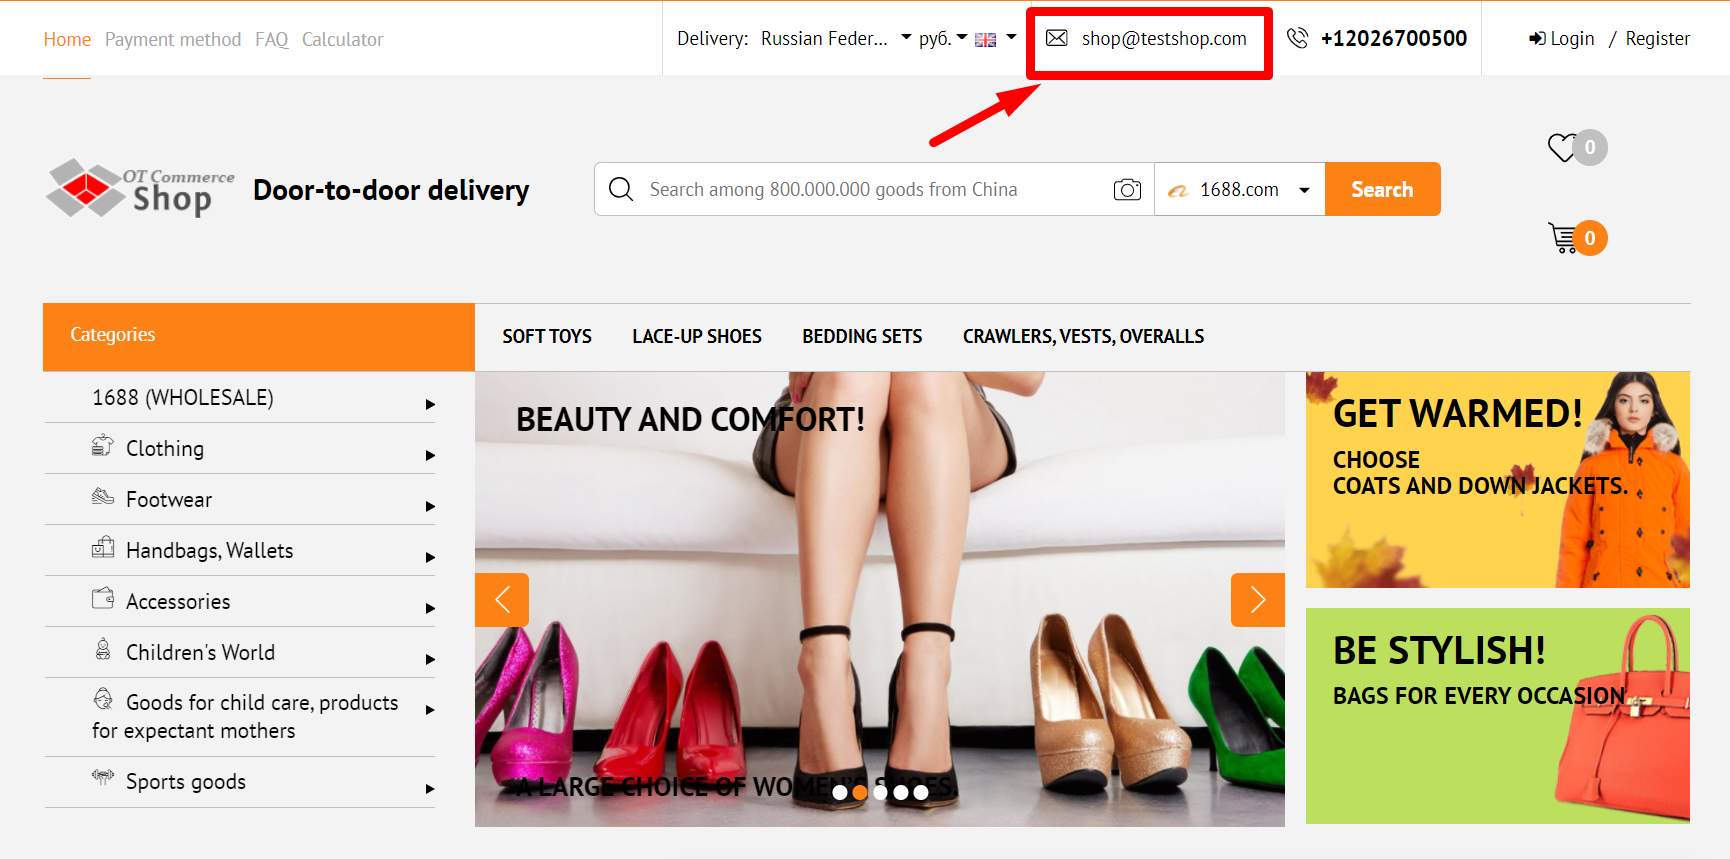
Click "Save" button to add email to website header
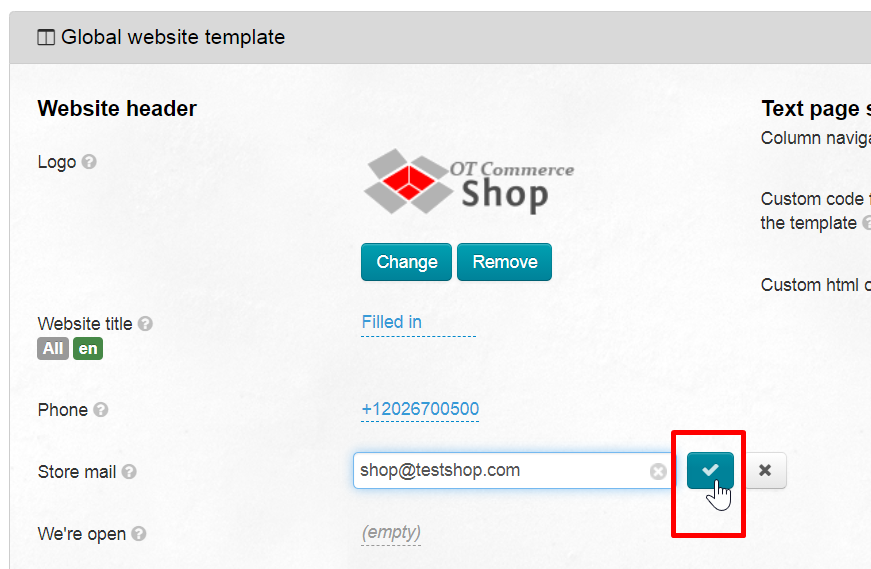
Its location and appearance will depend on website design.
Opening hours of operators on your website
It's possible to add opening hours of operators, processing orders and receiving calls in this field.
Open “Configuration -> Configuration → Global website template” section in admin panel
Click ".
Write opening hours: what days and time operators are available (or when orders are being processed, etc.).
Click "Save" button to save work schedule.
Opening hours will appear on the site immediately after saving.
Text direction is left to right by default. Right to left is recommended for Arabic, Hebrew, Persian, Urdu, and Sindhi.
OT Box makes it possible to use several languages on the site, as well as individual settings for each language. (read above “Language version of site header"
OT Box makes it possible to use several languages on the site, as well as individual settings for each language. (read above "Language version of site header").
You can skip this step if website languages assumes only left-to-right languages.
Open “Configuration -> Website configuration → Global website template” section in amin panel.
Find "Text direction" and click it.
Select "Right to left" and click "Save" button.
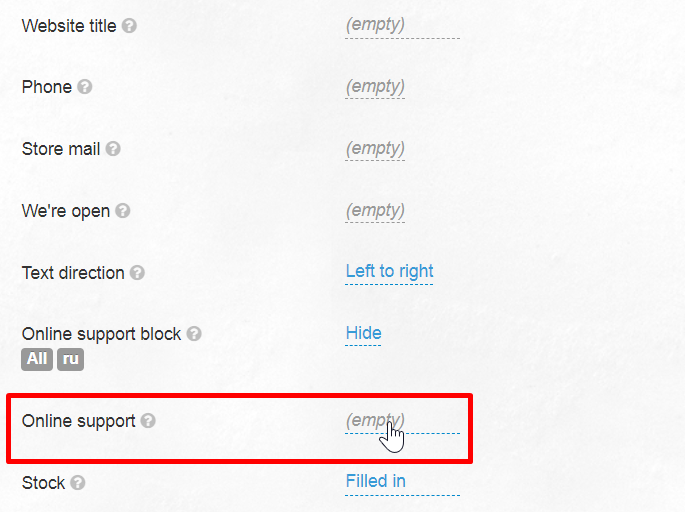
Online support block
We recommend enabling “Online support block” in website header if you have an online customer support service.
There is “Online support” block right after this item - a block where online support code is inserted.
Open “Configuration -> Configuration → Global website template” section in admin panel
Find "Online support block"
Click drop-down list and select "Display"
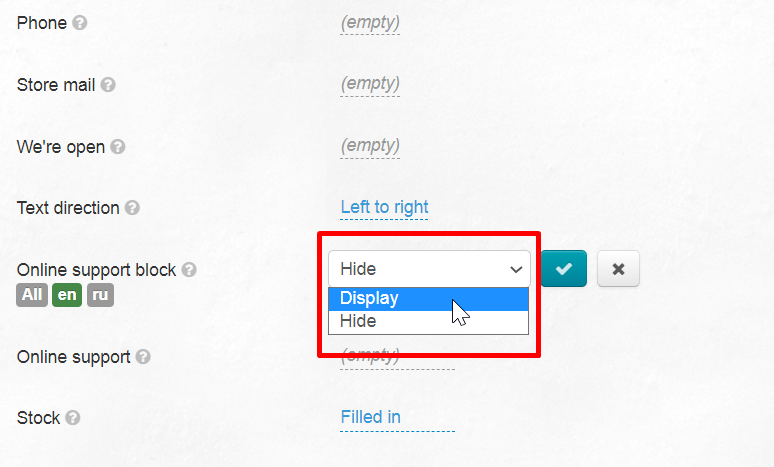
Click "Save" button
Your customers will be able to write to you about their problems and ask questions if you add online support service code.
Online support
At the moment, there are many services for installing an online chat right on your website. For its work, they give a special code which must be added to the site. There is a place in the right corner of the header (see above) for this goal.
You can start setting up once you have this special code.
Open “Configuration -> Configuration → Global website template” section in admin panel.
Find "Online support" block
A field will open where we copy Online Support service code.
Click "Save" button
Online support will be shown on the site when you select "Display" in “Online support block”.
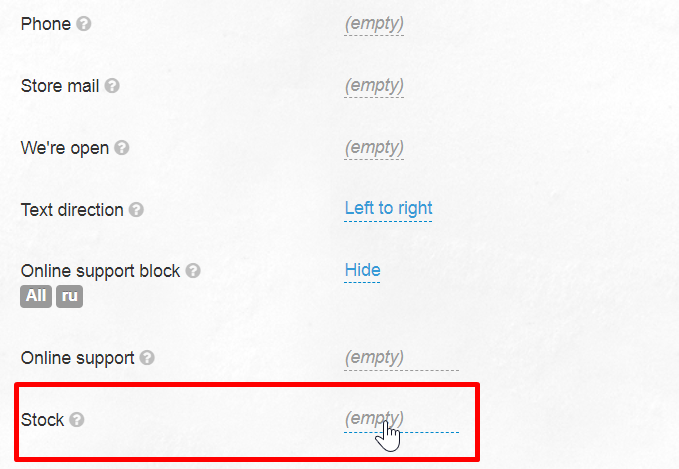
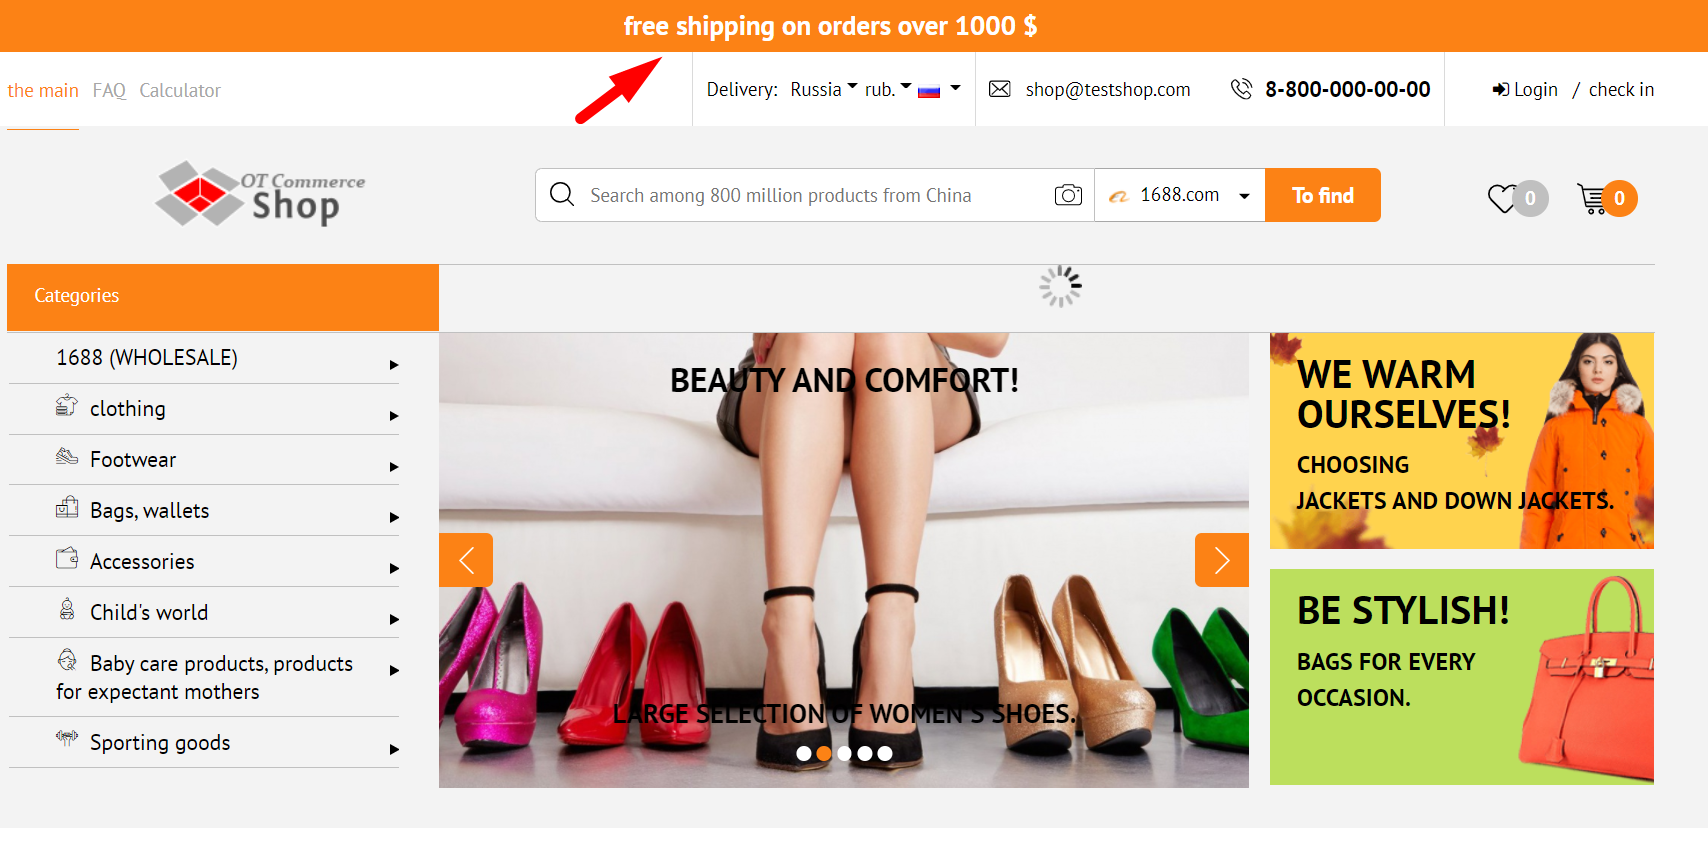
Promotional offer above website header
You can add promotional offer text above website header. For example, information about a sale or about shipping or birthday bonuses.
Customer can hide promotional offer by mouse click. Offer will be hidden for one day and shown next day.
This line with promotional offer will be visible on the home page a well as all other pages of your store.
Open “Configuration -> Configuration → Global website template” section in admin panel to make such offer
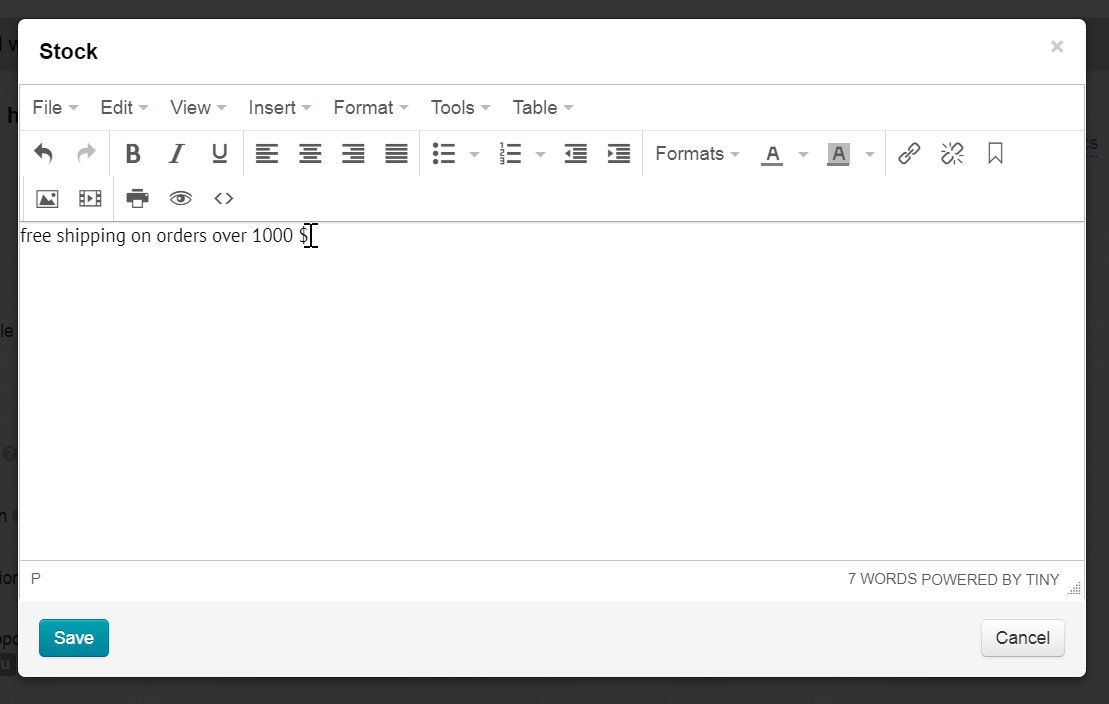
Find "Stock" block
Clicking the mouse open editing window where you can write promotional text
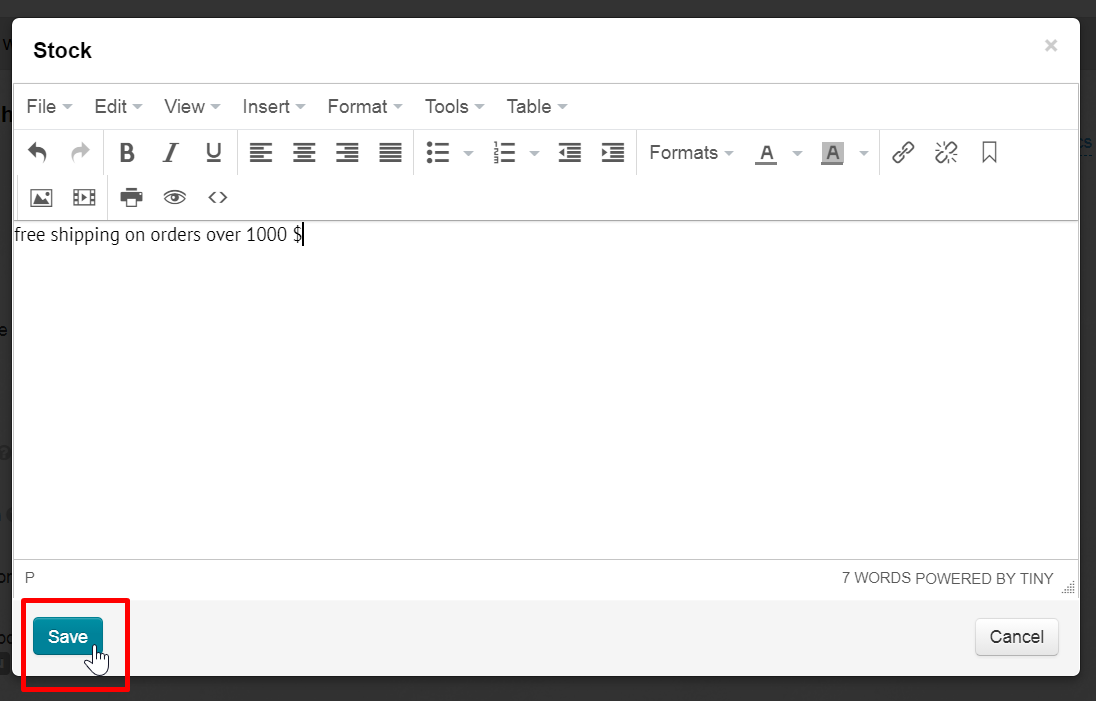
Click "Save" button and this promotion will immediately appear on the site.
Text pages setup
Website text pages are added using "Contents" manual (for example, "About us" or Текстовые страницы сайта добавляются с помощью раздела Содержание (например, “О нас” или “F.A.Q.”).
Навигация в колонке
Выбор отображения навигационного меню на текстовых страницах сайта. Навигационное меню отображается по умолчанию слева. Есть три варианта отображения:
| 1. Отображать все страницы | 2. Отображать только разделы | 3. Скрыть левое меню |
|---|---|---|
Открываем в админке раздел “Configuration” и смотрим “Configuration → Global website template”
Справа на странице находим строчку “Навигация в колонке”
Кликаем мышкой, чтобы открылся список и выбираем тот вид левого меню, который больше всего подходит.
Сохраняем выбор. После сохранения изменения меню будут видны на всех текстовых страницах.
Свой код в секции head шаблона сайта
Блок используется для размещения кода Яндекса и Гугла (подтверждение прав или работа с сервисом вебмастера)и прочих полезных сервисов и изменений. По умолчанию этот блок пустой.
Код счетчика посещений можно добавит в разделе Продвижение.
Чтобы добавить код, открываем в админке раздел “Configuration” и смотрим “Configuration → Global website template”
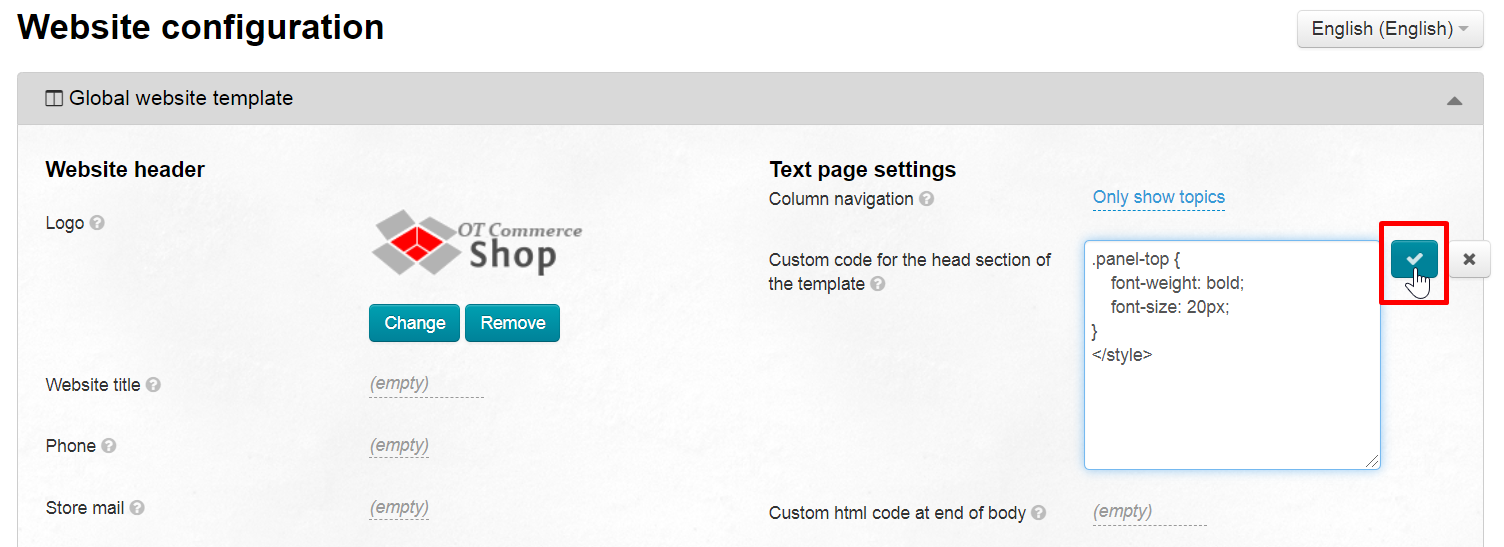
Справа на странице находим поле “Свой код в секции head шаблона сайта” и кликаем по нему.
В открывшееся поле пишем код нужного сервиса или любой другой полезный код.
Нажимаем кнопку “Сохранить”
Свой код перед закрывающимся тегом body
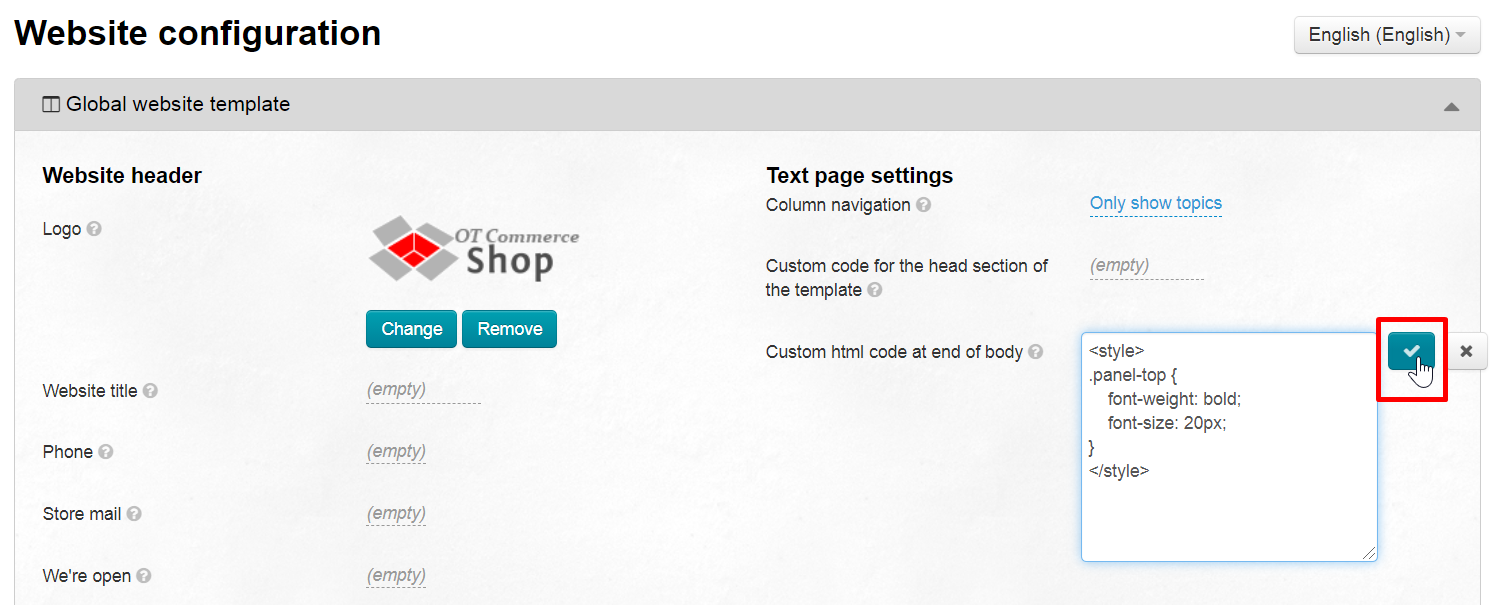
Используется в тех же случаях, что и “Свой код в секции head шаблона сайта”, описанный выше. Сторонние сервисы всегда четко указывают куда лучше добавить их код.
Открываем в админке раздел “Configuration” и смотрим “Configuration → Global website template”
Справа на странице ищем строку “
В открывшееся поле вставляем код нужного сервиса.
Нажимаем кнопку “Сохранить”
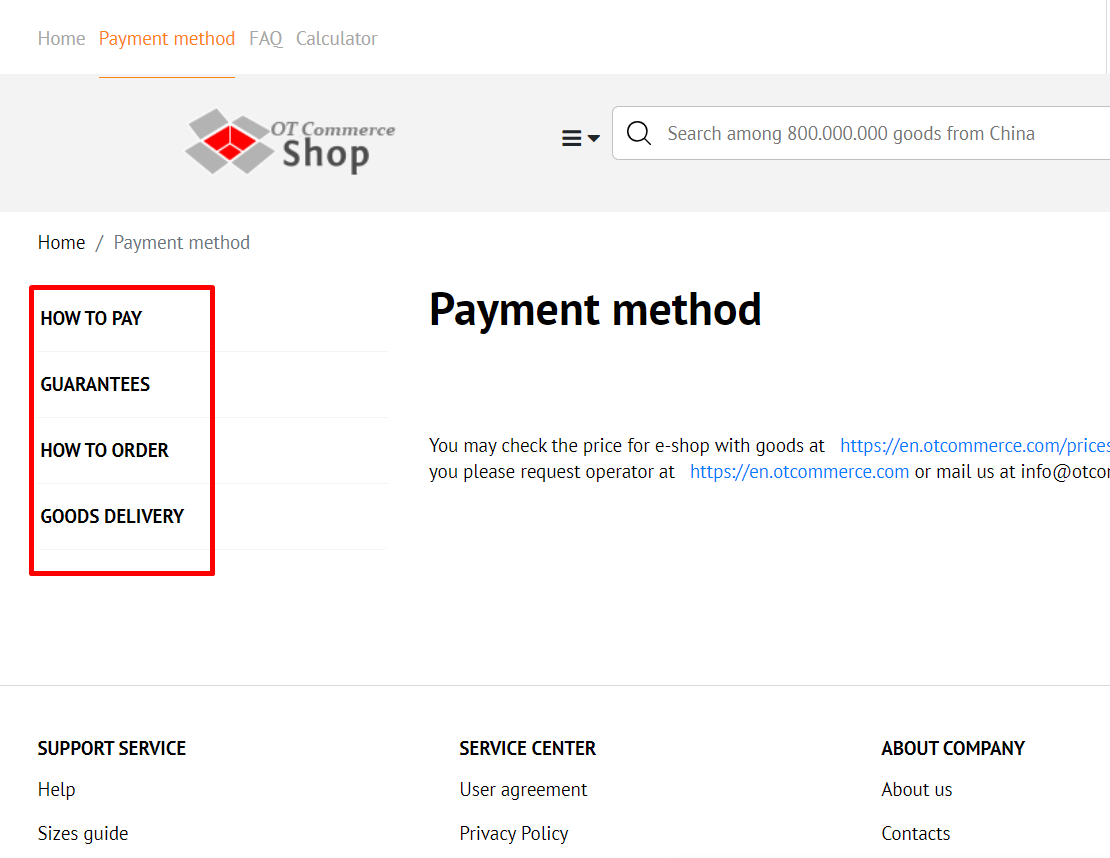
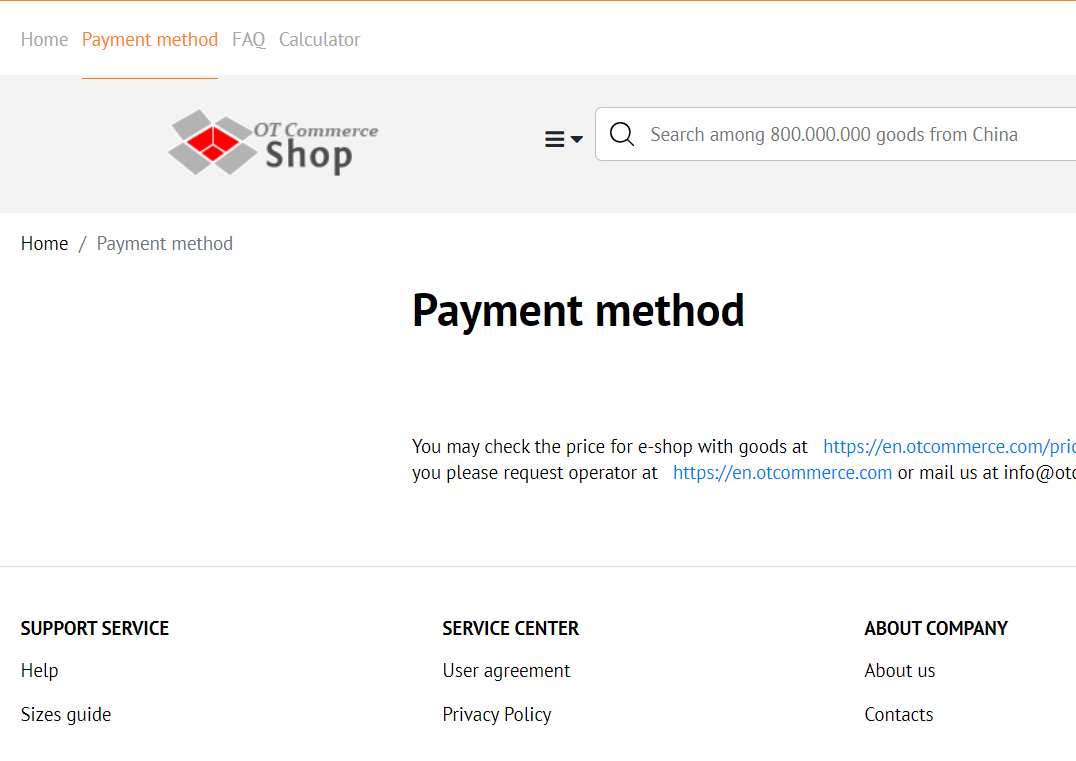
Column navigation
Selecting navigation menu display on website text pages. Navigation menu is displayed on the left by default. There are three display options:
| 1. Show all pages | 2. Only show topics | 3. Hide left menu |
|---|---|---|
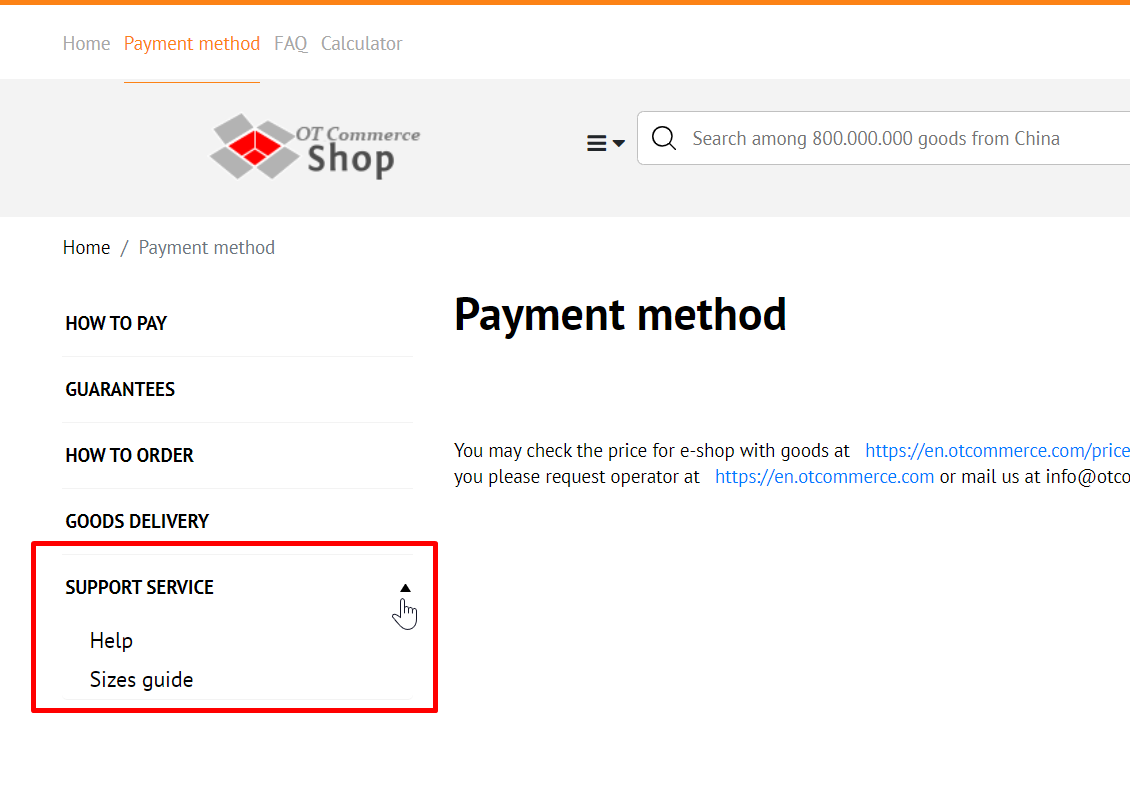 |  |  |
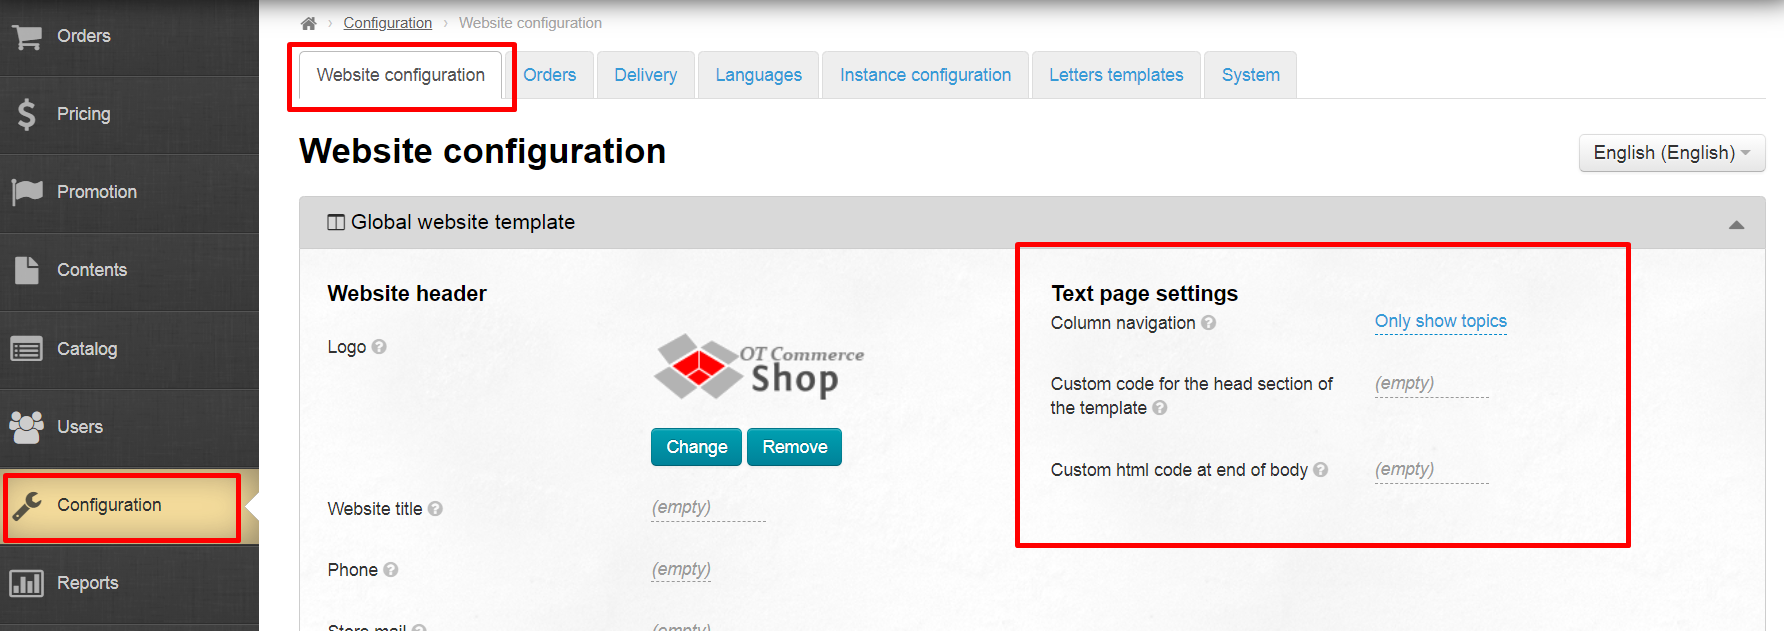
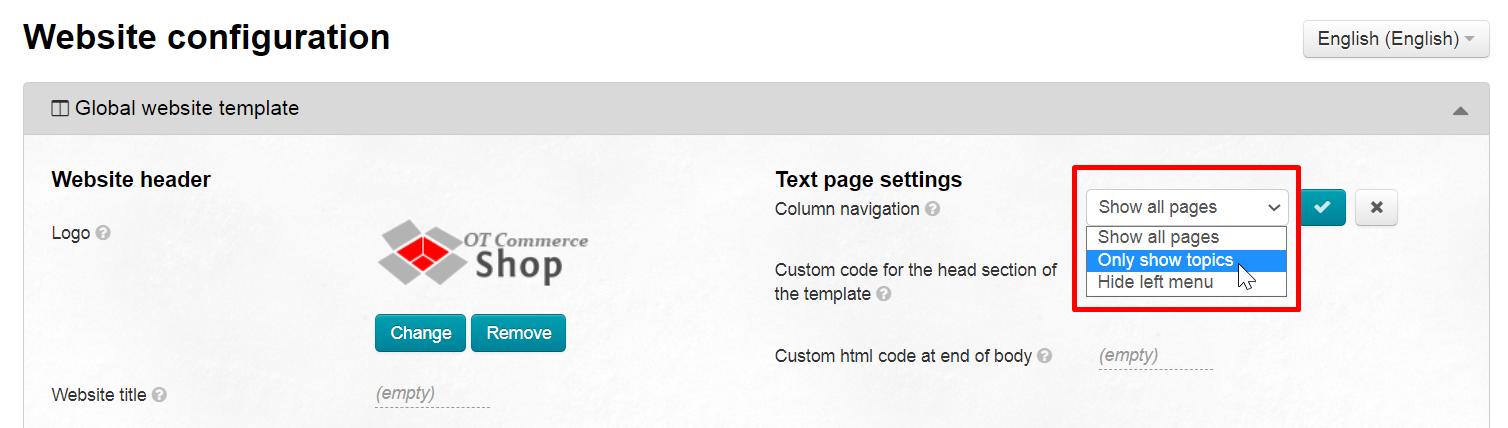
Open “Configuration -> Configuration → Global website template” section in admin panel
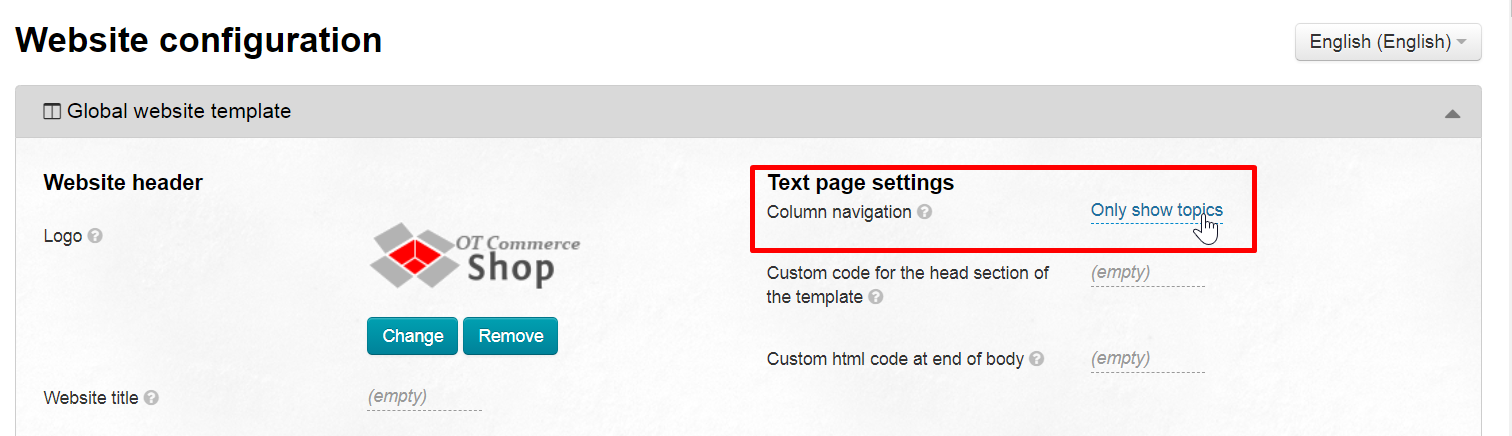
Find "Text page settings" block on the right
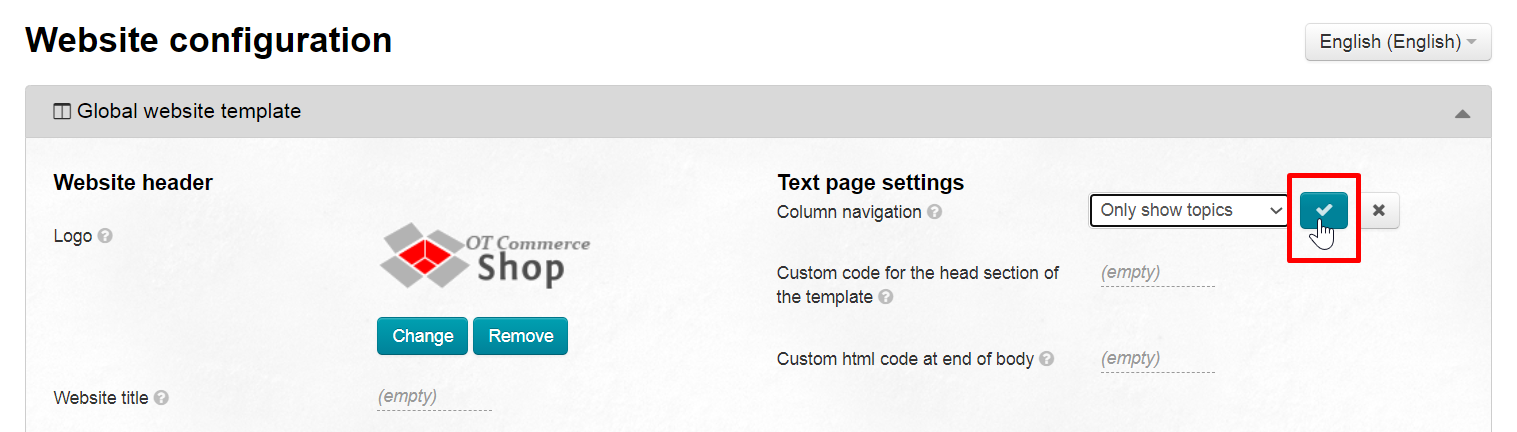
Clicking the mouse will open the list. Select menu type that suits best.
Save choice. Once the changes are saved, the menus will be visible on all text pages.
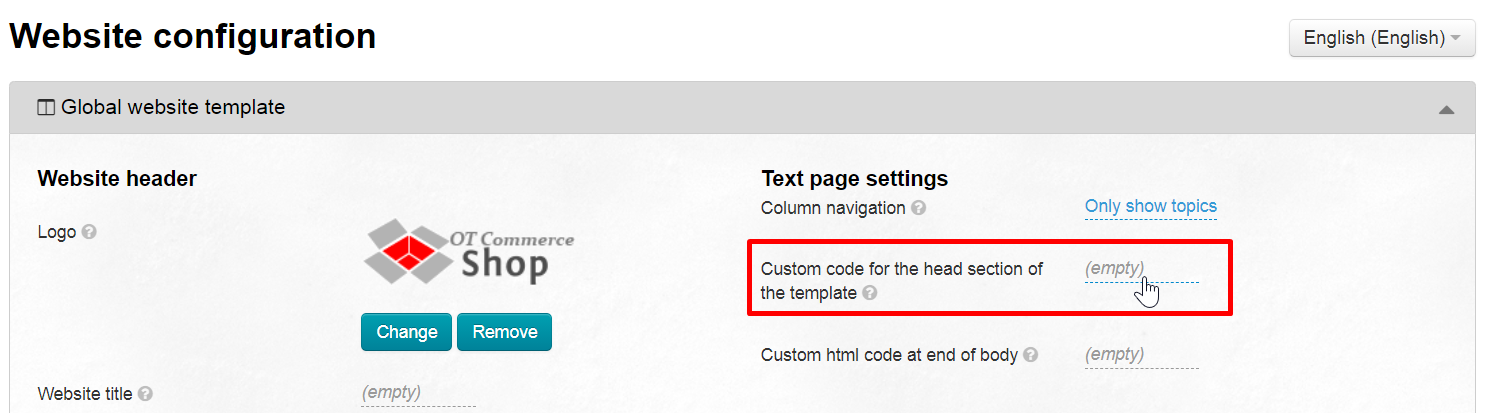
This block is used to add Yandex and Google code (rights confirmation or work with webmaster's service) and other useful services and changes. This block is empty by default.
Visitors' counter code can be added in "SEO" section.
Open “Configuration -> Configuration → Global website template” section in admin panel to add the code
Find ".
Write the code of required service or any other useful code into the window.
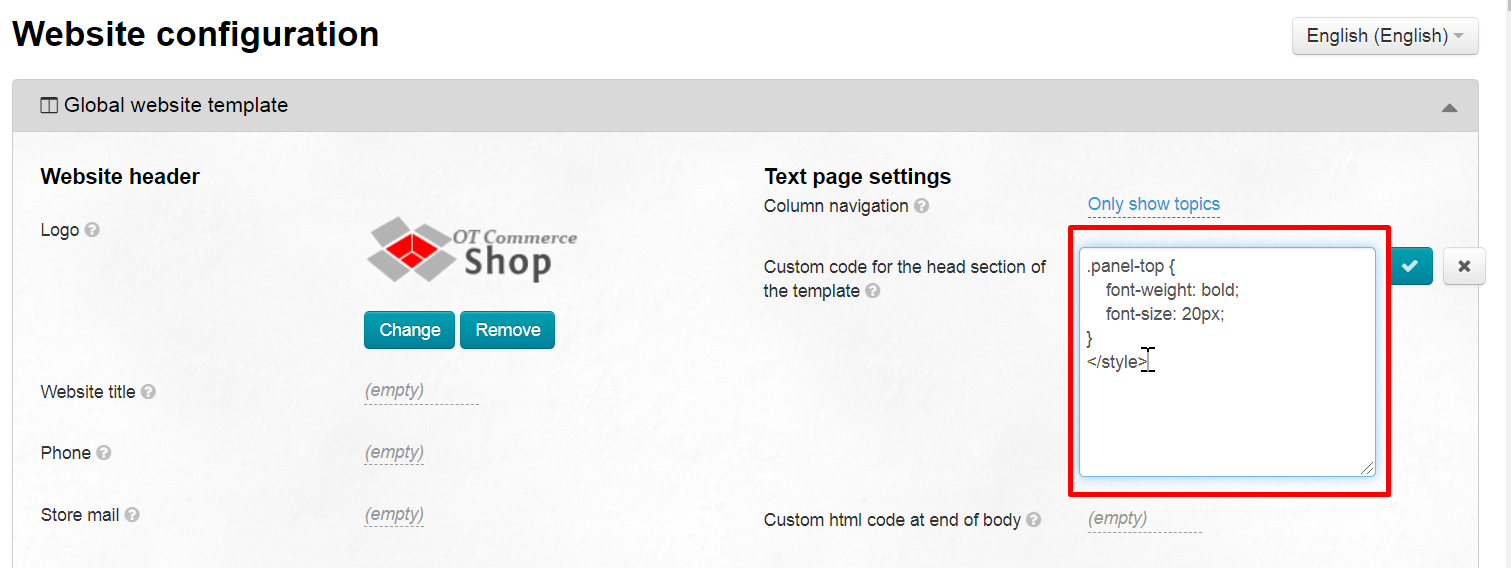
Click "Save" button
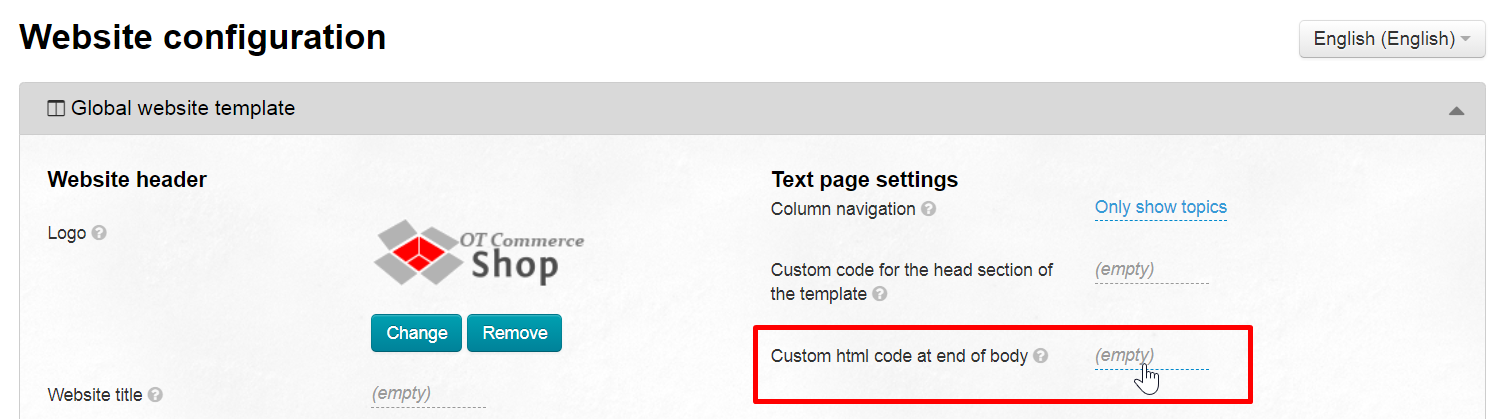
Used in the same cases as “Custom code for the head section of template". Third-party services always clearly indicate where it is better to add their code. For example, you need to write a code from Facebook pixel into this field (this is an analytics tool for identifying your advertising effectiveness, which allows you to study audience behavior of your website and create customized audiences).
Open “Configuration -> Configuration → Global website template” section in admin panel
Find "
Paste the code of required service into opened field.
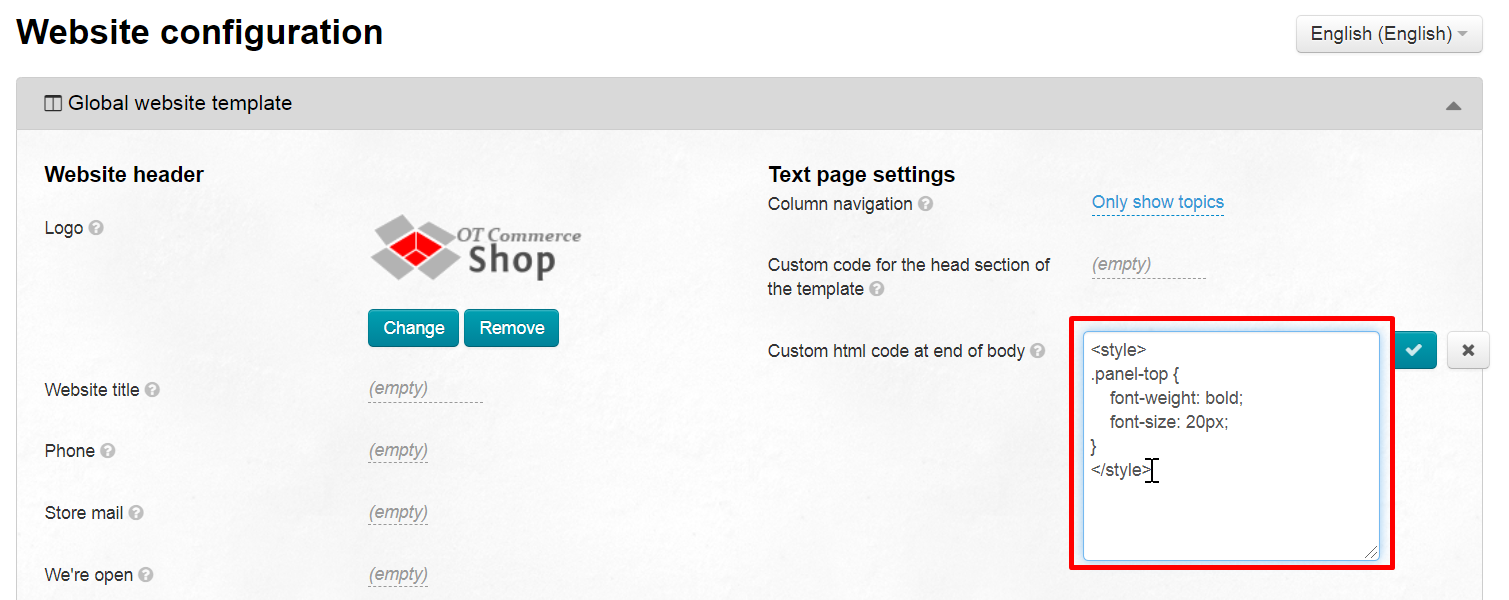
Click "Save" button
Design Themes (outdated setting
...
)
This is where one can set one of free design variants. The default design theme is Standard.
...
To change a design theme you should do the following:
Select a design theme (for example, KaraKum).
...