Location in admin panel
Operation with catalog: Catalog › Categories › (hover menu) «Goods in Selector»
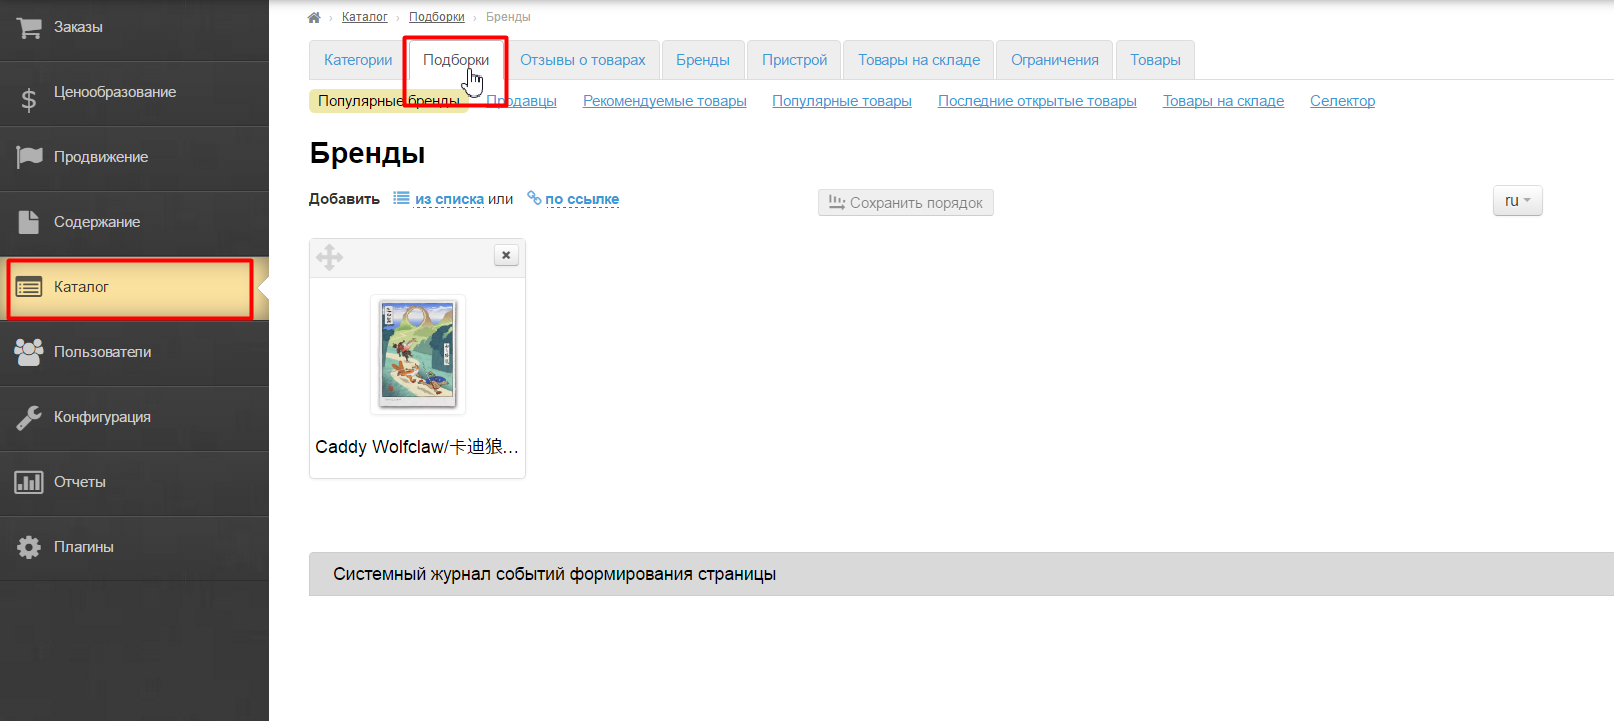
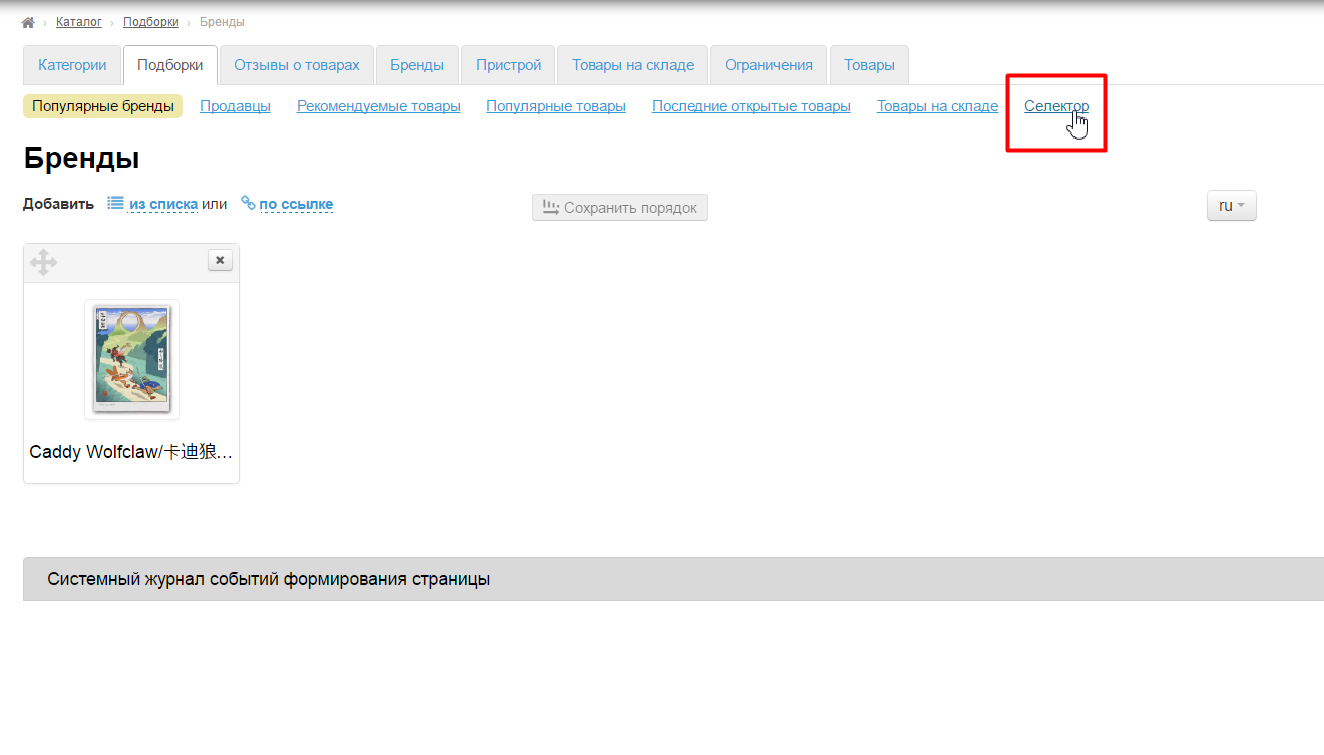
Operation with goods: Catalog › Collections › Selector
Description
"Selector" module allows you to create virtual categories (collections) in catalog and fill them with any goods individually (upload it by link or from file) and show collections on home page. The most obvious example is seasonal offers.
You can also correct translation and description for each product and even upload your own photo with the help of "Selector". This module is suitable for both specialized stores and for promoting sales of certain categories of goods with a full range.
Read detailed description of business benefits here: Selector (module description)
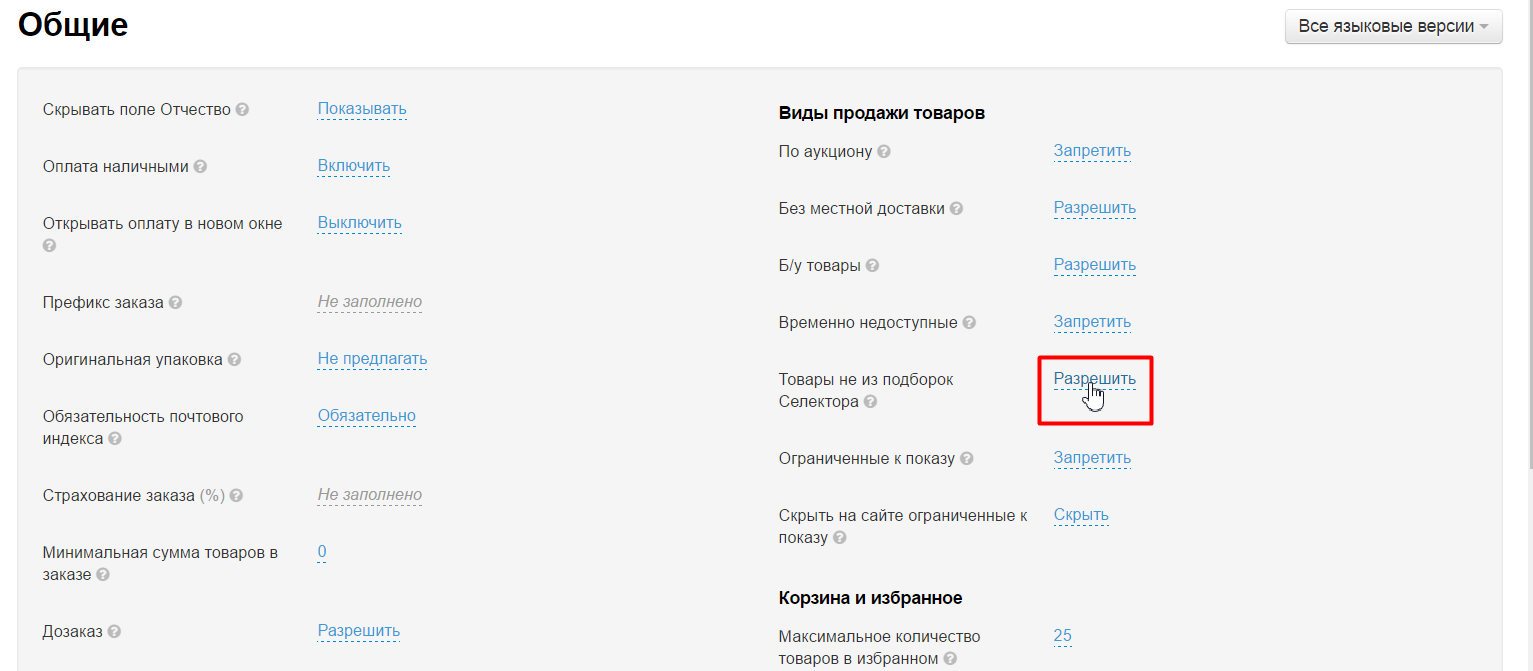
How to forbid sale of goods out of Selector?
Add goods into Selector first (read below). Go to Configuration > Orders:
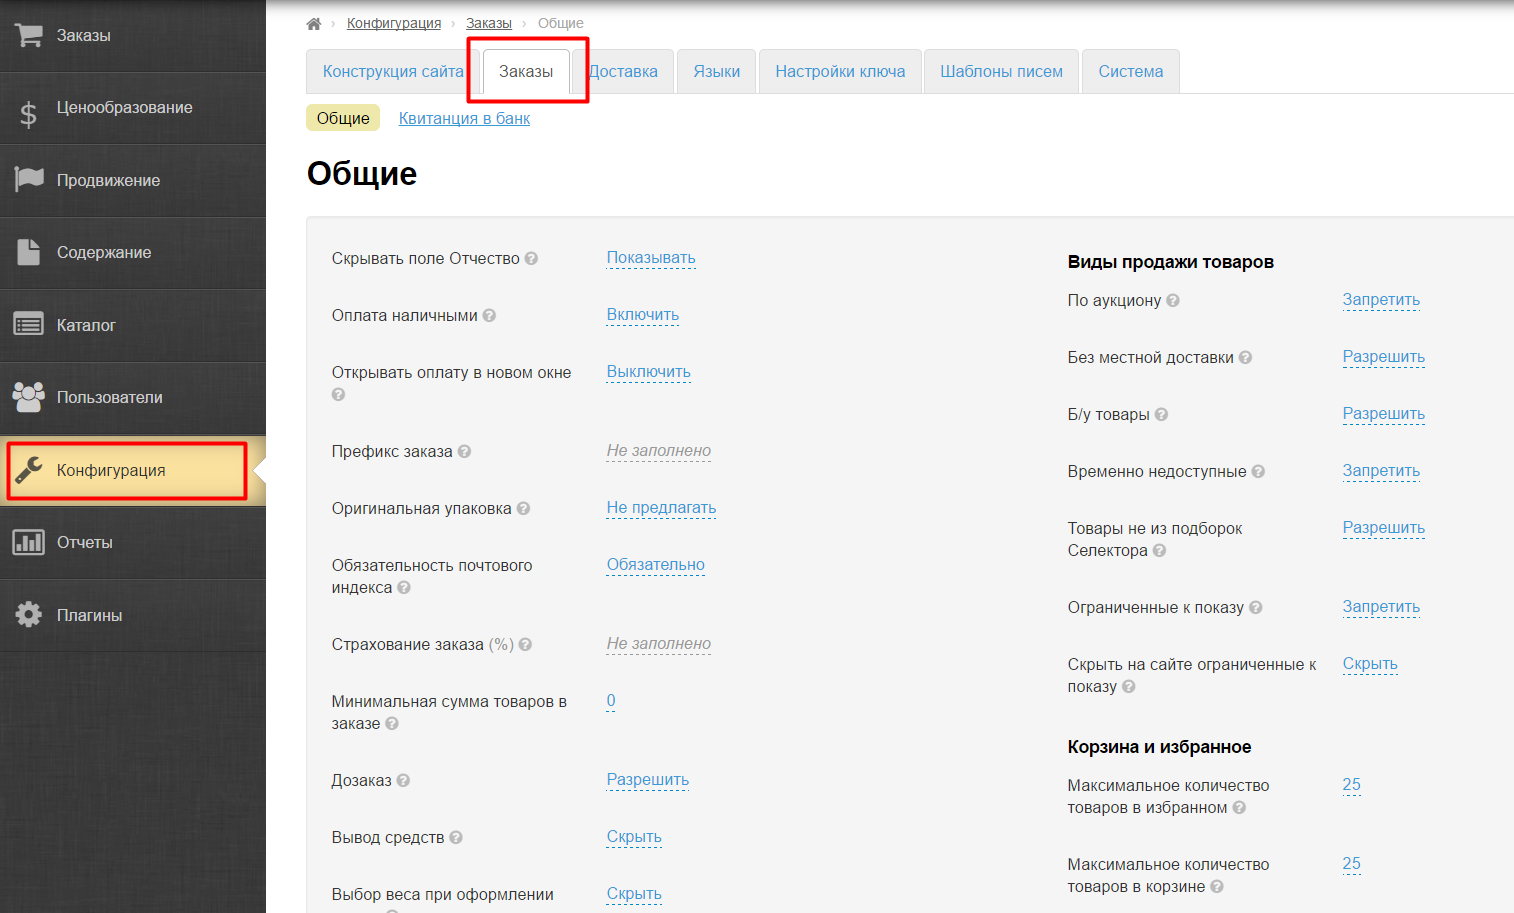
Find "Items not from the Collections Selector":
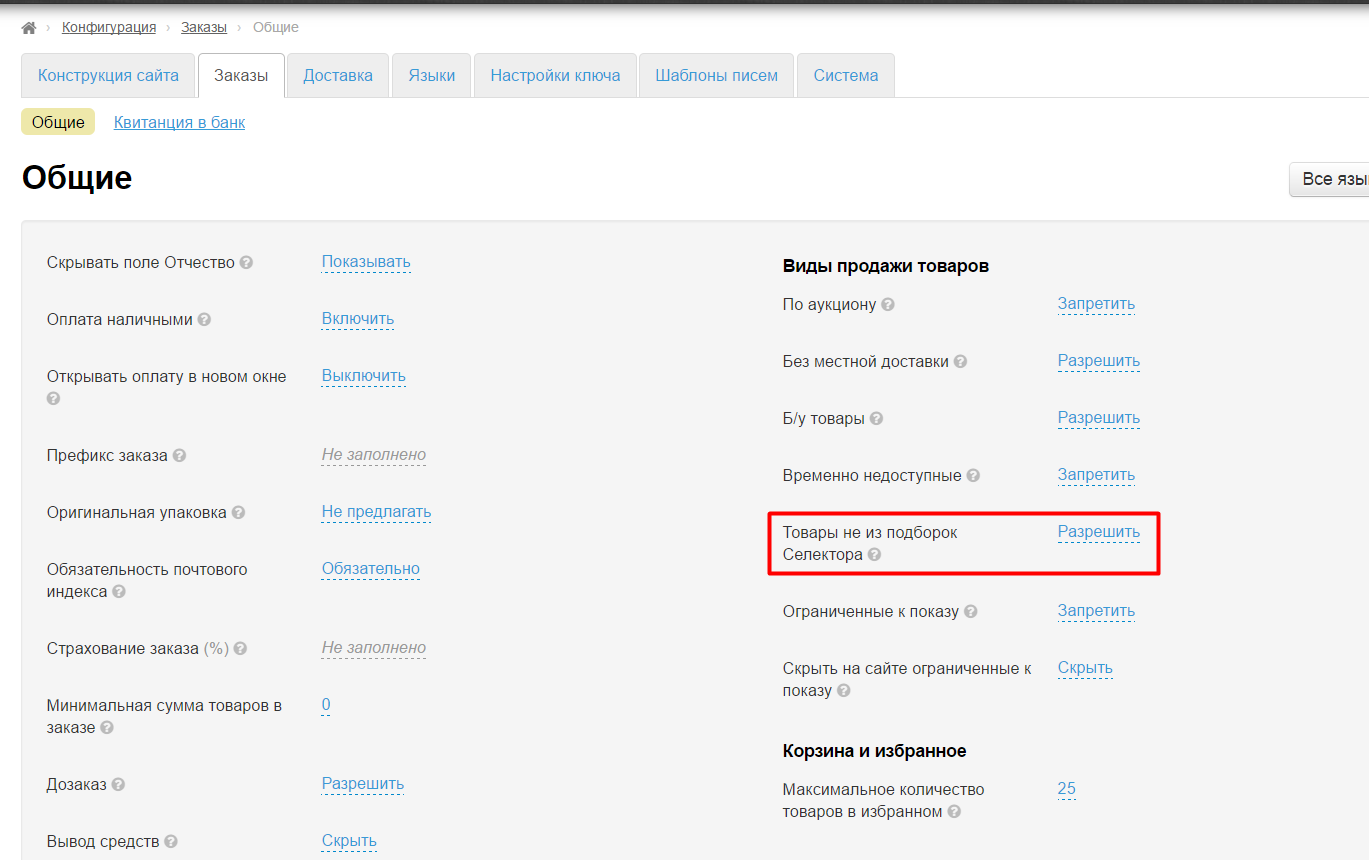
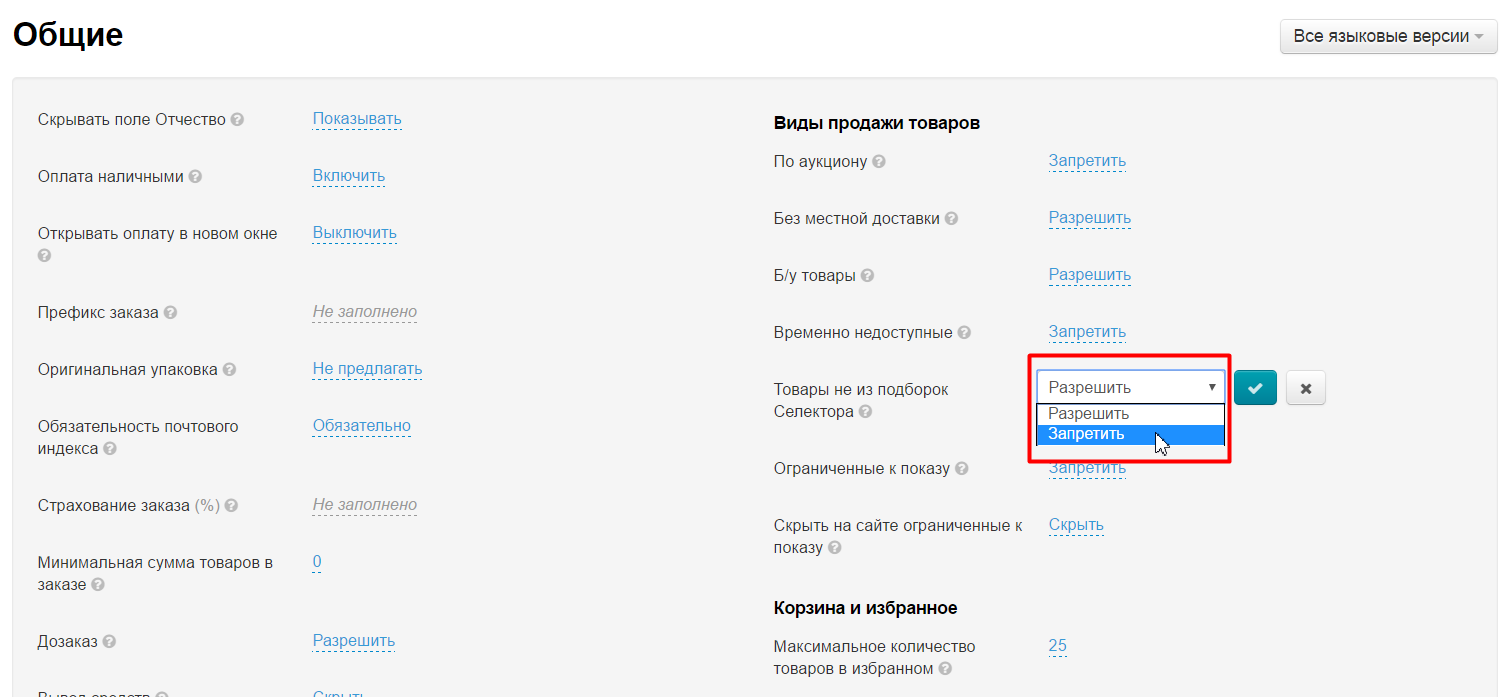
Click "Allow" to forbid sale of goods out of Selector:
Choose "Forbid" from drop-down list:
Save by clicking blue arrow on the right:
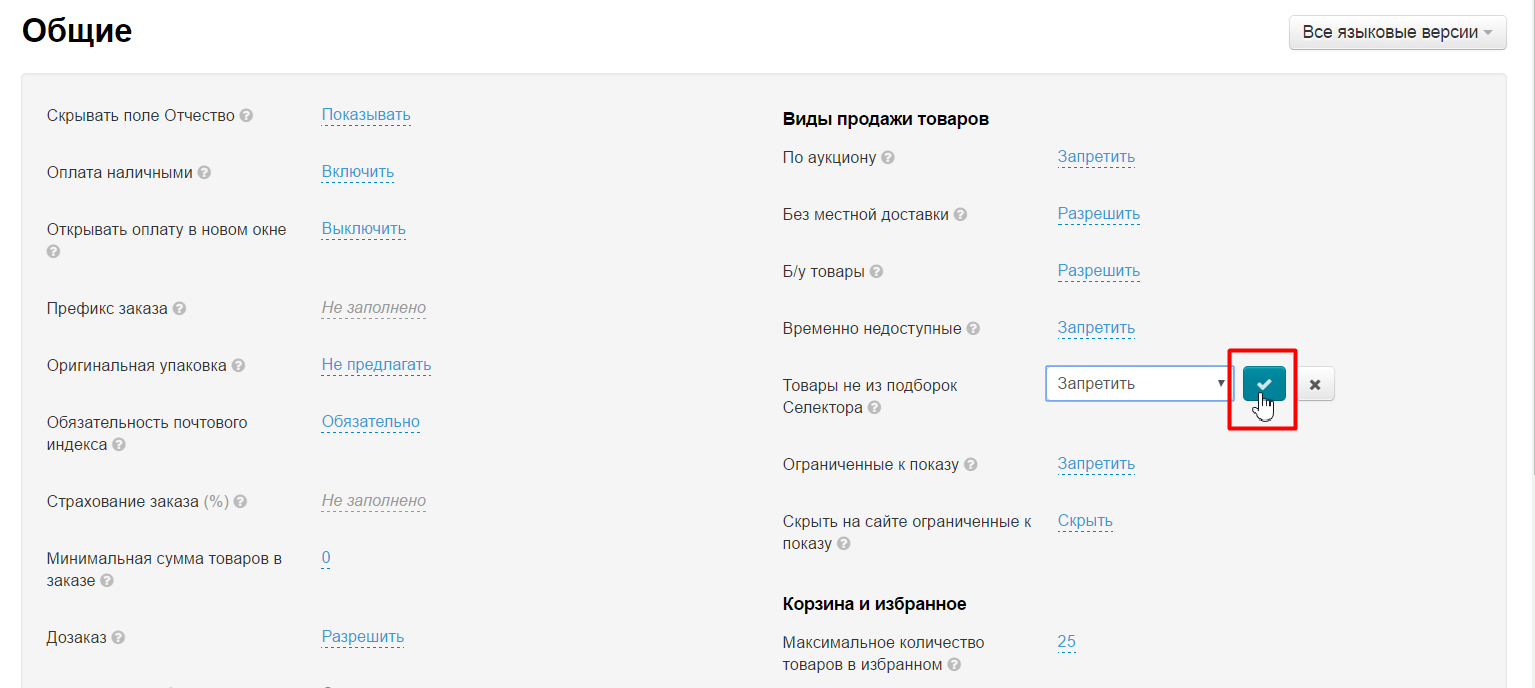
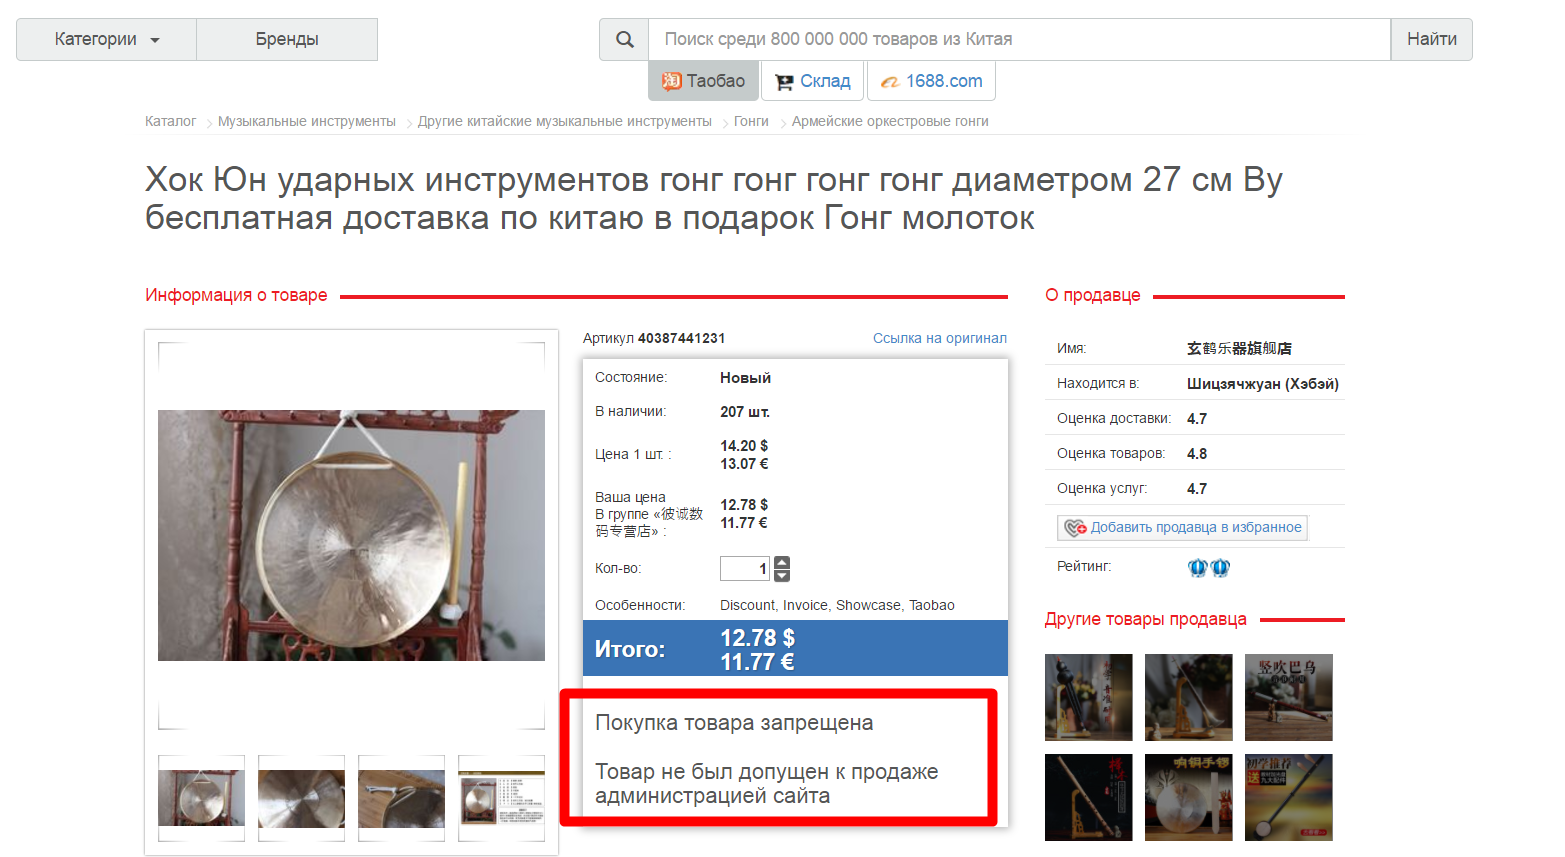
Ready. It will be impossible to buy goods out of Selector.
How to add seasonal offer?
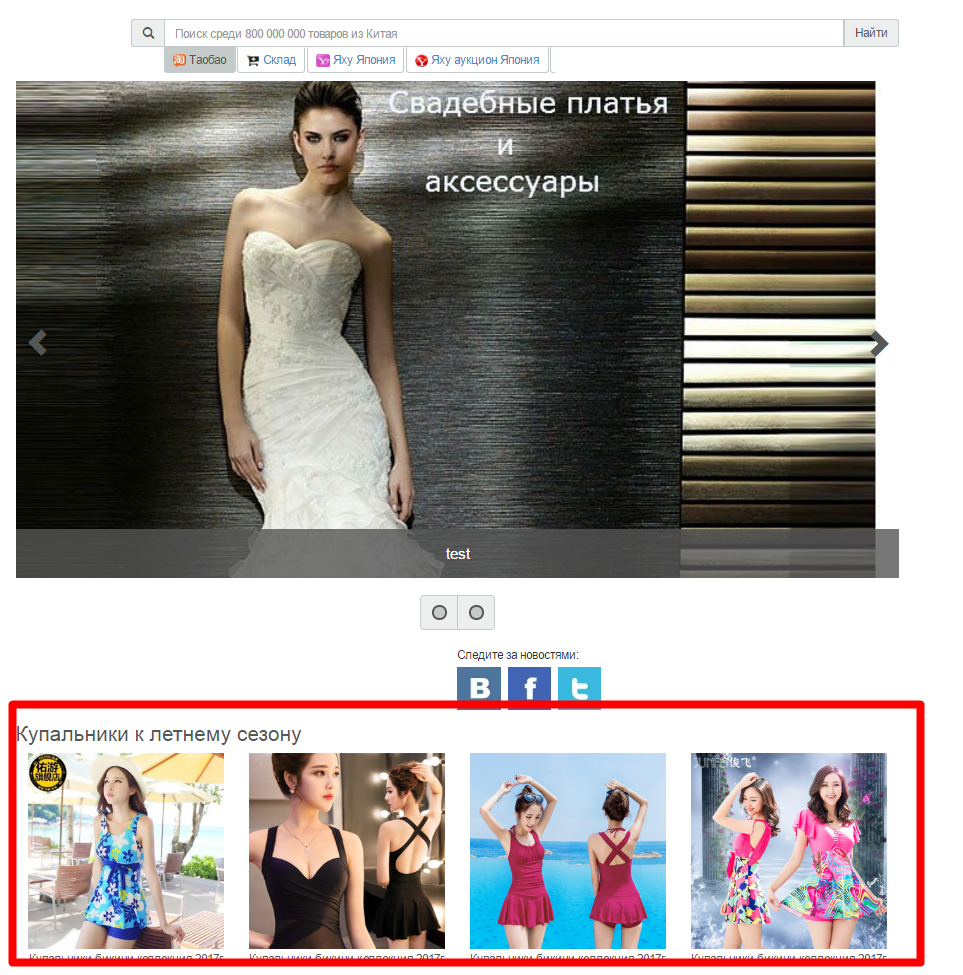
It is necessary to prepare a selection of swimsuits and bring the first few items to the home page, for example.
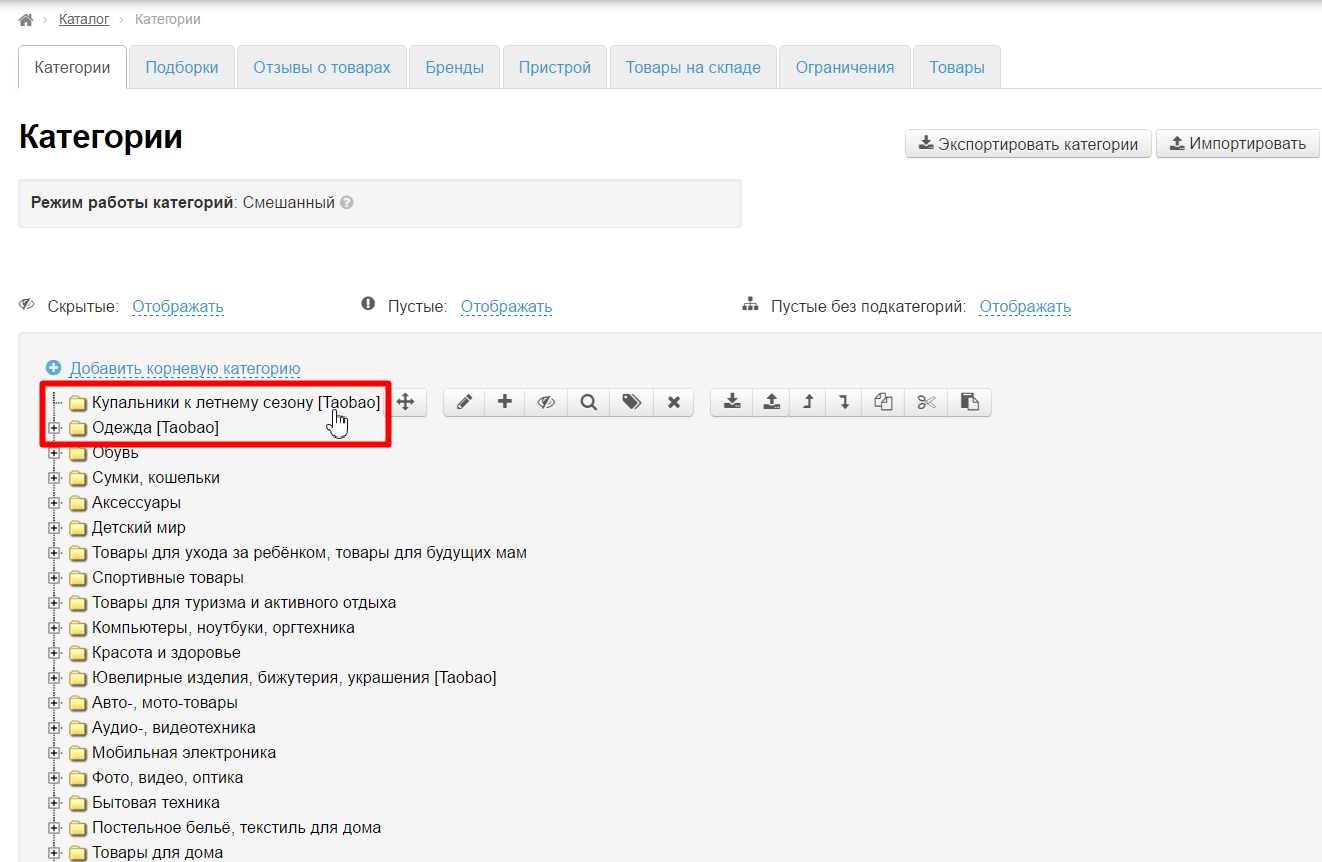
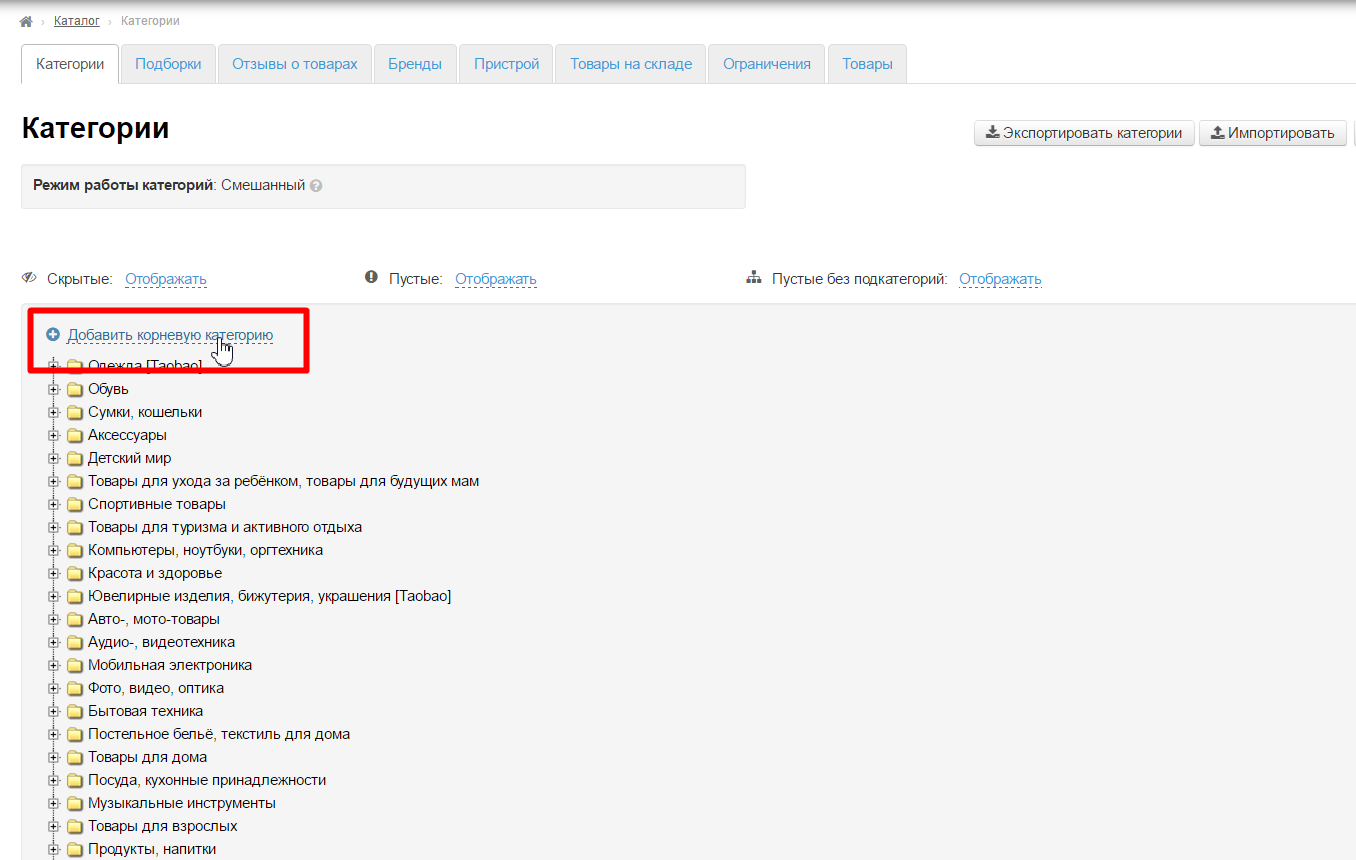
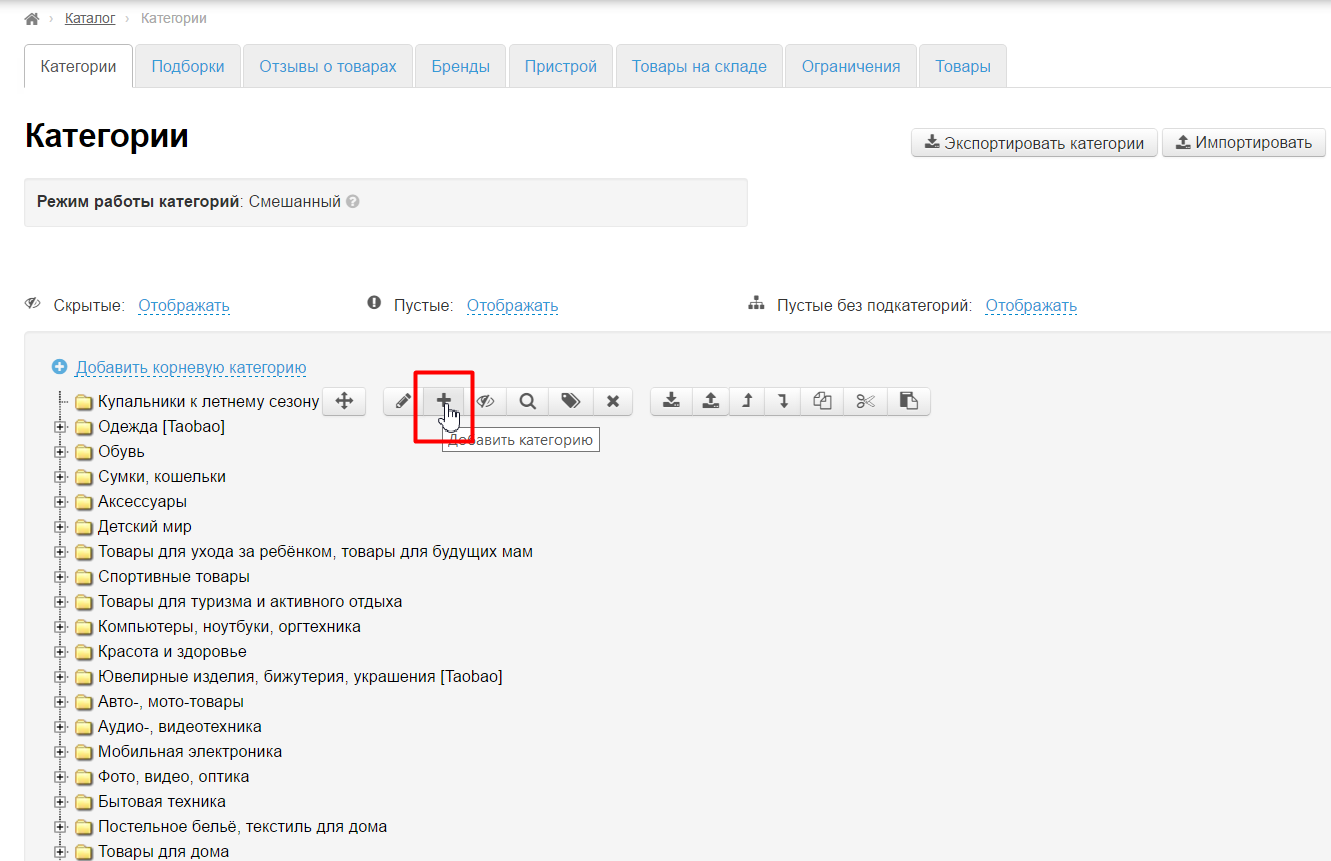
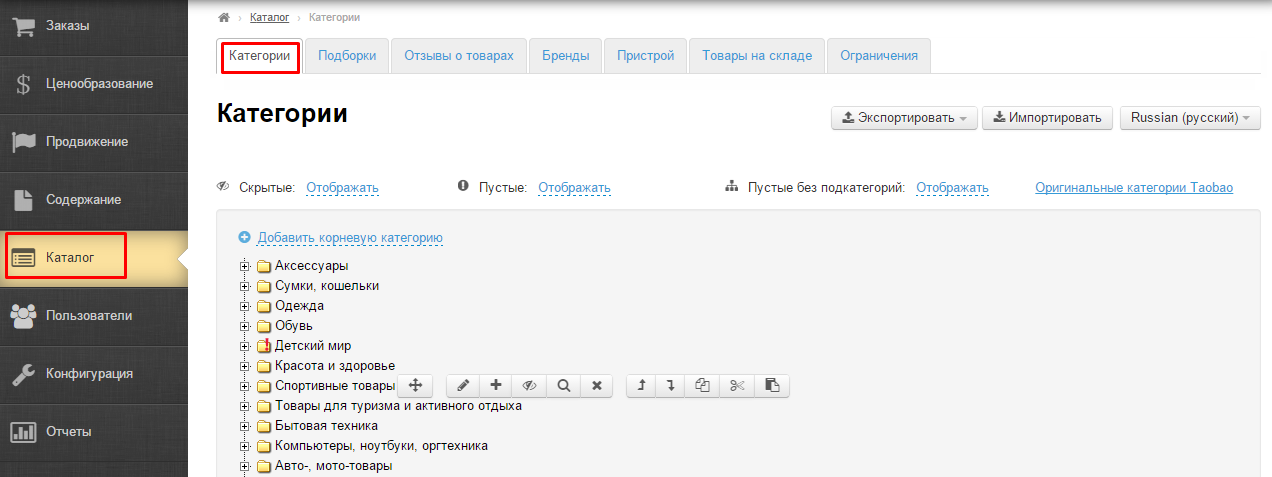
Go to Catalog > Categories section:

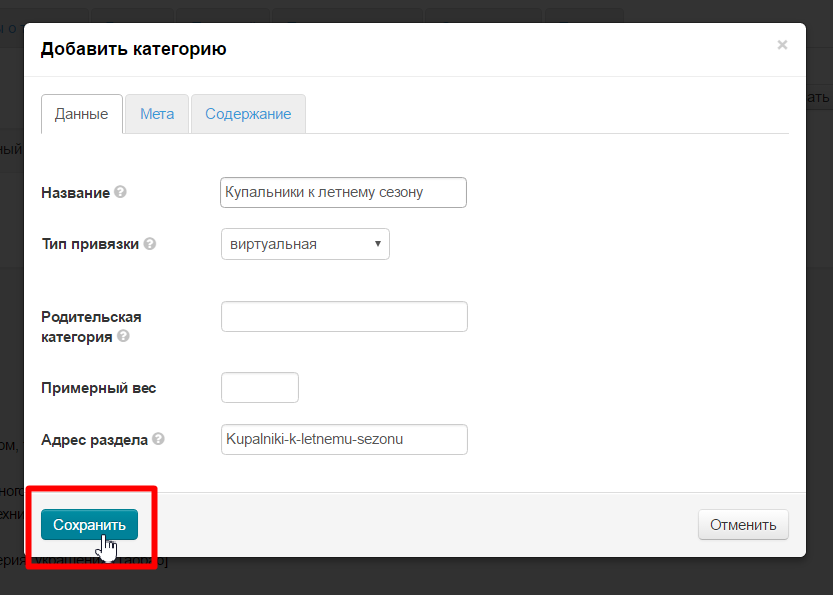
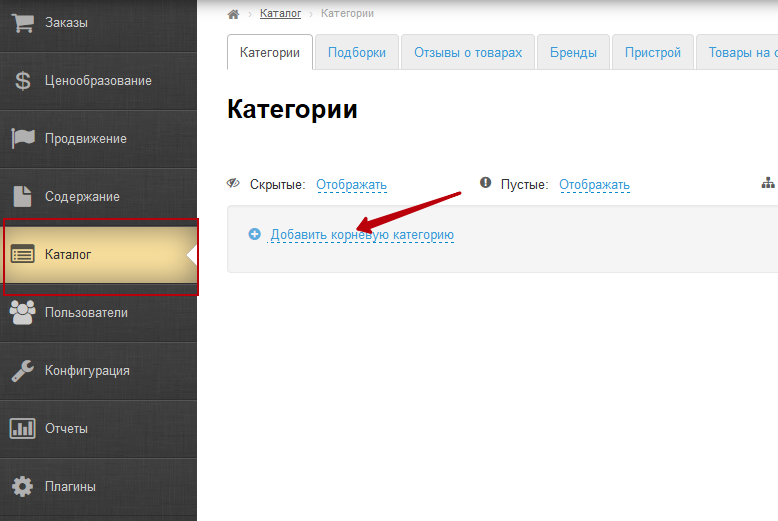
Add root category:

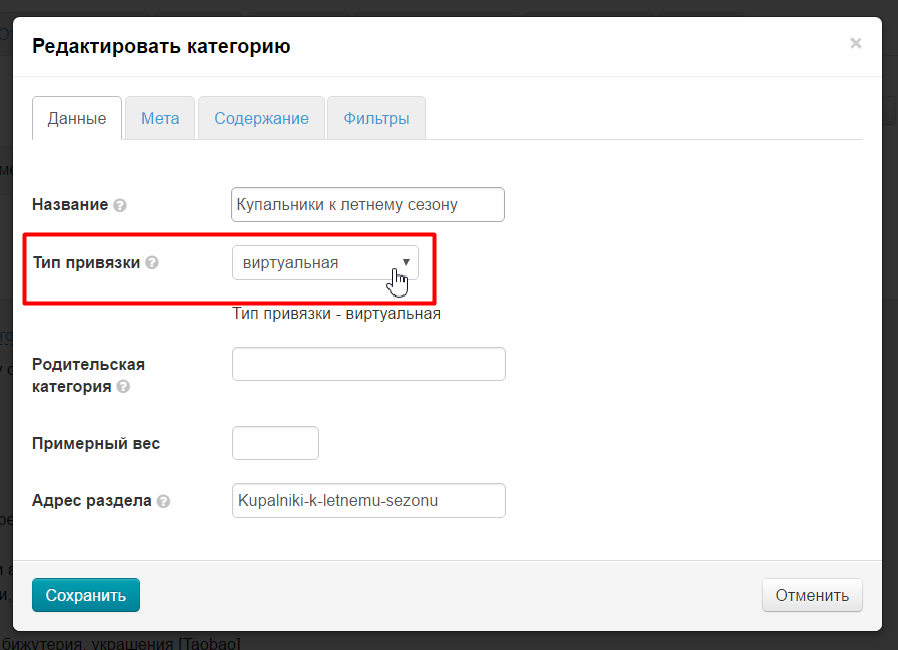
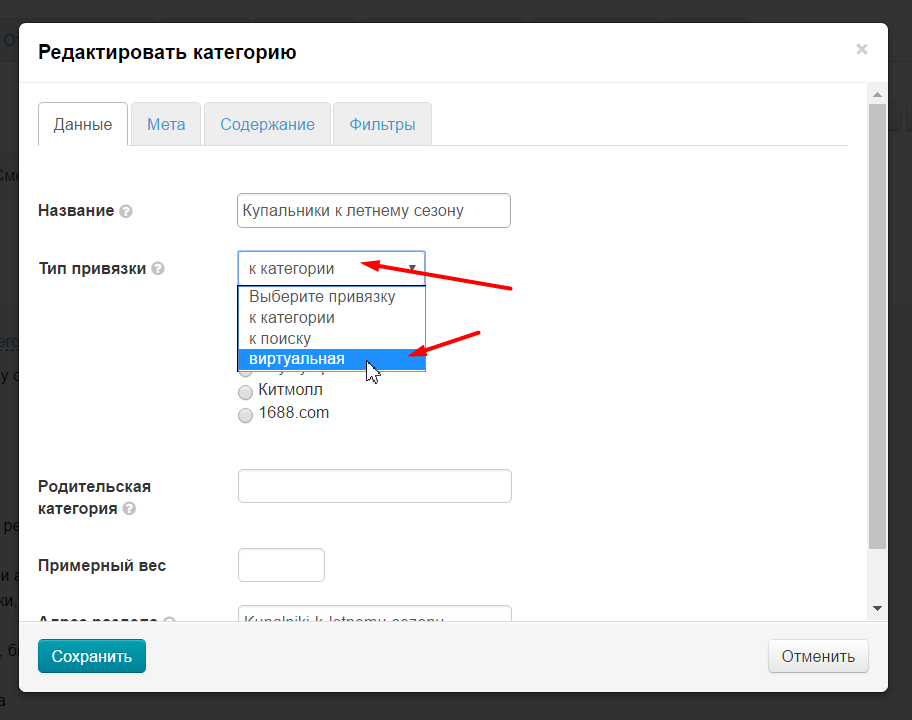
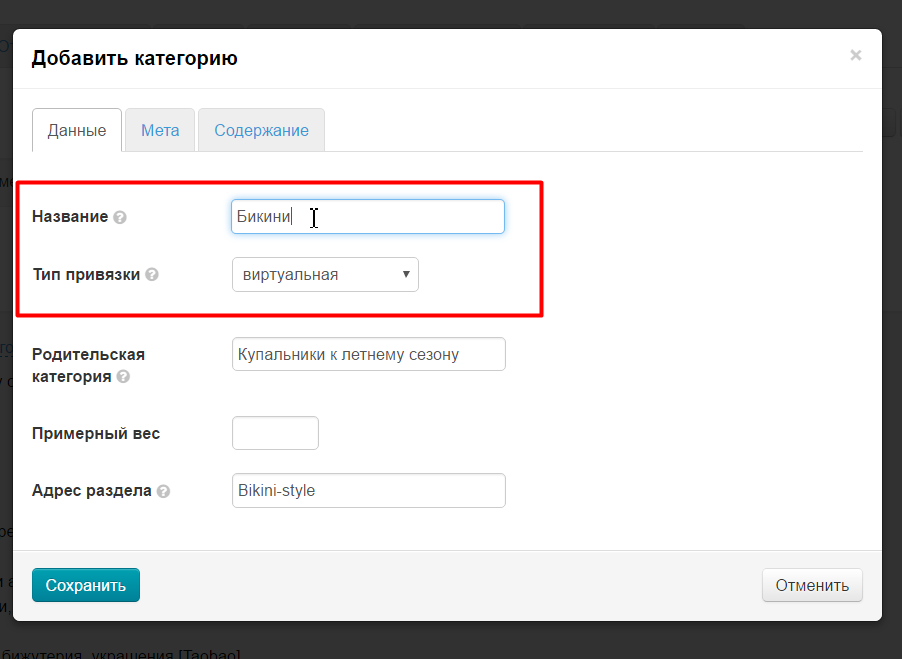
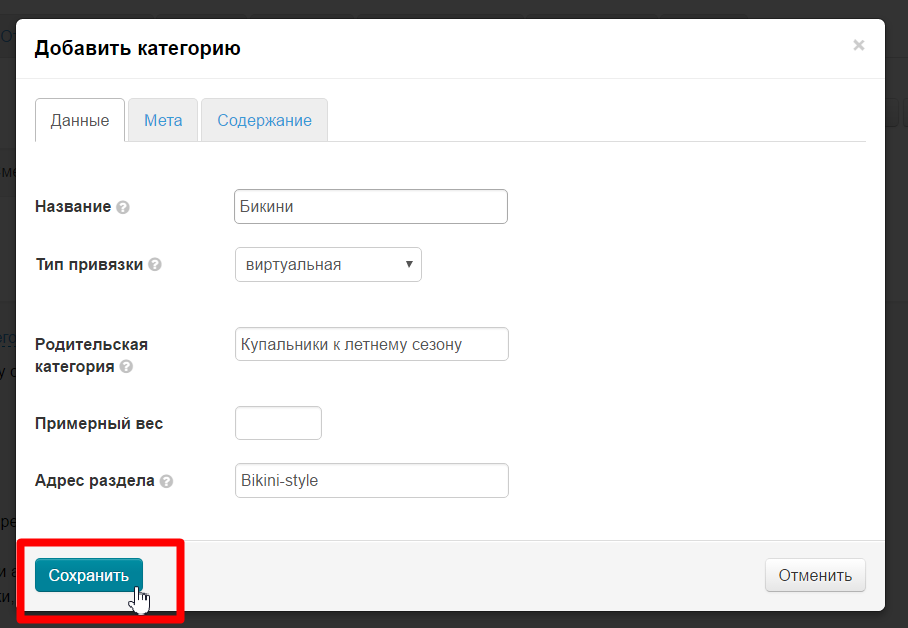
Enter name of this category in catalog and choose virtual type of binding:
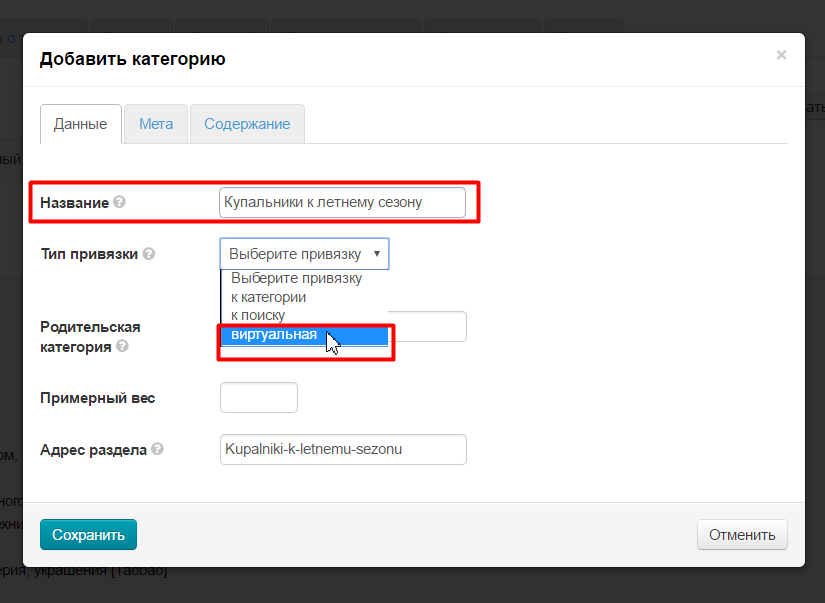
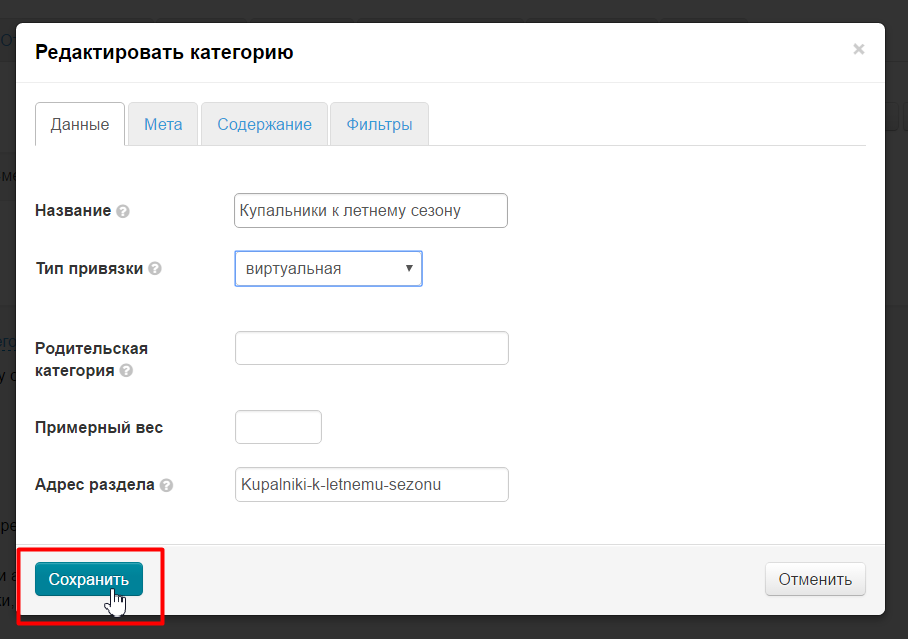
Save.

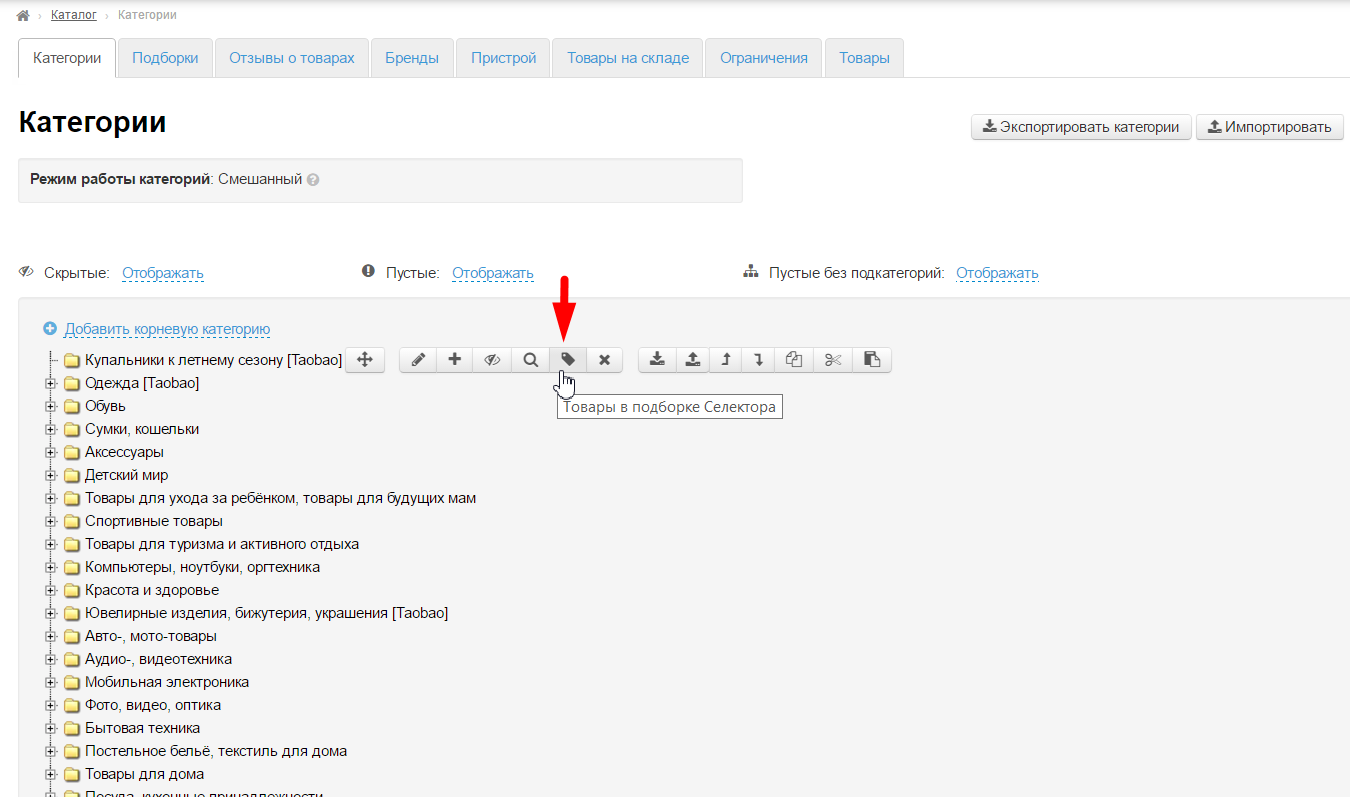
Move mouse over created category and select button with a label (or tag) in appeared menu. When we hover over it we get "Items from the Collections Selector" title.
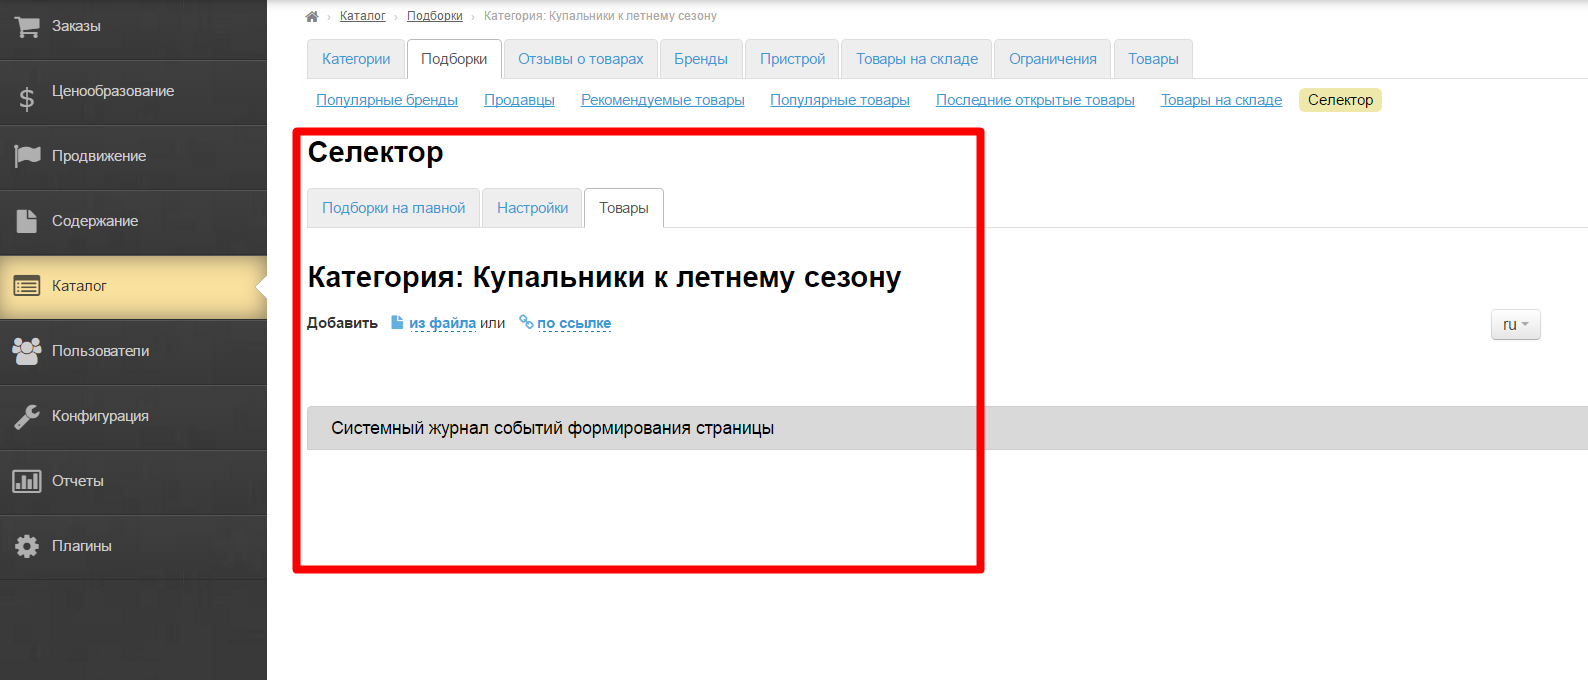
A page to add goods will open after clicking.
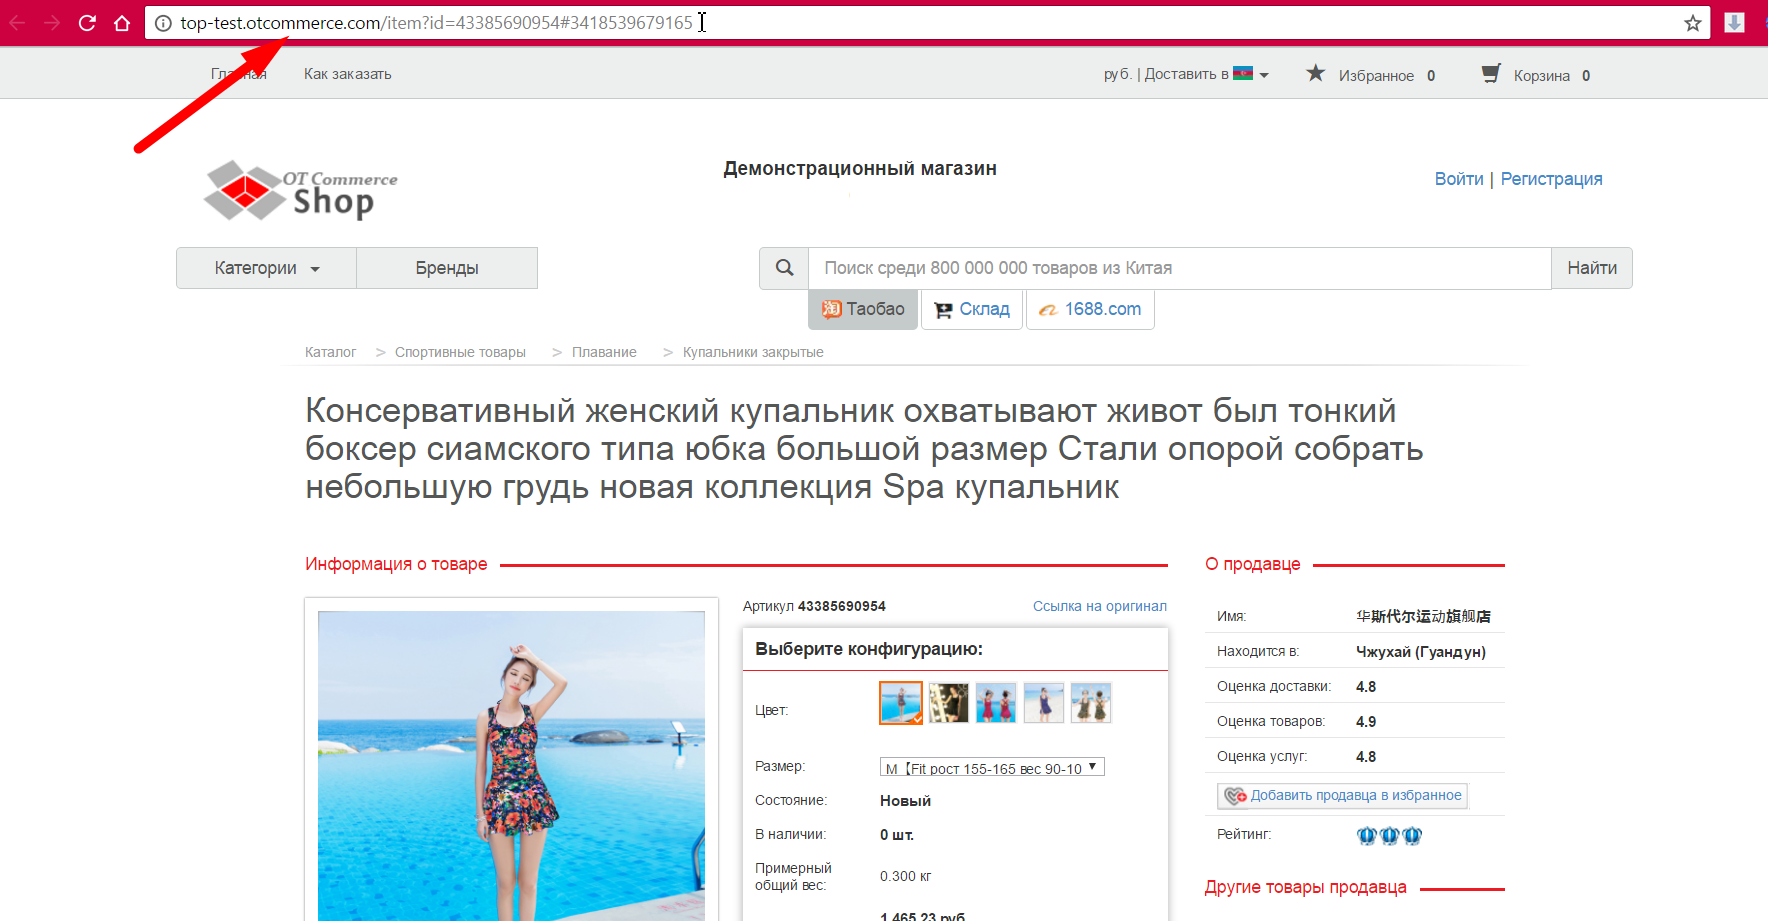
Choose goods for sale on your site and copy links to these products in browser's address bar:
Create a notepad file on your computer and paste goods links there. Each link should start from new line. Click "Enter" button on a keyboard. You will have something like this:

Save it.
It is better to make separate files if you plan several types of goods (for example, swimsuits solid, bikini and swimming trunks). Then you will be able to set a joint name for each group of goods for uploading and save time on renaming.
Go back to the page of adding goods again, click "From file" and upload created file:
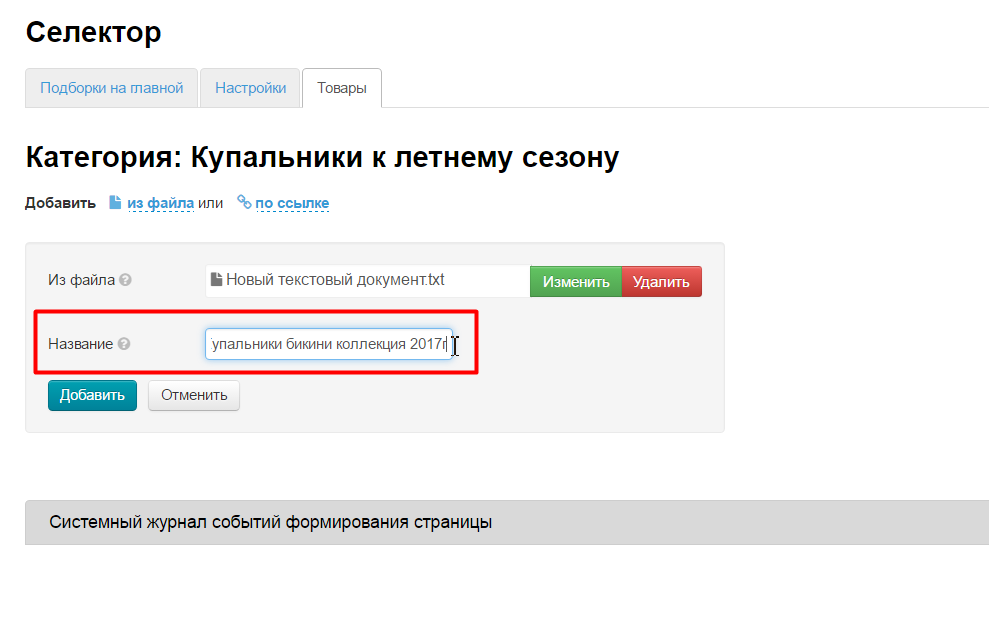
Write joint title, for example, "Swimsuits bikini collection 2017":
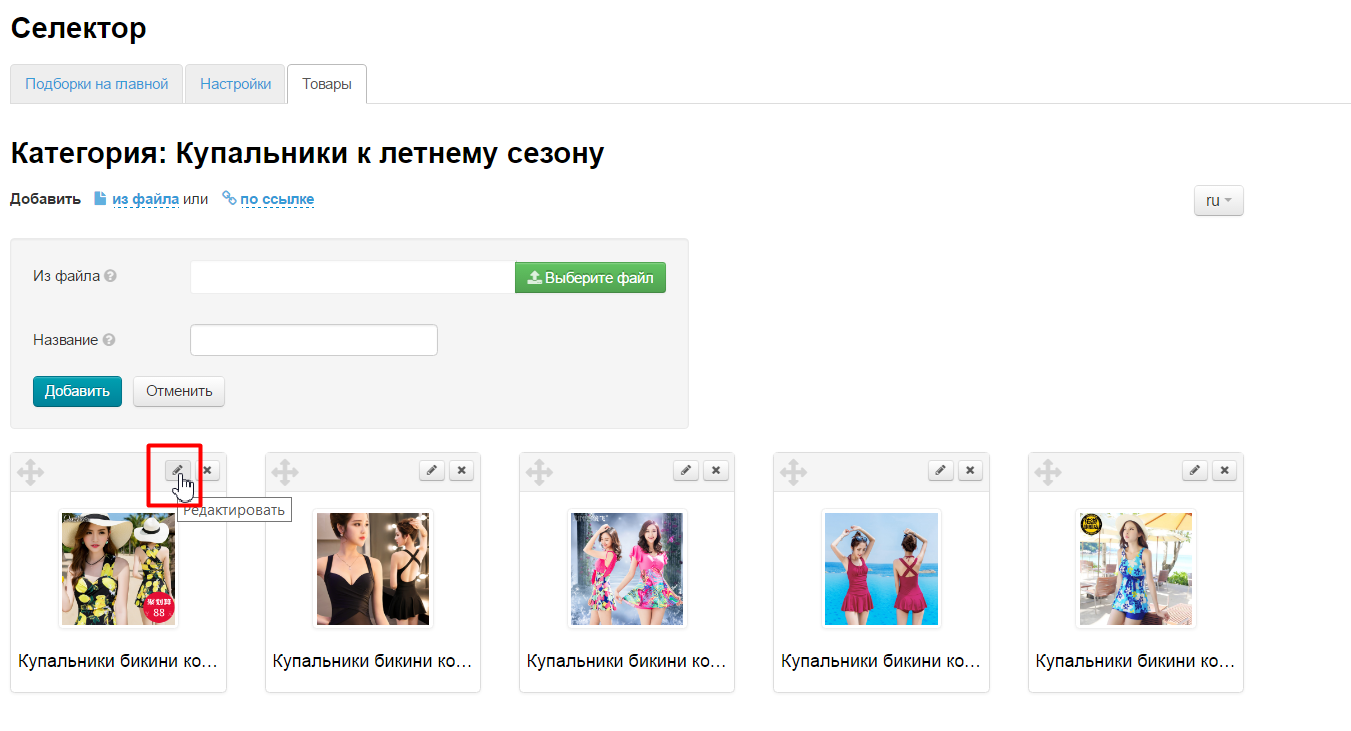
Files will be added into selection after uploading.

It is possible to edit files titles and main image clicking product button with a pencil:
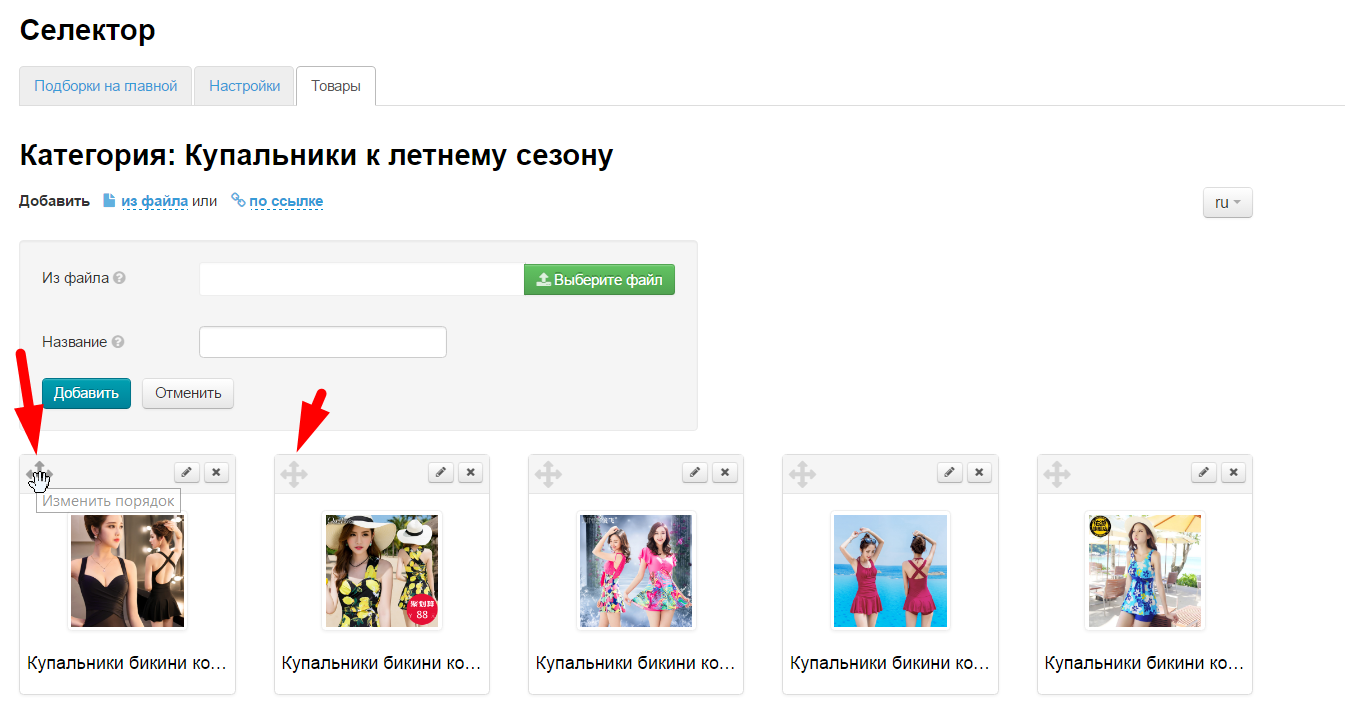
Collection is ready. You can change goods positions now, putting those ones we want to show on the home page to the first place. Drag goods holding transfer icon:
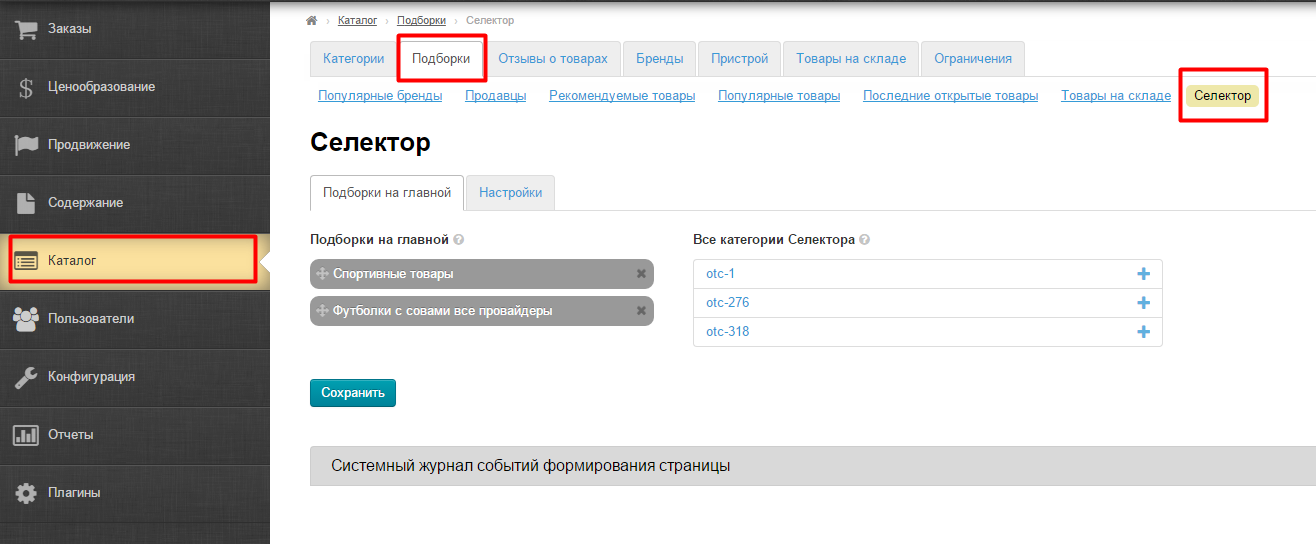
Open "Collections" section to display goods on home page:
Click "Selector":
Find created category on the right:
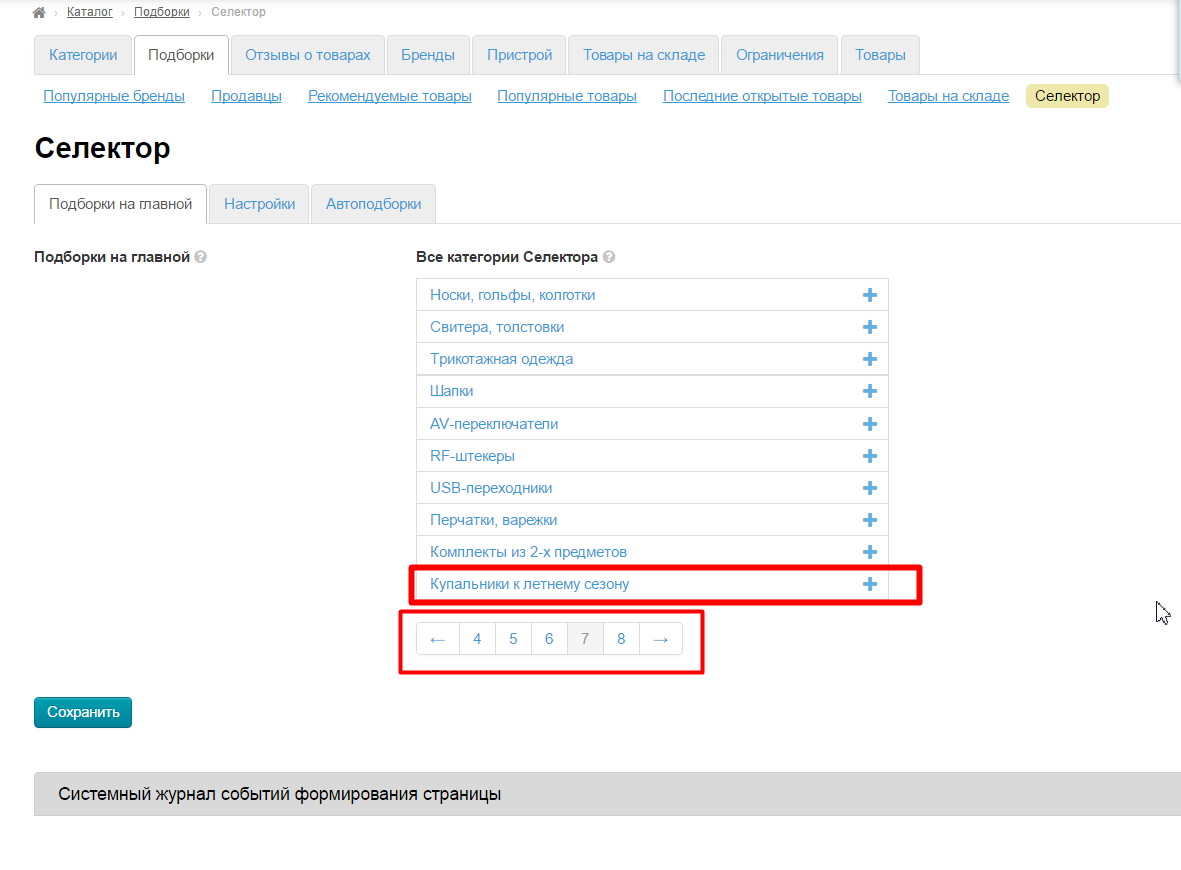
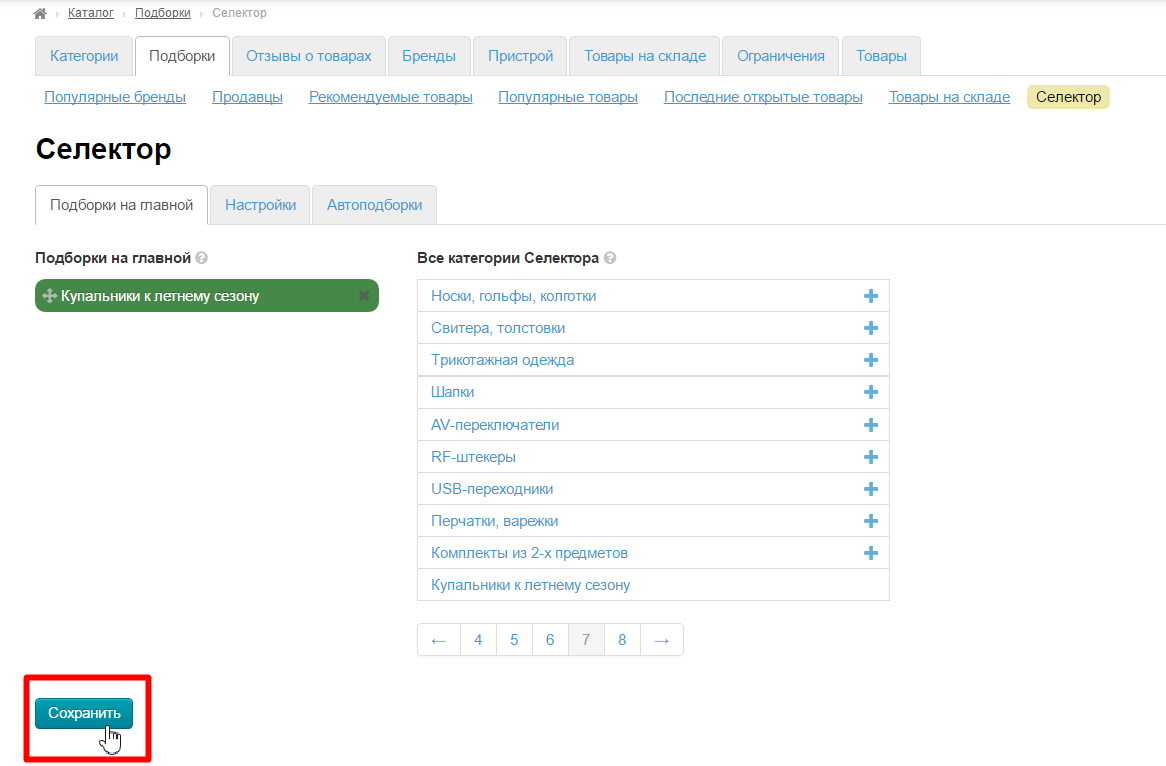
Add it to the column on the left by clicking plus sign:
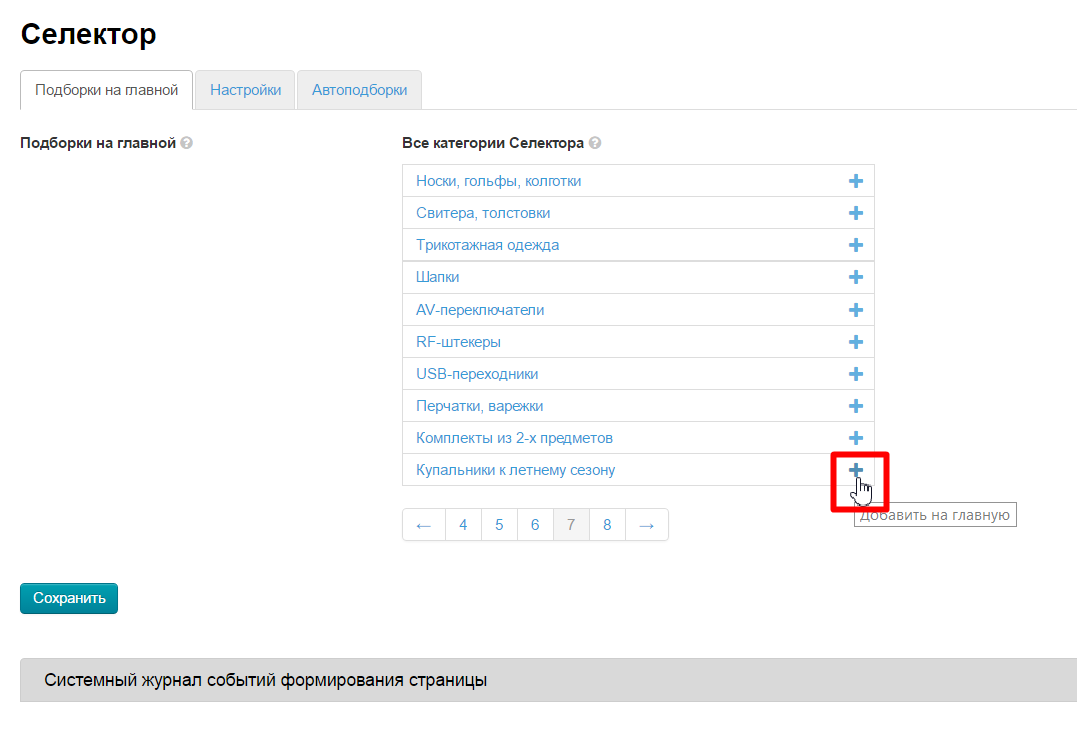
Save.
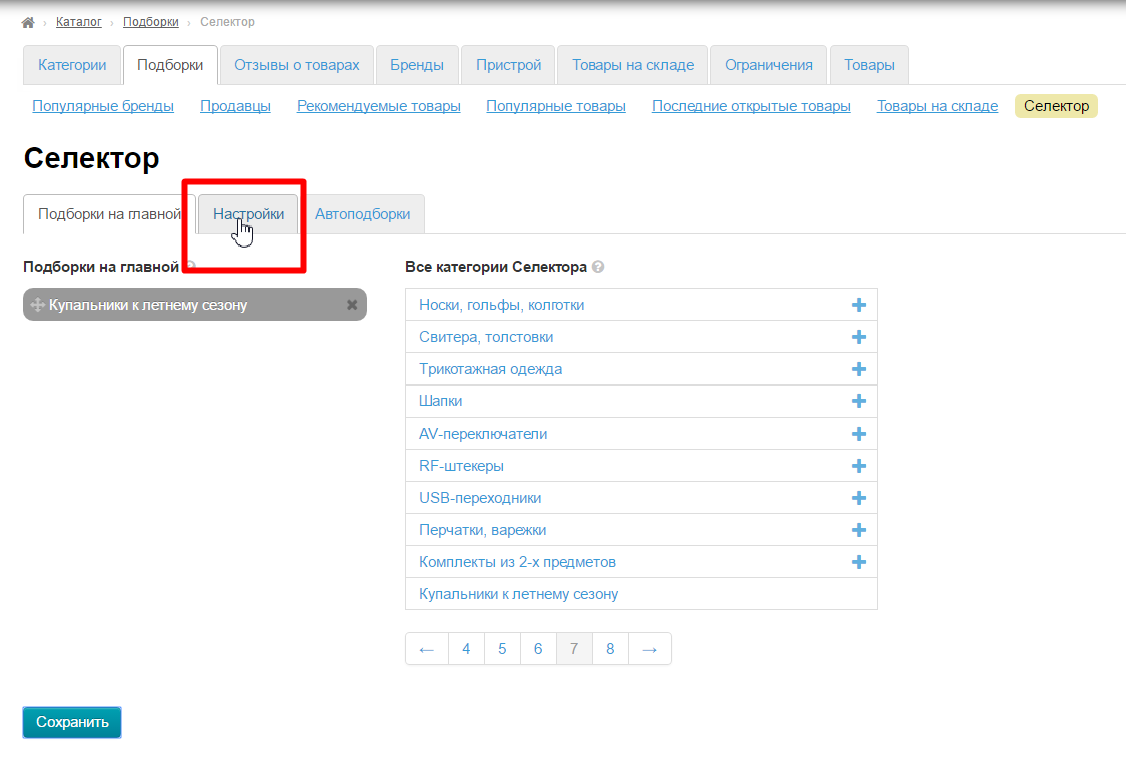
Open "Settings" tab:
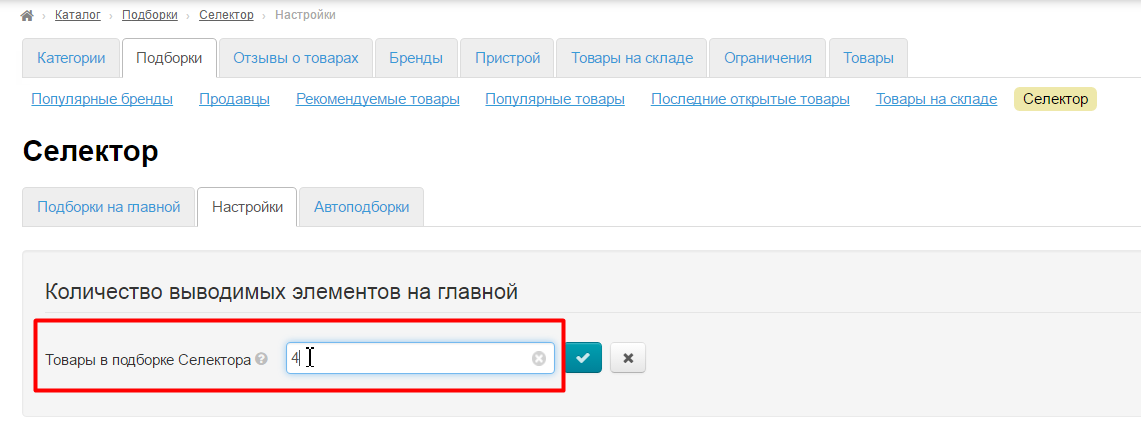
Set number of goods you want to show on home page (or leave 8 by default):
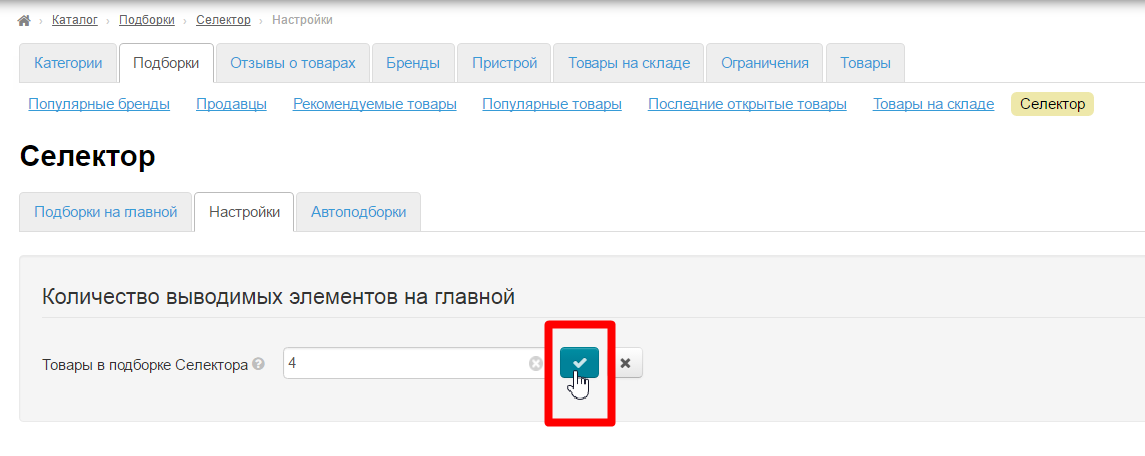
Ready:
"PRODelivery" module along with "Selector" module successfully complements seasonal offers. It is possible to make "free delivery" of goods with its help. Contact OT managers in your Skype chat to purchase this module.
How to add selected goods into existing category of catalog?
You can add selected goods into existing category of catalog if you already have a list of links to goods. You can do it in "Catalog" section:

It is important to remember that it is possible to display either goods selected manually or those "transferred" directly from Taobao.
Find category in catalog where we want to add goods:
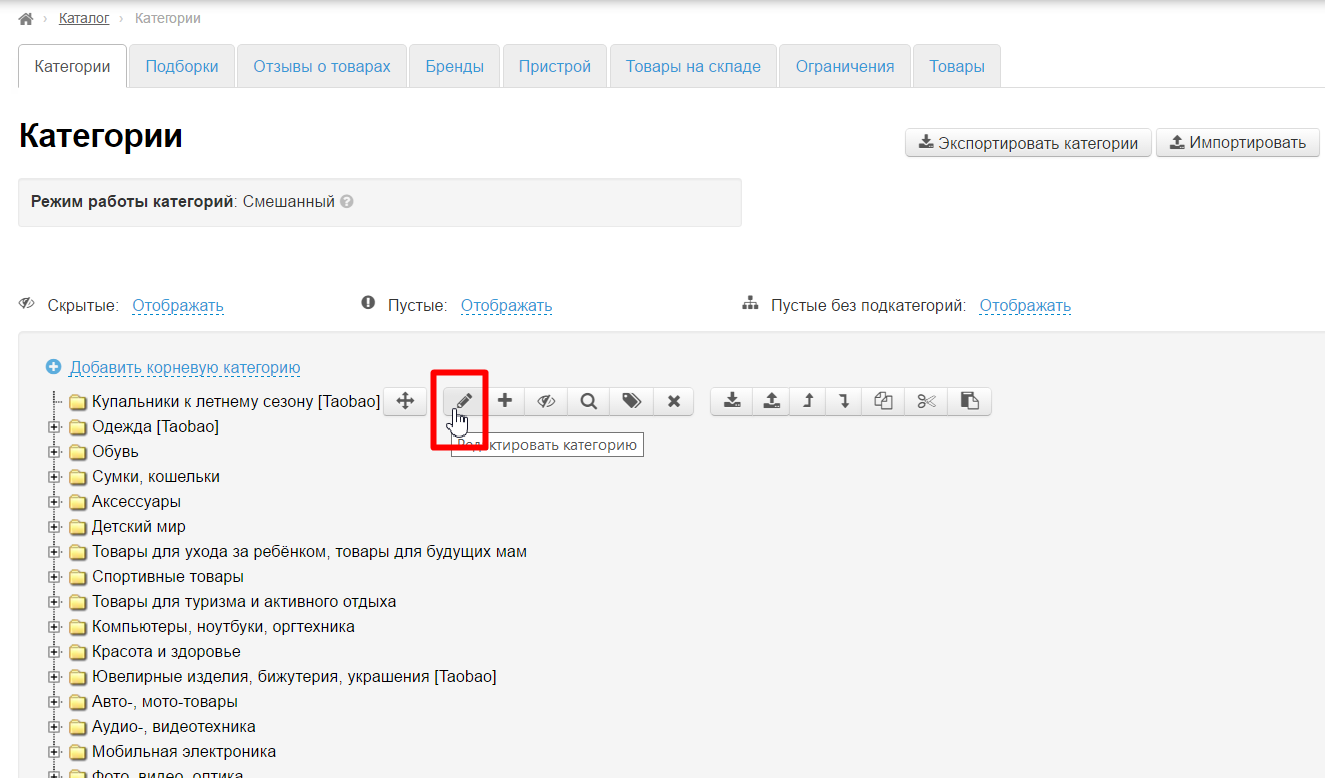
Menu appearson the right when you hover. Look for an icon with a pencil and click:
Check binding type:
Close category if type of binding is virtual. It suits us. Change it to virtual if any other is set:
Click "Save":
Move mouse over created category and select button with a label (or tag) in appeared menu. When we hover over it we get "Items from the Collections Selector" title.
A page to add goods will open. Click "From file" and upload created file:
Write joint title, for example, "Swimsuits bikini collection 2017":
Files will be added into selection after uploading.
It is possible to edit files titles and main image clicking product button with a pencil:
Selection is ready.
Goods titles. Is there any operative way to change them?
It is better to make separate files if you plan several types of goods (for example, swimsuits solid, bikini and swimming trunks). Then you will be able to set a joint name for each group of goods for uploading and save time on renaming.
Choose goods for sale on your site and copy links to these products in browser's address bar:
Create a notepad file on your computer and paste goods links there. Each link should start from new line. Click "Enter" button on a keyboard. You will have something like this:
Save it.
Find category in catalog where it's necessary to add goods with identical titles:
Move mouse over created category and select button with a label (or tag) in appeared menu. When we hover over it we get "Items from the Collections Selector" title.
A page to add goods will open. Click "From file" and upload created file:
Write joint title, for example, "Swimsuits bikini collection 2017":
Files will be added into selection after uploading.
Unfortunately it's impossible to rename all uploaded goods at once but it's possible to delete them, upload again (by one file) and rename them on uploading phase.
How to create section with subcategories and chosen goods?
It's possible to create own category for each group of goods if you plan to have several types of goods (for example, swimsuits solid, bikini and swimming trunks).
Open Catalog > Categories:

Create category:
Call it "Swimsuits for summer season" and make it virtual:

Save.
Point mouse over created category and select button with plus sign clicking it in menu that appears:
Window to add category will open. Choose virtual type of binding:
Parent category will show category that was created first:
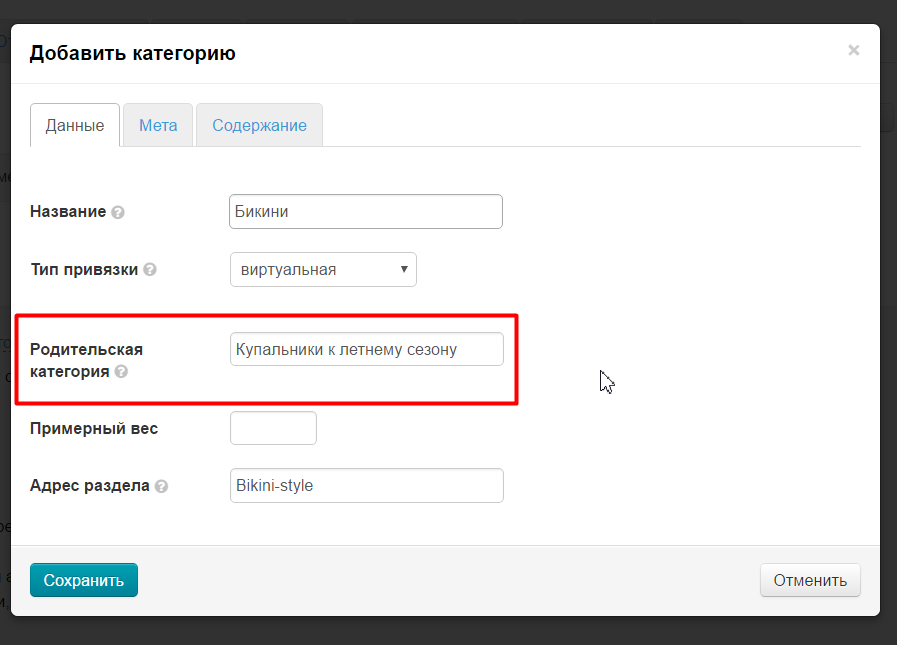
Save category:
It will become subcategory after saving:
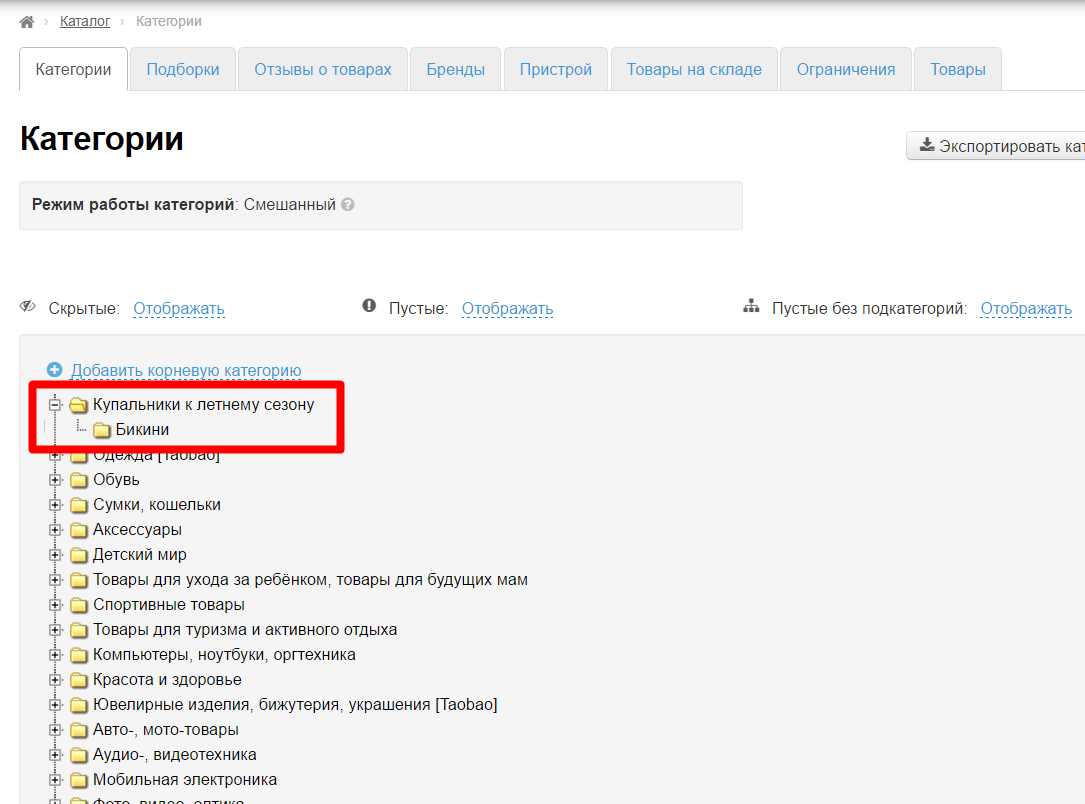
That's how we create a category tree, and then we fill each category separately with goods.
Actions with category (selection) of Selector
Create
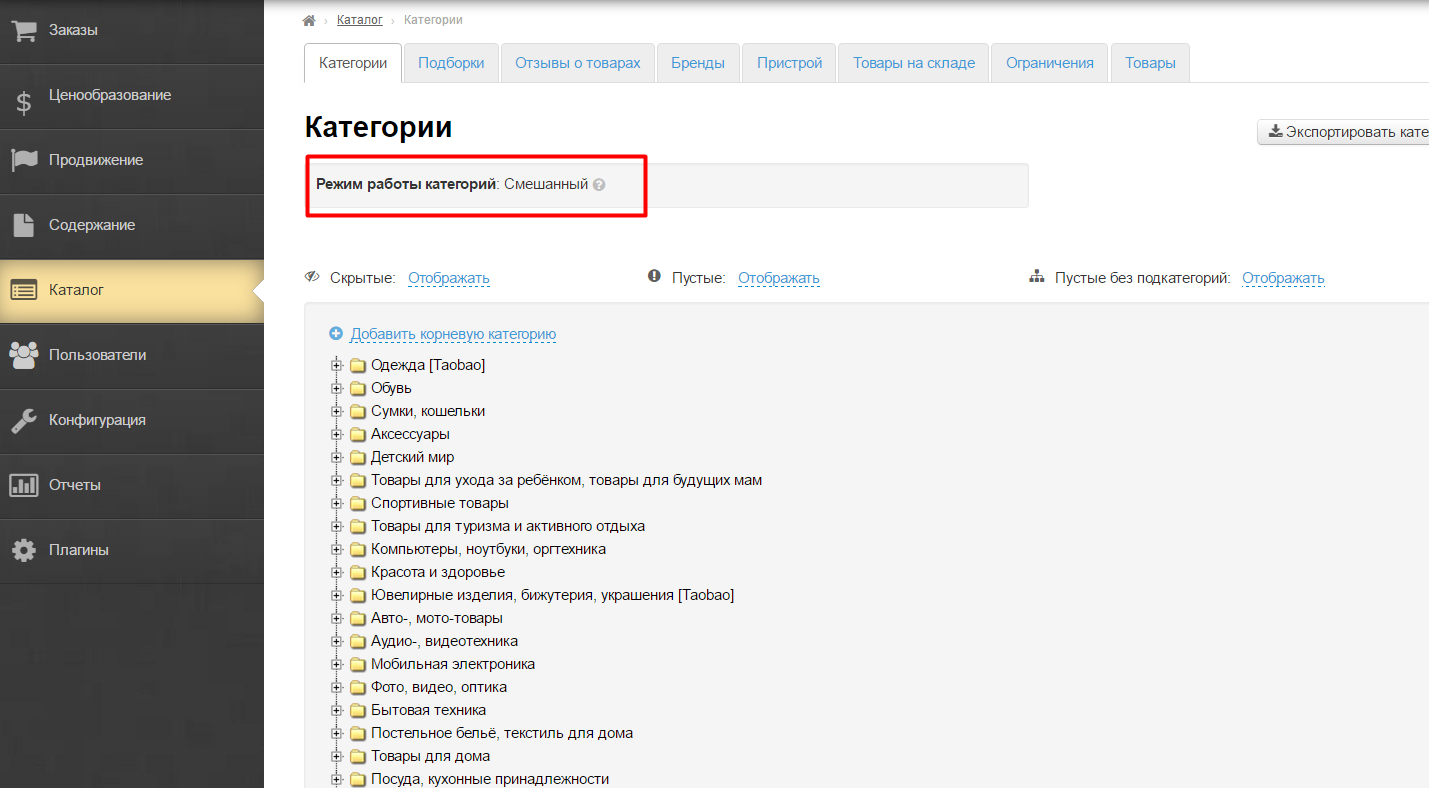
Note!
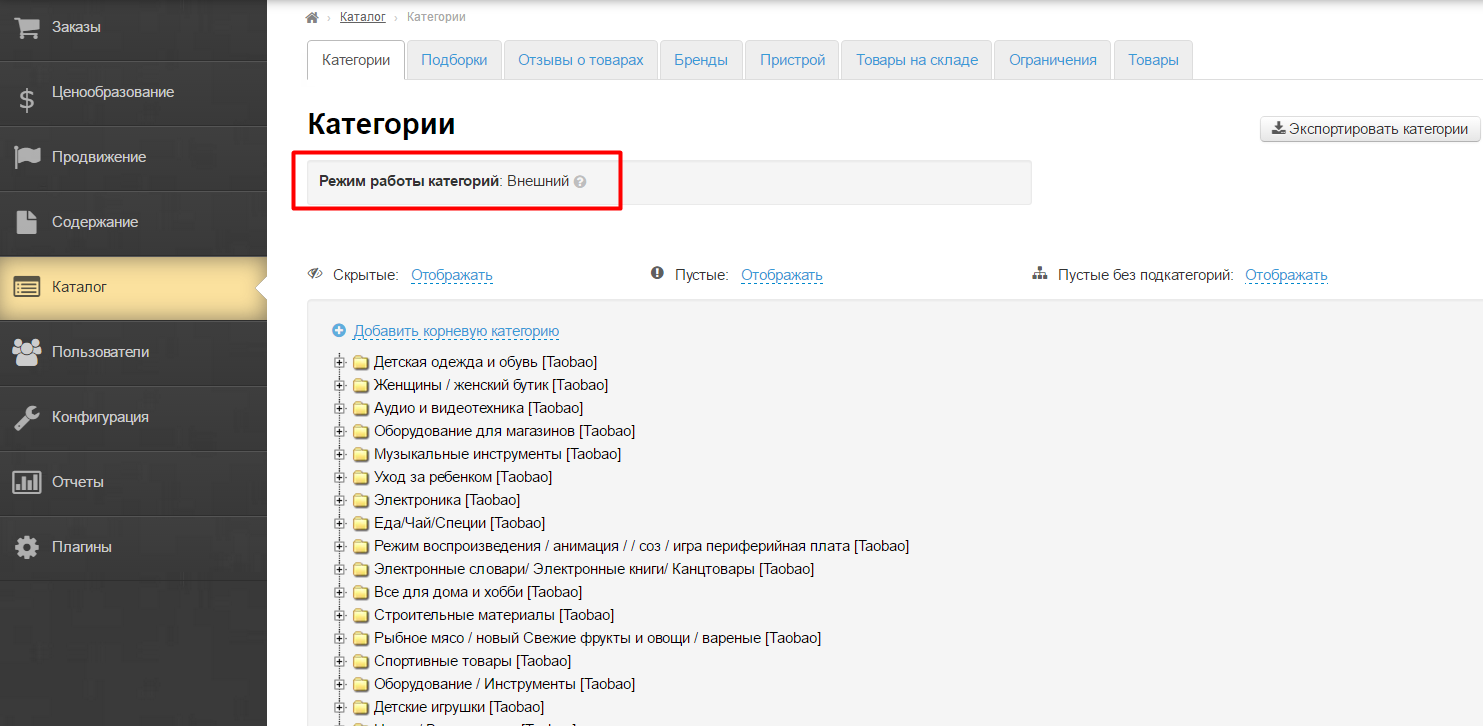
Check categories operation mode before adding Selector category.
Change categories operation mode to "Mixed" if you use "External" standard catalog:
Read how to change categories operation mode in Catalog (Configuration) instruction.
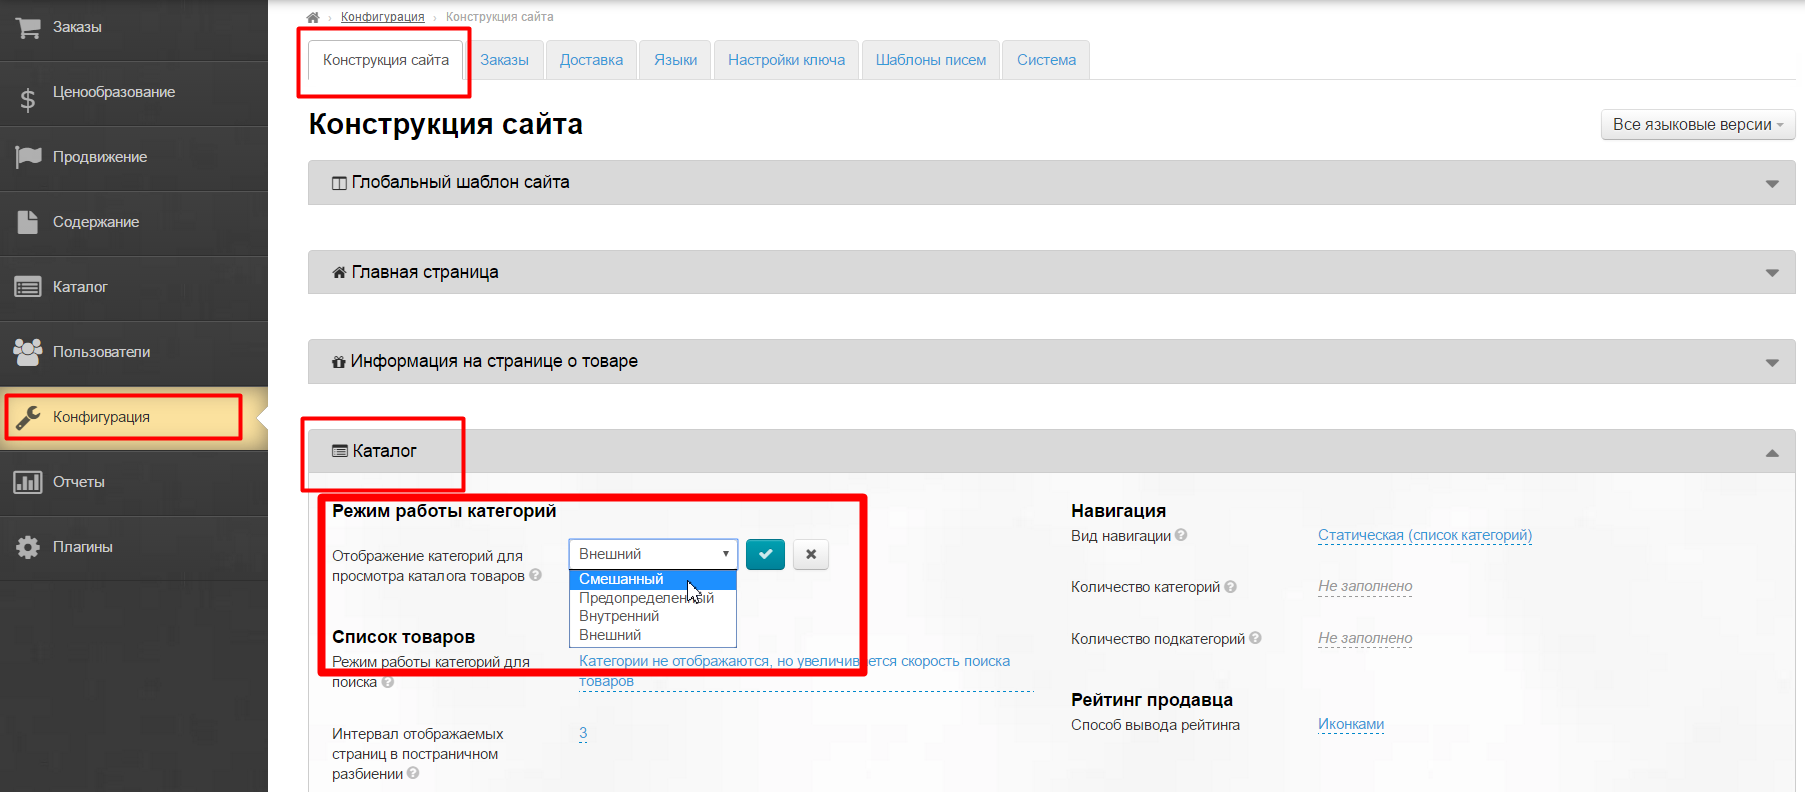
You will see "Mixed" categories operation mode after change:
Edit original Taobao categories to save (it's not necessary in "Internal" mode) if you have them in "Mixed" mode. In this way these categories do not disappear when creating a virtual category.
It is pecularity of "Mixed" catalog. Skip this step if there are no root categories with Taobao in this mode.
Selections can be used in "Mixed" and "Internal" modes.
Enter Catalog > Categories.
Click "Add root category".
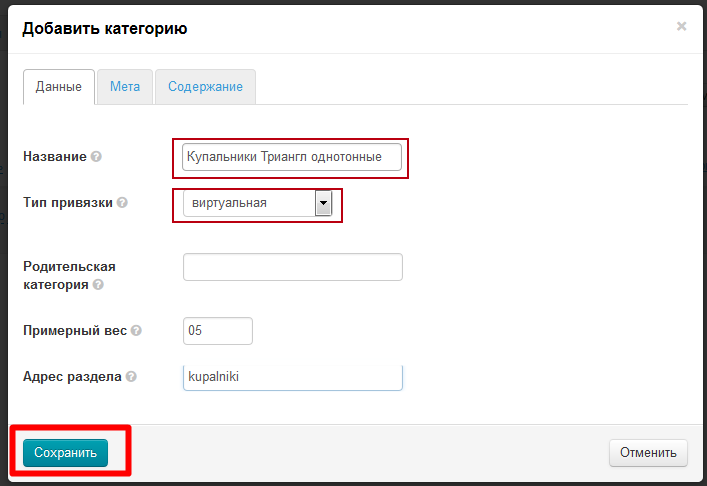
Enter category name and choose virtual type of binding.
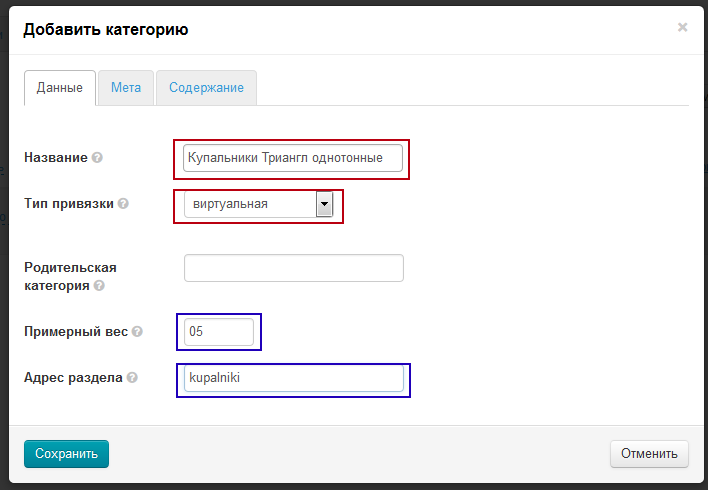
Other parameters are filled in if desired (read instruction Catalog: "Add root category")
Нажмите кнопку Сохранить и Обновите страницу
Также у категорий (подборок) Селектора можно заполнять информацию во вкладках Мета и Содержание, стандартным образом.
Подробнее можно прочитать в разделе «Категории: Добавить корневую категорию»
Удаление
Внимание!
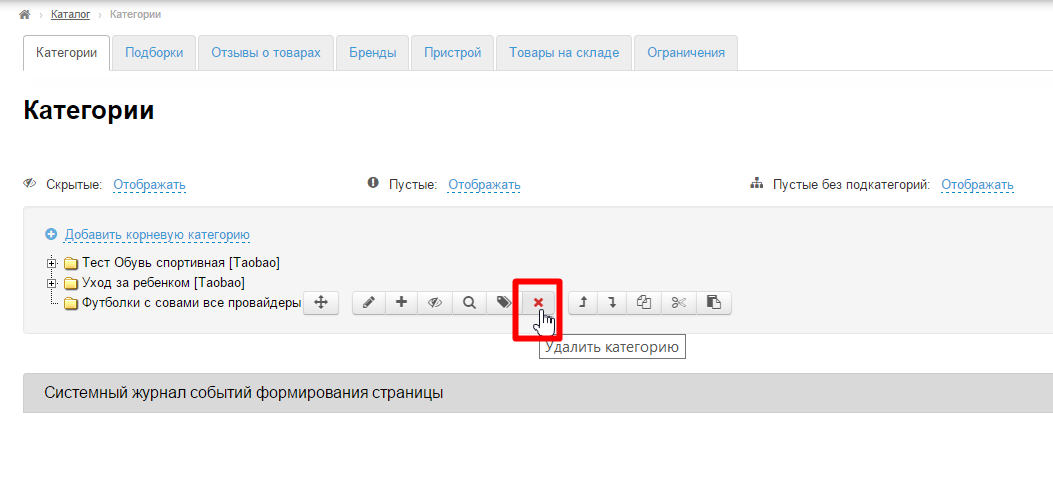
Обратите внимание, при удалении категории (подборки) Селектора все товары в ней также удаляются.
Чтобы удалить категорию (подборку) Селектора, наведите на него курсор мыши и нажмите на крестик:
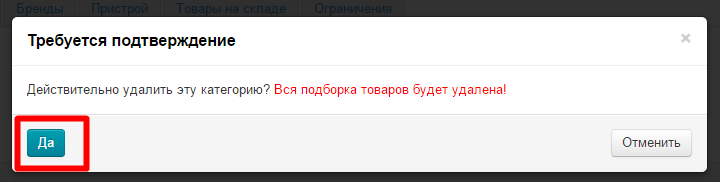
Для полного удаления требуется подтверждение. Если вы уверены, нажимаем кнопку «Да»:
Редактирование
Внимание!
После создания категории (подборки) Селектора нельзя изменять привязку с виртуальной на другую. В этом случае товары не будут отображаться!
Категория (подборка) Селектора редактируется стандартным образом. Подробнее можно прочитать в разделе «Категории: Редактирование»
Работа с товарами
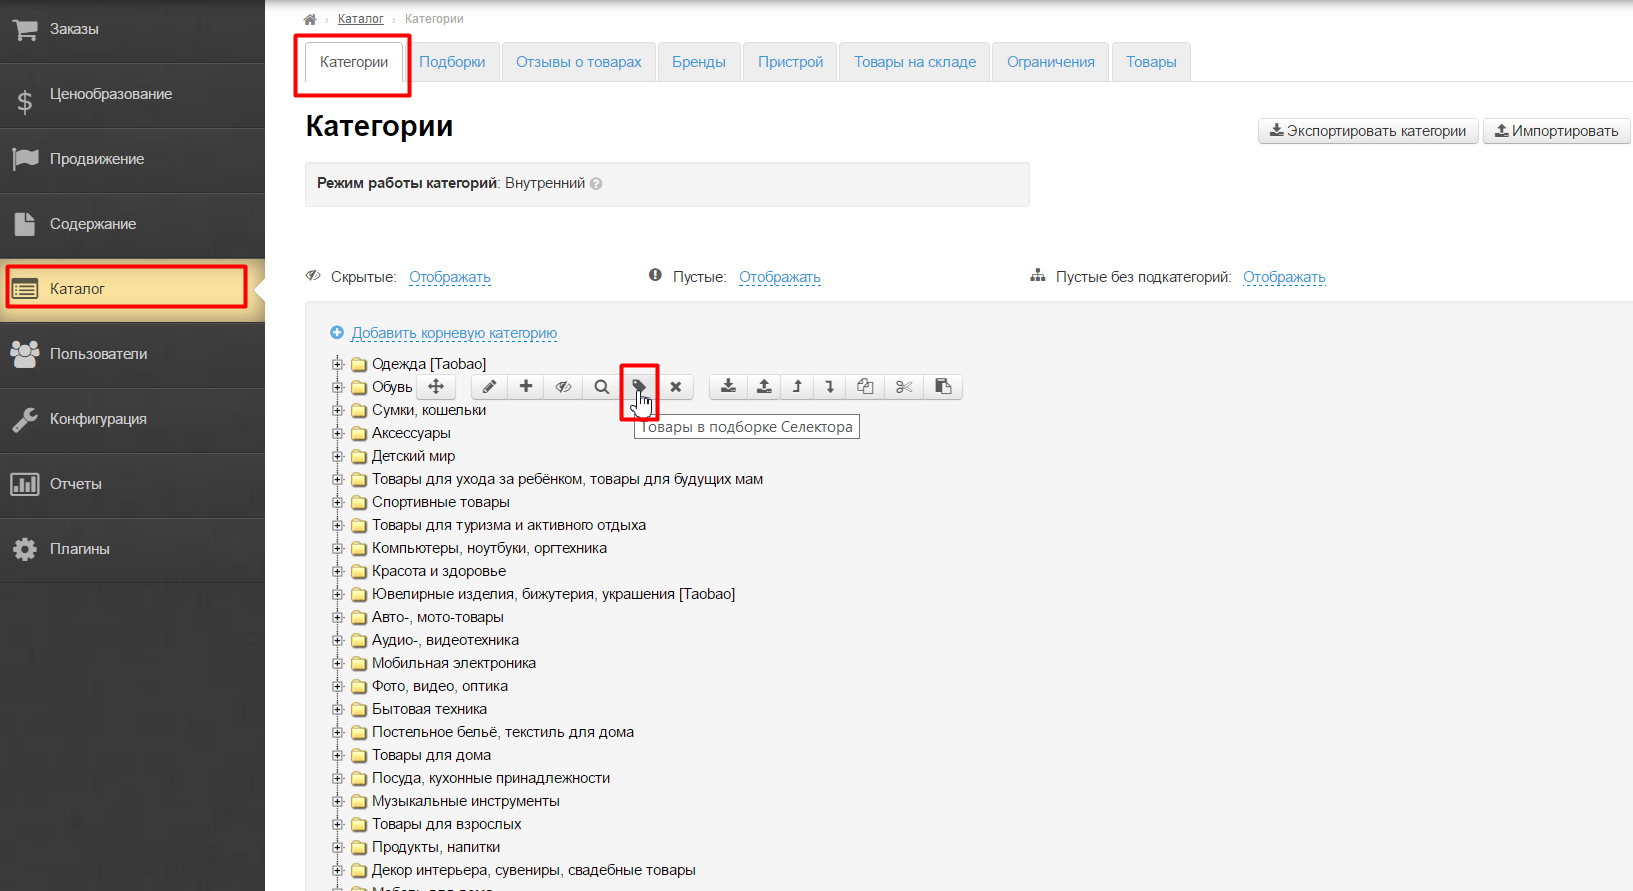
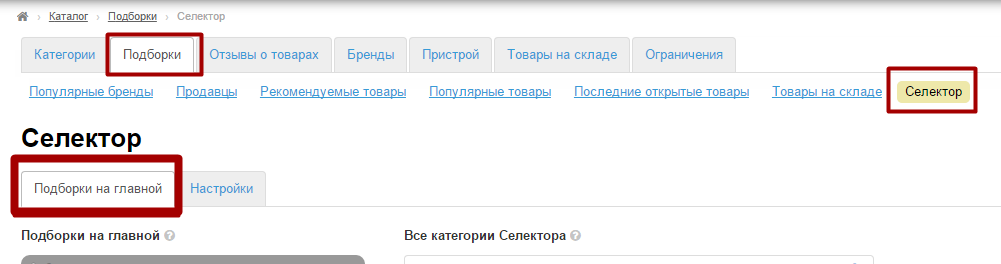
Наведите мышью на категорию. Нажмите на значок «Товары в подборке Селектора».
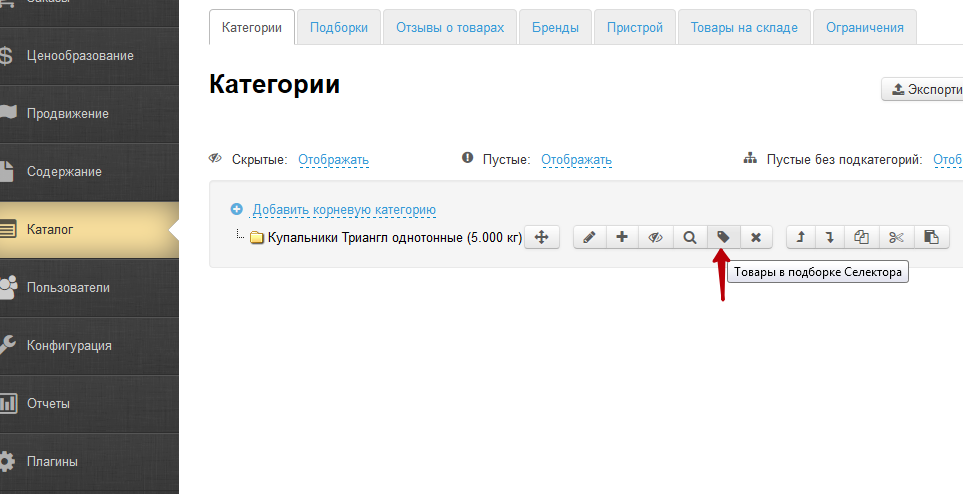
Вы перейдете в раздел Подборки (при этом в браузере откроется новая вкладка).
Добавление
Добавлять товары можно двумя способами — по ссылке и из файла.
Добавление товаров по ссылке
Скопируйте ссылку на нужный товар из адресной строки браузера.

Нажмите «По ссылке» и вставьте ссылку в поле ввода. Нажмите Добавить.
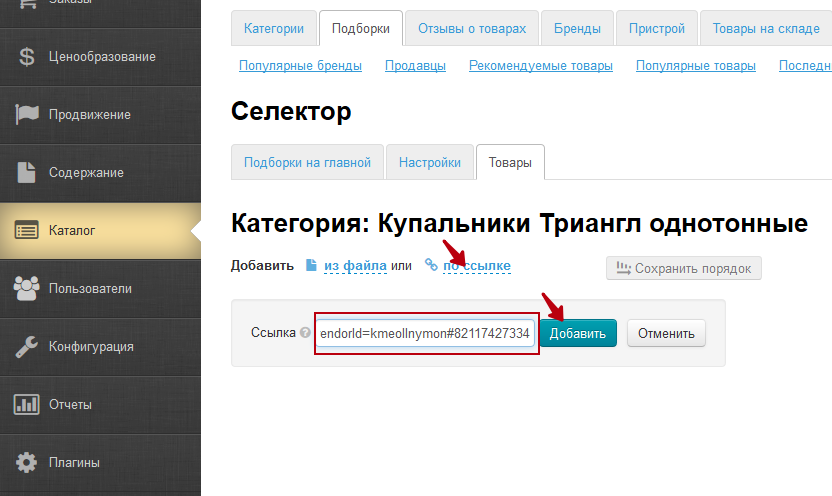
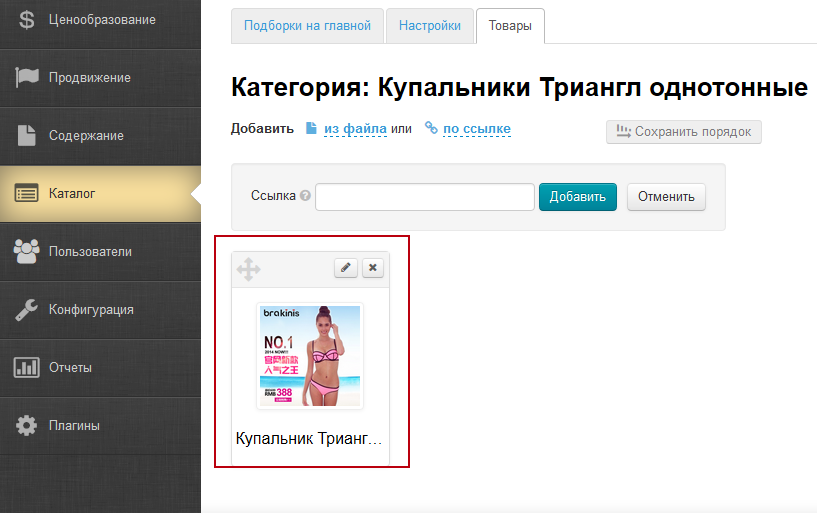
Товар появится внизу.
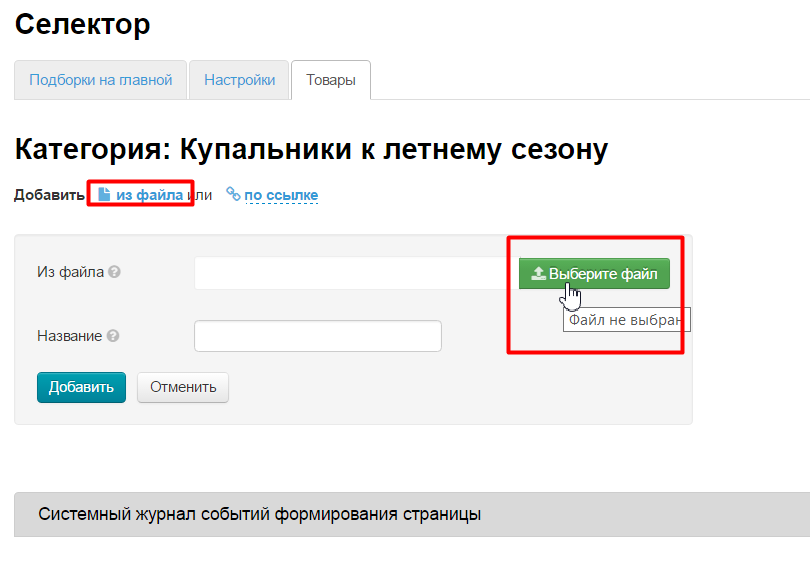
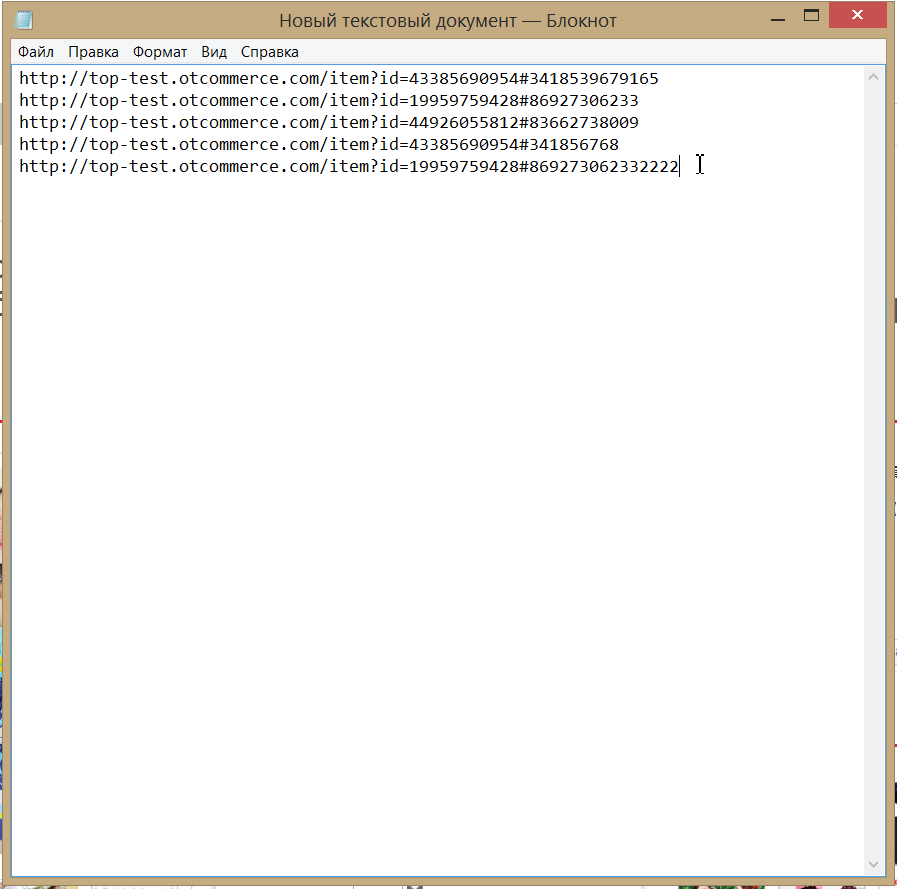
Добавление товаров из файла
Создайте файл формата txt. Скопируйте все ссылки необходимых товаров. Каждая ссылка должна размещаться с отдельной строки.
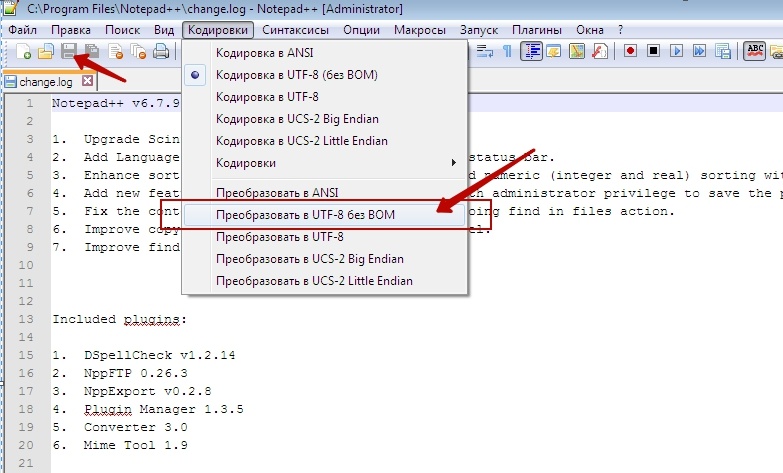
Откройте файл, например, в программе https://notepad-plus-plus.org/download/v6.7.9.html . Нажмите Кодировки — Перекодировать в UTF-8 без BOM.
Сохраните файл.
Нажмите «Из файла», Выберите файл, созданный на шаге выше. Нажимаем кнопку «Добавить».
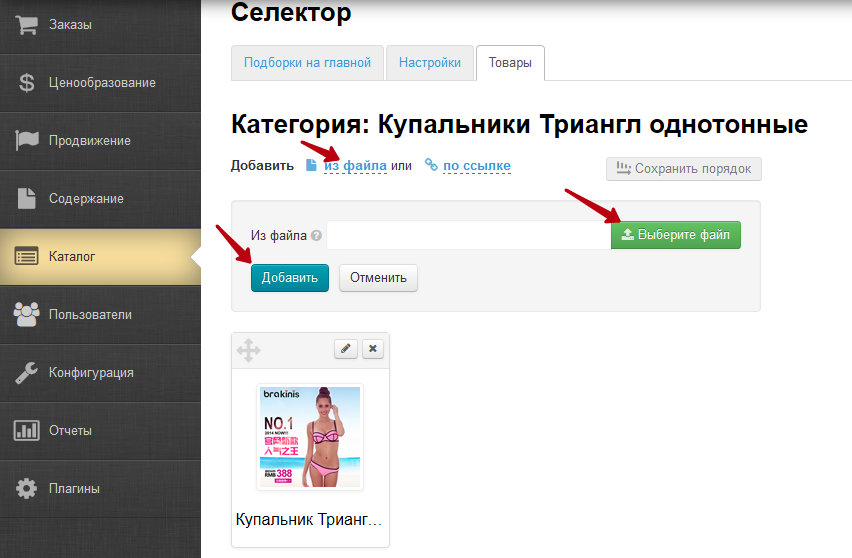
Все товары, ссылки на которые вы добавили, отобразятся внизу, как и при загрузке по одному товару.
Редактирование
Модуль позволяет редактировать название товара, страницу «Фото и описание» и загружать свою основную фотографию. При загрузке своего изображения для товара — оно изменяет только главное, остальные подменять своими картинками нельзя.
Перейти в товары нужной подборки можно через каталог (как было описано выше), либо через Селектор — Подборки на главной — Перейти в редактирование товаров.
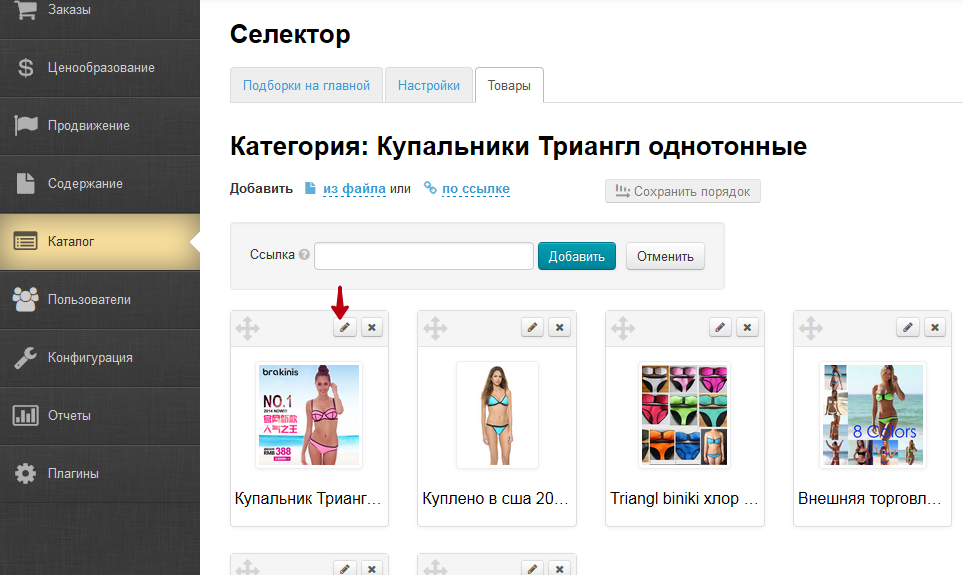
Нажмите на иконку Редактировать.
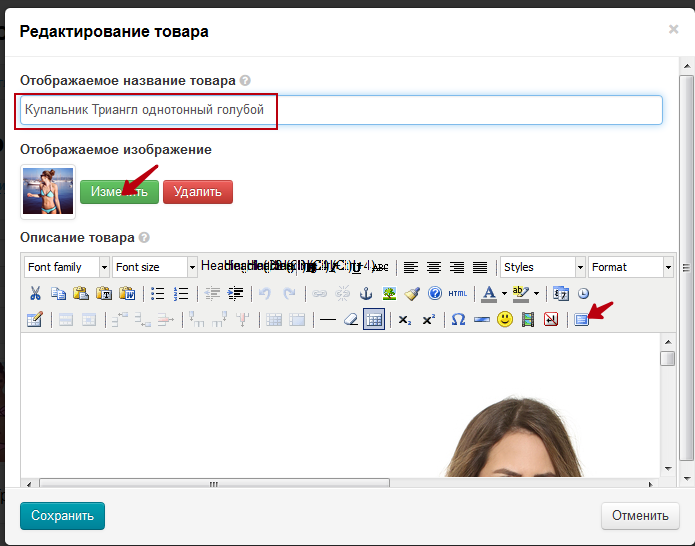
Откроется окно редактирования товара.
Введите название. Добавьте свою фотографию.
Для редактирования описания нажмите на квадратик, чтобы перейти в расширенный режим, где редактор раскроется на весь экран. Работа с редактором стандартна. Нажмите Сохранить.
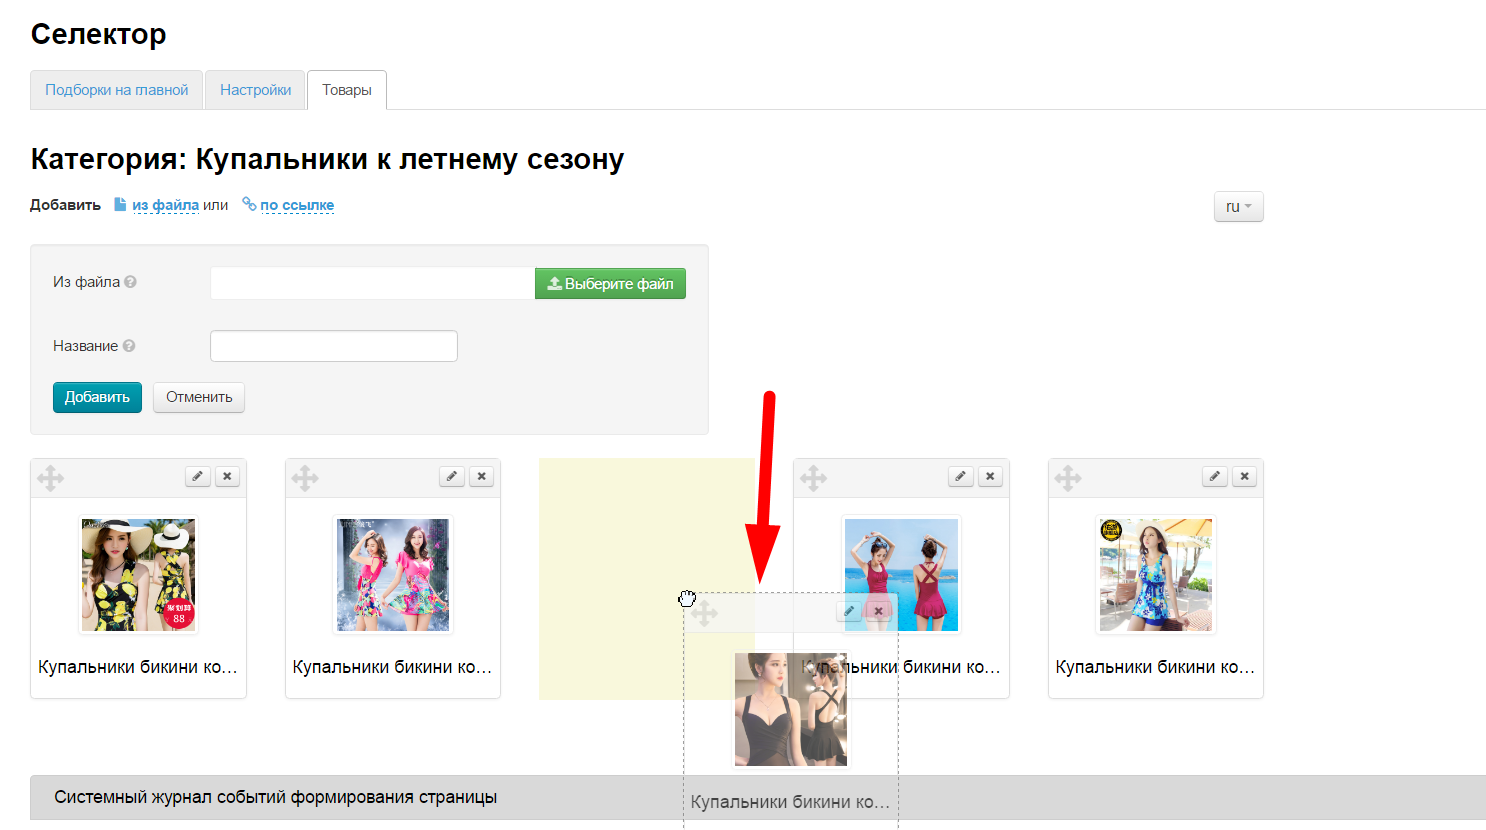
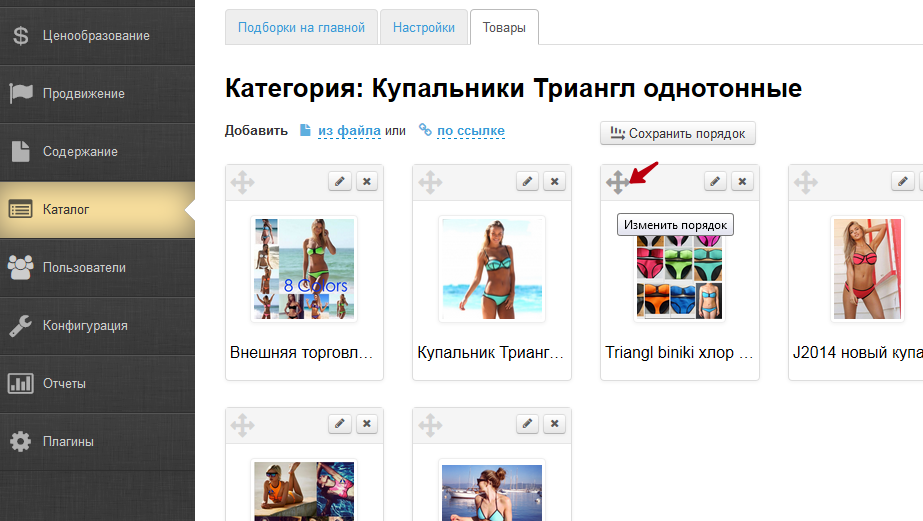
Перемещение
Для перемещения товара захватите мышкой специальный указатель, передвиньте в нужном направлении, убедитесь, что на будущем месте товара появилась пунктирная обводка, отпустите мышь. Нажмите кнопку Сохранить порядок.

Удаление
Для удаления товара нажмите на крестик.
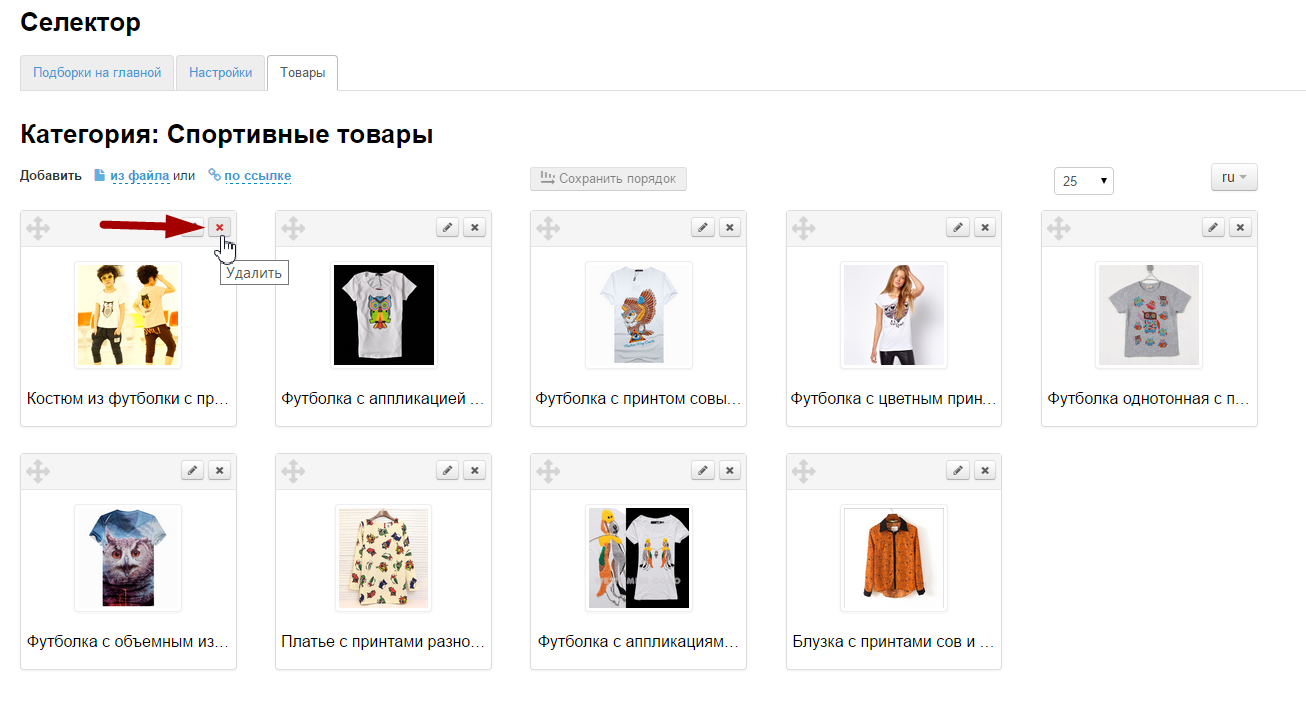
После нажатия на кнопку удаления, требуется подтверждение действий. Если вы действительно хотите удалить товар из подборки, нажмите кнопку Да:
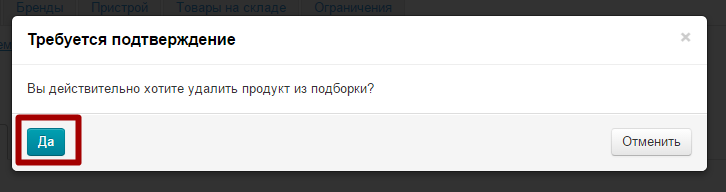
После нажатия на кнопку, товар удалится из подборки и перестанет отображаться на главной странице.