| Оглавление |
|---|
This is where the content hierarchy of your website is created. The content hierarchy is defined as sections with subsections which are web pages. Here one can also enter the content of web pages.
Navigate to Content > Pages > Sections in admin panel.

Description
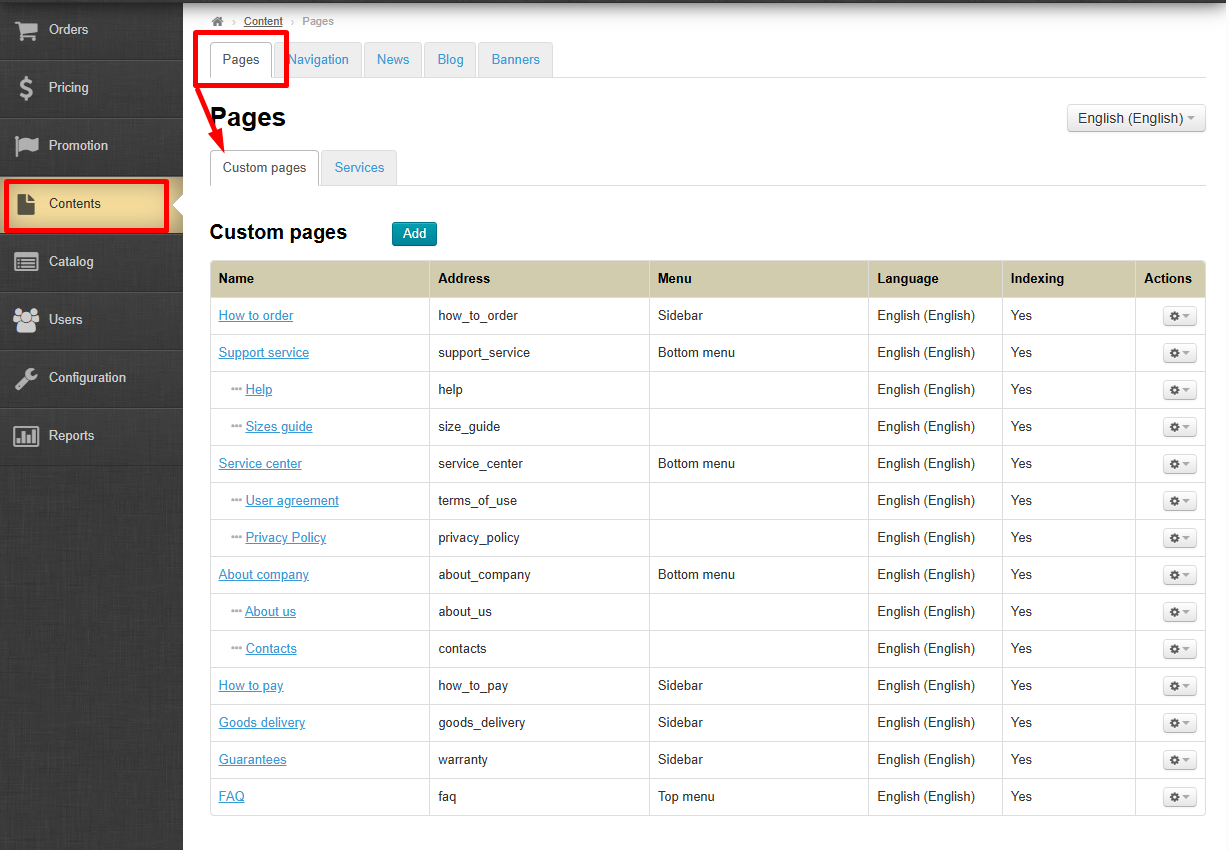
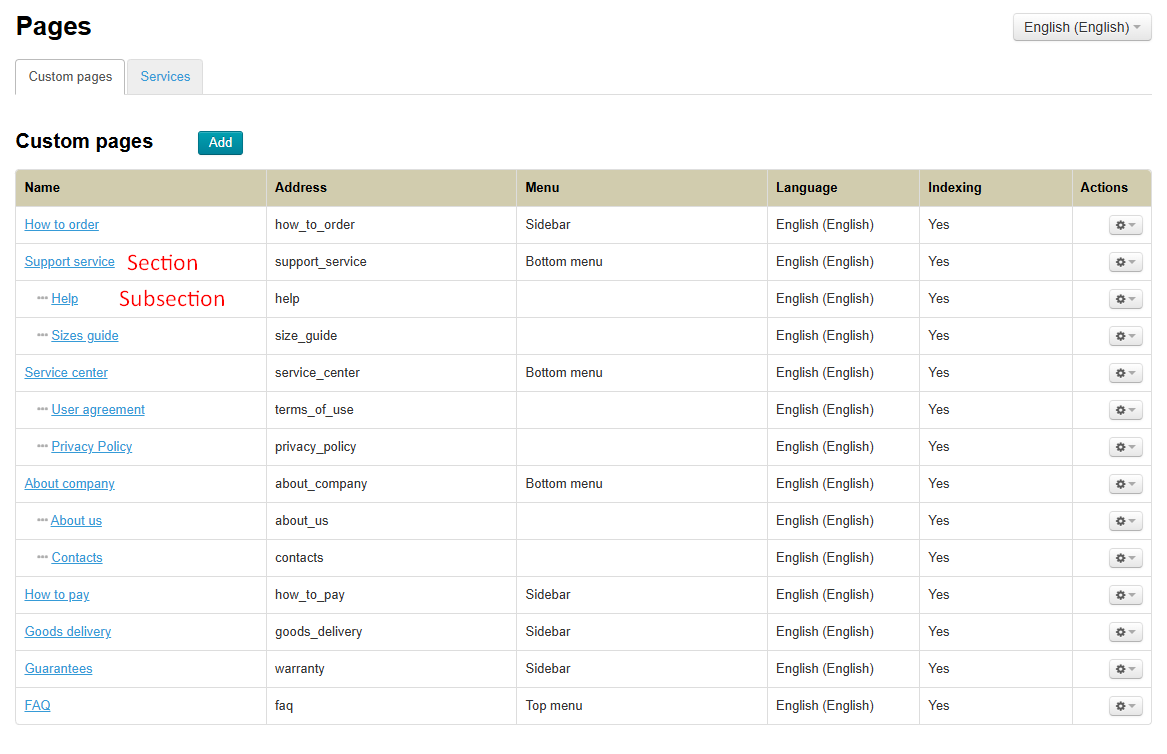
Custom pages section is represented as a hierarchy of sections and subsections. This hierarchy is implemented in the form of the table consisting of the following columns:
The title (of sections and their subsections)
The address (the names of sections or subsections written in Latin script. The address is displayed in an address bar.)
A Menu (the menu type this section is assigned to)
A Language (i.e. language version of the section and its subsections)
Actions (what one can do with the section and its subsections)

Each section or subsection is a page. The only difference is that the ones (subsections) are subordinates of others (sections). Thus, for clarity sake, we call these pages “sections” and “subsections”.
Menus on website
Sections and subsections fall into three different menus.
...
Menu Location
...
The way it looks like On website
...
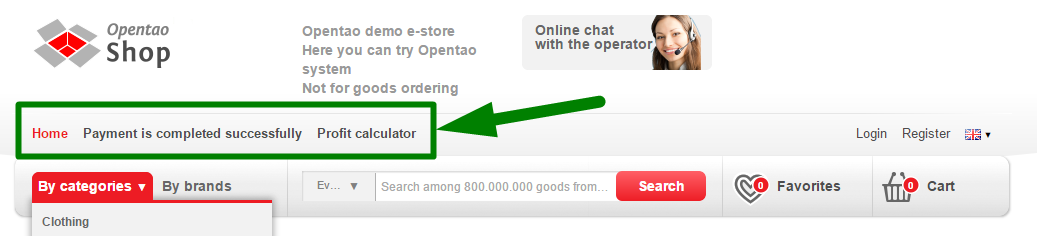
Top
...
...
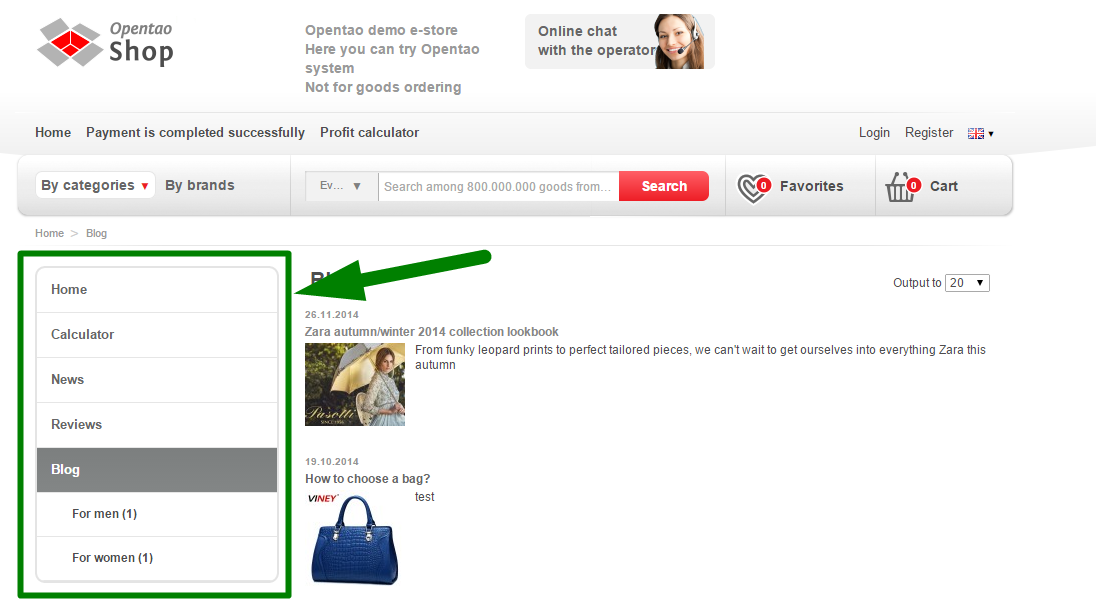
Sidebar
(The menu is visible when a section or subsection created precisely in Content is selected by a user)
...
...
Bottom
...

...
Text pages for the website are added here: contacts, policies, terms and conditions, and more.
Location in admin panel: Contents → Pages → Custom pages.
Language Version ("Multilanguage" module)
| Информация |
|---|
"Multilanguage" Module is included in “Top” and “Standard” OT Box versions. If you are using “Basic” version of OT Box, please contact your manager to purchase this module. |
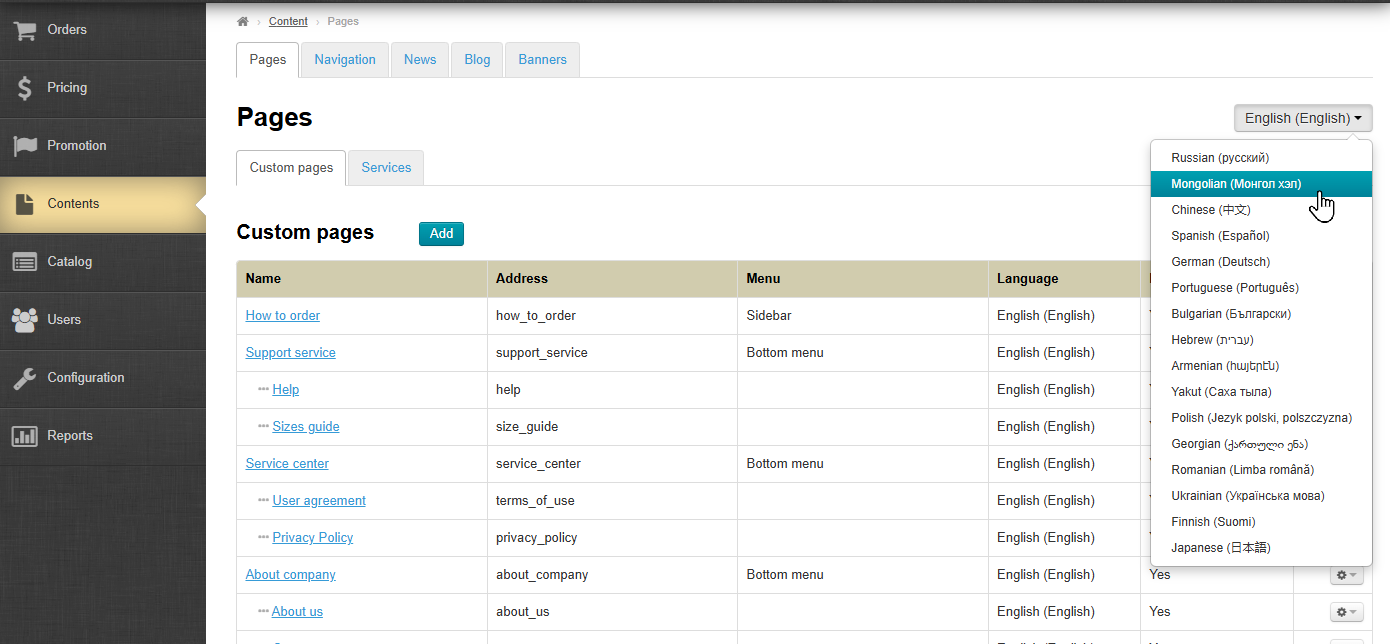
You can add and configure text pages separately for each language version of your website.
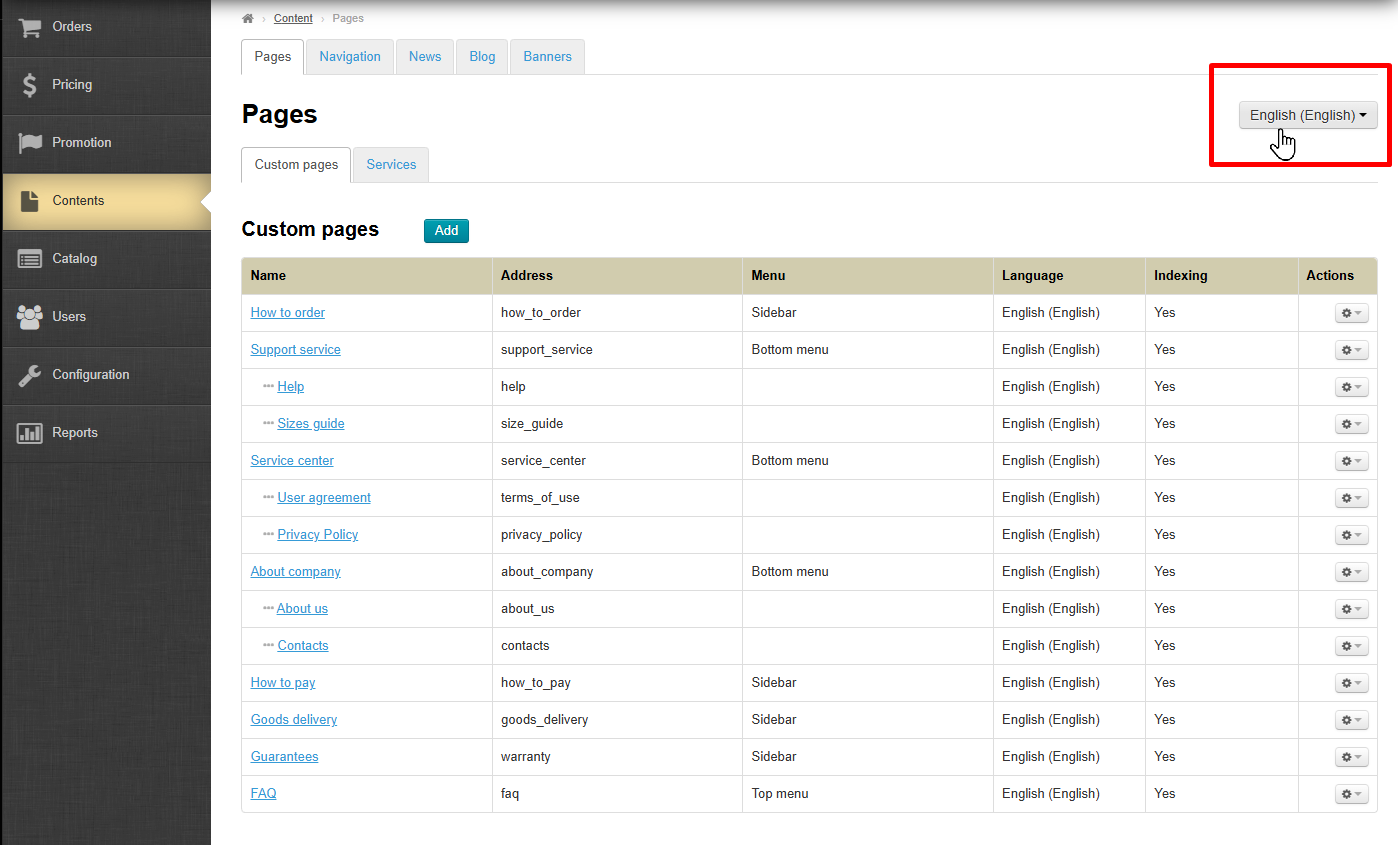
In the top-right corner of each section page, there is a language selector. Click to choose necessary language.
How It Looks on the Website
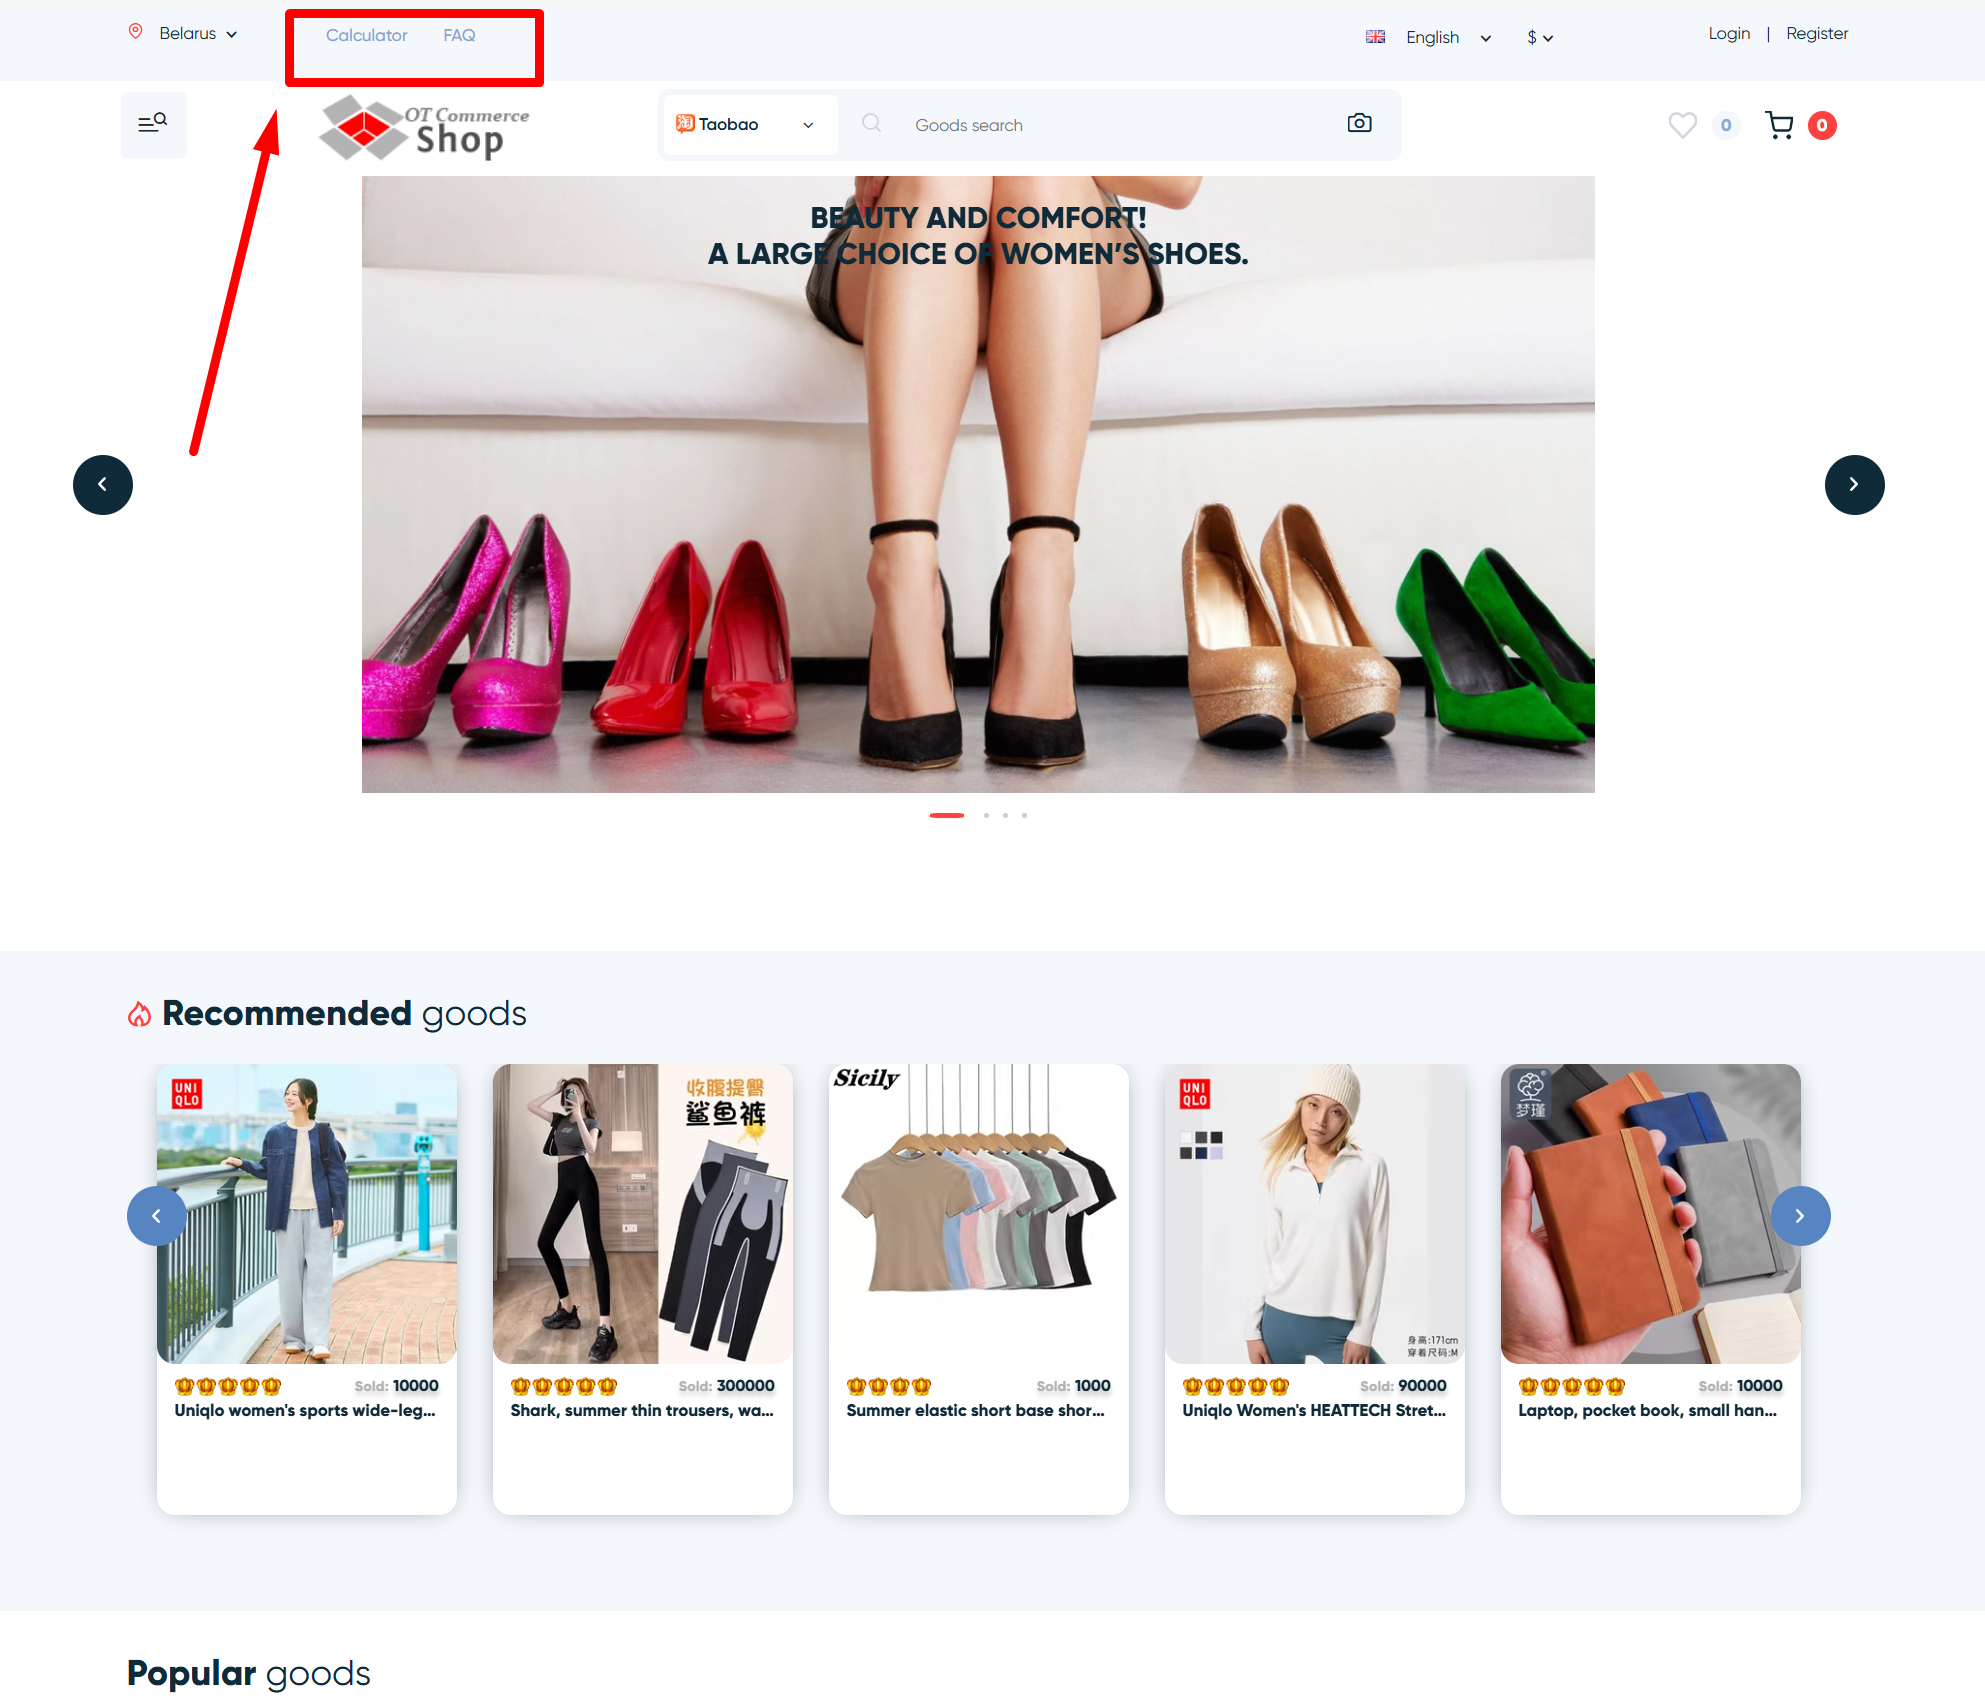
Website Header: Everything for Order
We recommend placing the most popular and essential pages here - those that help customers make a decision while choosing products.
For example:
- delivery cost calculator
- size chart
- delivery and payment terms, etc.
These pages are used frequently by your customers and directly influence whether they proceed with a purchase.
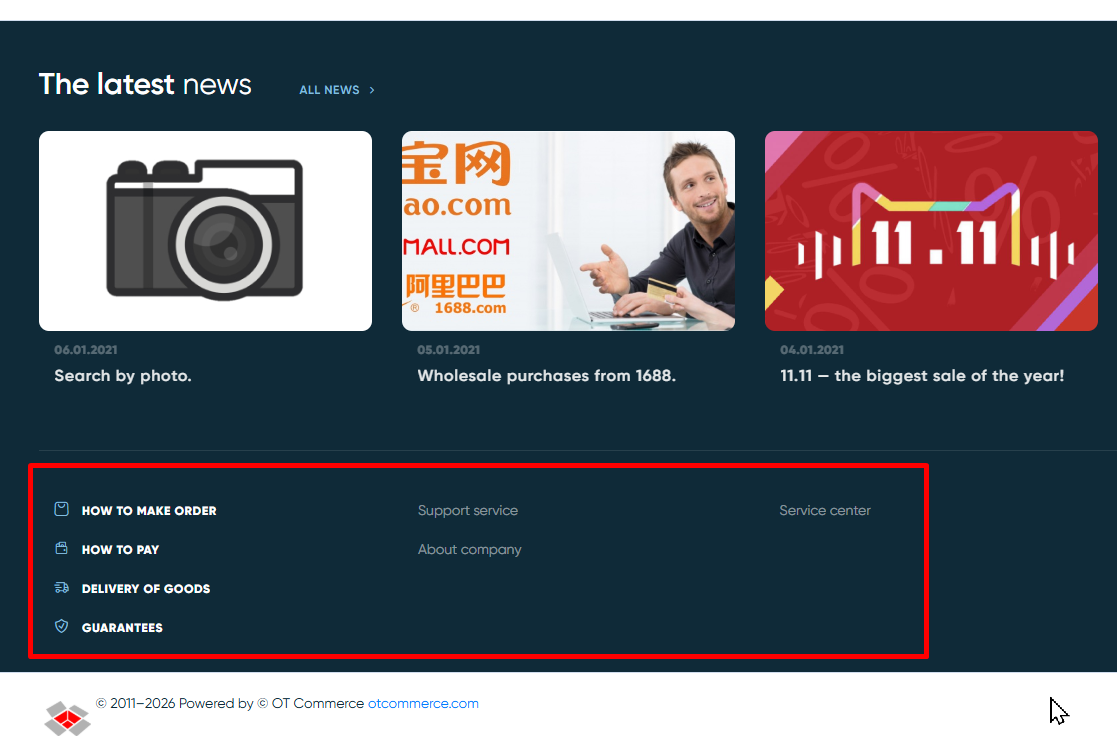
Website Footer: All Information About Terms and Policies
This section includes:
- site policies
- guarantees
- contact information
- articles about placing orders, etc.
These pages are not critical during the product selection stage (unlike, for example, a size chart). However, once a customer is interested in your products, they will look for additional information in the footer.
Therefore, all important information you want to communicate to your customers should be added here.
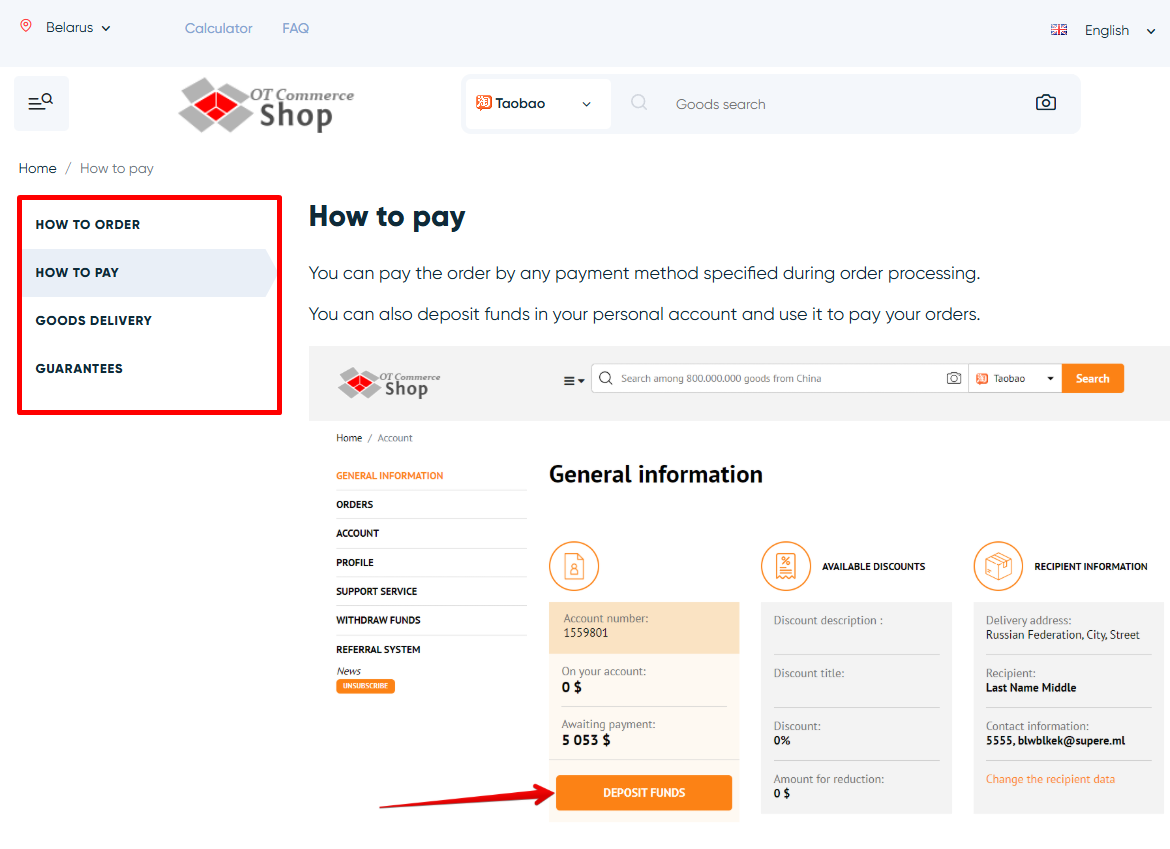
Sidebar: Subsections of Text Pages
The sidebar is visible only when the customer is viewing text pages.
Add pages
Sections and Subsections
Pages that can be added are organized into sections and subsections. This means you can either add a single page or create a page with subsections by adding multiple pages inside it.
The maximum nesting depth is 2. This means that a page can have subsections, but you cannot add another subsection to a subsection.
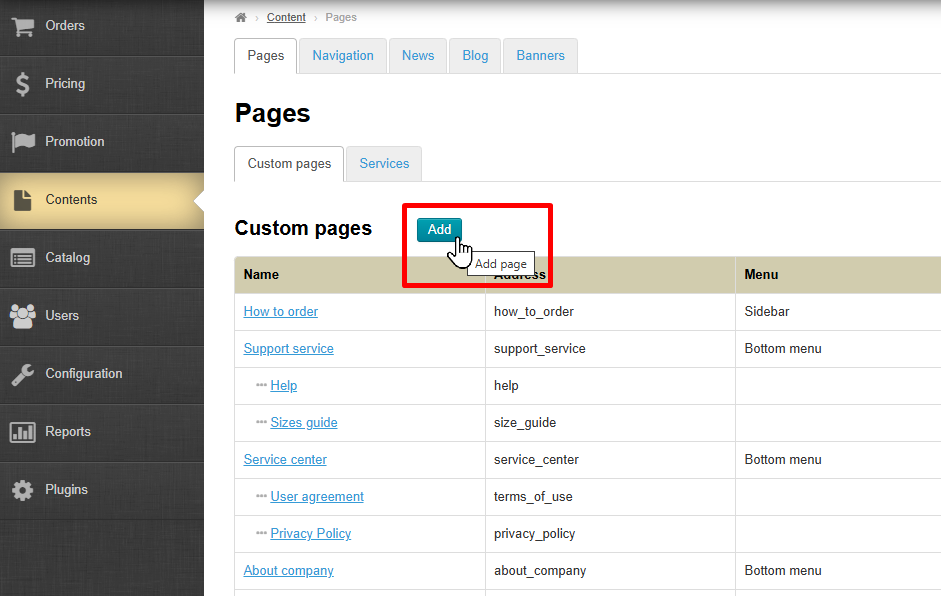
Add
Click "Add" button to add a page.
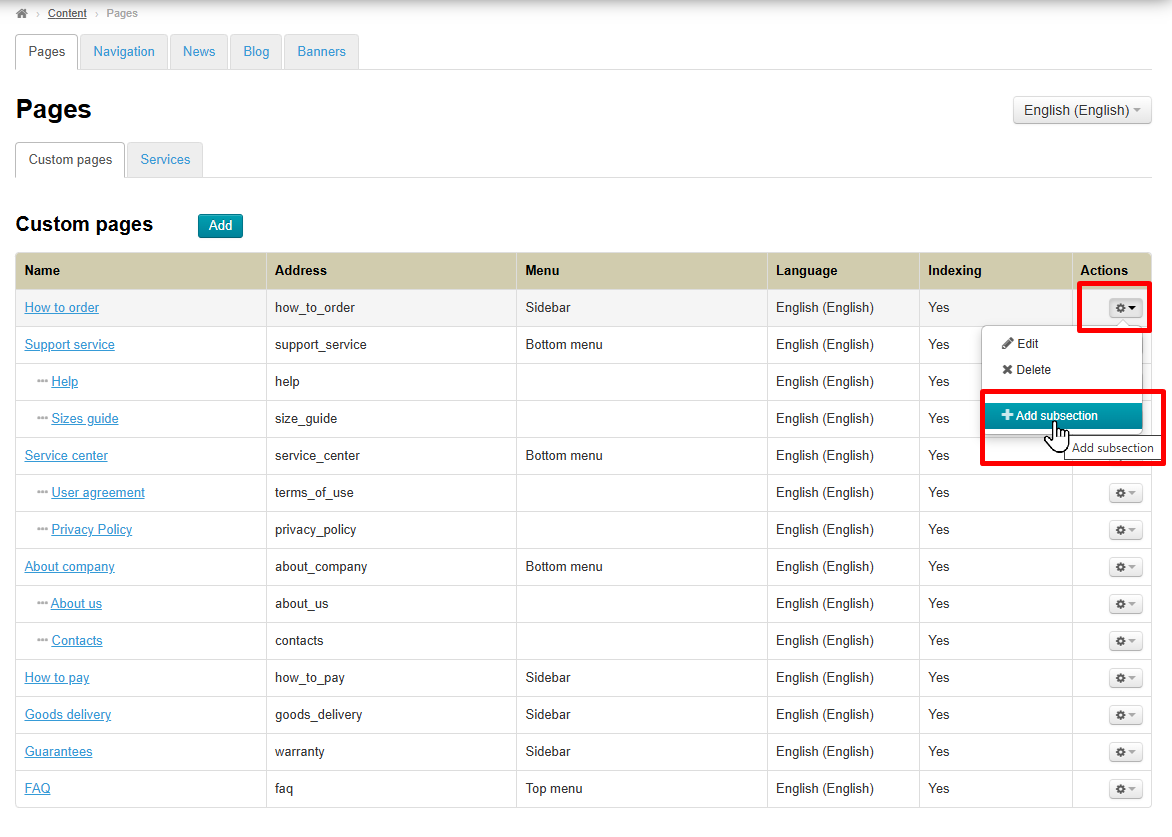
To add a subsection, click the gear icon in the “Actions” column and select “Add subsection”.
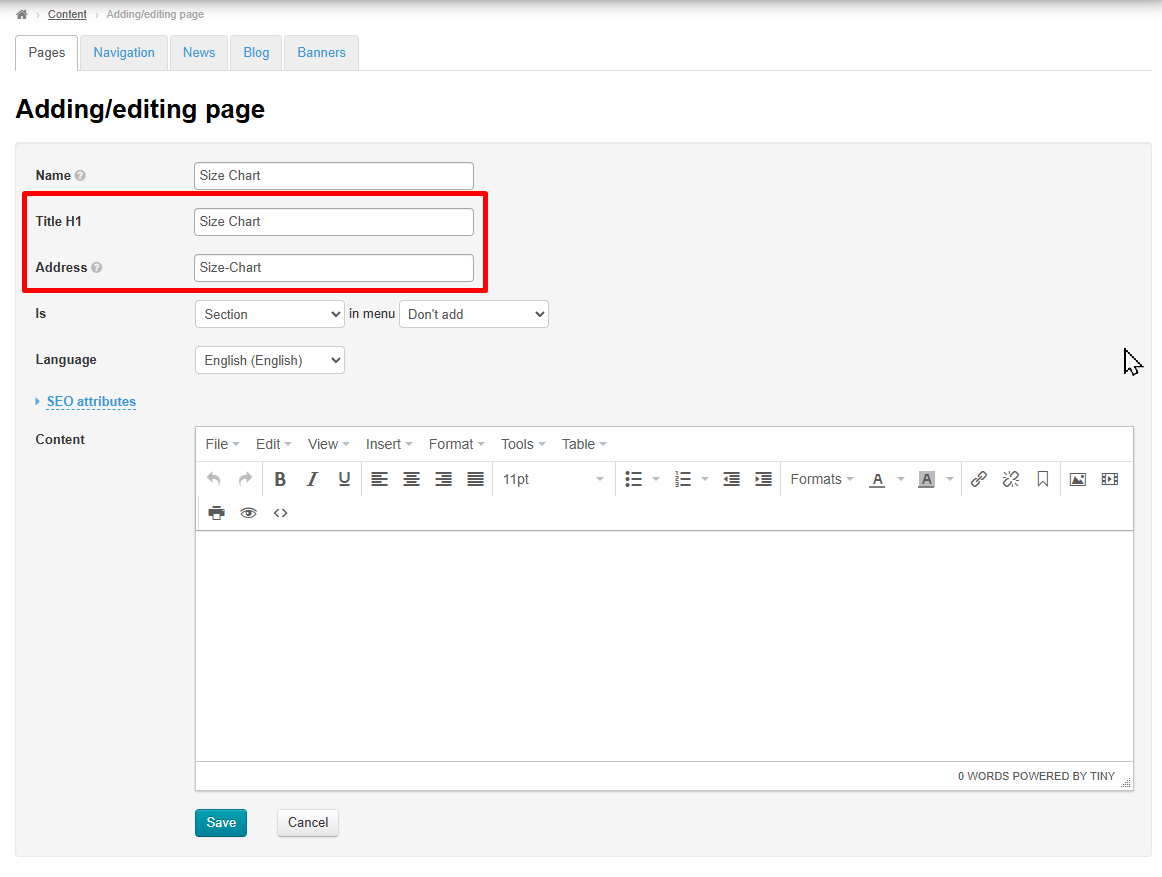
Enter the page title.
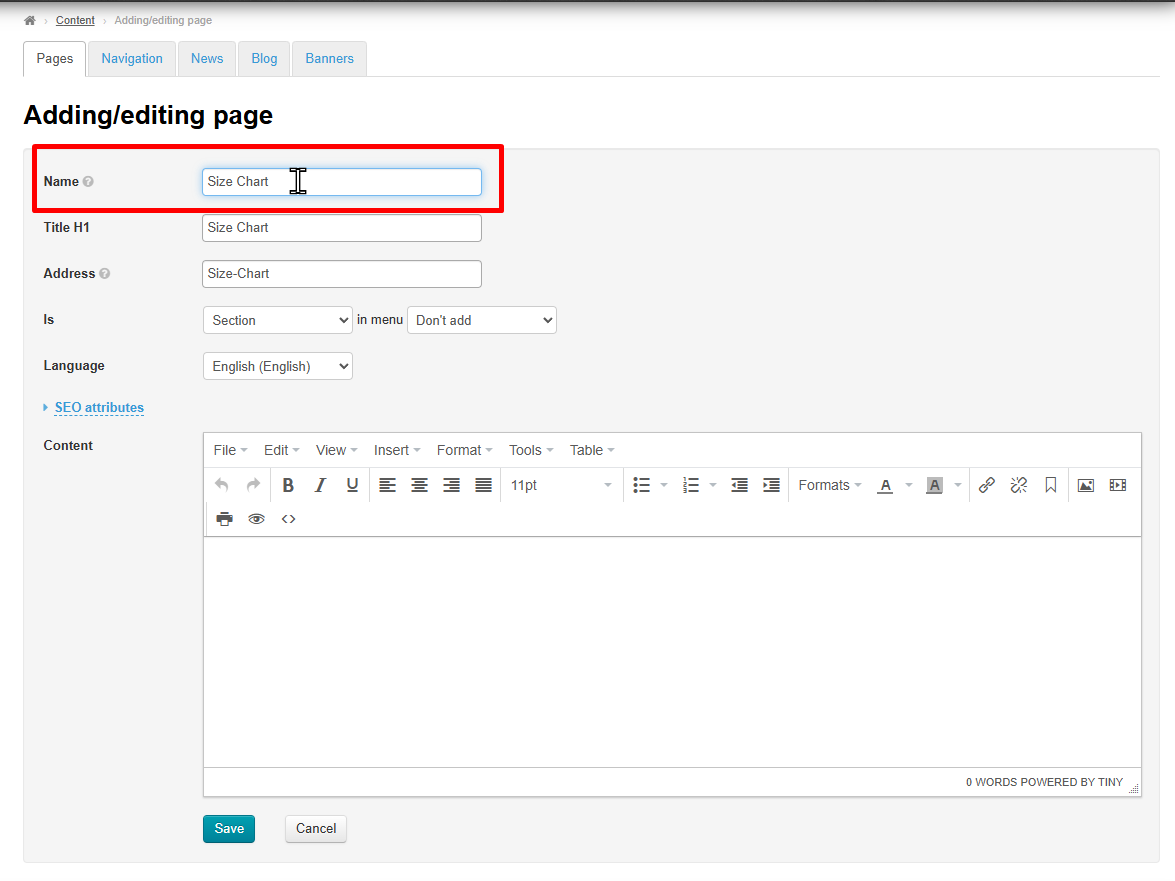
“Title H1” and “Address” titles will be filled in automatically. You can leave them as they are or edit them if you wish.
H1 title will be displayed as the page heading in search engines, while the Address will be used in the website URL.
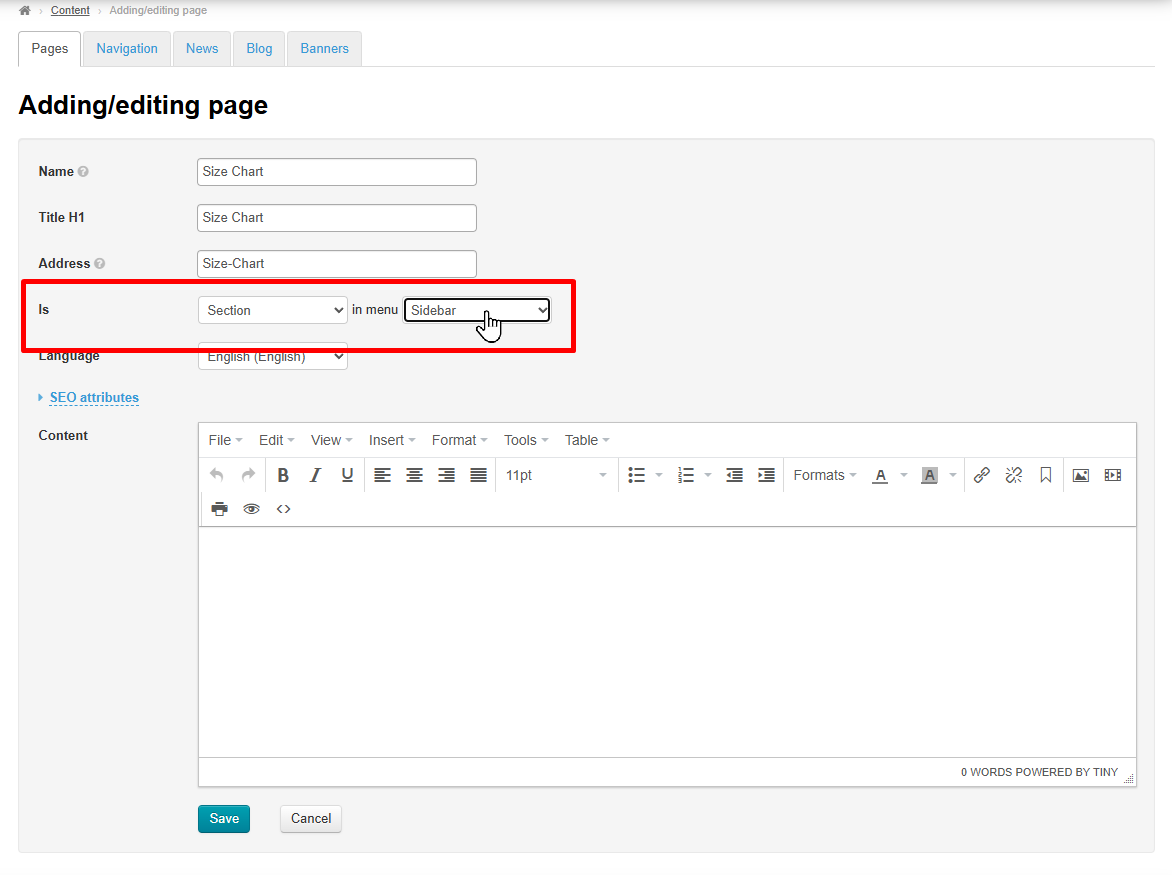
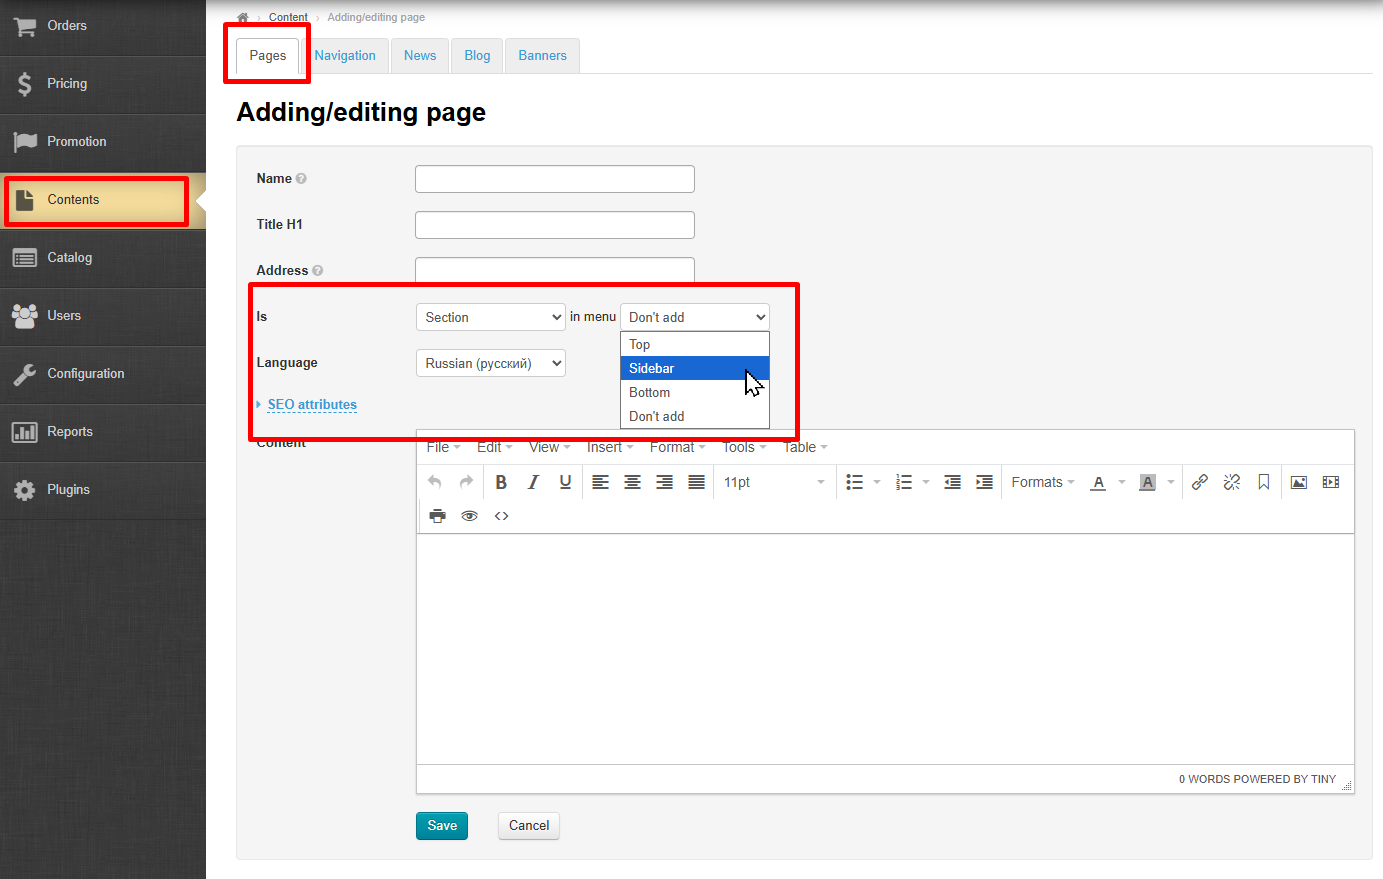
If you want to change whether it is a section or a subsection, you can do so in the “Is…” field. You can also immediately specify in which menu you want your new page to be displayed.
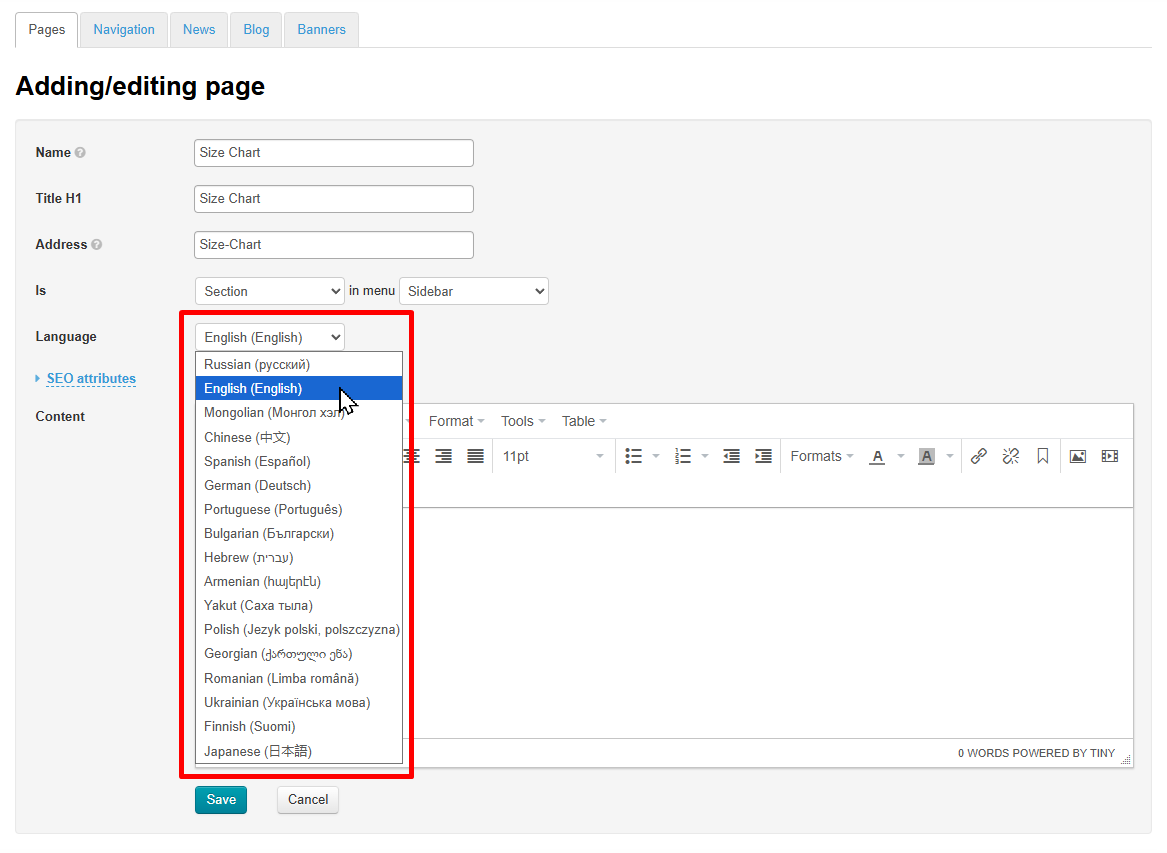
Next, select website language version from the available ones.
Then fill in the page content.
SEO Optimization for Search Engines
Click “SEO Attributes.”
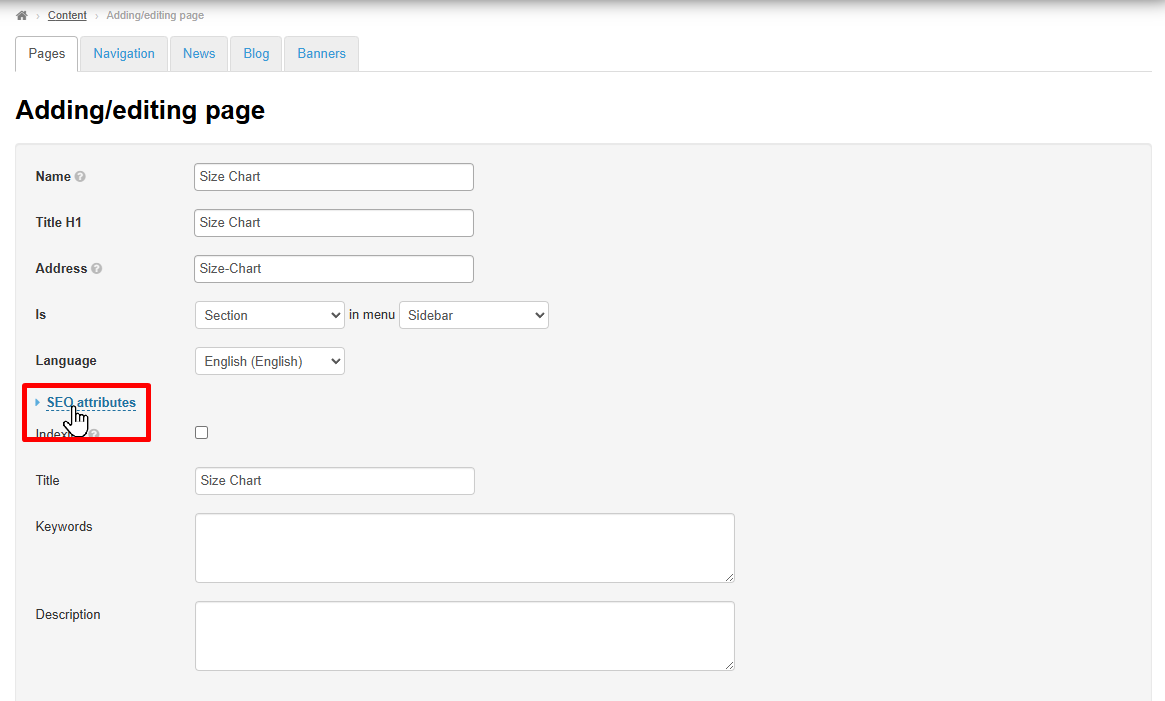
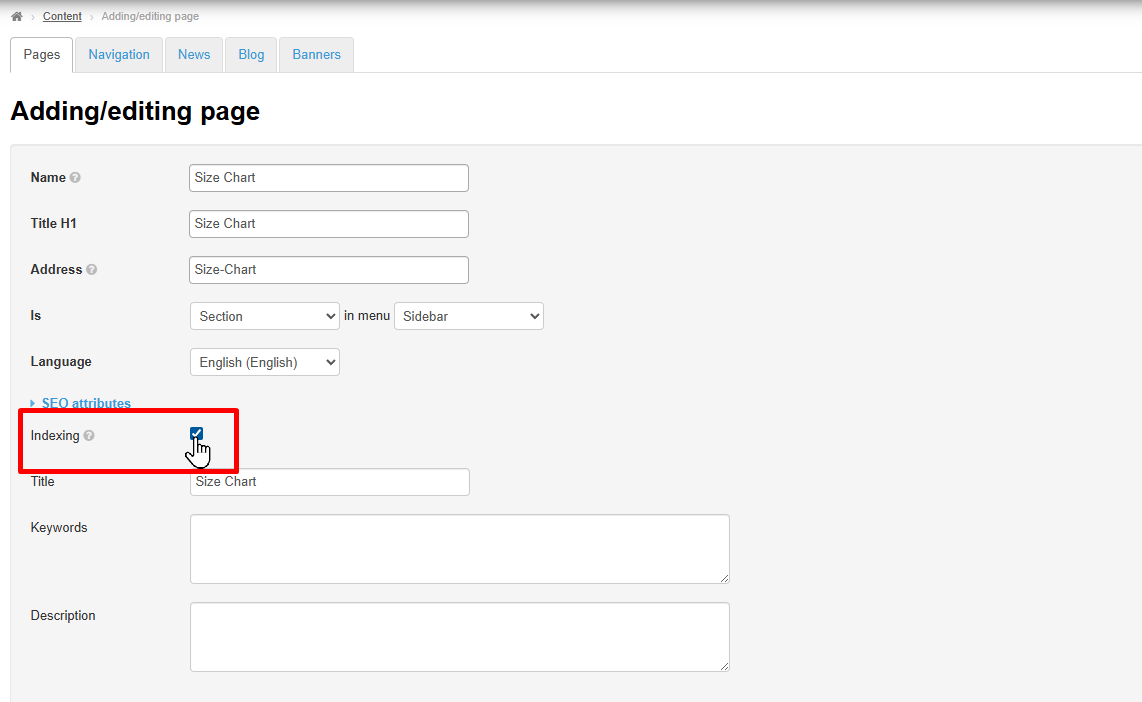
If you want search engines to crawl your page and include it in search results, check the “Indexing” box.
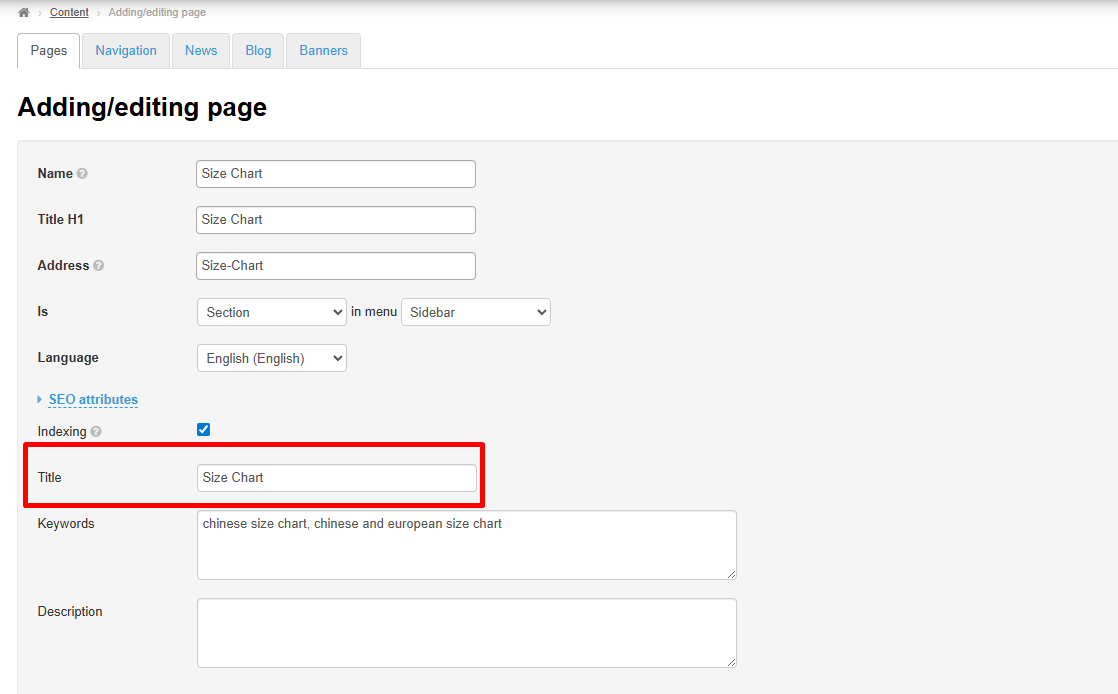
Enter the title that will be displayed in search engines.
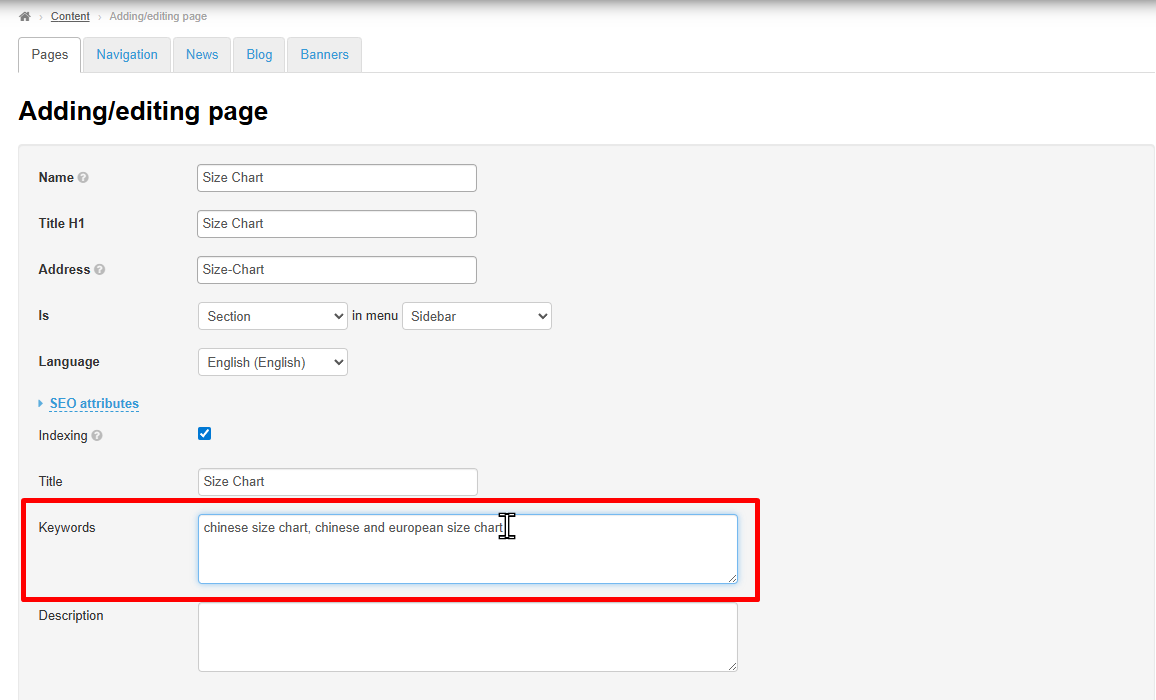
Enter keywords for searching the page (usually up to 6 phrases).
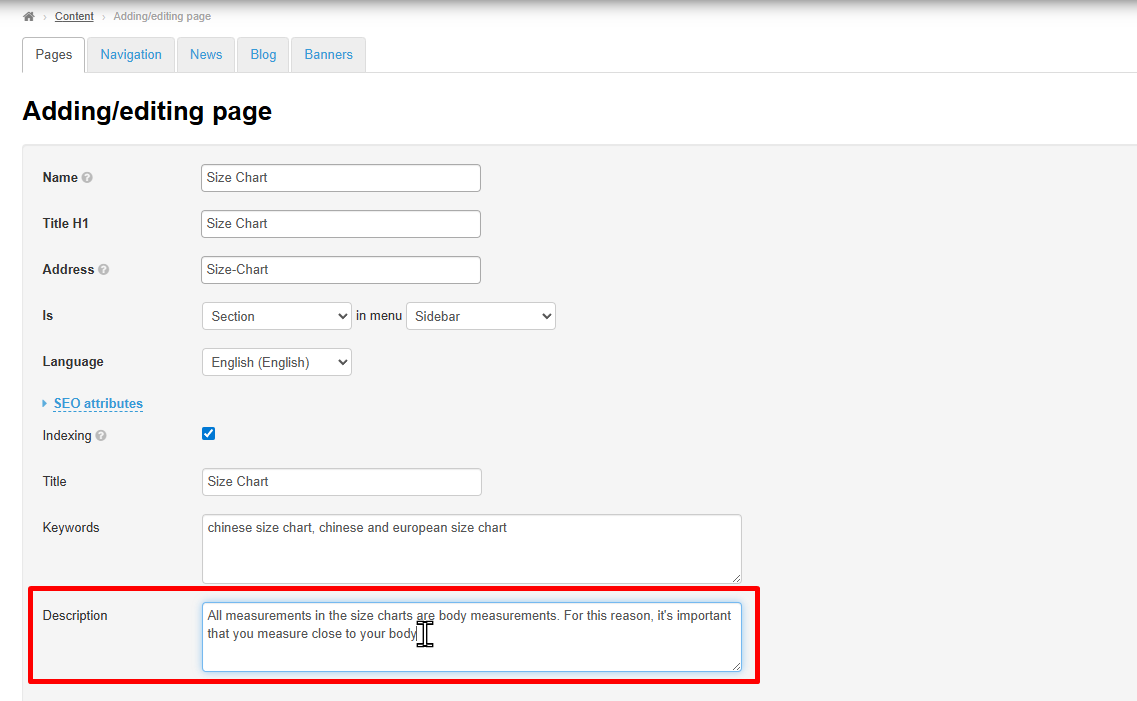
Add a short description. The length depends on the search engine, but we recommend keeping it around 120–150 characters.
Pages Editor
The page content itself is added in this block. Text editing works similarly to MS Word. You can insert images, links, and format the text.
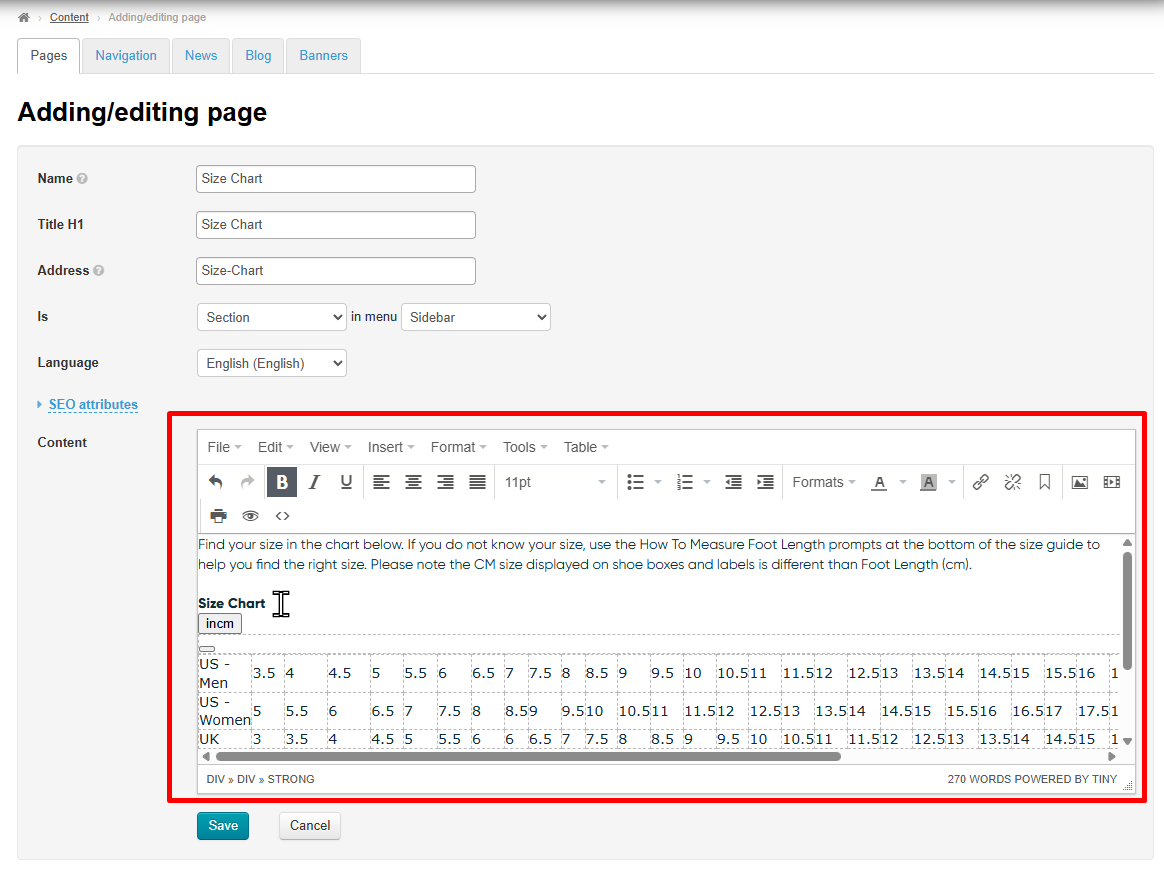
Save all added content by clicking “Save” button, or exit the editing mode without saving by clicking“Cancel”.
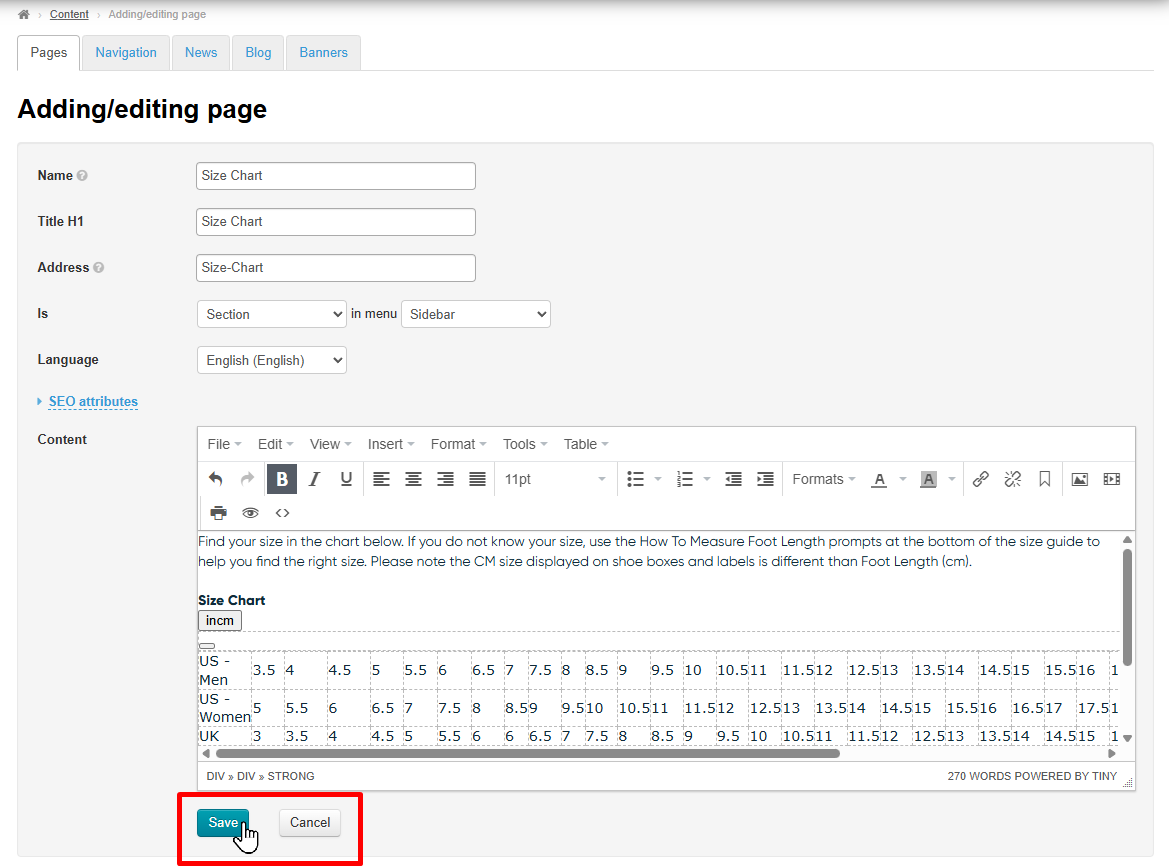
Edit
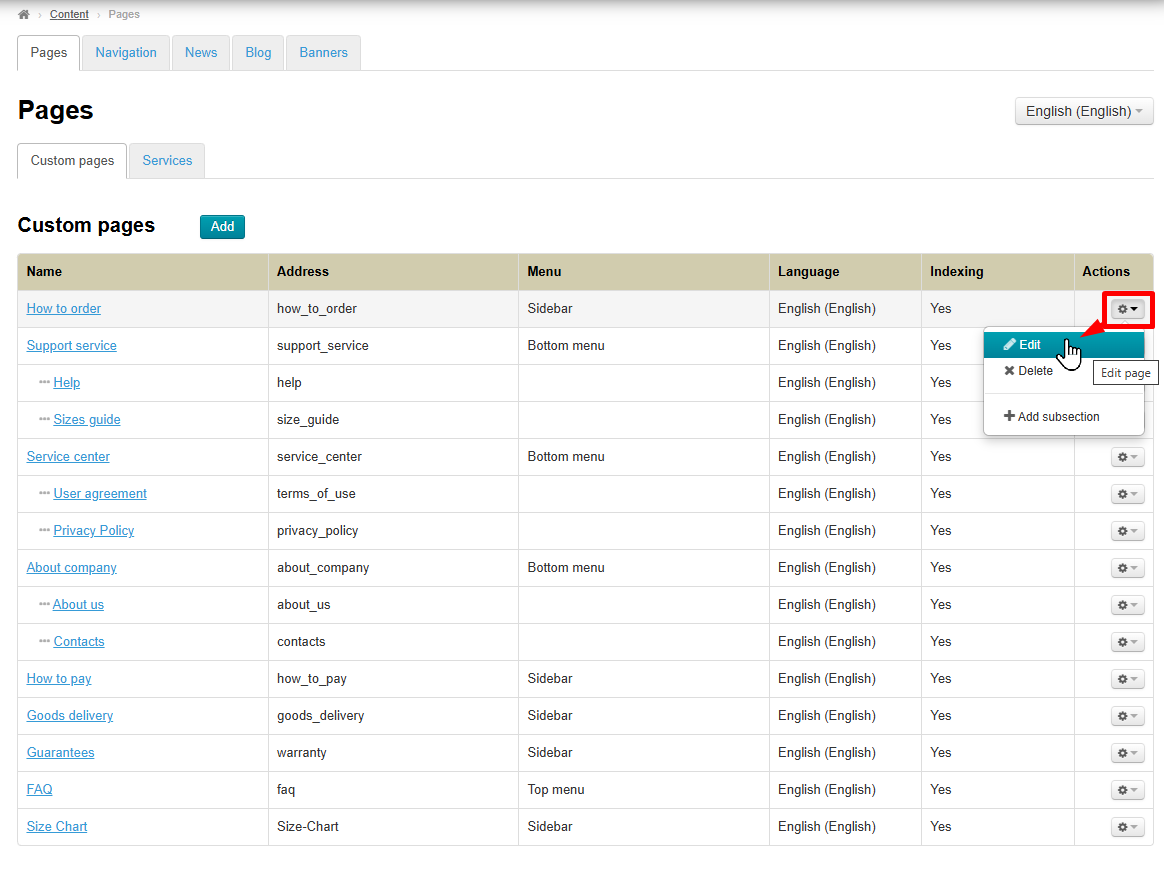
To edit a page, click the gear icon in the “Actions” column and select “Edit”.
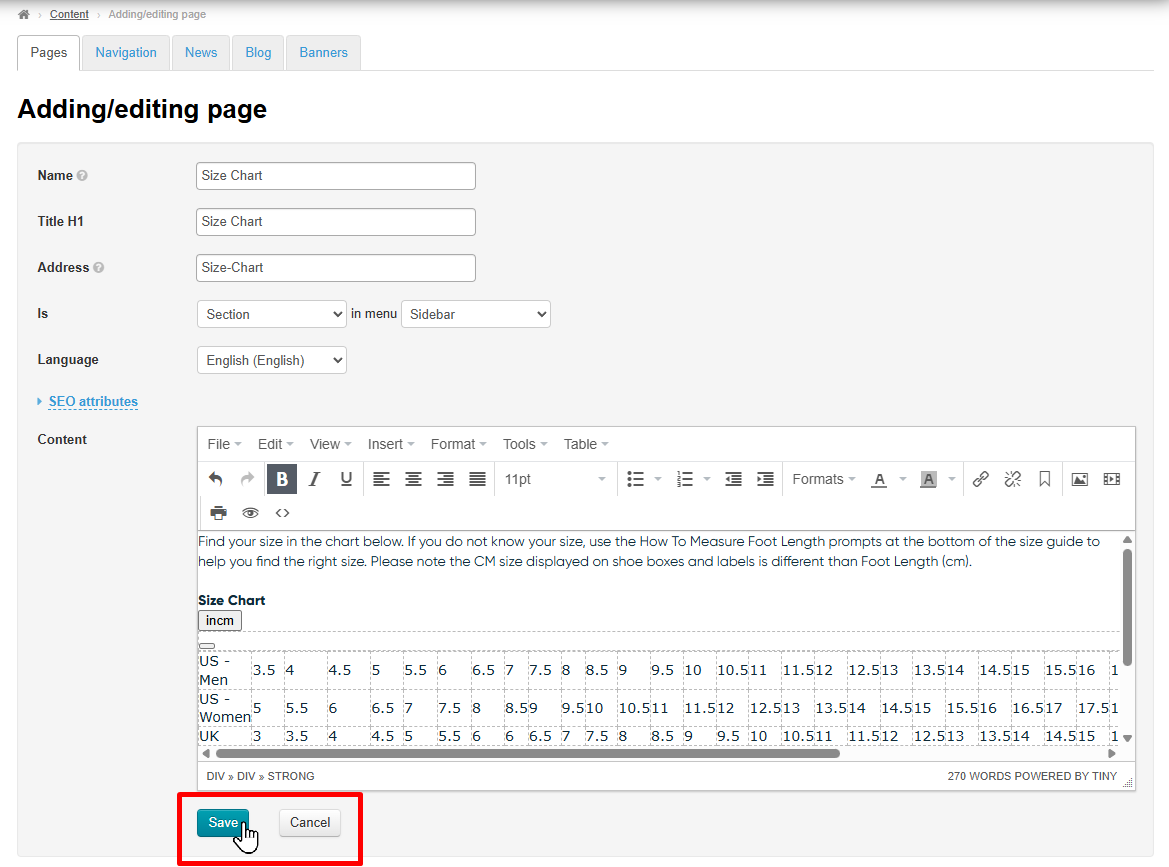
Save all added content by clicking “Save” button, or exit the editing mode without saving by clicking“Cancel”.
Delete
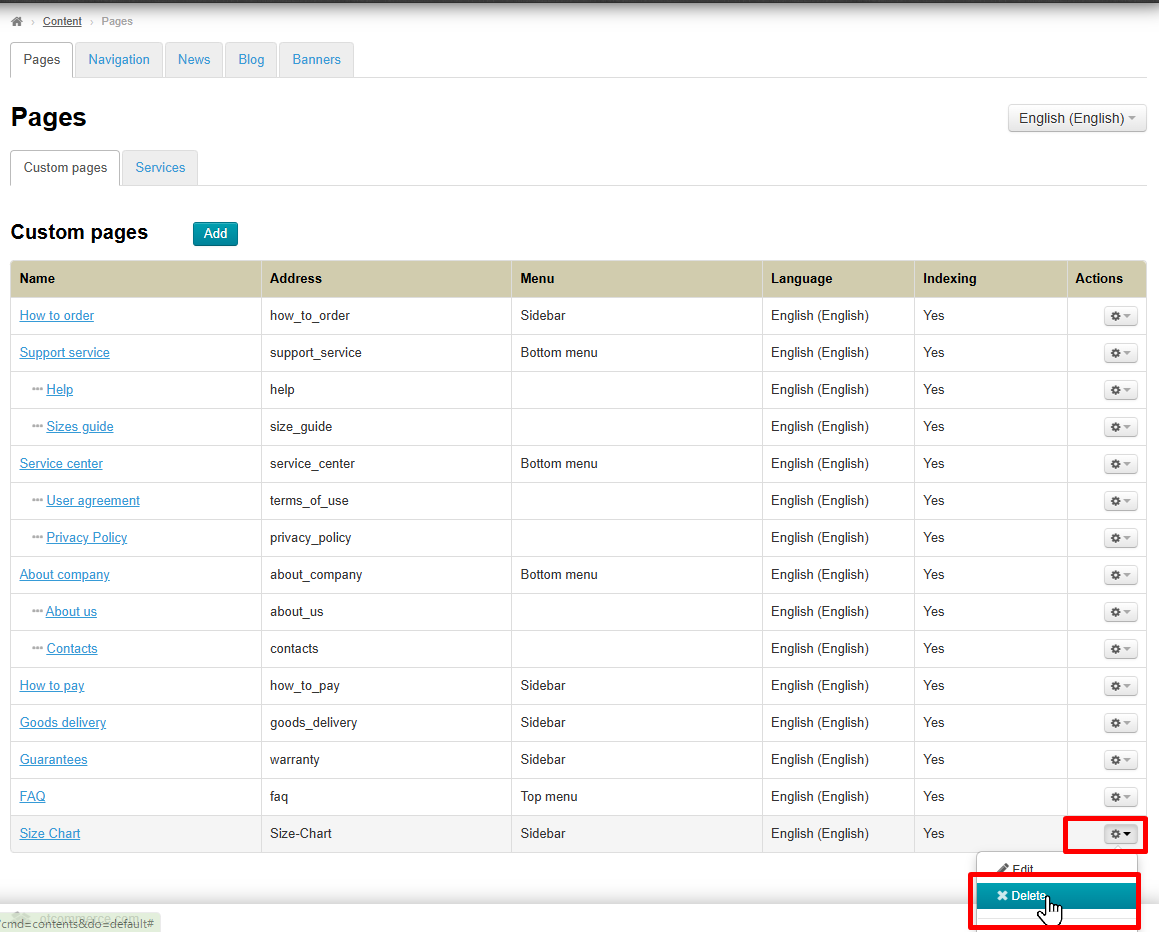
To delete a page, click the gear icon in the “Actions” column and select “Delete”.
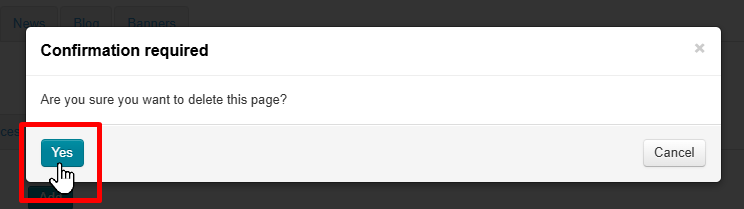
Confirm your selection by clicking “Yes.”
Enable and Disable Page List Display on the Website
Pages display can be configured in “Configuration” section.
Location in admin panel: Configuration → Website configuration → Global website template → Advanced settings.
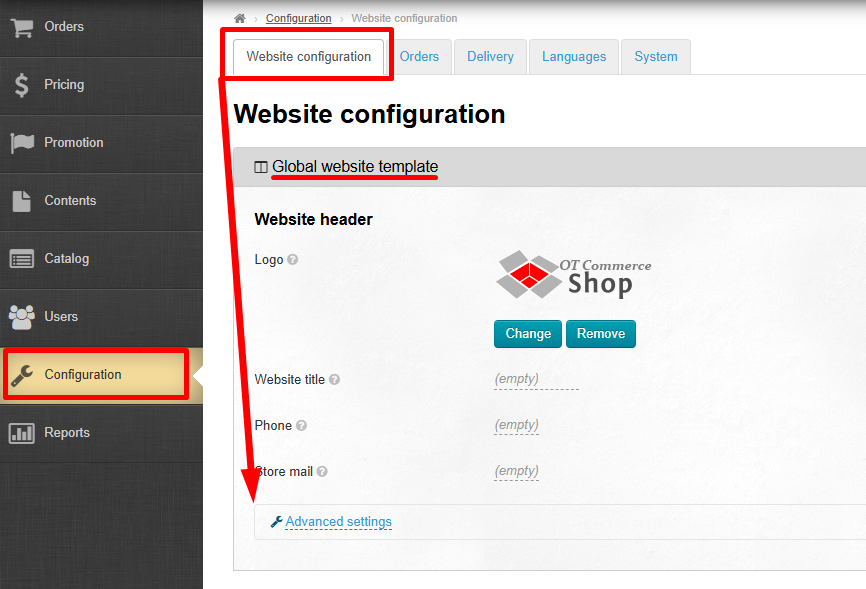
Click “Advanced Settings”, and additional site settings will open.
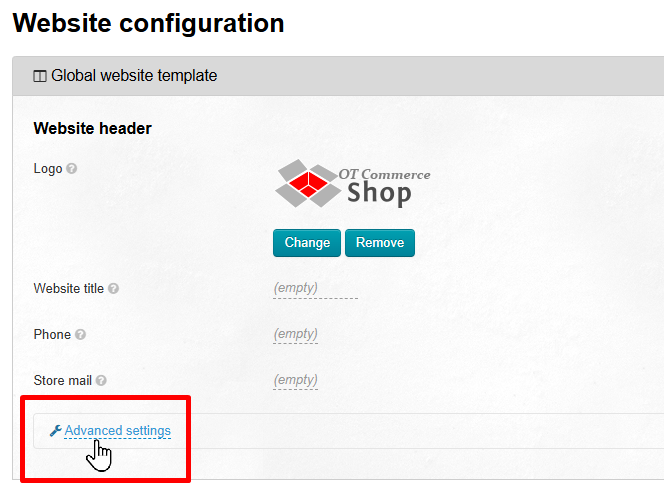
We are only interested in “Column Navigation” setting.
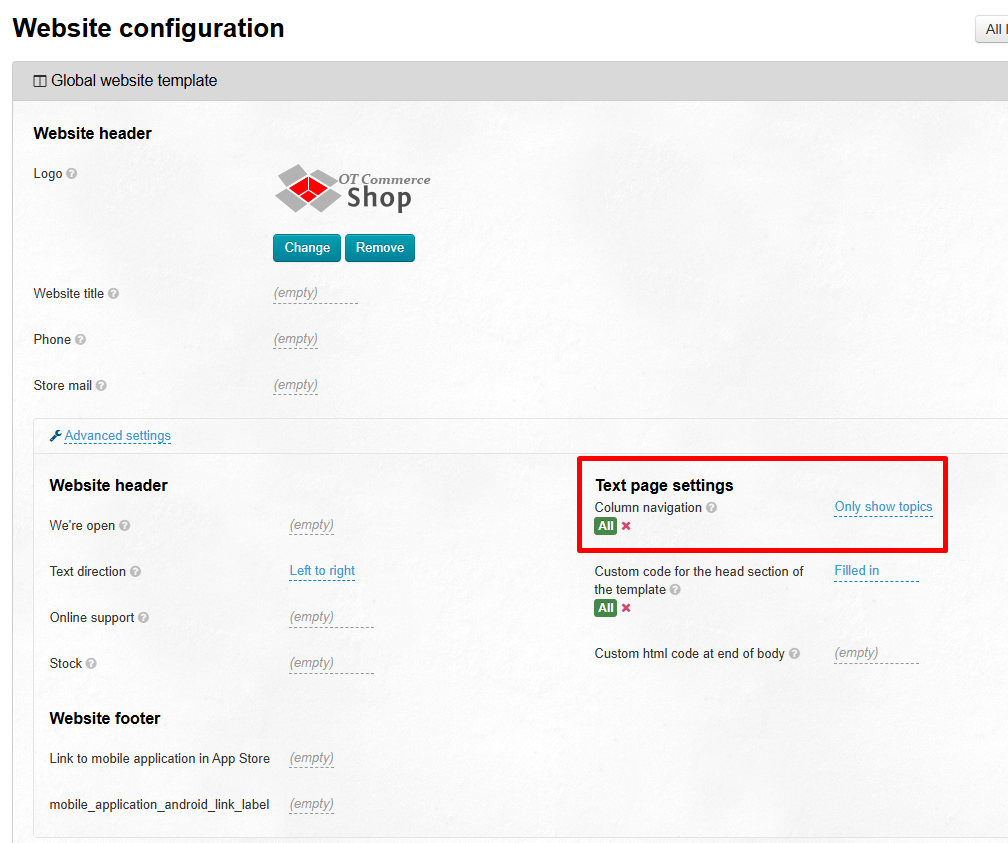
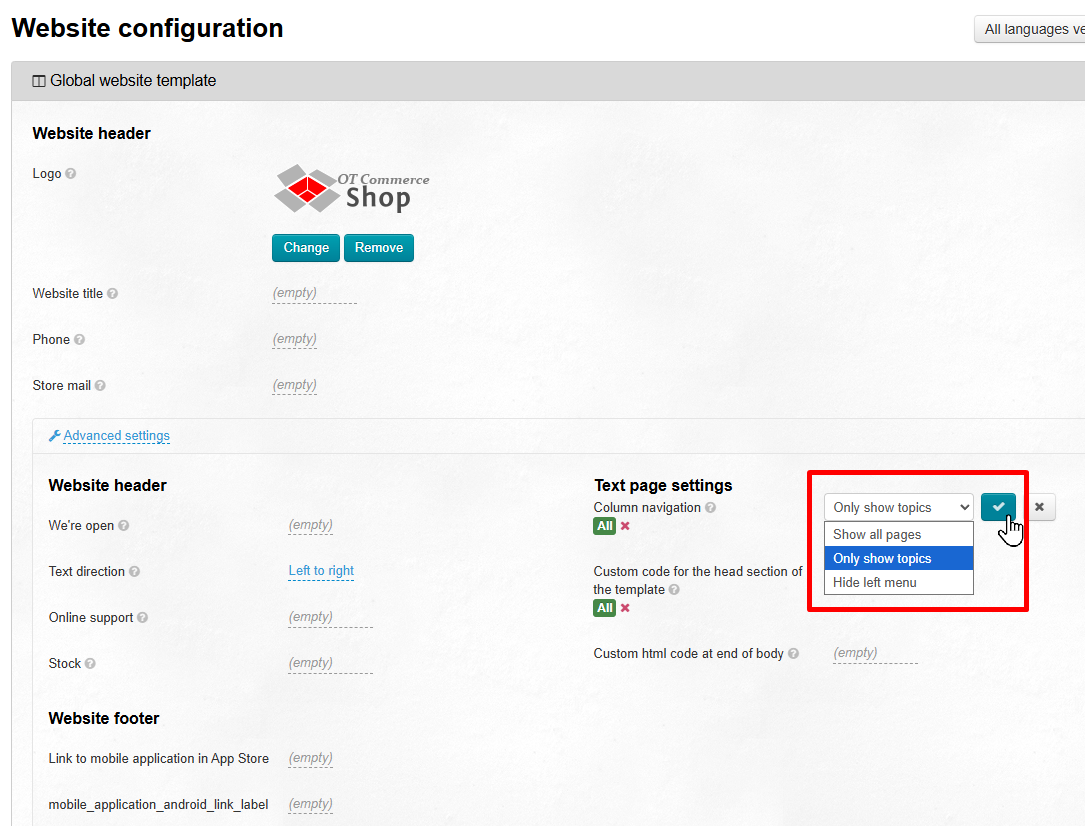
Click the blue label on the left, then choose the option you need from the list of three available variants (the differences between the display options are shown below).
To save your changes, click the checkmark button.
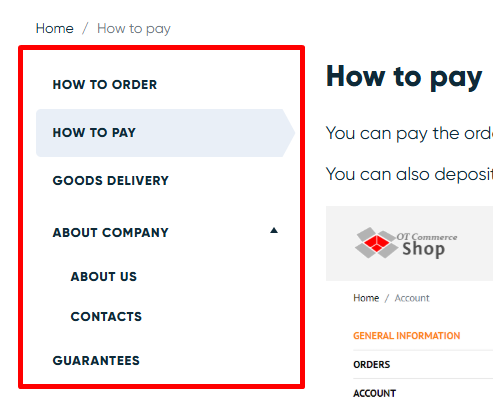
| Navigation Selection | How it looks on the website when viewing pages |
|---|---|
Show all pages |
|
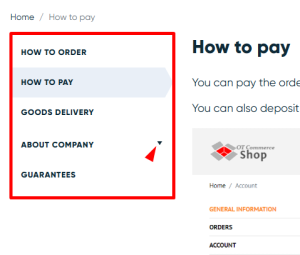
Only show topics (at the same time, users will be able to click the triangle icon on the right to expand and view subcategories) |
|
| Hide left menu | Меню не будет видно на сайте |
Website Page Layout
Pages are added in the "Navigation" section if they weren't added when adding or editing a page.
Location in admin anel: Contents → Navigation
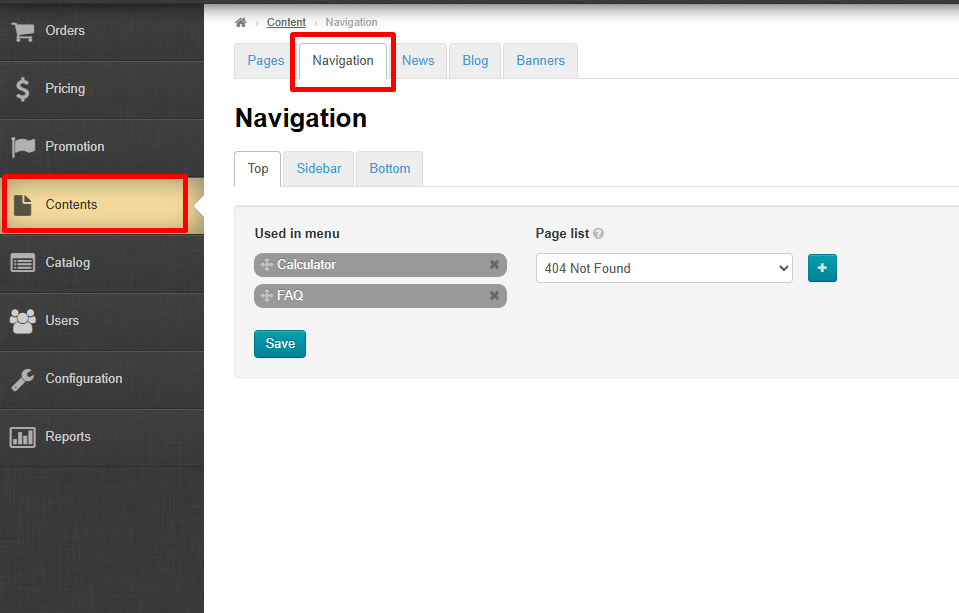
Here you will read how to add pages to different parts of the website menu.
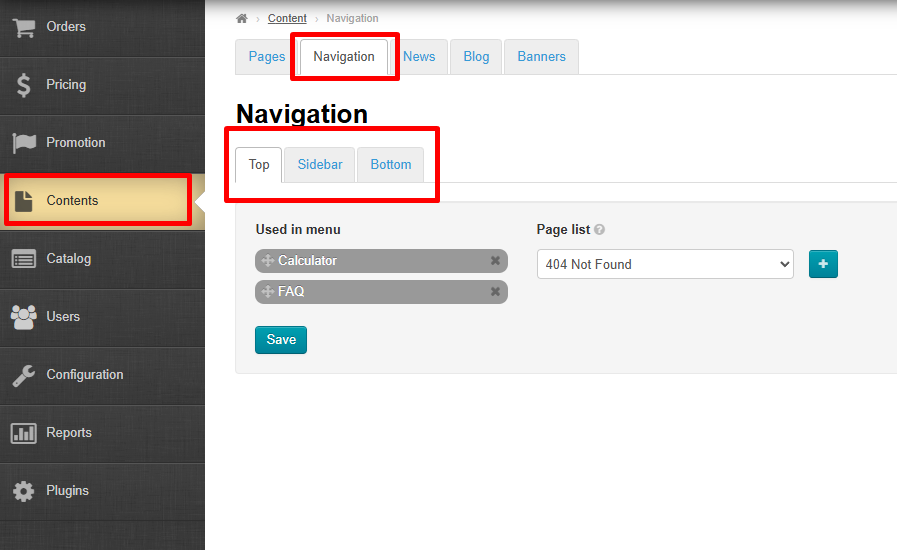
There are 3 tabs in “Navigation” section, that determine where customers will see the pages.
Select the required tab:
- Top tab - pages in the website header
- Sidebar tab - pages in the side menu
- Bottom tab - pages in the footer
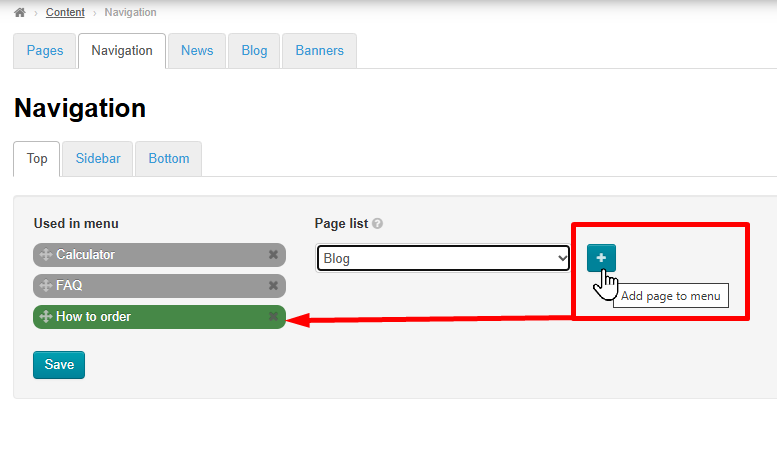
In the selected tab, choose the pages you want to display in the menu by clicking them in the list on the right.
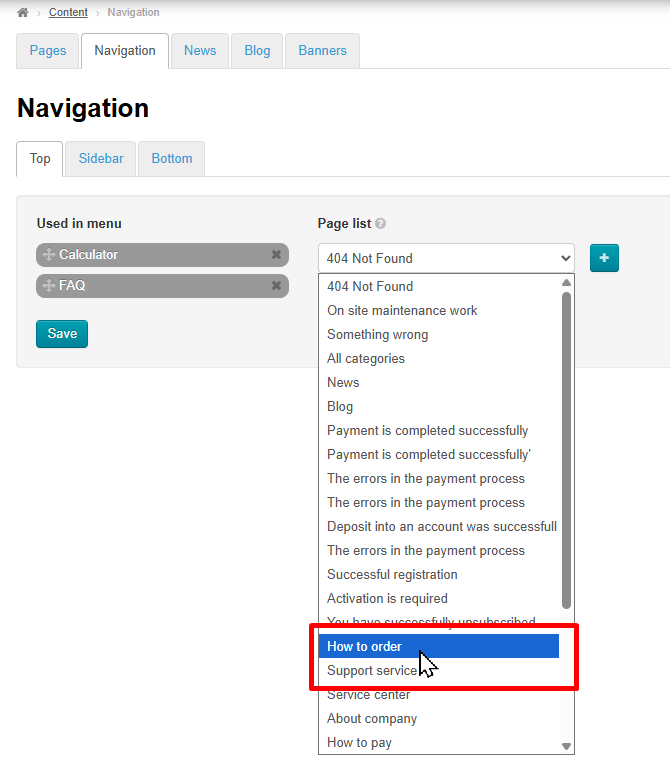
After selecting the page, click “+” button and selected page will appear in the list on the left. It will be highlighted in green.
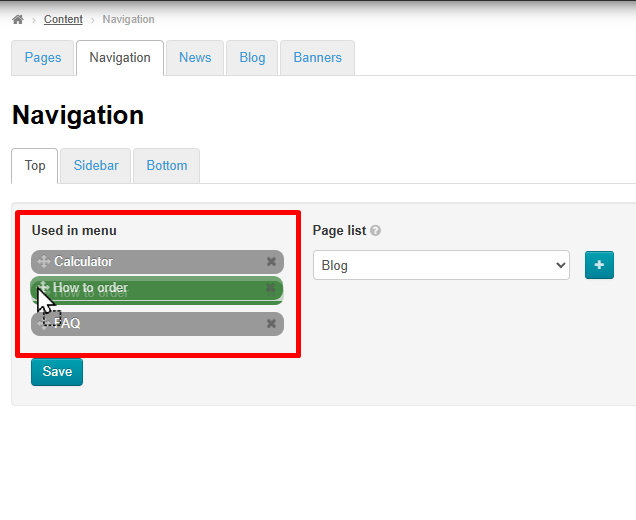
To change page order, click and hold ✥ icon (to the left of the page name), then drag the page up or down.
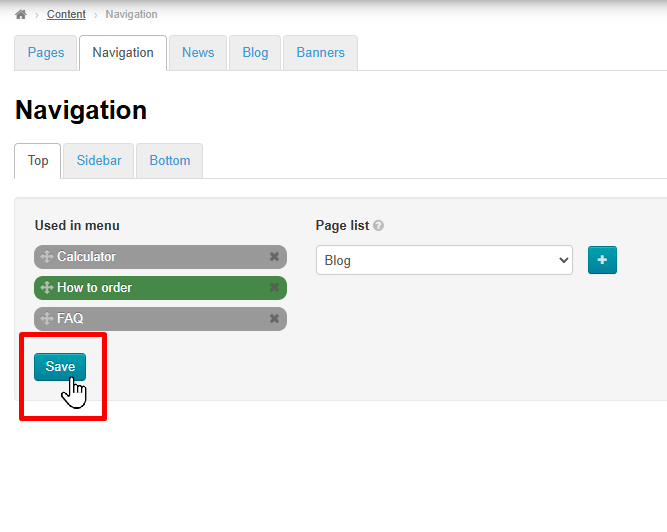
Click "Save" button.
A section can be configured to not display in a menu at all.
A sidebar menu can be set up in the Configuration section.
One can choose the pages to display in different menus Using Navigation section.
Add section
| Информация | ||
|---|---|---|
| ||
Since sections and subsections are added one after another (a new one is added to the end of the list) you should have a clear understanding of the sequence of sections (and subsections) within different types of menus. One can change the order of sections within a menu in the “Navigation” section. |
To Add section you need to click the “Add” button.

This will open a form for adding a page.

The page:
Can be a section or a subsection;
Can or cannot be added to the menu;
Can be a page in any language available.
Basic data
Enter the name of a page:
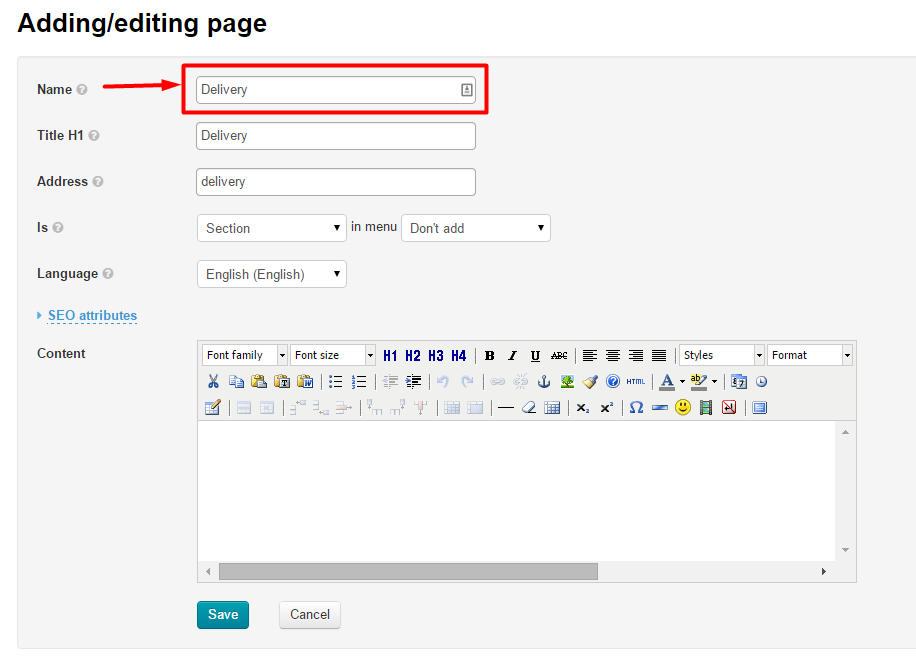
The address and the title H1 will be entered automatically.

If you want to change the address or title H1 you need to clear the text field and type a new address or title.

Since we are creating a section leave the name as it is “Section”.

Choose what type of menu the section will be displayed in.
Click the down arrow to open a drop-down list of menus.

Select the appropriate menu from the list.

If the Multilingualism module is enabled you can select a language which the section will be displayed in.

Сontent
This is what a section is created for: information essential for a buyer.
Fill in the form.

Add any information and pictures. You can do any required formatting in a content editor like you do using MS Word.

When the text editor field has been completed please click the “Save” button.

Once you’ve done this, the new section will show up in the sections list in admin panel. The section will also appear On website – in the menu that it was assigned to upon creation.

Search engine optimization attributes
Completing the Search engine optimization attributes form is necessary for website promotion. For details see Optimizer Module.
Actions with section
Once a section has been created it can be edited or deleted. To do so you need to use the dropdown menu in the “Actions” column.

Edit
In admin panel
Choose a section to edit and click the gear button.

In the dropdown list that appears select Edit.

This will open a page similar to that for adding a section. Fill out the fields in the same manner as you did in the “Add section” part of the present instructions.
On website
Click the name of a section in admin panel.

Once you’ve done that the selected section with the “Edit text” button will be opened in a new browser tab.

Click the “Edit” button. This will bring up a text editor (in the same manner as in the “Add Content” part).

Make all necessary modifications and save them by clicking “Save” button.

Upon saving all changes will appear On website.
Delete
If it is necessary to delete a section one should remember:
A section (with all information) will be permanently deleted.
In case there are subsections in a section they will automatically be subsections of the superior section.
To delete a section Click the gear button in the “Actions” column in the string that contains a section to be deleted.
From the subsequent drop-down list select the “Delete” button.

Once you have clicked the “Delete” button you should confirm the deletion. A confirm screen will appear asking if you are sure you want to delete the section.

Once you click “Yes” the section will be permanently deleted.
If there were subsections in the “How to choose the right size” section they would be subsections of the ”Questions and Answers” section.
Add subsection
There are two ways to add a subsection:
Click the “Add” button
Select the section and add a subsection Using “Actions” menu.
Let’s us consider both variants.
By clicking “Add” button
One can add a subsection in the manner as he or she did when adding a section (Please refer to “Add section” part of the present instructions). The only difference lies in the “is a” field.

So then you need to click the “Add” button. This will bring up a form to be completed. Fill in all the fields as you did in the “Add section” part.

In the “is a” string click the down arrow in the “Section” field.

When the drop down menu shows up Click the “Subsection” option.
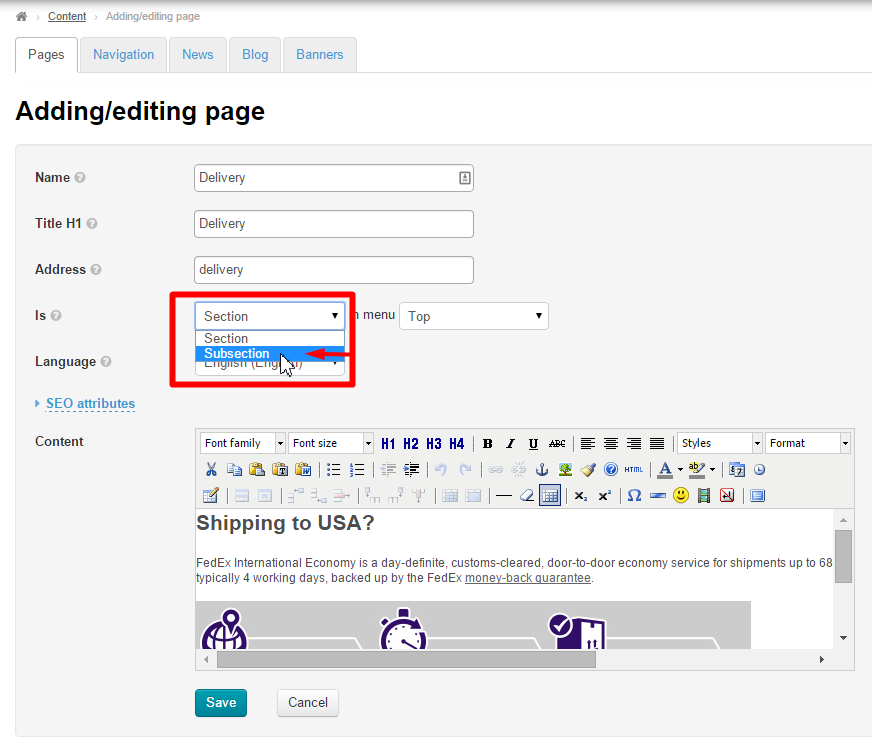
Once you have done this a new field will appear to select a section which the new subsection is assigned to.
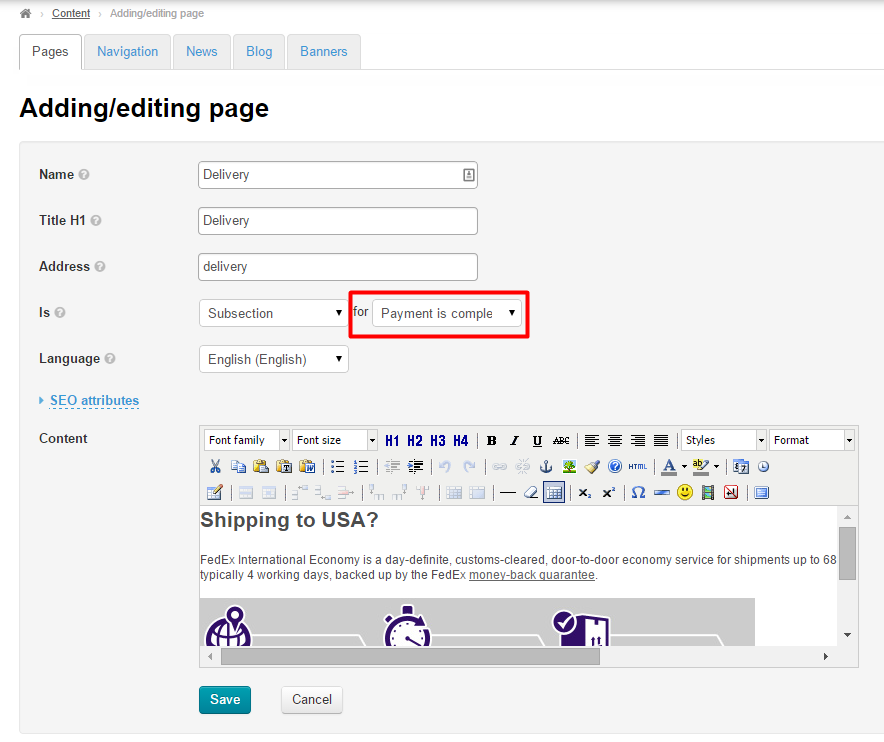
Click the down arrow to the right of a section name.

You will see a list of options to select the desired section.

To save the settings you need to click the “Save” button.
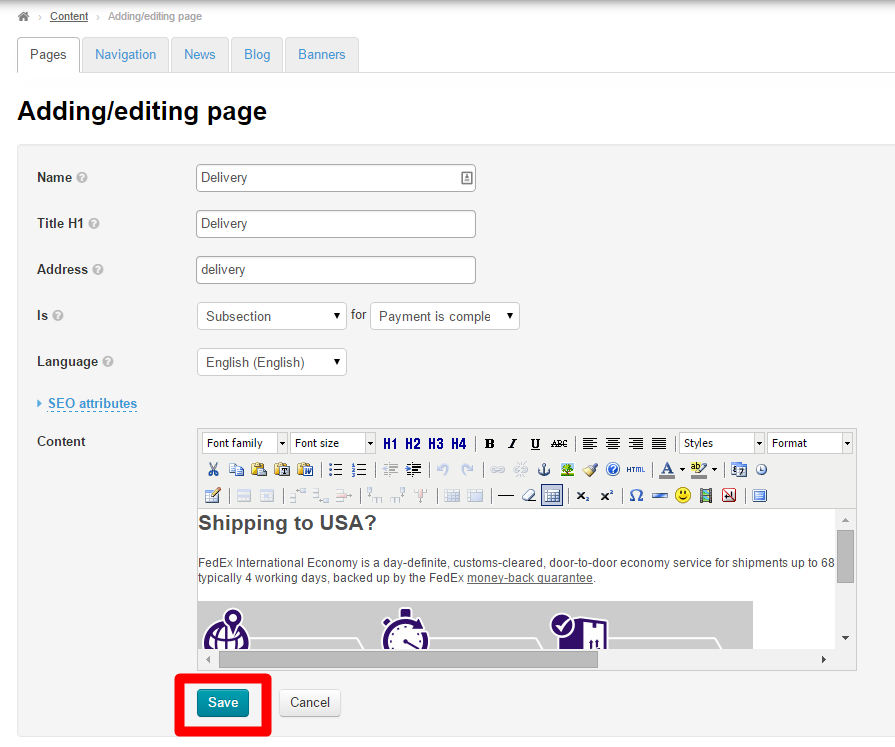
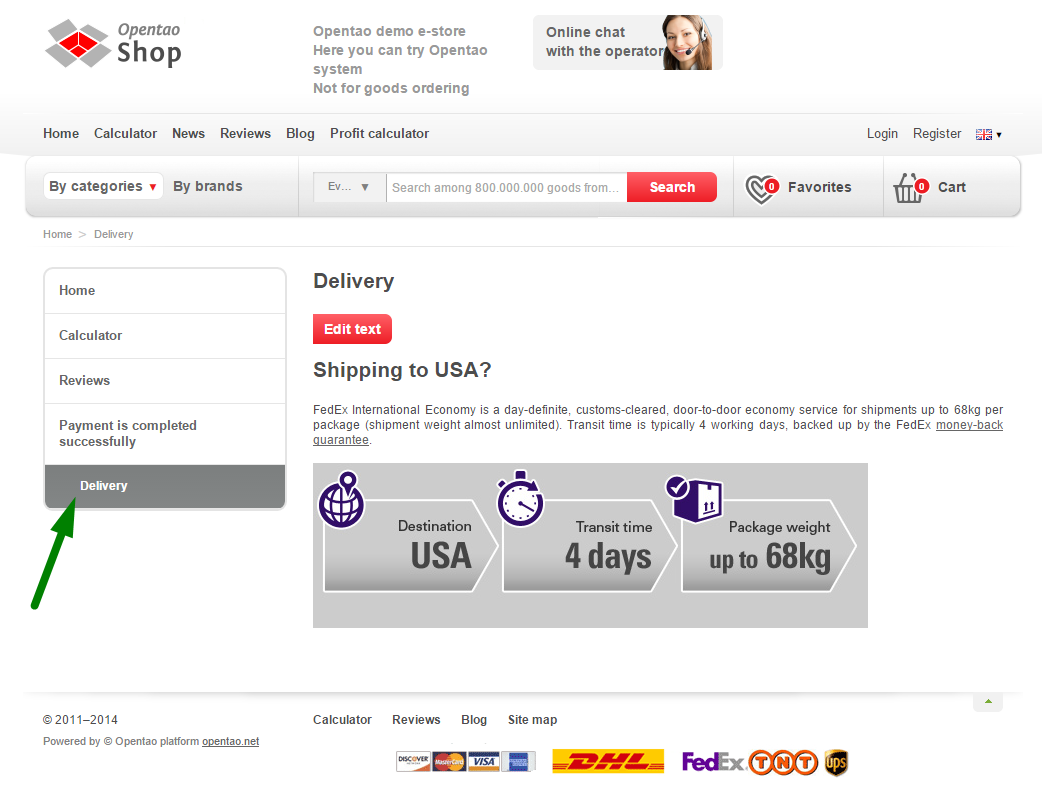
Upon saving the new subsection will be displayed in admin panel.

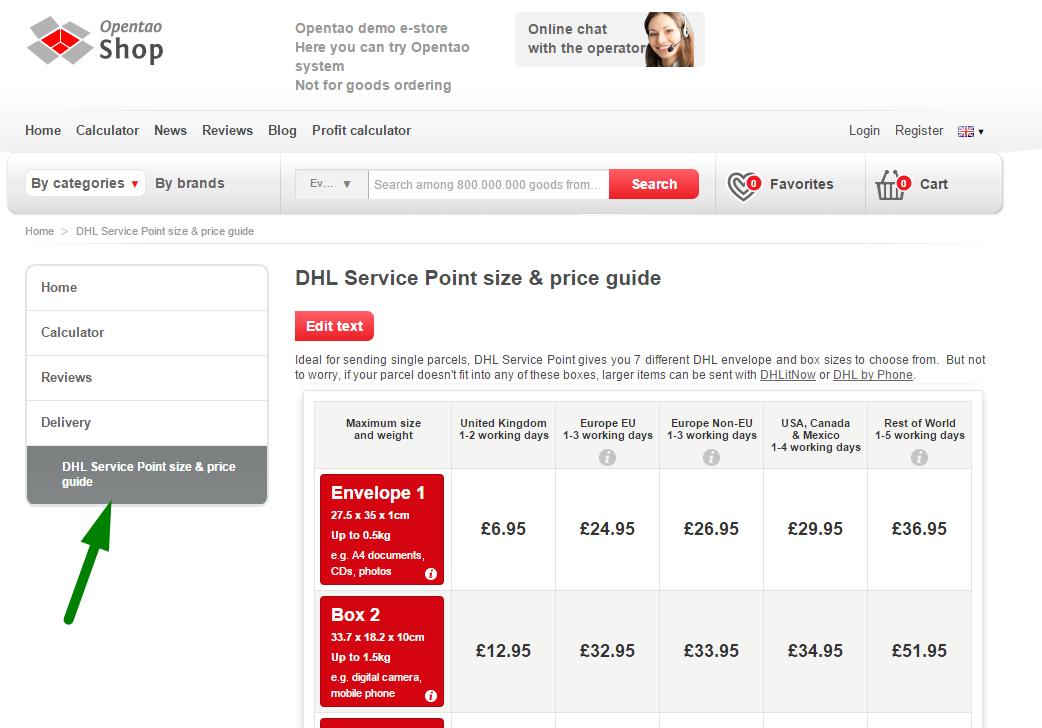
You can also see the new subsection within the chosen section On website.
Using “Actions” menu
To add a subsection Using “Actions” menu you should select the desired section and click the gear button.
This will bring up a dropdown menu with a list of options. Select the “Add a subsection” option.

Next a form for adding a subsection will be opened. This form will show the section this subsection is assigned to.

Fill in all the fields as you did in the “Add section” part of the present instructions and save the changes By clicking “Save” button.

After saving a subsection will appear in admin panel.
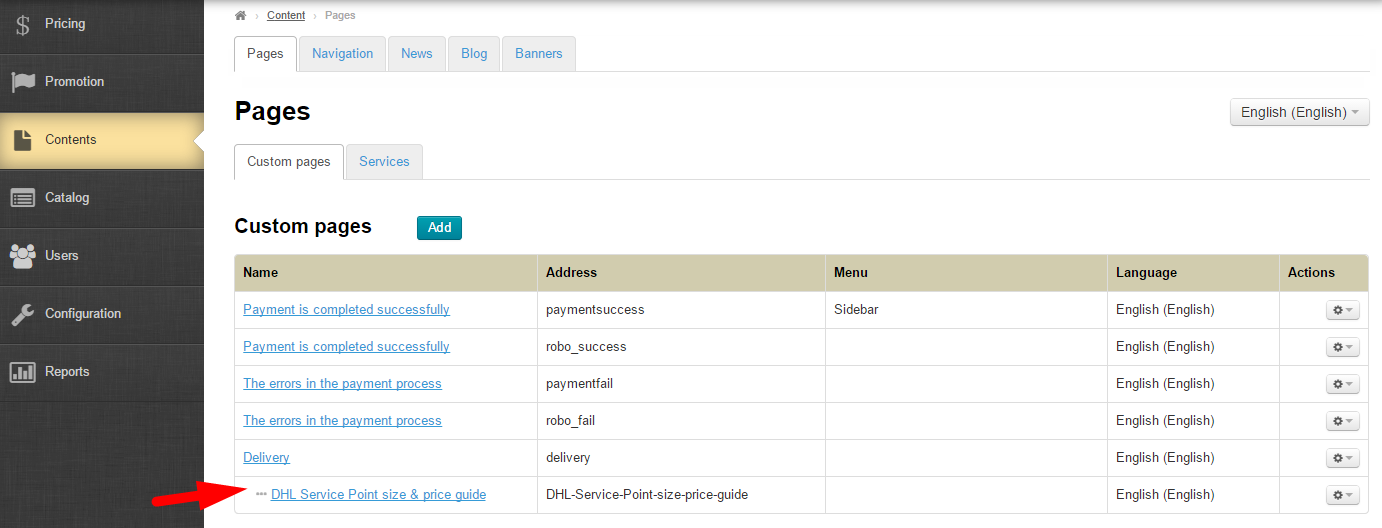
And On website
Actions with subsection
Subsections as well as sections can be edited or deleted.
Edit
There are two ways of editing a subsection:
in admin panel Using “Actions” menu (please refer to the “Editing in admin panel” part)
On the subsection page On website (please refer to the “Editing On website” part)
Delete
To delete a subsection you need to Click the gear button in the “Actions” column.

In the dropdown list that appears click the “Delete” option.

To delete a subsection you should confirm your choice. If you are sure you want to delete the section click “Yes”.

Once you click “Yes” the section will be deleted.