...
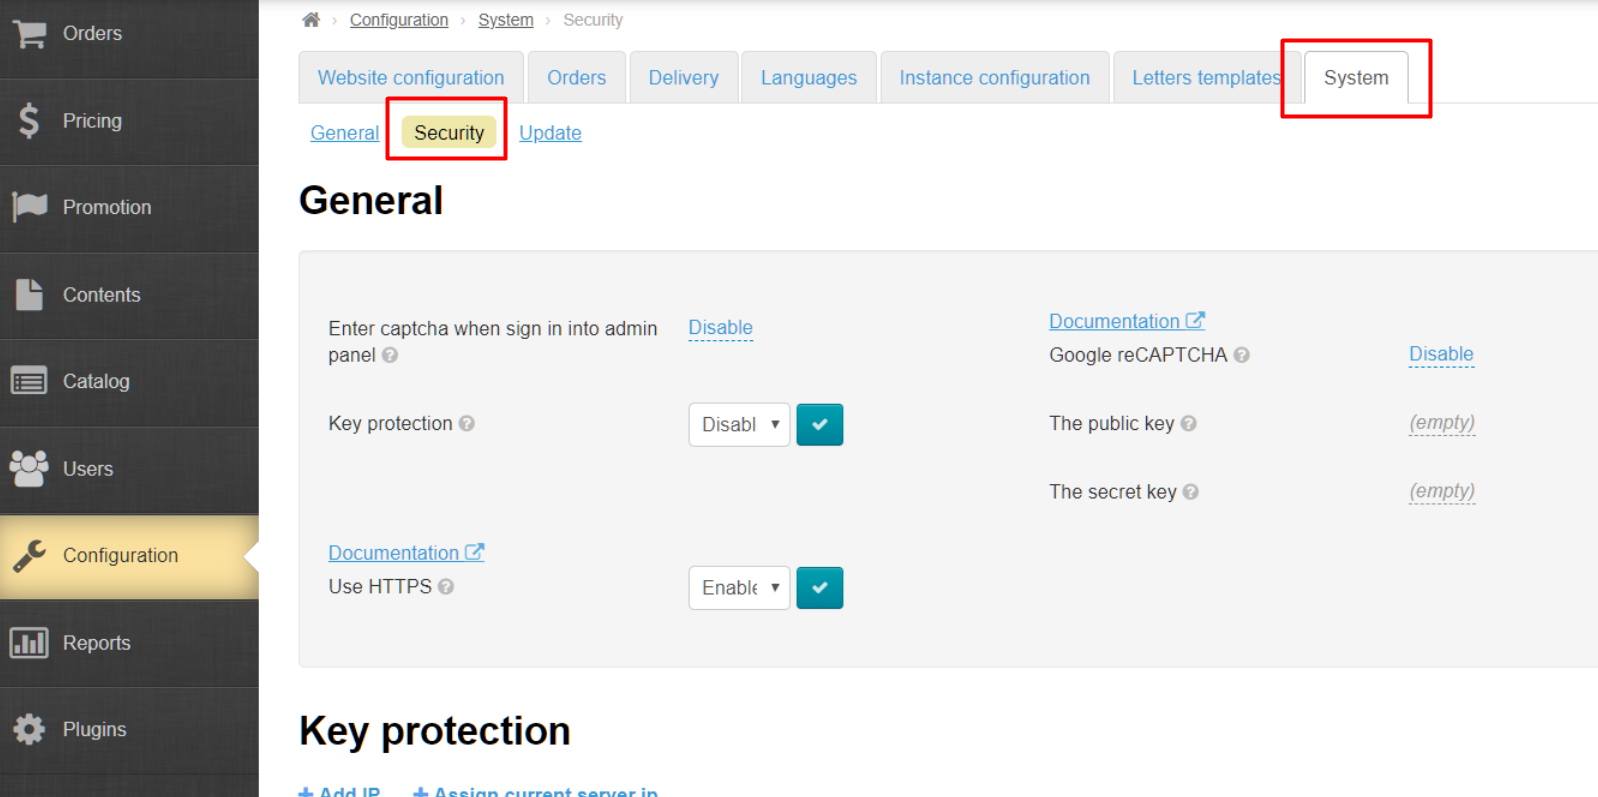
Location in admin mode: Configuration › → System › → Security
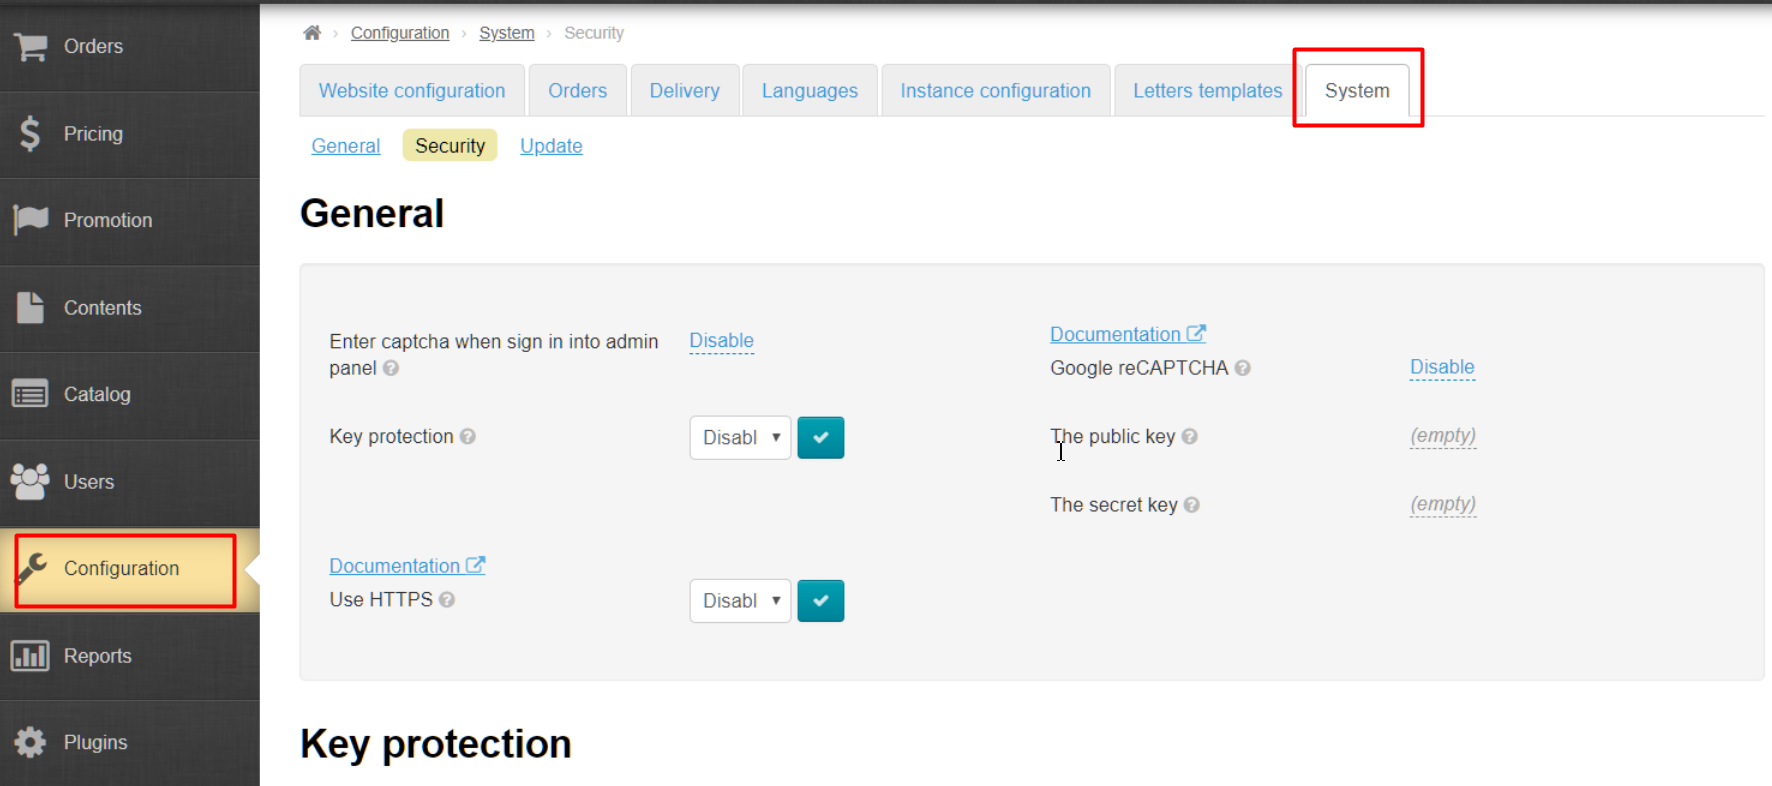
General
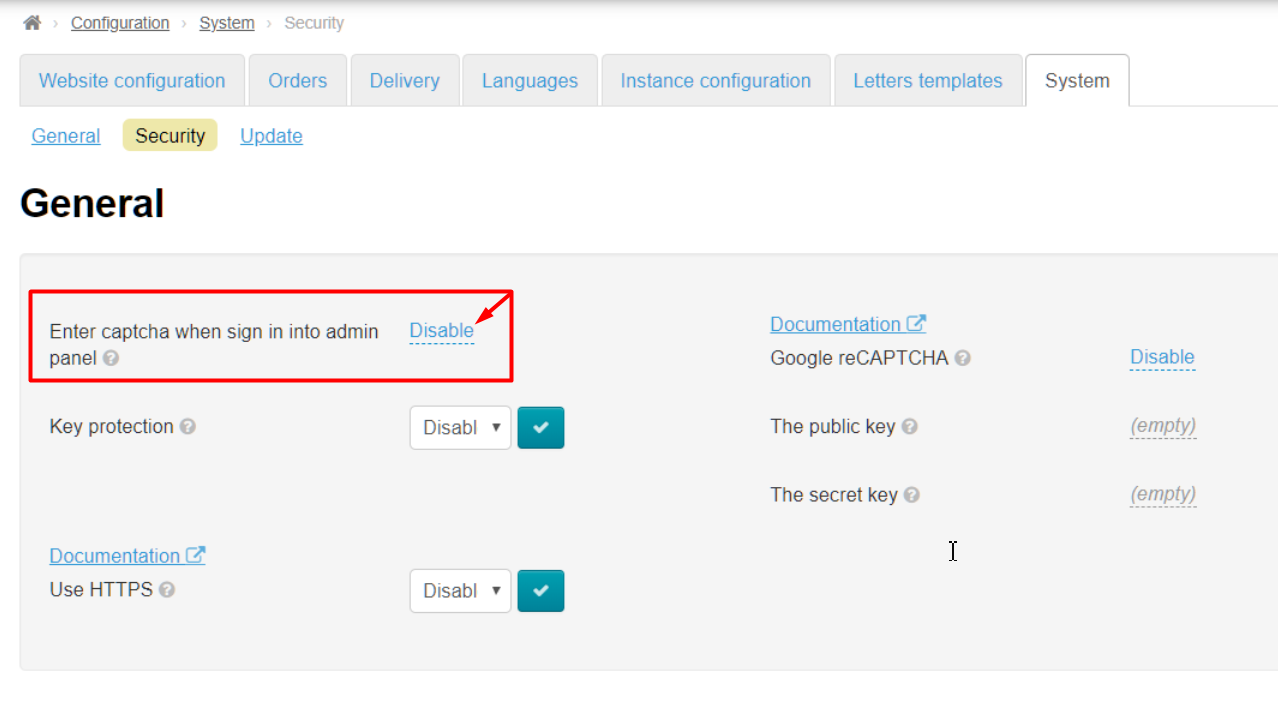
Enter captcha when signing into admin panel
Captcha is an additional bruteforce brute forcepassword protection for admin panel.
Click caption with dotted line to use (or disable) this feature:
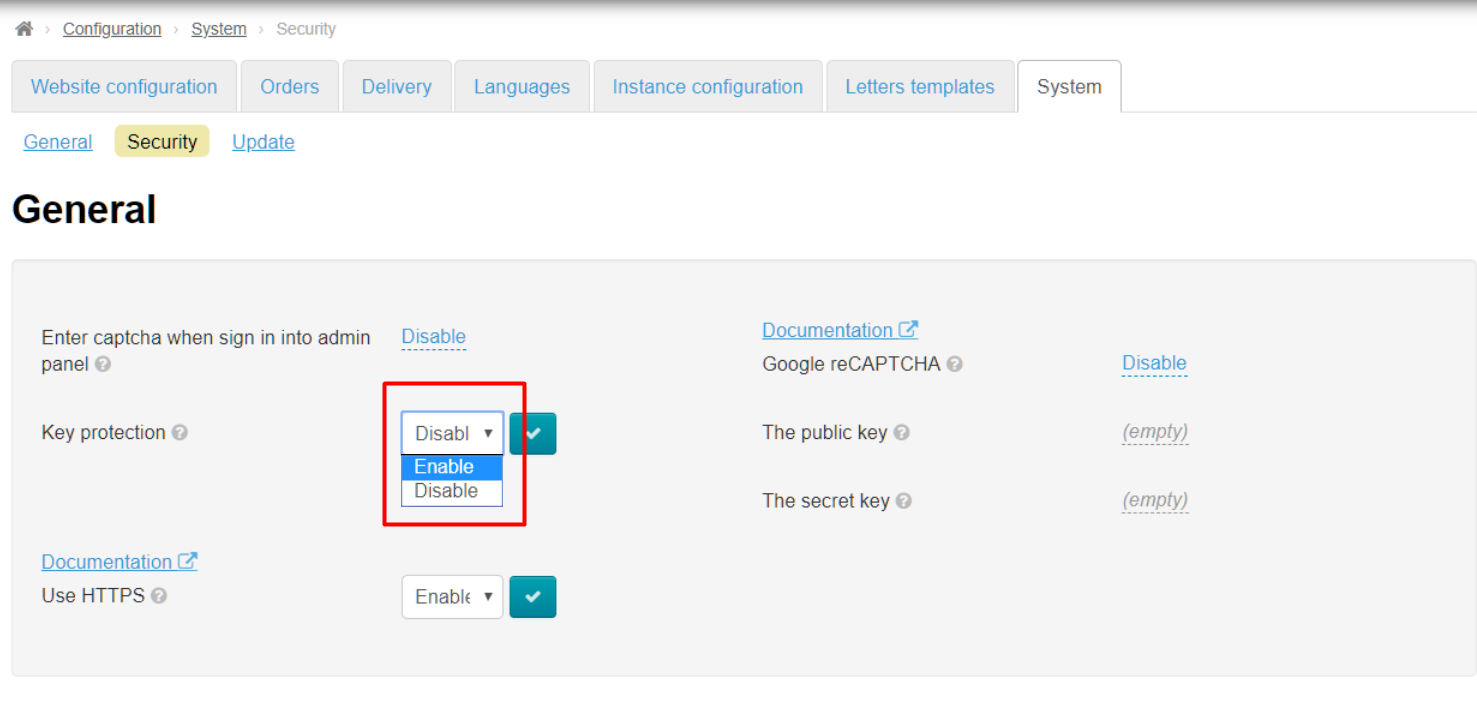
Open drop-down list clicking a triangle:
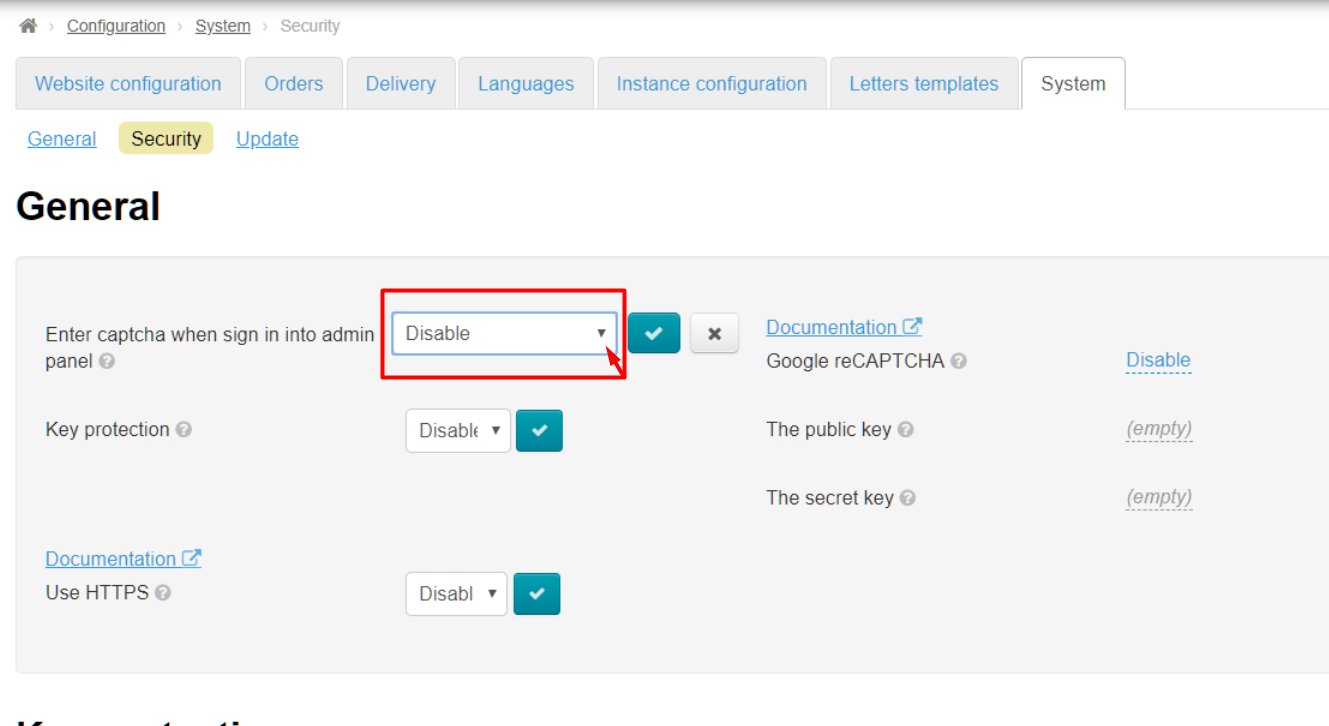
Choose necessary value from drop-down list clicking it:
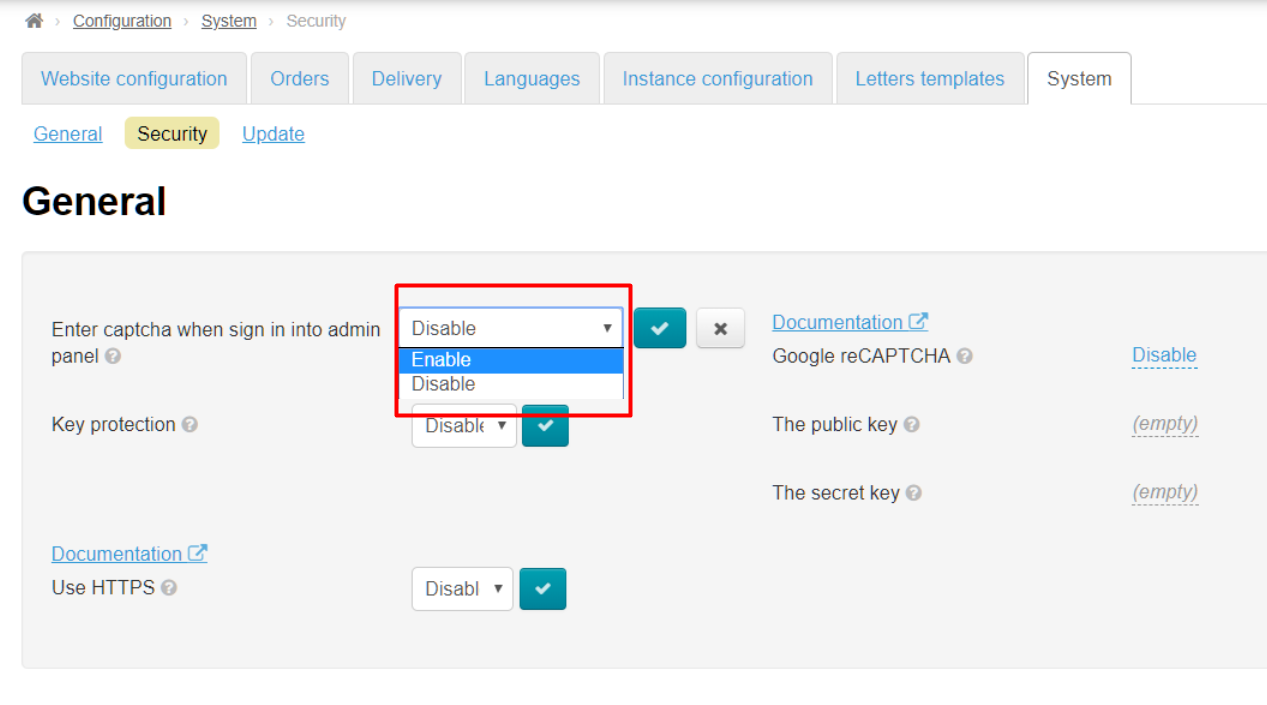
Save choice clicking checkmarked button:
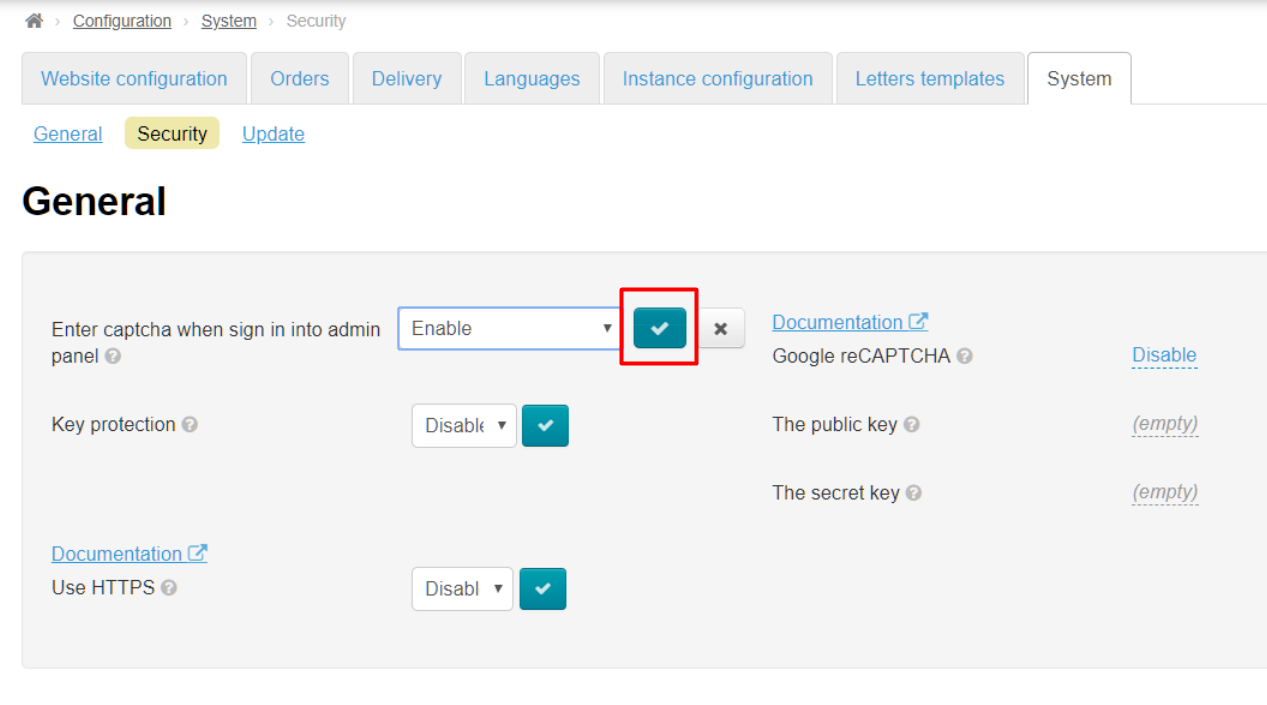
Changes will take effect immediately after saving.
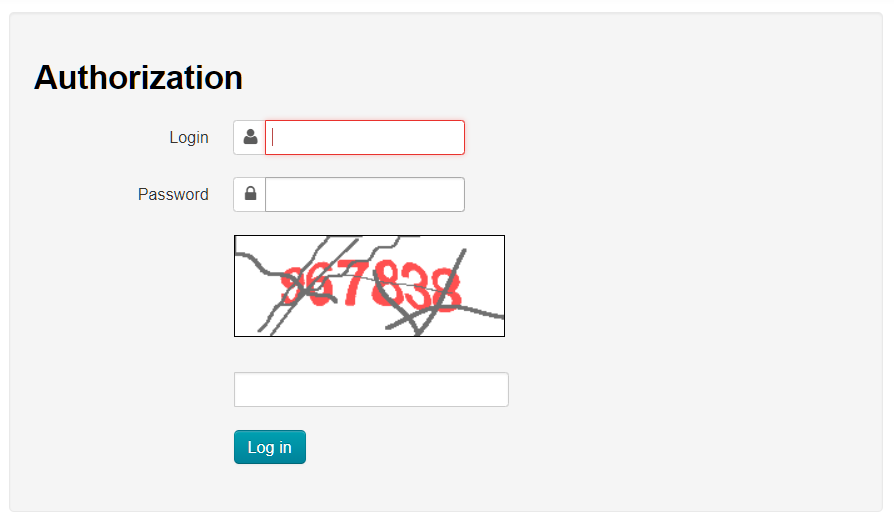
Captcha is displayed during authorization in admin panel when this option is enabled:
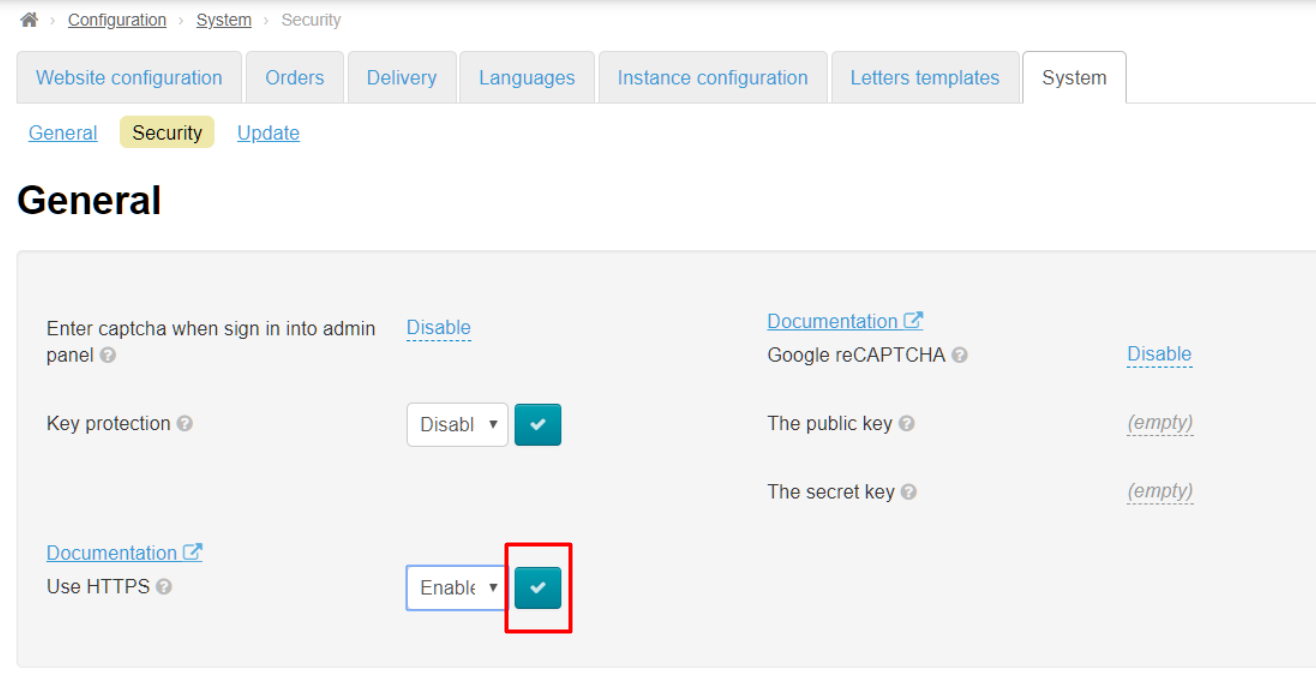
Secure protocol HTTPS
...
Click a triangle to open drop-down list to enable protocol:

Choose and click "Enable" “Enable” (or "Disable" “Disable” if this service is no longer required) in the list:

Save choice clicking checkmarked button:
...
We need API key to install such captcha, therefore we go to https://www.google.com/recaptcha/admin. You should be registered in Google to get access to this page.You will be prompted to register your site and enter a list of domains where this particular reCAPTCHA will be used. Subdomains are automatically counted.
Note! We support only reCAPTCHA v2 (version 2) or more earlier versions. We don't support new versions.
You will get website key and partner secret key after that:
...
These 2 keys will be necessary when setting up captcha in OT admin panel.
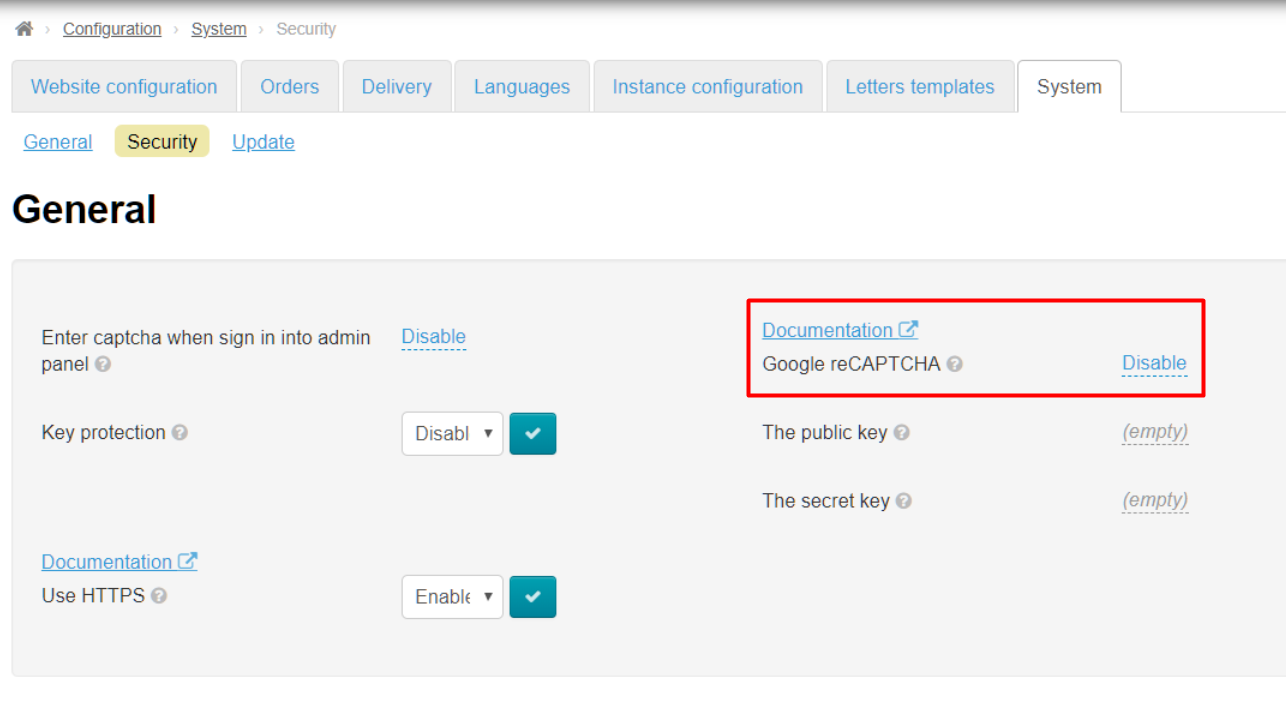
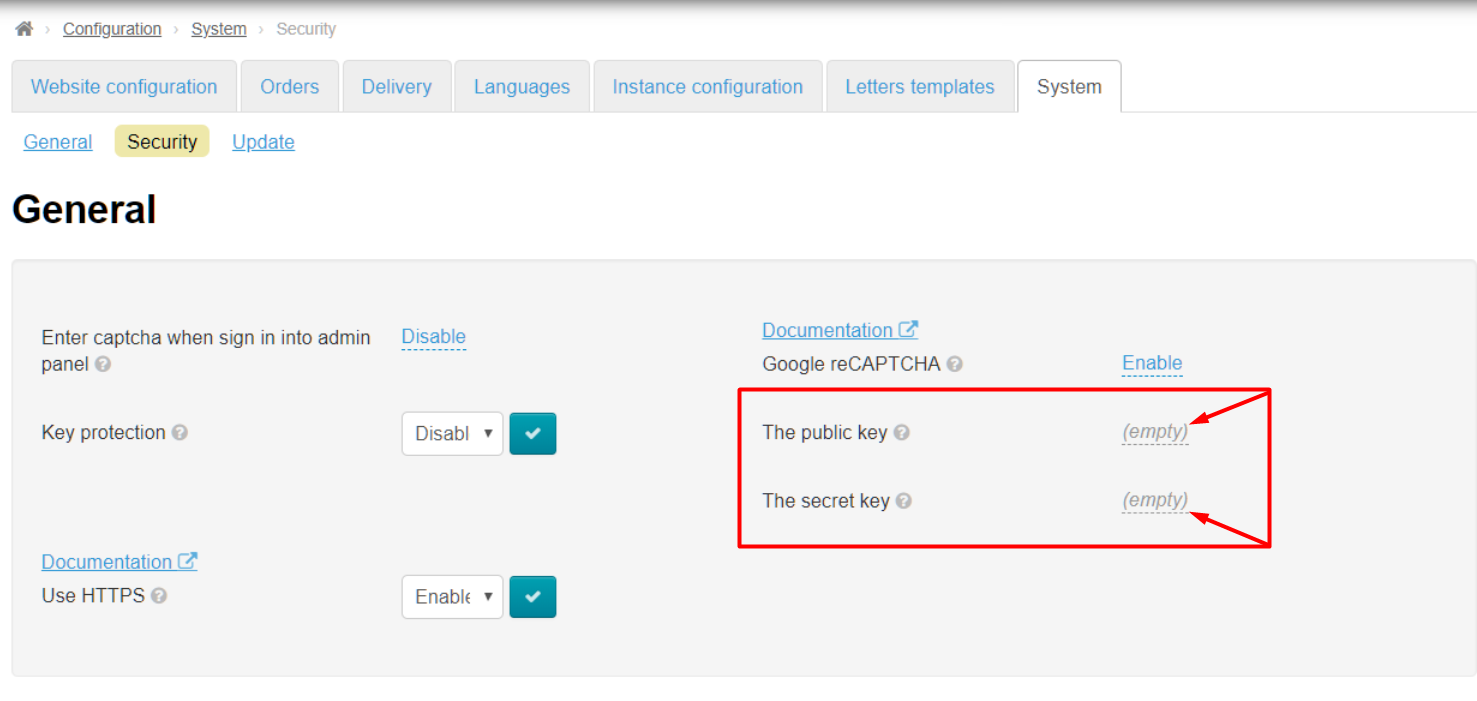
Open "Security" “Security” section:
Click caption with dotted line "Disable" “Disable” next to Google reCAPTCHA:
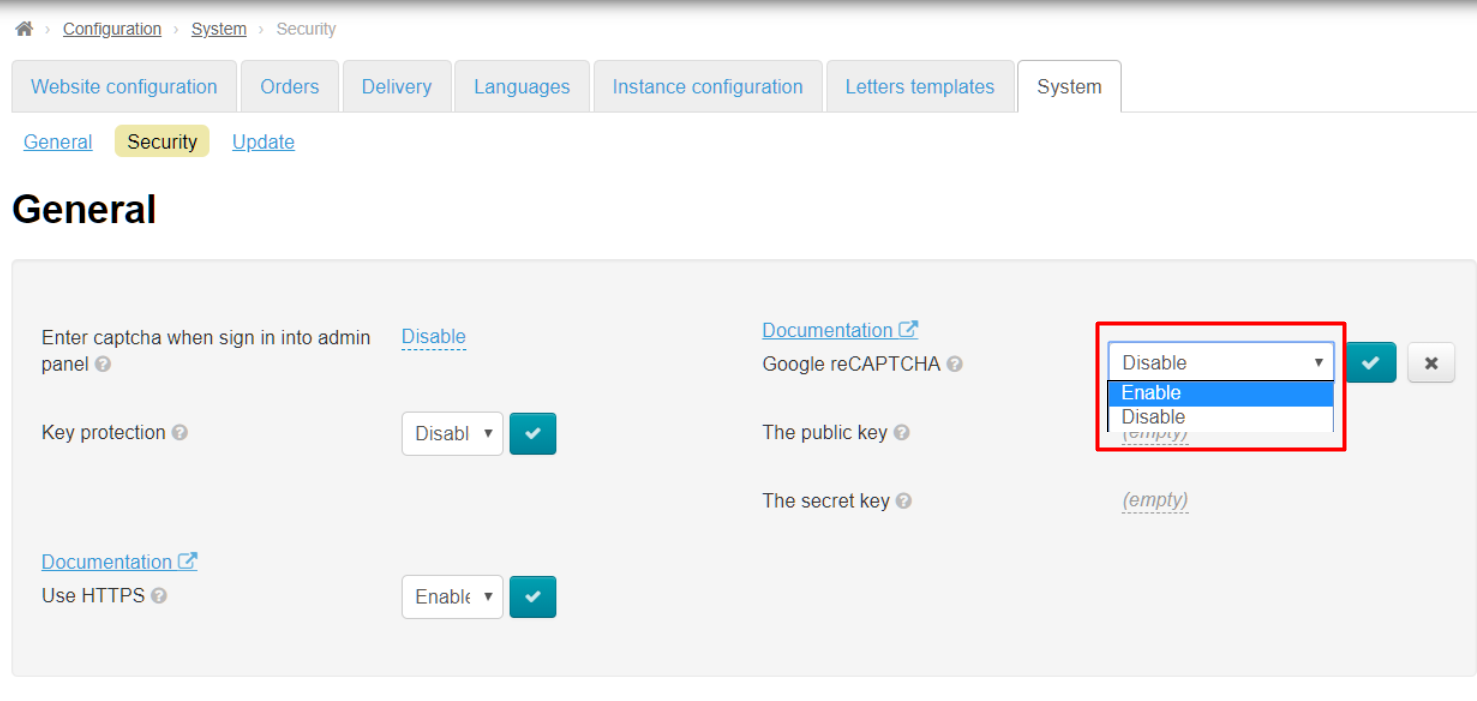
Choose "Enable" “Enable” from drop-down list:
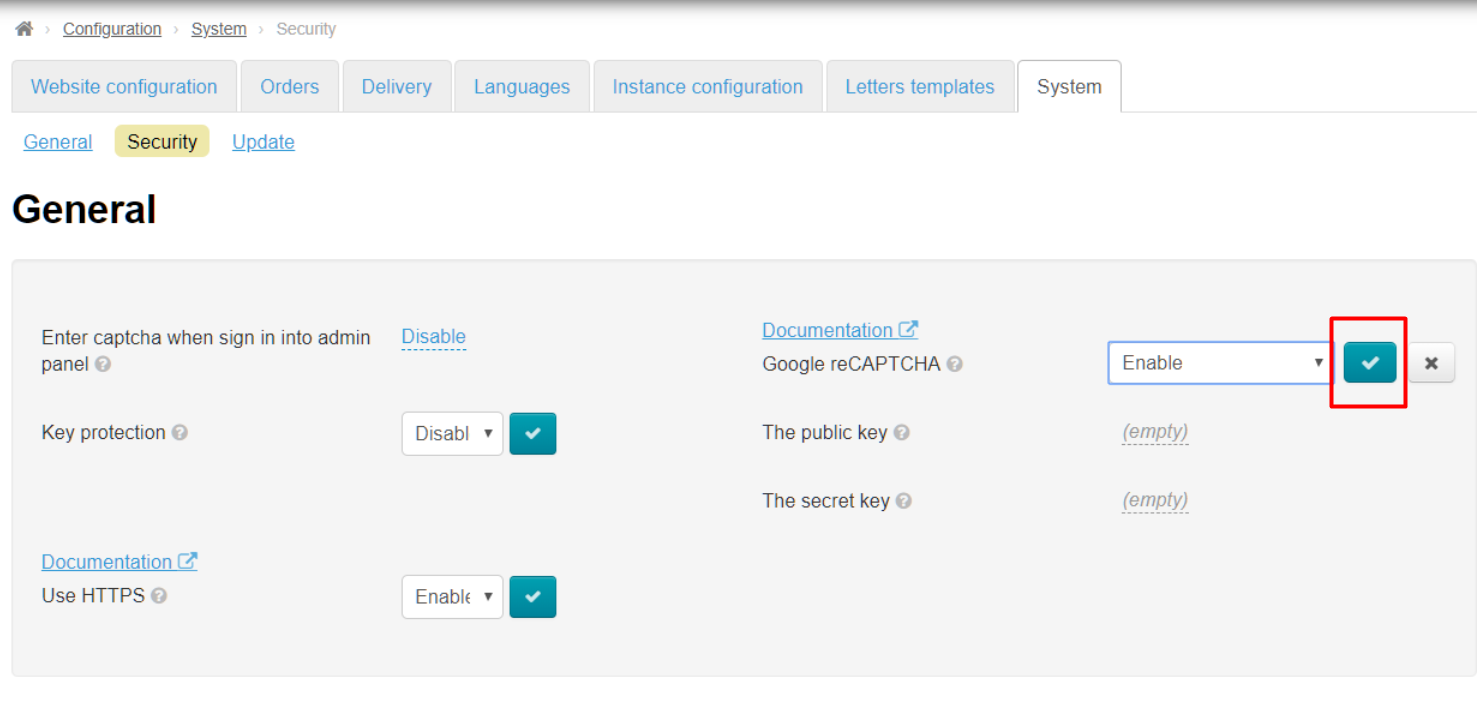
Save choice clicking checkmarked button:
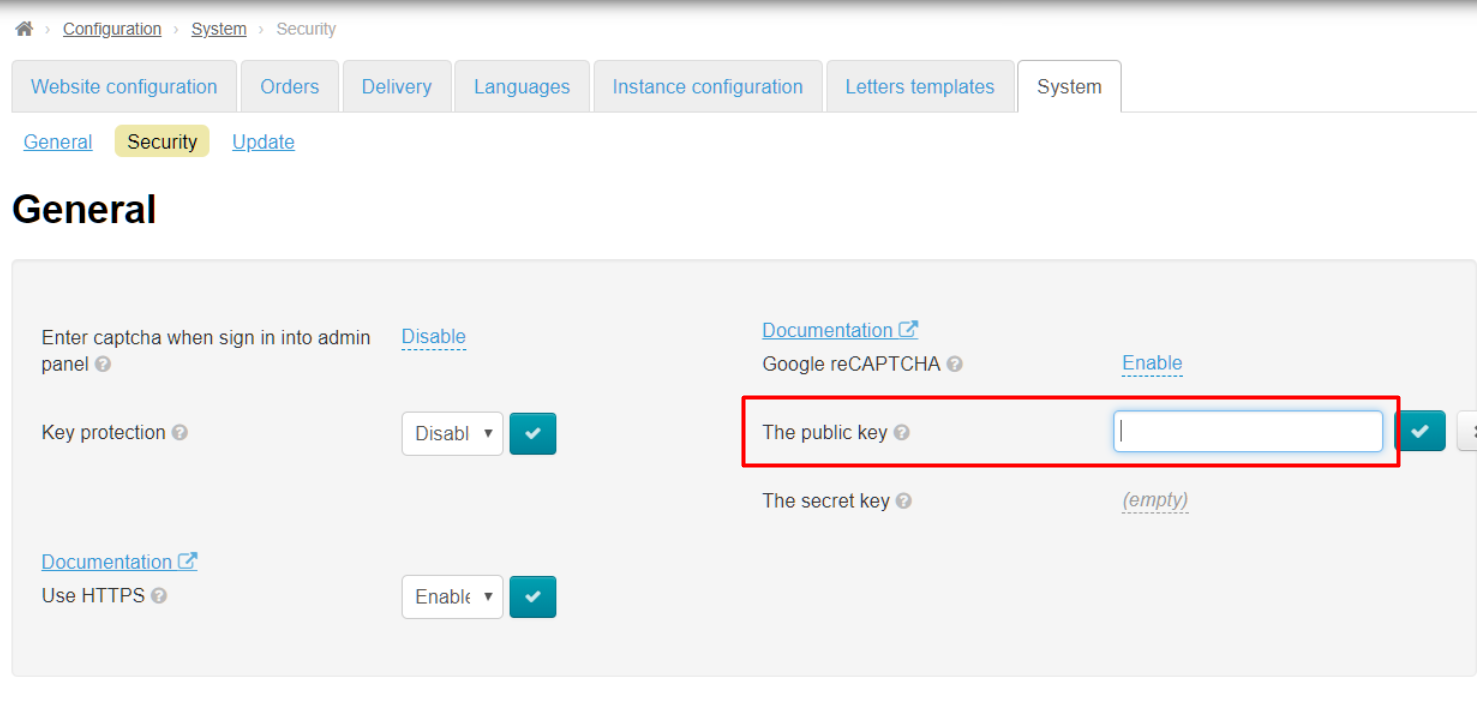
Enter Fill in the fields "Public key" and "Secret key" with the keys from Google into “Public key” and “Secret key” fields.
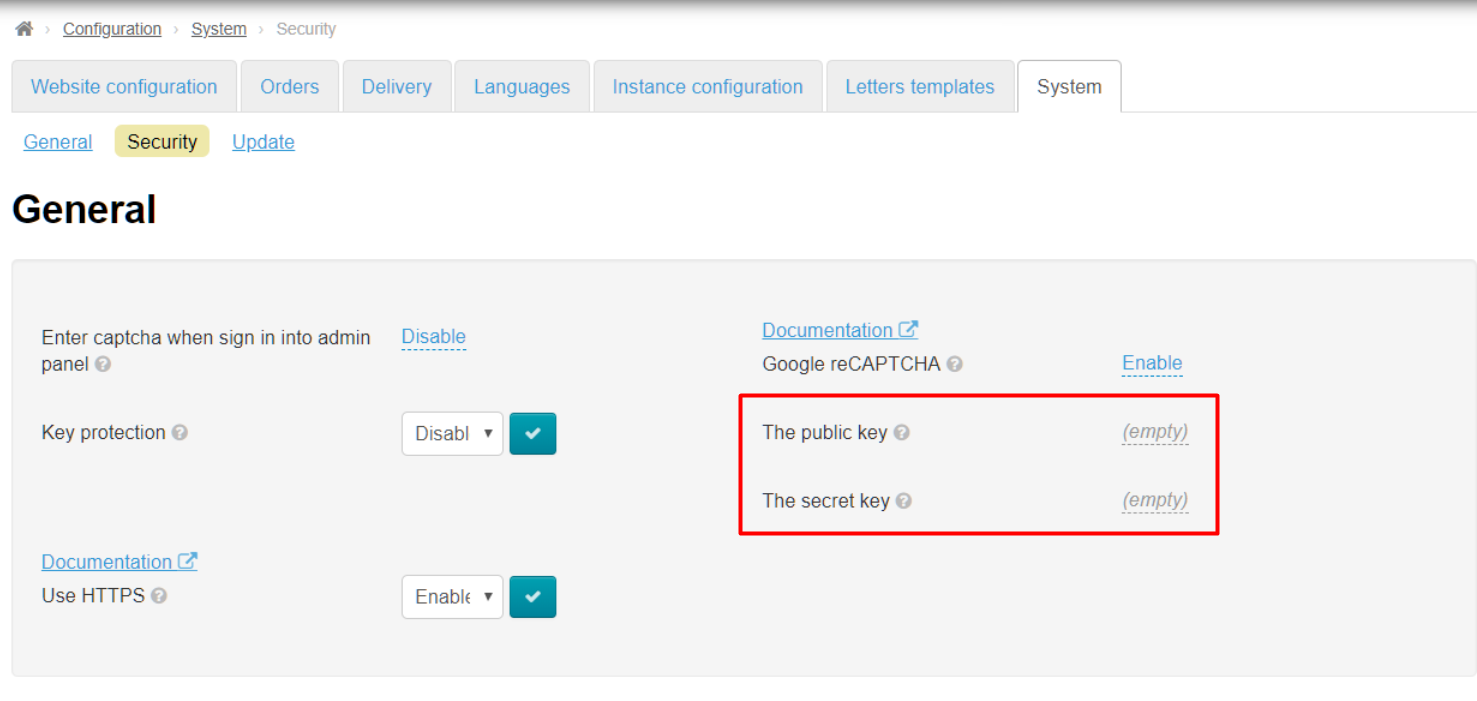
Click grey caption with dotted line :
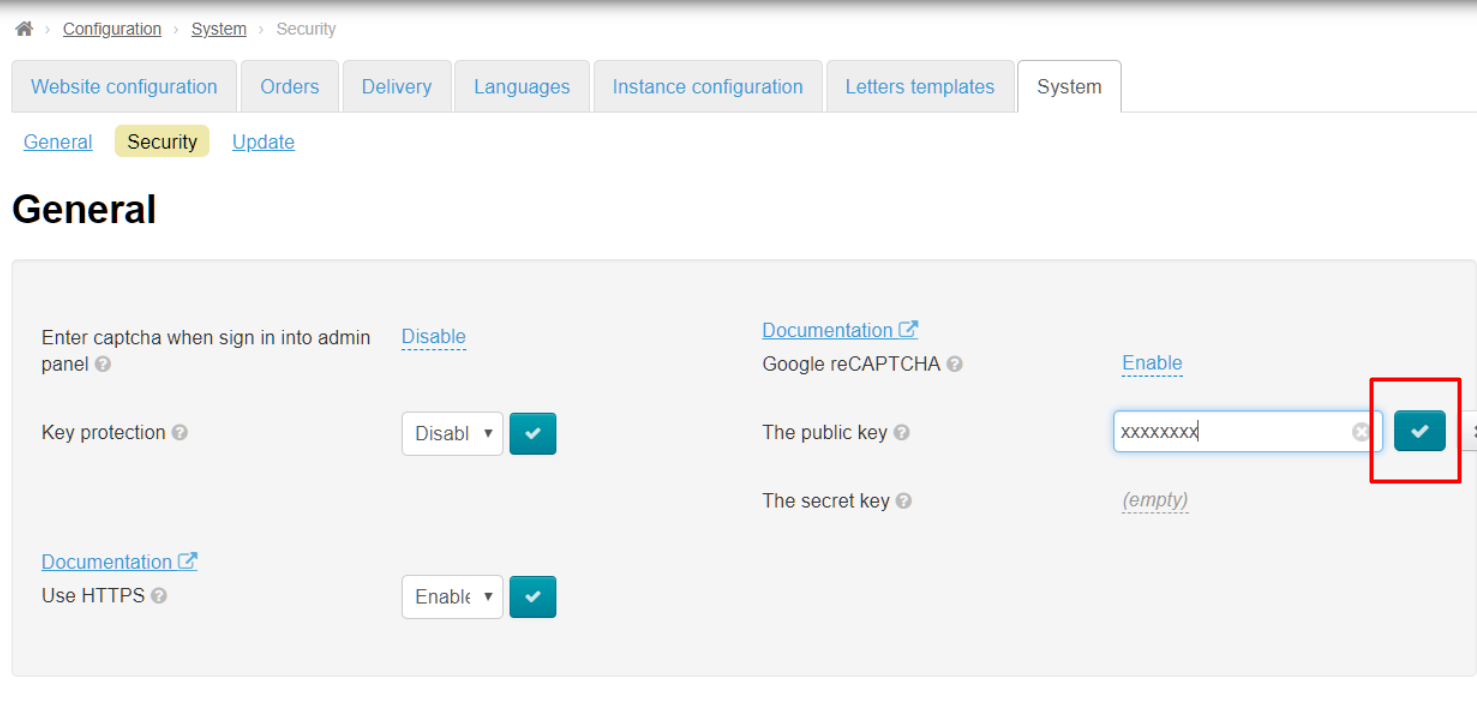
Copy key in Google and paste it into corresponding field. Paste site key in "“The public key" key” field, paste secret key in "“ .
Save data in each field separately clicking checkmark button:
Ready. Google reCAPTCHA will track users' activity on your site now.
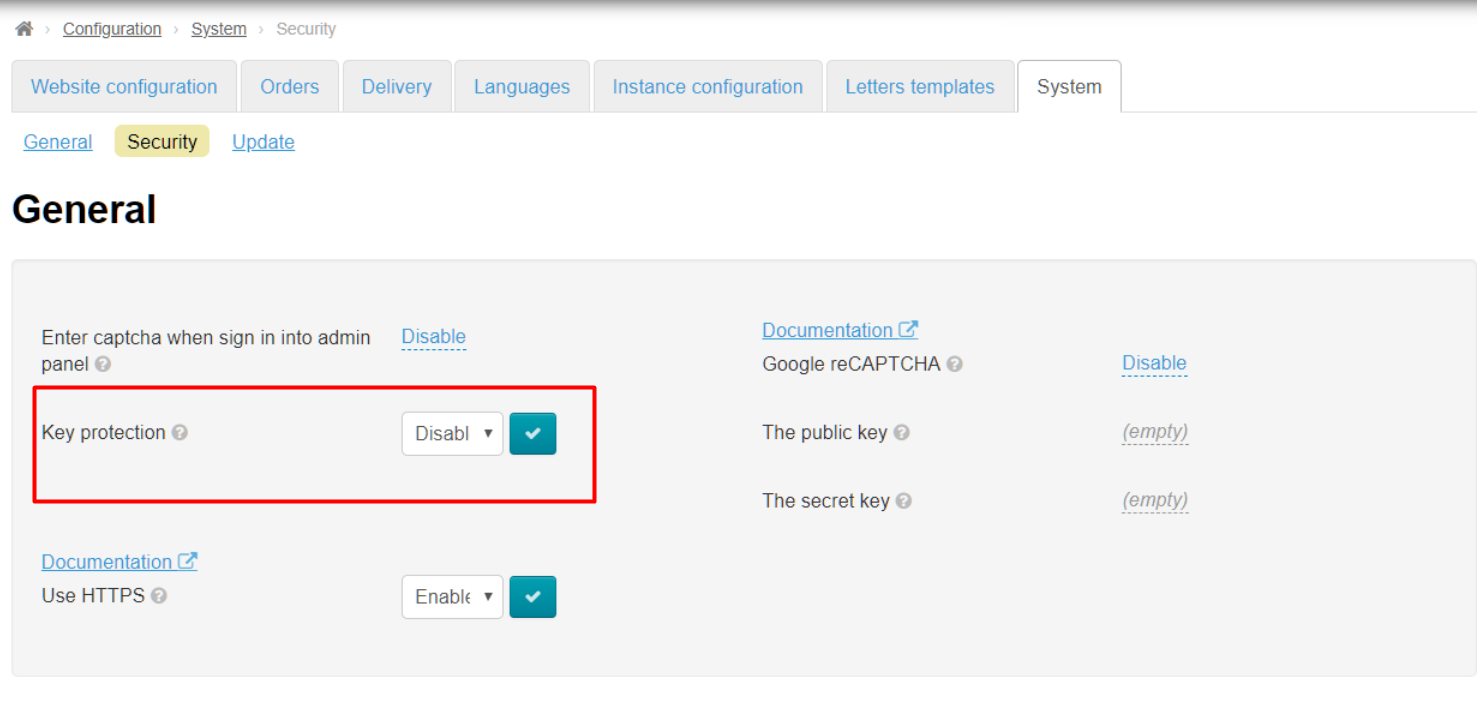
Защита ключа
Key protection
You must specify IP address of the server where your Box is located in order to protect your Personal Key Чтобы защитить Ваш Персональный Ключ (Instance Key) от незаконного использования, при попадании к третьим лицам, необходимо указать IP адрес сервера, на котором расположена Ваша Коробка. Когда настройка включена, Ключ не будет работать на другом сервере, кроме Вашего.
Чтобы узнать IP адрес вашего сервера, обратитесь к системному администратору или в техническую поддержку вашего хостинга. Чаще всего выделенный IP адрес чаще всего оплачивается отдельно (предоставляется, как услуга хостинга, но обычно стоимость редко превышает пару-тройку долларов в месяц, Но есть и тарифы, где IP адрес сервера идет в качестве основной услуги и включен в абонентскую плату).
Чтобы включить защиту ключа, в выпадающем списке щелкаем по треугольничку, чтобы открыть список:
В списке кликом мышки выбираем «Использовать» (или «Не использовать», если данная услуга больше не требуется):
Сохраняем выбор, нажав кнопку с галочкой:
Затем на странице находим блок «Защита ключа»:
Для того, чтобы ограничить количество адресов, имеющих доступ к ключу, нажимаем на надпись «Добавить IP»:
В открывшемся поле вводим IP адрес вашего сервера (где располагается сайт):
И нажимаем кнопку «Добавить»:
После этого адрес появится в списке ниже:
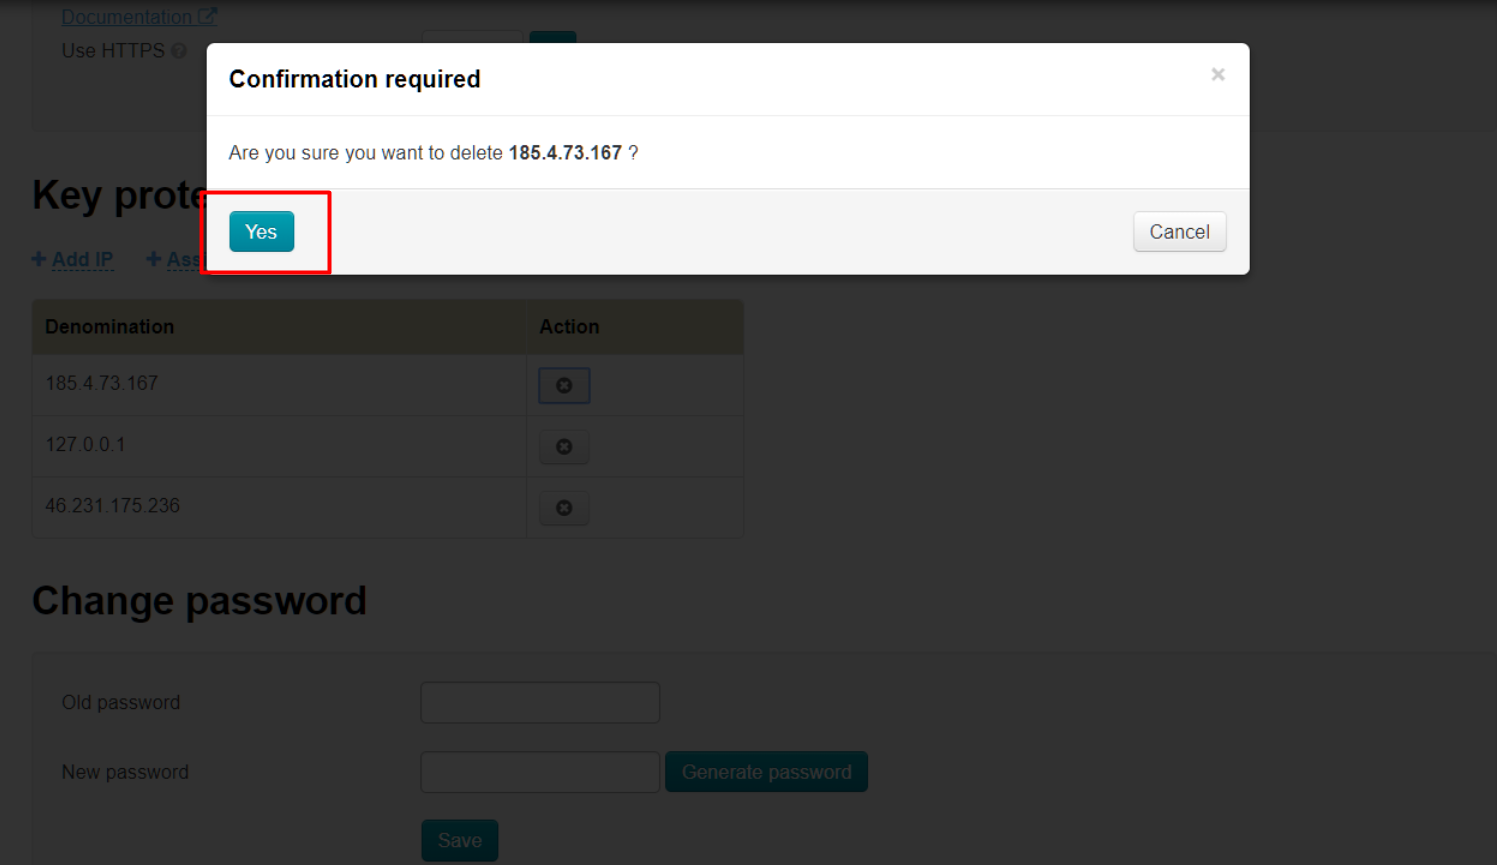
Чтобы удалить адрес, нажимаем крестик в колонке «Действия»:
Если на данный момент, ваш сервер с сайтом уже имеет свой выделенный IP адрес, то можно привязать его одним кликом. Для этого нажимаем на надпись «+Привязать текущий IP сервера»:
После нажатия, станица обновится и адрес появится в списке.
Смена пароля
Чтобы сменить пароль своей (текущей) учетной записи, сначала вводим старый пароль:
Затем вводим новый:
Можно воспользоваться функцией генерации пароля, для того чтобы пароль был сложнее, чем в примере (где представлен ненадежный вариант пароля). Для этого, кликаем по кнопке «Сгенерировать»:
Новый пароль готов.
Чтобы его сохранить, нажимаем «Сохранить»:
Для изменения пароля требуется подтверждение:
Если все прошло удачно, пароль будет изменен. Если Старый пароль неверный, то будет ошибка:
from illegal use, when it comes to third parties. Key will not work on another server besides yours when the setting is enabled.
Contact your system administrator or technical support of your hosting to find out your server IP address. Most often, dedicated IP address is most often paid separately (provided as a hosting service, but usually price rarely exceeds a couple of dollars a month, but there are also tariffs where server IP address is used as the main service and is included in the monthly fee).
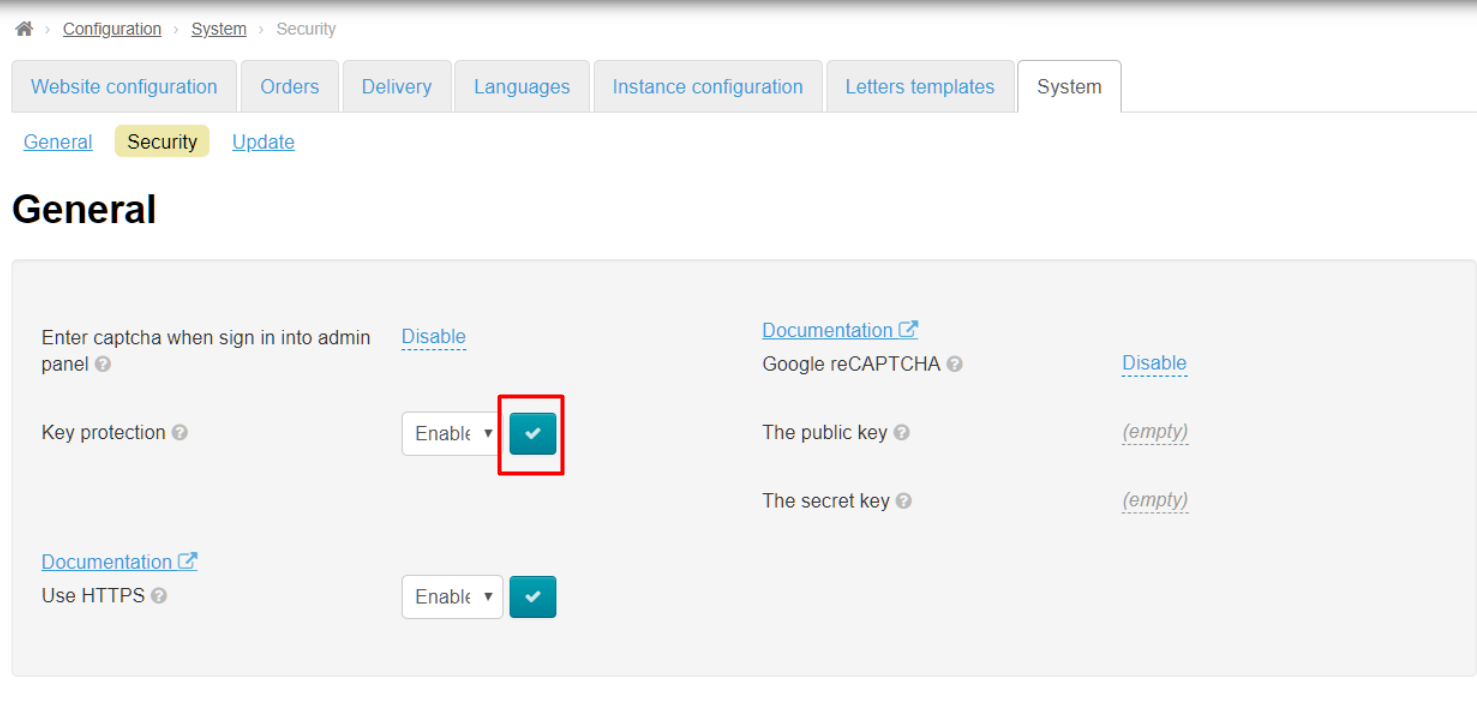
Click a triangle to open drop-down list to enable key protection:
Choose and click “Enable” (or “Disable” if this service is no longer required ) in the list:
Save choice clicking checkmarked button:
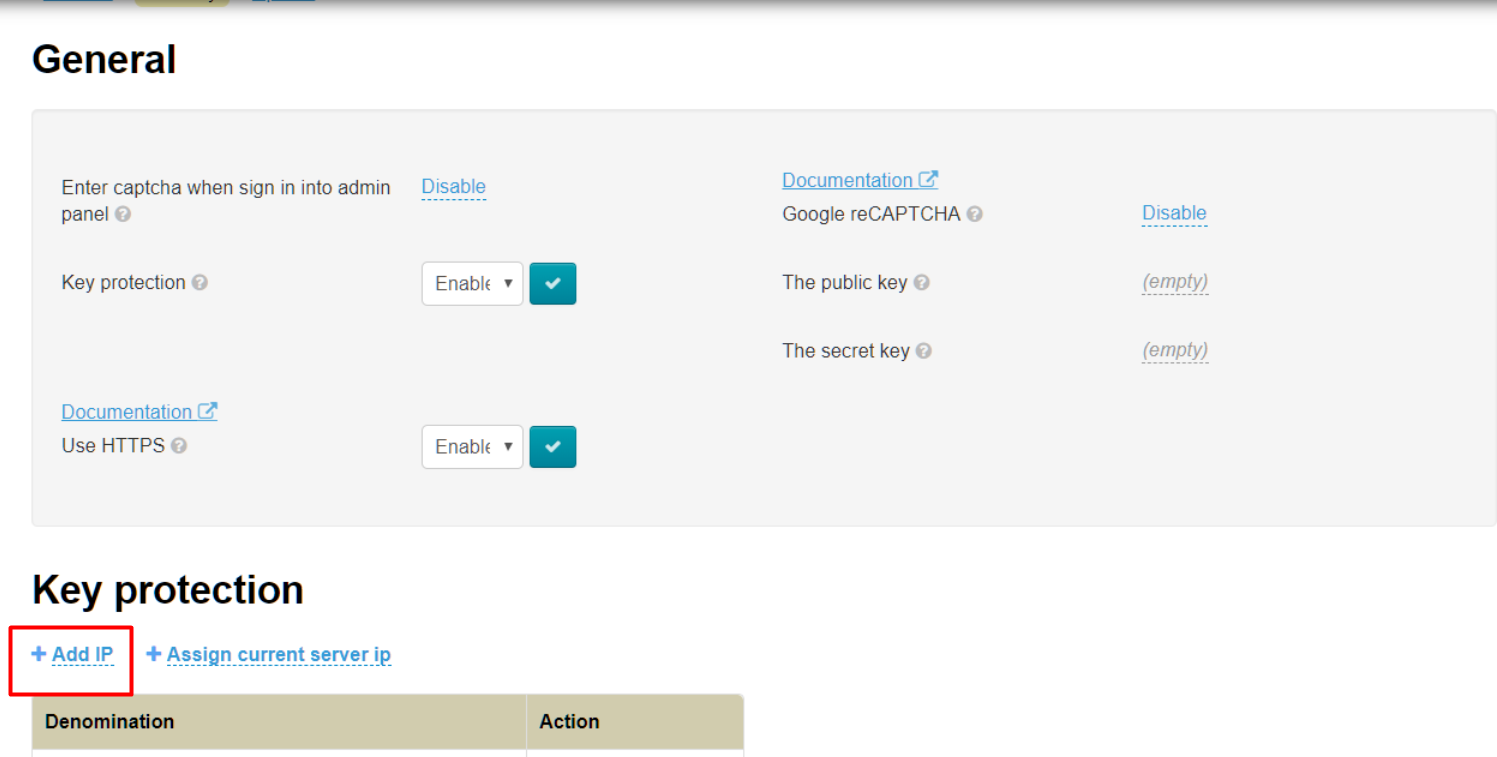
Find “Key protection” on the page:
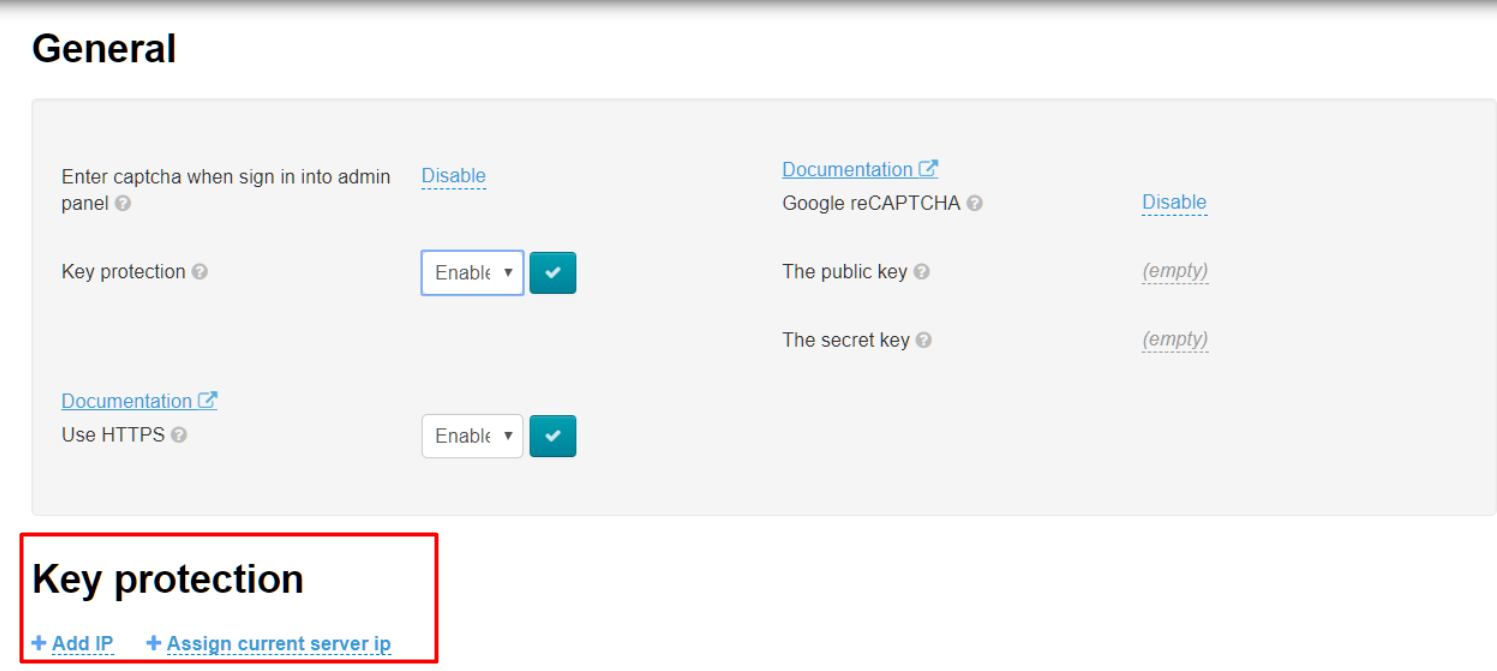
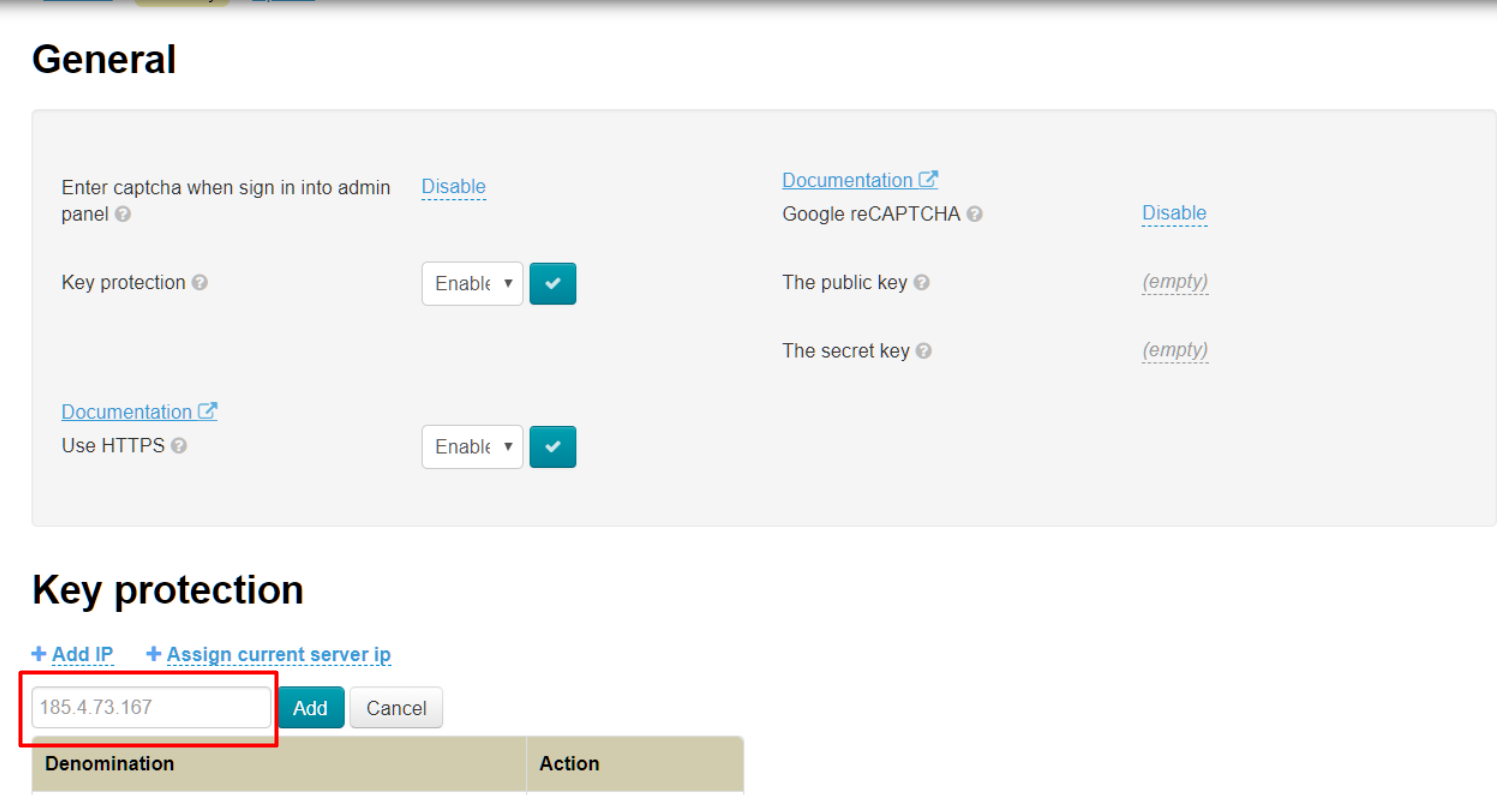
Click “Add IP” to limit number of addresses that have access to the key:
Enter IP address of your server in opened field (where website is located):
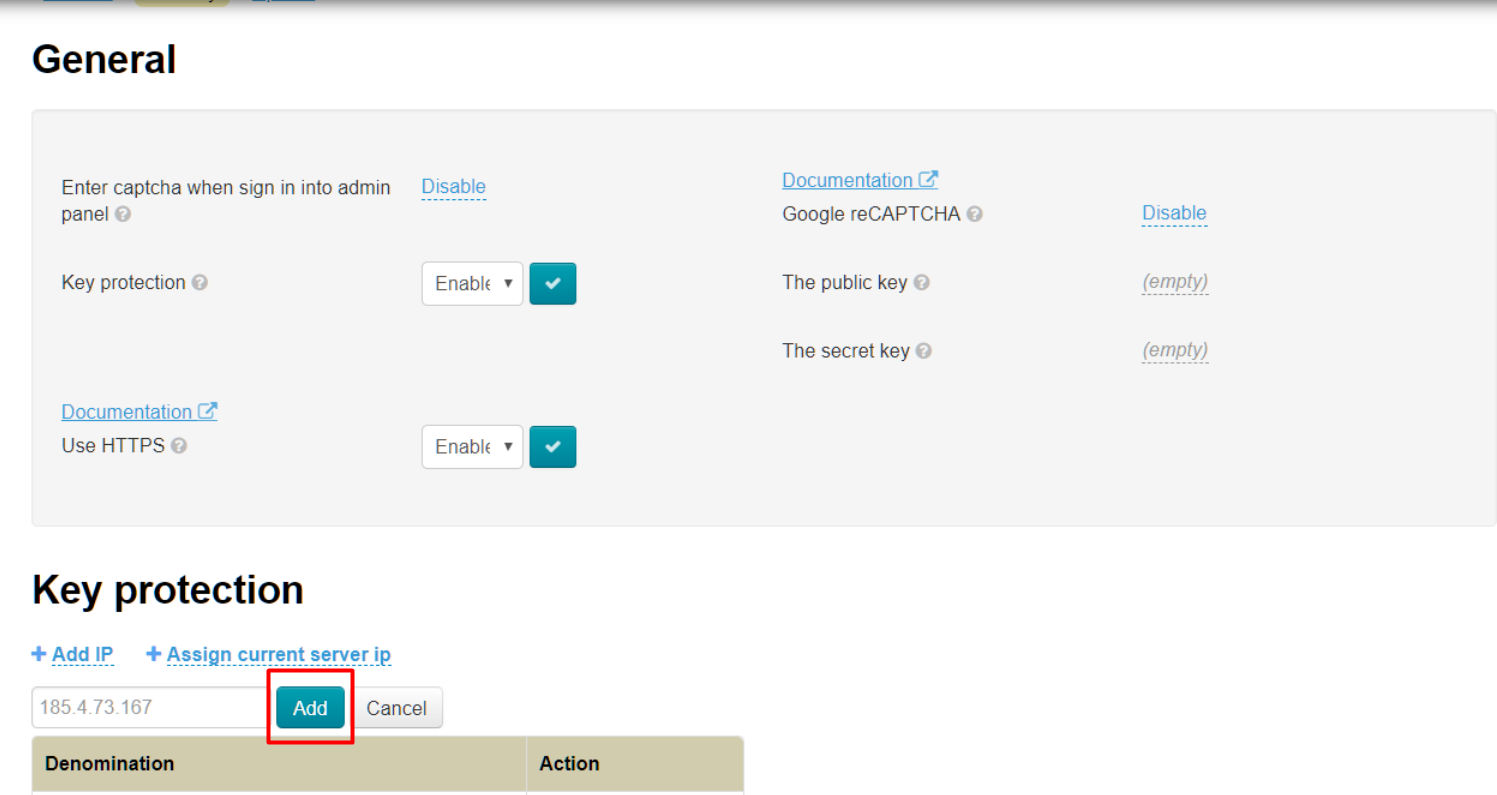
Click “Add” button:
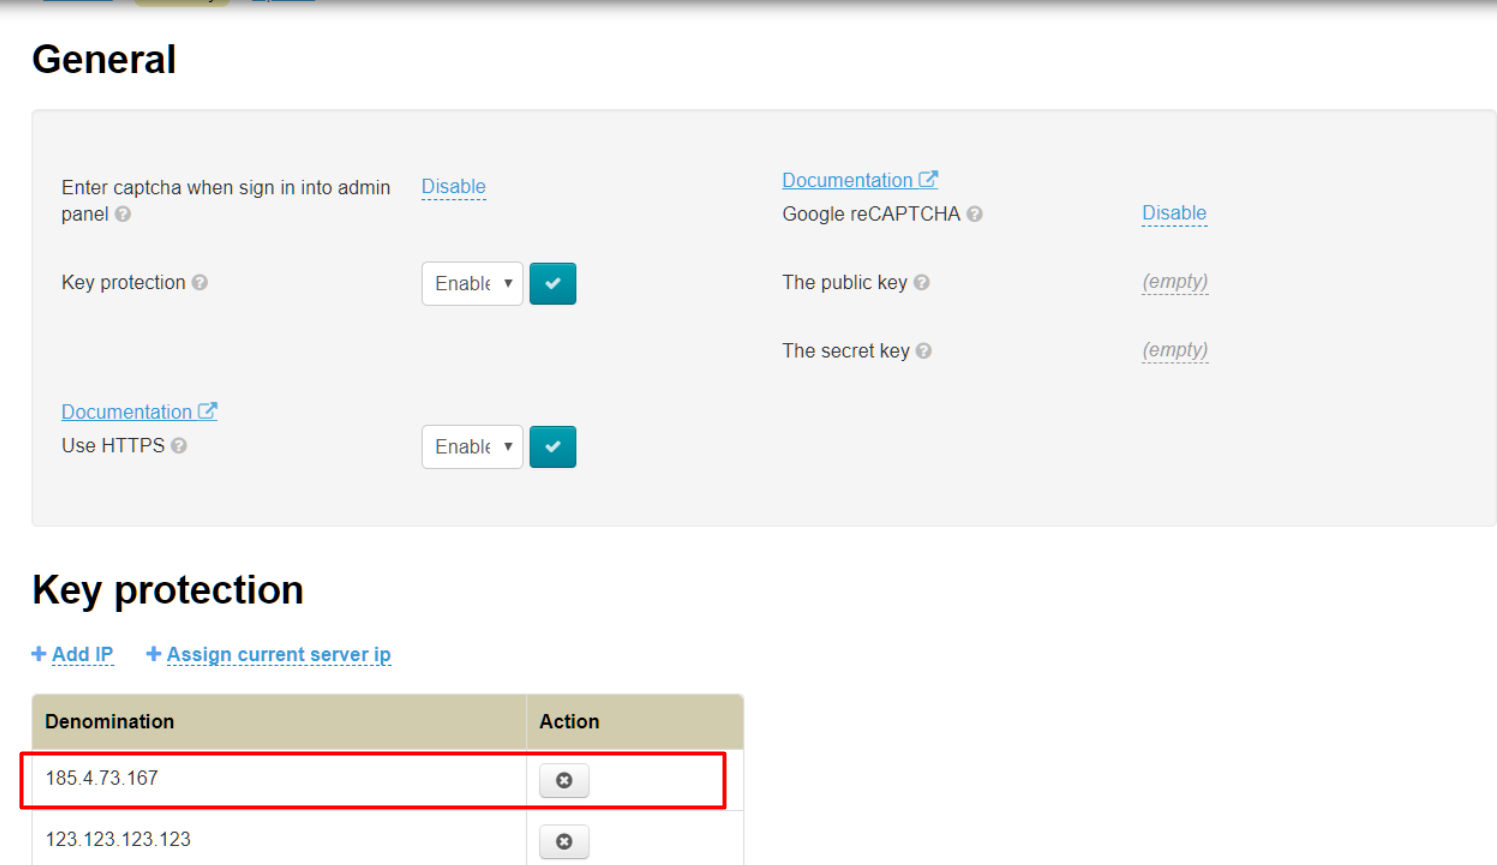
IP address will appear in the list below:
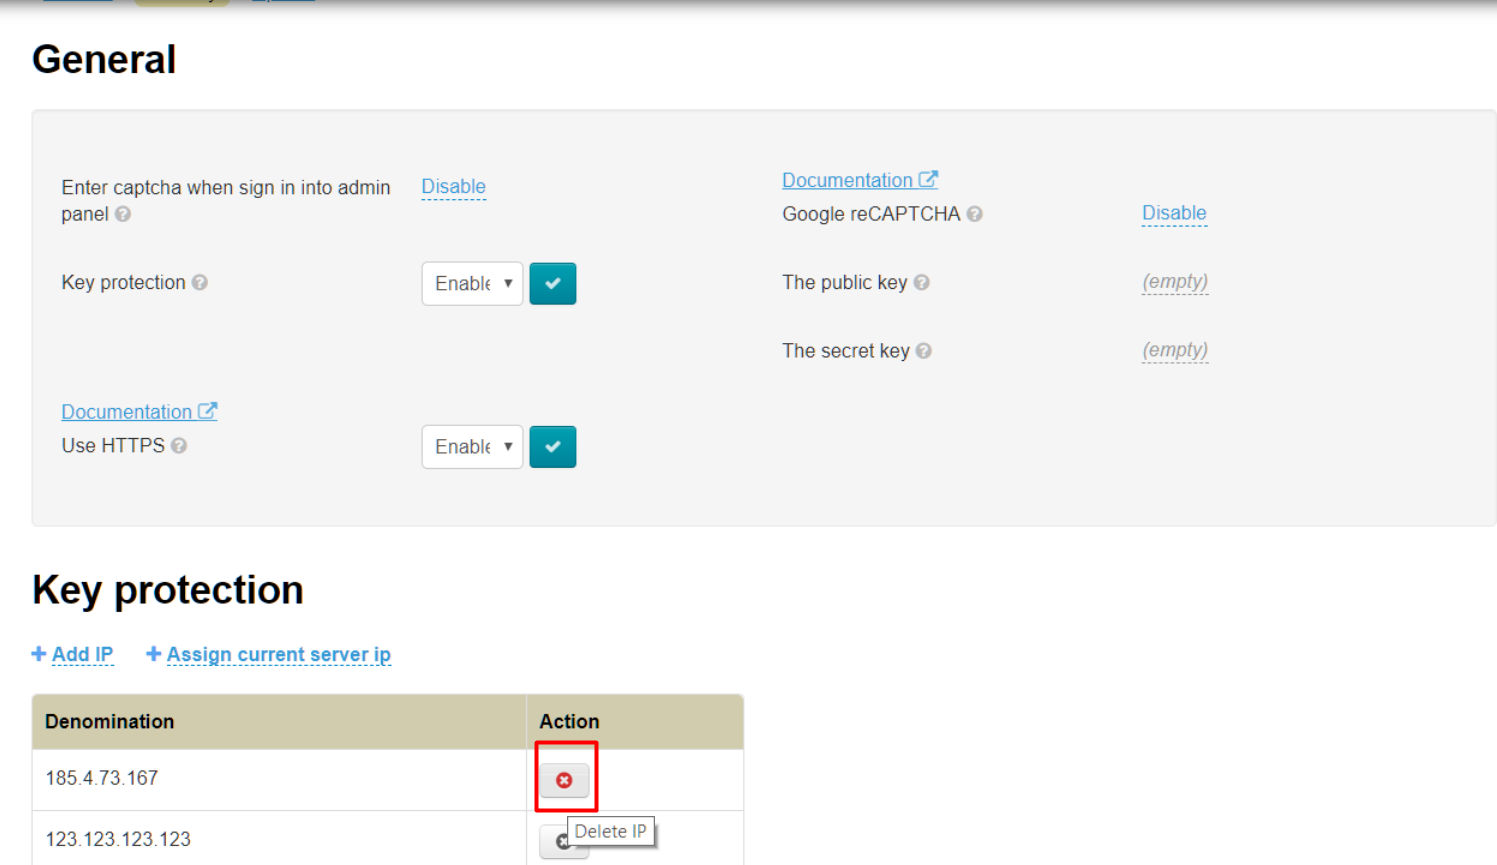
Click cross in “Actions” column to delete IP Address:
If at the moment, your server with the site has its dedicated IP address already, you can bind it with one click. Click “+ Assign current server ip":
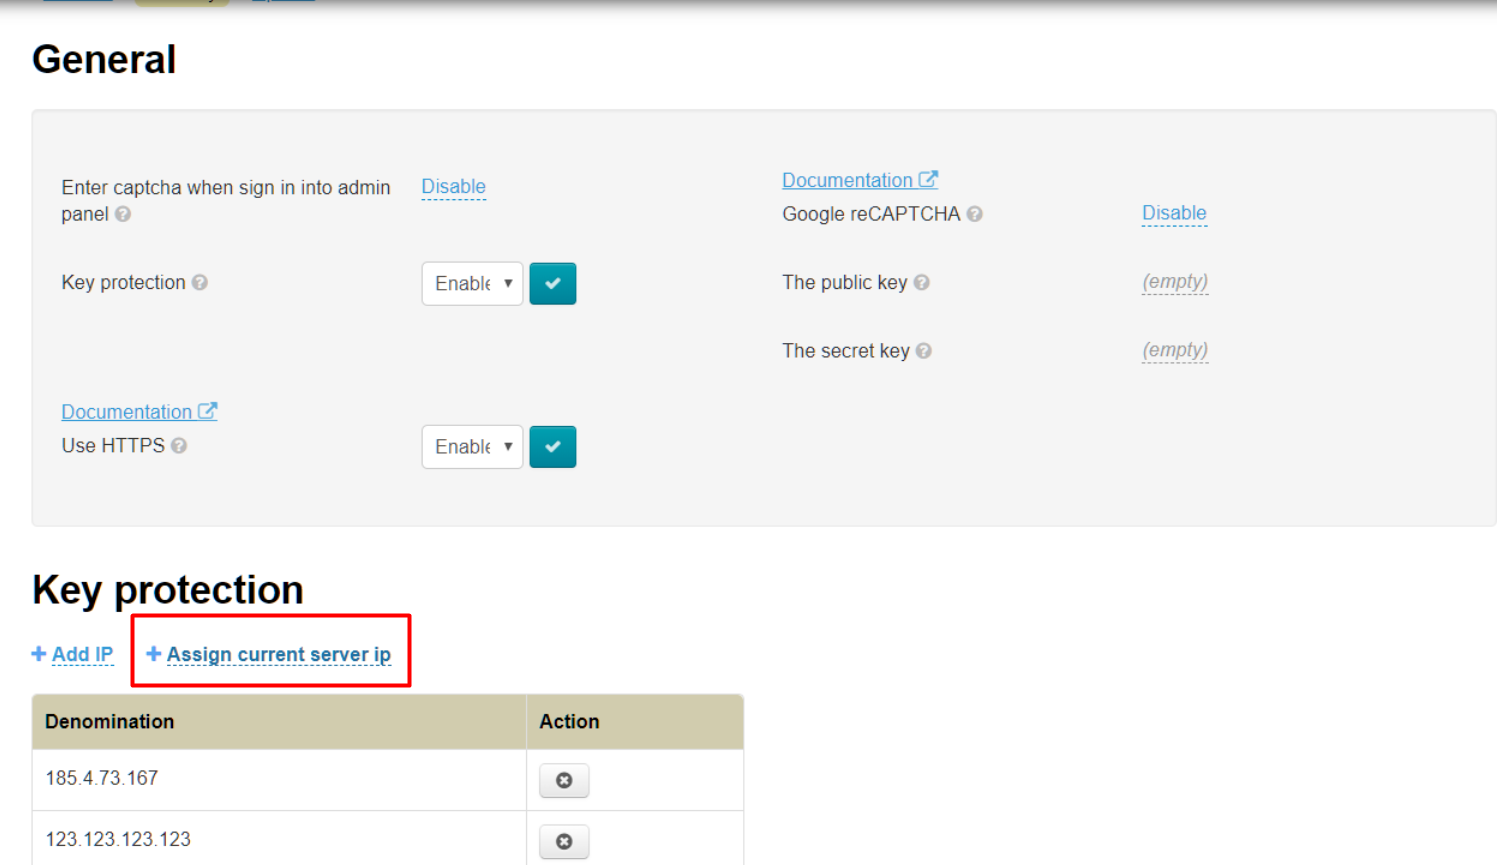
Page will be updated after clicking and IP address will appear in the list.
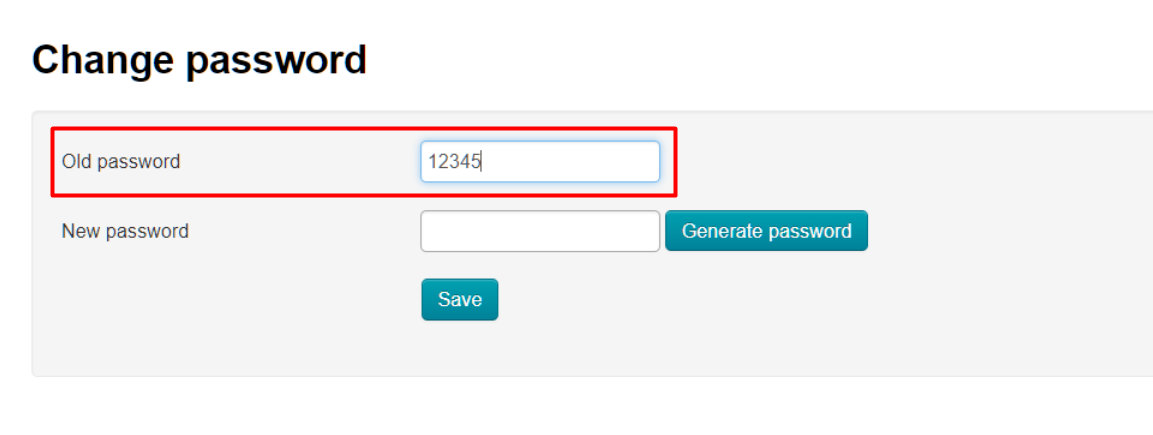
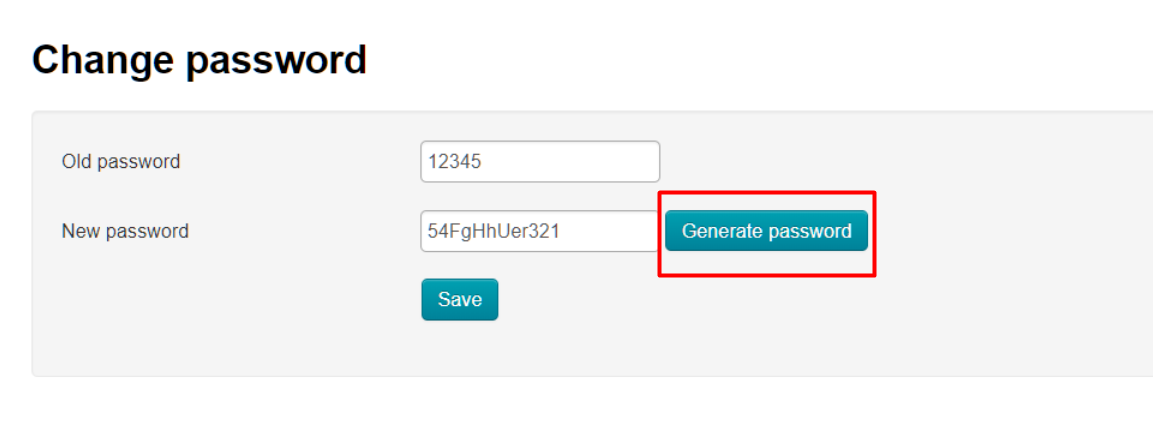
Change password
Enter your old password first to change password of your (current) account.
Enter new password after that:
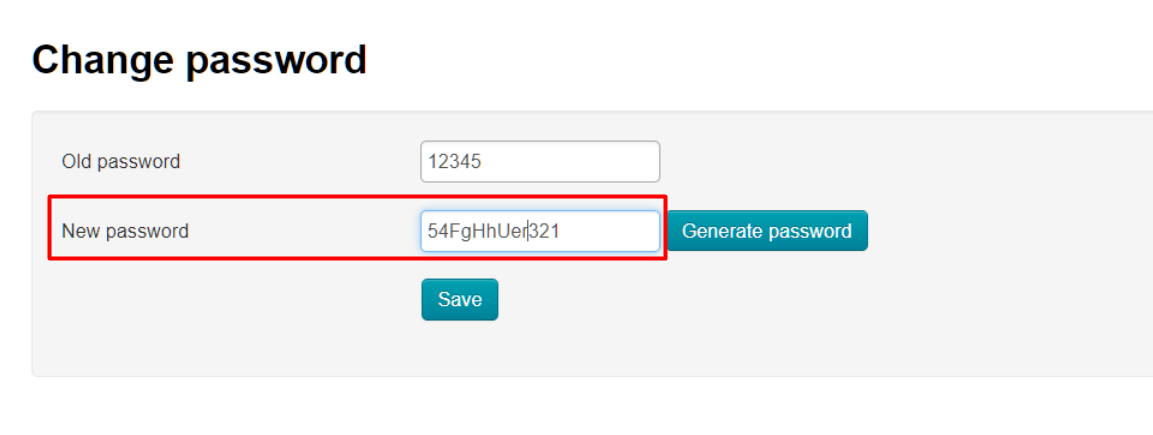
You can use password generation function to make password more complicated than in the example (where unreliable version of password is shown). Click “Generate” button:
New password is ready.
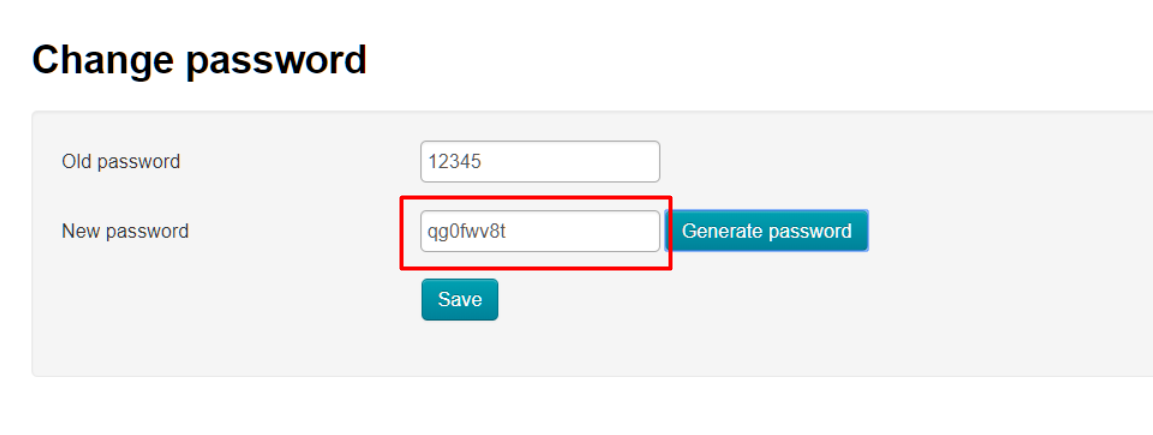
Click “Save” to save it:

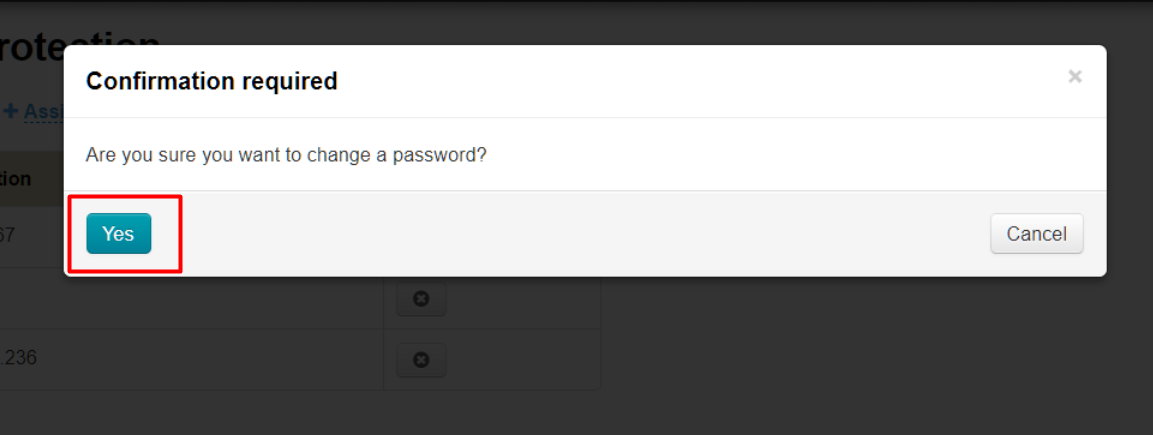
Confirmation is required to change password:
Password will be changed if everything went well. Error will be shown if the old password is incorrect:
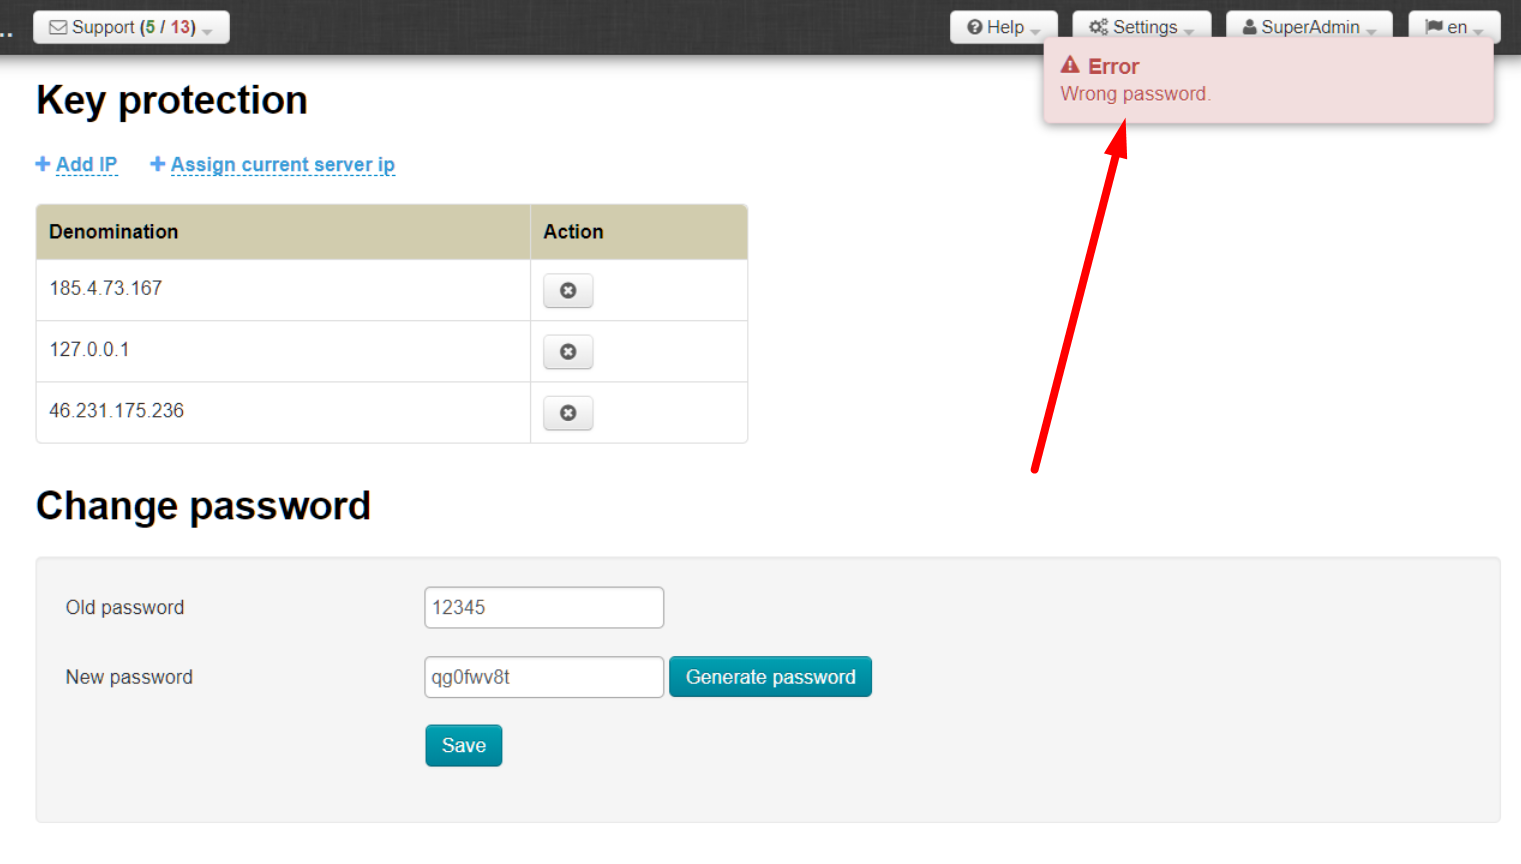
Change password and try againИзмените пароль и попробуйте снова.