| Оглавление | ||
|---|---|---|
|
This page allows one to view orders details. The “Purchase” tab.
Go to: Orders > Order number (ID) in the administrative area of your website.
Ready for purchase
The items the status of which is “Paid” are displayed in the “Ready for purchase” section on the “Purchase” tab.
Items information
This section includes the items list. Each item contains the following:
Order and item number.
Item status.
Photo.
SKU.
Vendor name.
Item configuration (color, size in the language of the administrative area and in Chinese).
Weight.
Price.
Quantity.
Total (amount).
Item page
Click the item number (ID) in order to view the individual item page on your website.
To view an item page on Taobao you should click on SKU.
Description
To view the item description click on the “i” icon.
A pop-up with description will appear.
Vendor
Clicking on a vendor name takes you to the page that lists all goods of this vendor on your website.
Altering an order status
An item can be removed from the “Purchase” tab if the order changes its status. Let us consider the position of an item on the tabs in the table below:
The “Purchase” tab with the appropriate statuses is shown in green.
The table presents statuses that can be assigned to an item on the “Purchase” tab.
...
Status
...
Tab
...
Awaiting payment
...
Items
...
Paid
...
Purchase – Ready for purchase
...
Price confirmation
...
Items
...
Ordered
...
Items
...
Goods quality inspection
...
Items
...
Received at warehouse
...
Purchase - Purchased
...
Packing
...
Purchase - Purchased
...
Ready to ship
...
Purchase - Purchased
...
Shipped
...
Purchase - Purchased
...
Received
...
Purchase - Purchased
...
Returned to vendor
...
Items
...
Impossible to deliver
...
Items
...
Cancelled
...
Items
...
Страница просмотра детализации заказов. Вкладка «Закупка»
Расположение в админке: Заказы → Номер-заказа
Товары со статусом «Оплачен» отображаются во вкладке «Закупки» в разделе «Готовые к закупке»

Основная статья «Auto-purchase Module» содержит подробности работы и настройки модуля. Например, как настроить сессию.
Здесь рассмотрим саму закупку по шагам.
Выбор сессии
Сессия выбирается автоматически, в зависимости от того, какой товарный провайдер у вас подключен и какой используется в заказе.
Однако, на одного провайдера может быть несколько сессий (аккаунтов на маркетплейсе для закупок). Если необходимо добавить еще сессию, нажимаем на кнопку «+» и авторизуемся на маркетплейсе (Таобао или 1688)

Синхронизация
Если ваша сессия истекла (маркетплейс снял авторизацию и надо снова вводить логин и пароль), то после выбора сессии, запустите синхронизацию статусов товаров
Если сессия не истекла, статусы обновляются автоматически.
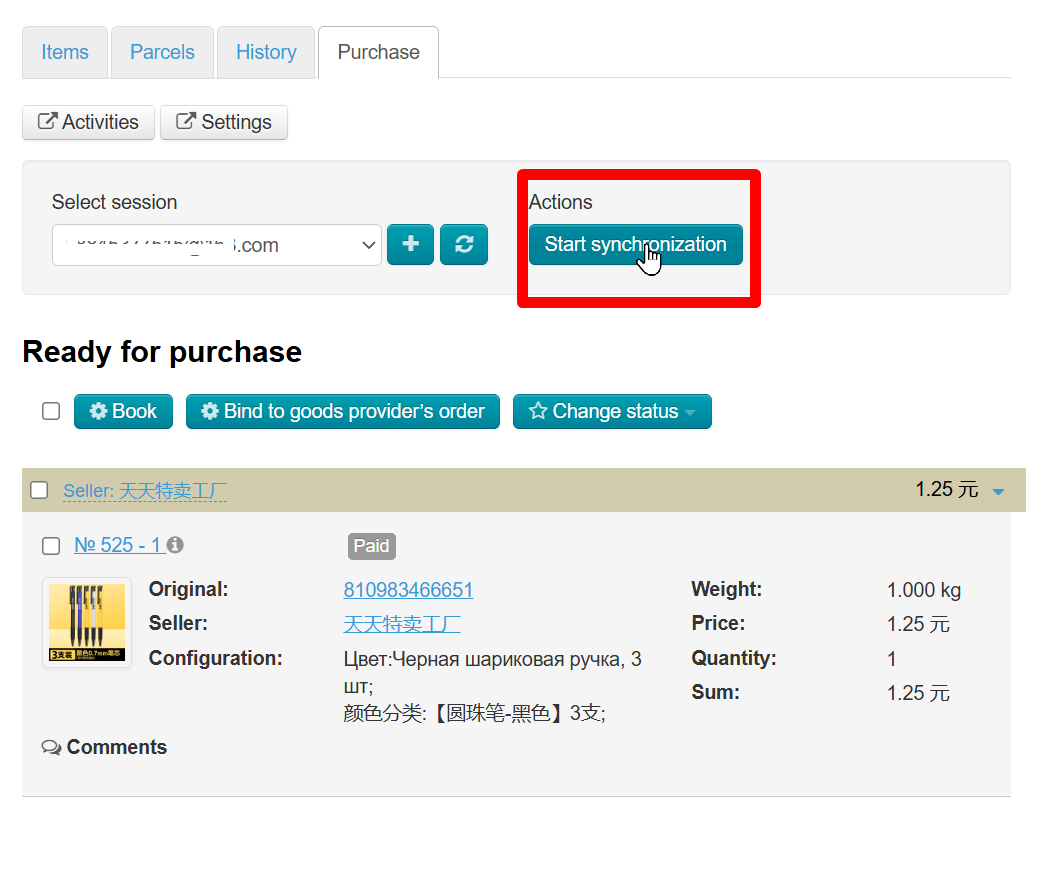
Процесс синхронизации будет показан в окошке

Все действия будут отражены в разделе «Активности»

Бронирование товара
| Информация | ||
|---|---|---|
| ||
На количество сделок для бронирования есть ограничение, которое зависит от того, как часто и много вы покупаете. Иногда невозможность забронировать товар обуславливается этим ограничением. |
Если товар еще не забронирован на маркетплейсе, выбираем его в списке и нажимаем «Забронировать»

Если товар был забронирован ранее не через админку Коробки ОТ, а на сайте маркетплейса, его надо связать с заказом. Выбираем товар и нажимаем «Связать с провайдерским заказом»

И вводим id заказа на маркетплейсе провайдера (Таобао или 1688)

Все действия будут отражены в разделе «Активности»
Чтобы снять товар с бронирования, выбираем товар в списке «Закупленные» и нажимаем «Отвязать»

Что после бронирования?
- Заказ необходимо оплатить через ЛК на маркетплейсе. Как обычно совершаются покупки.
- После оплаты заказа, процесс выкупа пойдет дальше и все изменения будут попадать в админку Коробки ОТ
- Далее работа идет по вашим бизнес процессам как обычно: изменение статусов (если автоматический статус необходимо поменять), общение с покупателем и создание посылки.
Работа с заказами расписана в несколько этапов в статьях раздела “Order Page”
To alter an order status of items you should select the desired items by putting a mark in the checkbox to the left of an item number (the selected item will be highlighted in yellow):
Or tick the checkbox in the table header if you need to select all items on a page automatically.
Click the “Change status” button which is located above the table.
Select the status you would like to assign to selected items from the dropdown menu that appears (in the example below: Received at warehouse).
Once you’ve clicked all selected items will change the status to that one you have just chosen and go to the “Purchased” section.
Purchased
This section of the “Purchase” tab shows items with the following statuses:
Received at warehouse.
Packing.
Ready to ship.
Shipped.
Received.
This section is purely informational. Here you can find the items that have already been in stock at warehouse or proceeded to the next steps of order fulfillment.
The status or configuration of items listed in this section cannot be changed. If you need to change the status or configuration of an item you should navigate to the “Items” tab.
Item information
This section includes the item list. Each item contains the following:
Order and item number.
Item status.
Photo.
SKU.
Vendor name.
Item configuration (color, size in the language of the administrative area and in Chinese).
Weight.
Price.
Quantity.
Total (amount).
Item page
Click the item number (ID) in order to view the individual item page on your website.
To view an item page on Taobao you should click on SKU.
Description
To view the item description click on the “i” icon.
A pop-up with description will appear.
Vendor
Clicking on a vendor name takes you to the page that lists all goods of this vendor on your website.